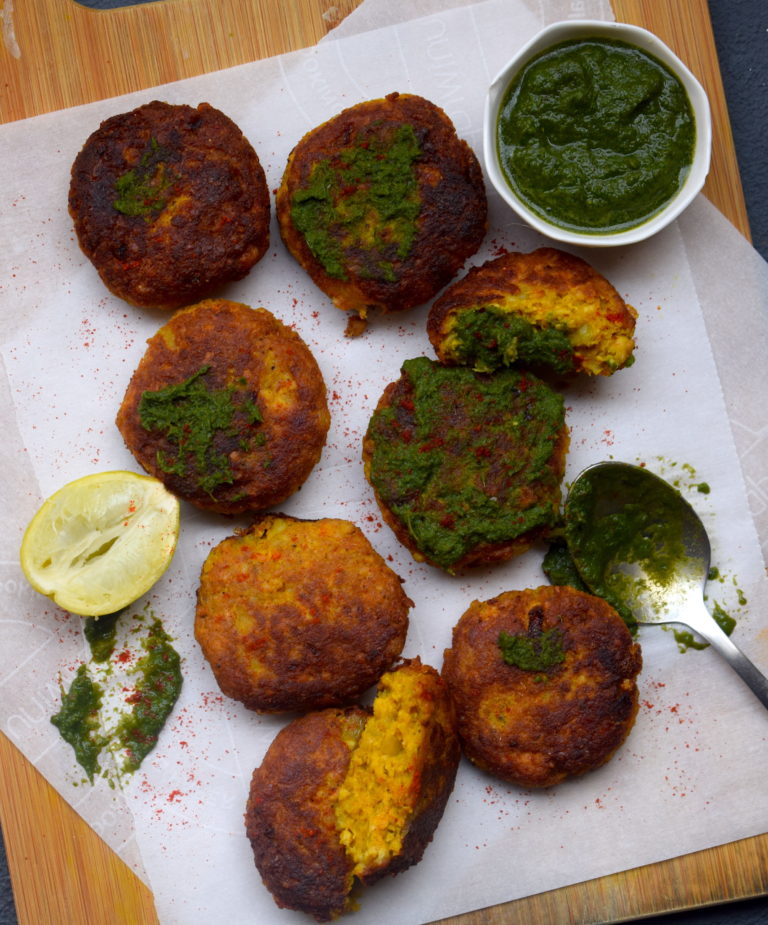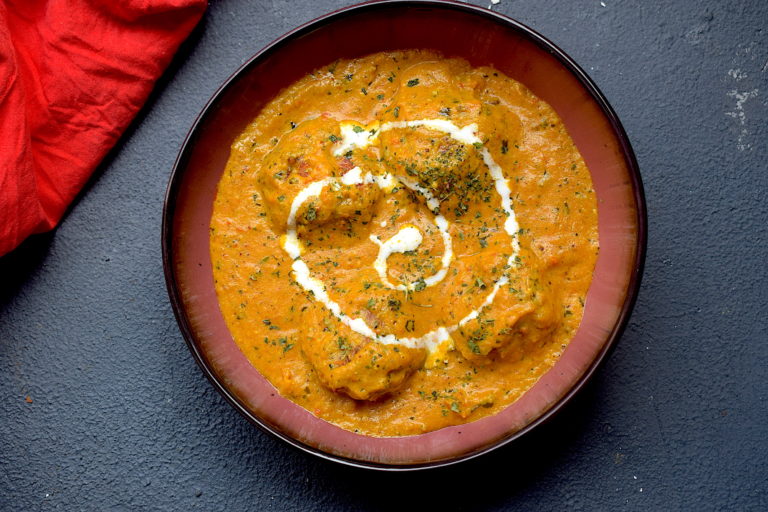
Malai Kofta Curry

The first time I ever decided to malai kofta curry was while flipping through pages from a vegetarian cookbook that my mother had. I was about twelve at that time. I do not remember the name of the book but a lot of my early childhood memories are around that book. That book taught me how to cook delicious Indian vegetarian food. It makes me think how long lasting and impactful childhood memories can be!

malai kofta curry

Fast forward years later, I have come up with my own version. I absolutely love this recipe and make it a lot! A lot of my hardcore non-vegetarian friends also love it!

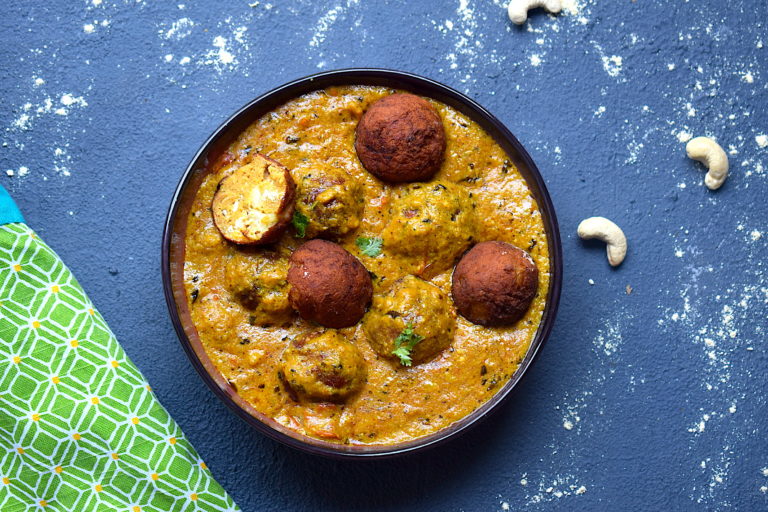
The gravy of this malai kofta curry is a luxurious mix of cashew cream and curd, and the koftas are soft and melting in the mouth. Both of them combined along with some ghee laden rotis are a match made in heaven!

malai kofta curry

The curry is creamy, slightly sweet, luxurious and dreamy. It is thick as it is a smooth paste of a variety of elements.

Preparation time – 30 minutes

Cook time – 30 minutes

Serves – 2-3 people

[ingredients title=”Ingredients”]

For the koftas:

  • 150 grams grated paneer
  • 1/2 tsp garam masala
  • Salt to taste
  • 1 tsp cumin powder (jeera)
  • Chopped coriander leaves
  • 3 tbsp gram flour (Besan)
  • 1 tsp red chili powder
  • Water, as required
  • Oil (for deep frying the koftas)

For the malai kofta curry:

  • 2 onions, ground to a paste
  • 2 medium tomatoes, roughly diced
  • 1 green chili
  • 10 g ginger
  • 4 garlic cloves
  • 100 g cashews, ground to a paste
  • 1 tsp cumin
  • 2 tbsp curd, beaten well
  • 1 tsp black pepper powder
  • 1 tsp sugar
  • 1 tsp Kashmiri red chili powder
  • 1 tsp turmeric powder
  • 1 tbsp desi ghee
  • 1 tsp coriander powder
  • 1 tsp garam masala
  • 200 ml warm water
  • 1 tbsp Kasuri methi for garnish
  • Salt to taste [/ingredients]

[directions title=”Directions”]

  1. Thoroughly grate the paneer ensuring there are no large chunks. Add salt, garam masala, gram flour, chopped coriander leaves, red chili powder and water to form a thick batter.
  2. Make round koftas and freeze them for at least an hour.
  3. Deep fry these koftas in hot oil until they are crispy from all sides and cooked from within. Set aside.
  4. In a blender, make a fine paste of one green chili, tomatoes, ginger and garlic with a little water.
  5. Heat oil in a  kadhai. Add the onion paste. Saute the onions till the raw aroma disappears, they turn brown and the oil starts to separate from it.
  6. Add some sugar into the onions. This will help to give it a beautiful brown color and also enable the onions to cook faster. It will also add some sweetness to your final recipe.
  7. Once the raw aroma of the onions disappears, add the blended tomato puree. Cook this till oil starts to separate from the onion and tomato paste.
  8. Once the tomato is cooked, season with salt, turmeric powder, cumin powder, black pepper powder, coriander powder, and Kashmiri red chili powder. If you do not want too much chili flavor, skip adding the green chilies in the beginning.
  9. Add beaten curd and cashew paste to the mixture and stir well.
  10. Add in some warm to avoid the paste from sticking to the pan.
  11. Once everything is cooked, add some more warm water depending on the consistency you want.
  12. Season with garam masala and Kasuri methi just before turning off the gas. Give it one last stir.
  13. Add the koftas to the gravy just before serving.
  14. Enjoy with hot rotis, naan or jeera rice.[/directions]

malai kofta curry

malai kofta curry

malai kofta curry

I hope you try this really easy and delicious malai kofta curry for yourself and enjoy it as much as I do. If you have any questions, feel free to reach out to me with a comment or connect with me on Instagram or Facebook.

Happy cooking!

Related recipe – Lauki Kofta Curry

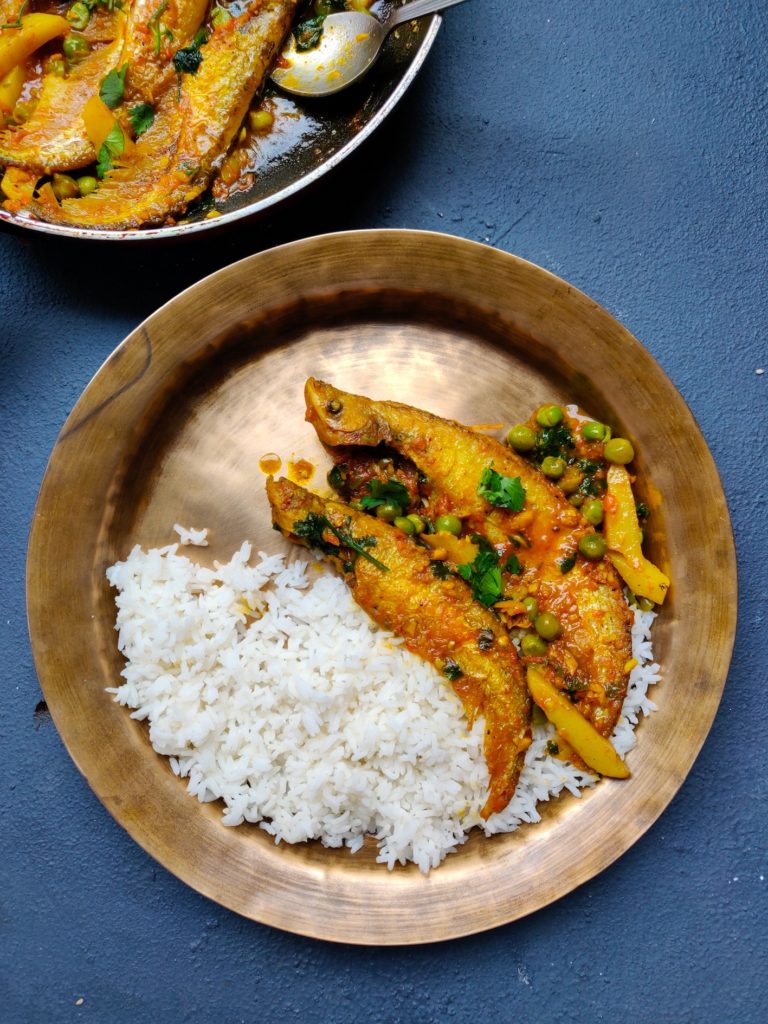
Pabda Curry With Peas & Potatoes

Oh, how I love simple recipes like these! I love eating and cooking fish. Having grown up in Assam, I grew up with an abundant consumption of freshwater fish. In any Assamese household, the absence of fish in a meal is a rarity. My culture hence has a huge influence on my food habits and choices.

This pabda fish curry is so heartwarming and simple. All you need is some steamed rice with this and you will be in heaven after a single bite. Pabda fish is a delicacy back home. It is quite expensive as well as compared to other varieties of fish, mainly because of its beautiful texture and taste.

pabda fish curry

Padba fish has to be one of the tastiest variants of river fish – sweet, flaky and buttery in texture. It is also extremely easy to eat as it has no bones beside the central skeleton. This recipe of pabda fish jul (curry) with peas and potatoes is infused with green chilies, ginger and mustard oil. The gravy is not too watery, just enough to eat with a handful of rice. A sparsely spiced curry, the aim is to not overpower the deliciousness of the star ingredient – the fish. This has to be one of my personal favorites.

Preparation time – 20 minutes

Cook time – 30 minutes

Serves – 2-3 people

[ingredients title=”Ingredients”]

  • 6 pieces of pabda fish
  • 250 g fresh peas
  • 1 large potato, cut in fingers.
  • 1 onion, finely grated
  • 1 tomato, finely chopped
  • 1 tsp ginger paste
  • 1 tsp garlic paste
  • 3 tbsp mustard oil (for frying the fish)
  • 2 tbsp mustard oil (for curry)
  • 1 tsp sugar
  • 1 tbsp turmeric powder
  • 1 tbsp salt
  • 2 green chilies, finely chopped
  • 1 cup warm water
  • Chopped coriander leaves for garnish
  • 1 tsp garam masala [/ingredients]

[directions title=”Directions”]

  1. Thoroughly clean the pabda fish, and pat dry.
  2. Marinate the fish with salt and turmeric powder. Use your fingers to cover every bit of the fish with the salt and turmeric mix.
  3. Hear mustard oil in a kadhai or pan. Once it gets hot and turns into a pale yellow color, fry the fish in batches. Fry the fish for one minute on each side. Be gentle so that the fish does not break. Keep it aside once done.
  4. Heat mustard oil in another kadhai. Let it get hot.
  5. Add the finely grated onion. Stir for a minute.
  6. Once the onion becomes translucent, add some sugar, followed by chopped green chilies. The sugar will give a beautiful brown color to the onion, and also add some sweetness to the gravy.
  7. Add the ginger and garlic paste and fry till the raw aroma of them disappears.
  8. Next, add the tomato and fry till it gets cooked.
  9. As the onion, tomatoes, ginger and garlic cook completely, add the peas and the potato fingers. Mix well with the rest of the spices.
  10. Season with turmeric, cumin, and black pepper powder. Mix well.
  11. Add 2 tablespoons of warm water so that the masala does not stick to the pan. Cover and cook for ten minutes till the potatoes and peas are soft.
  12. Once the vegetables are cooked, add the rest of the warm water. Add the fried pabda pieces to the gravy very gently. Cover and cook on medium heat for another five minutes till you get the desired consistency.
  13. Garnish with garam masala and chopped coriander leaves.
  14. Serve hot with steamed rice. [/directions]

pabda fish curry

You can add more seasonal vegetables to this curry, but just ensure it does not overpower the flavor of the fish.

I hope you try this simple, yet delicious padba fish curry recipe. Do let me know how it turns out for you.

pabda fish curry

And for more such delightful food, follow me on Facebook, Instagram, Twitter, and YouTube.

Happy cooking!

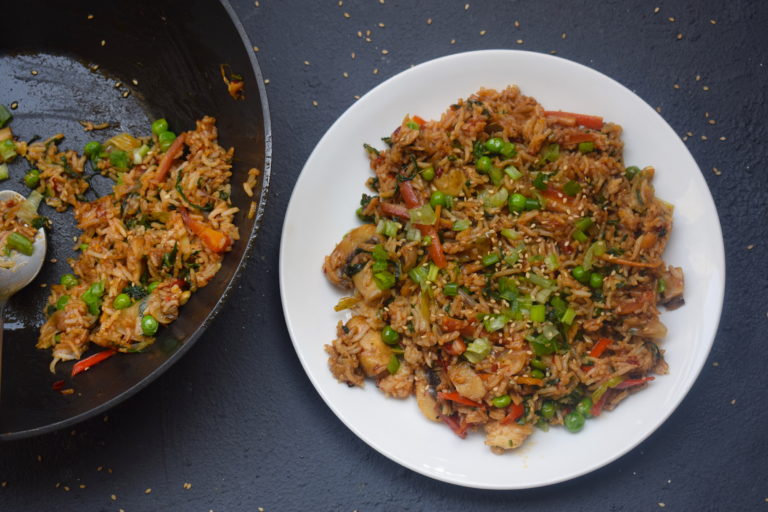
Winter Fried Rice

I love winters! Cooking becomes all the more fun because of the variety of seasonal produce that nature offers during this season. The colors and diversity at the local store make me a happy home cook!

The reason why I call this recipe winter fried rice is that you can add any number of winter vegetables here. I have gone ahead and added spinach, button mushrooms, carrots, and peas. The idea is to make your fried rice as diverse as possible in using winter produce!

fried rice

The reason why I love this fried rice so much is that it is not only tasty but filled with the crunch of vegetables. The health quotient is also automatically high as a result of so many vegetables. This is a vegetarian version. If you’d like, you can add your favorite protein in here too (chicken or eggs would be a heavenly addition).

fried rice

fried rice

Another reason is the use of the availability of fresh large red chilies or cayenne pepper in the market. The bright red color just pulled me towards it and I bought a few to add in my meals. And it added just the right punch to my fried rice.

Preparation time – 20 minutes

Cook time – 20 minutes

Serves – 2 people

[ingredients title=”Ingredients”]

  • 100 g cooked rice
  • 2 tbsp vegetable oil
  • 10 g butter
  • 8 garlic cloves, finely chopped
  • 1/2 carrot, finely sliced
  • 6 button mushrooms, cut in halves
  • 50 g fresh peas
  • 100 g chopped spinach
  • 1/2 fresh large red chili or cayenne pepper, finely chopped
  • 3 spring onion, chopped
  • 1 tsp sambal sauce
  • 1 tsp black pepper sauce
  • Salt to taste
  • 1 tsp Oyster sauce
  • 1 tsp dark soy sauce
  • Spring onion greens for garnish
  • Sesame seeds for garnish
  • Salt to taste [/ingredients]

[directions title=”Directions”]

  1. Heat oil in a wok. Add the butter to it and mix till it combines together.
  2. Add the chopped cayenne pepper into the oil. This will help its aroma and flavor of the cayenne pepper infuse into the oil.
  3. Next, add the finely chopped garlic to the oil. Give it a light stir. Do not burn. Let it release its aroma.
  4. Cut the spring onions into medium pieces and add it to the oil. Stir for about thirty seconds.
  5. Add the vegetables including peas, carrot, mushroom, and spinach. You can add any of your favorite winter vegetables here, including mustard leaves, capsicum, cabbage etc. It tastes brilliant!
  6. Stir the vegetables for another minute or two till they cook, but do not get soggy, The vegetables need to remain slightly crunchy to add freshness to the final recipe.
  7. Pour some oyster sauce and mix well.
  8. Season with salt and black pepper powder.
  9. Add the cooked rice, stir well till every grain is coated in the oil and sauces.
  10. Add dark soy sauce and mix well.
  11. Garnish with fresh scallions and sesame seeds.
  12. Serve hot. [/directions]

fried rice

fried rice

fried rice

For more such delightful food, follow me on Facebook, Instagram, Twitter, and YouTube.

6 Tips To Make Tasty Food at Home EVERY SINGLE TIME!

Ever since I have started gaining some loyal readers of the blog, I get asked these questions a lot – How does simple food taste so good? How do you make such tasty food at home so easily?

My friends and family members who know my cooking style have also asked me this question several times. So I thought about it and understood how cooking is a misunderstood concept. A lot of people I speak to are intimidated by the idea of cooking a meal at home. This is either because it seems like a time-consuming task or because they think it is way too much effort.

My cooking style is mostly quick and simple meals, but one thing that I cannot compromise on is flavor. I mean that’s the whole point of this exercise right? Food needs to taste good. It’s great if the food looks stunning on a plate, but until and unless the flavors are right, everything is more or less a waste.

So here are my two cents on how you can make tasty food at home every single time. These are very basic but mostly forgotten tips. You might already be knowing all of them but may have somehow not thought of it too much.

Whatever be the case, what I can assure is that you do not need too much oil, spice or cheese to make your food taste good. Just keep the following points in mind. And start slow, one step at a time.

1. Use fresh spices

This is a major secret for making tasty food at home. Well not really a secret but a lot of flavors that emanate from simple food come from the spices that are freshly ground or prepared at home.

tasty food at home

For instance, almost 95 percent of all the spices I have in my kitchen pantry has been powdered at home. Be it cumin, black pepper, coriander or garam masala, I get the whole spices from the market and then powder them at home. A slight dry roasting on a pan before grinding it brings out the maximum flavor. Too lazy? So am I. Which is why I make large batches at one time which lasts me for at least two months, and I keep refilling them with time.

The flavor of fresh spices or masalas is just divine. You do not even need to work too hard because the freshness and aroma of powdered spices at home will do the work of adding extra punch and flavor. So stop buying packaged spices and start grinding masalas at home!

2. Limit (or totally abandon) preservatives

You know what I hate the most? Frozen vegetables, processed foods, and packaged pastes and sauces. They just feel so artificial in my mouth. And processed foods are known to have carcinogenic elements in them. Not to mention how awful they taste.

So if I decide to make a peas pulao, I will buy fresh peas from the market, peel them and then use them for the recipe instead of buying a large packet of frozen peas. And that makes a huge difference, not just in terms of taste, but also to my health. I believe in using fresh ingredients to the maximum of my ability.

tasty food at home

So next time you have to put ginger and garlic paste in your chicken curry, do not buy a readymade version from the market. I know it sounds way to easy to do that, but it will never give you the taste that freshly made ginger and garlic paste would give. Once you start using everything fresh in your cooking, you will get used to it and never go back to buying stuff full of preservatives. And that would be a good habit!

3. Use seasonal produce

I know we live in a world where Instagram gives us major food goals. Avocado toast, blueberry cheesecakes, passion fruit smoothies – ah the list is endless. And indulging in these foods once in a while is also a great idea. But in India, since most of these things will be imported (and outrageously expensive), it does not make sense to eat them on a regular basis. Instead, eat what is in season and what grows around where you live. The same rule applies to whichever part of the world you live in.

tasty food at home

There are four advantages to eating seasonally. First, you eat the healthiest of produce because it is according to the crop cycle. Second, you save money because seasonal and local food is available in abundance so it is highly affordable. Third, you help local farmers by buying their products and supporting their livelihood. And lastly, seasonal produce simply tastes the best! Just think about mangoes in Indian summer, pumpkins during Halloween and spinach in winter. Such bliss!

Anything that does not fall in the seasonal produce category will not give you the best taste. So try to be sensitive to your local surroundings and eat accordingly. And you will get great tasting every time.

4. Keep an eye on the temperature

Different kinds of recipes require different techniques. I will state the most common ones here. First up is oil. If you are frying something in oil, wait for the oil to get hot. This is mostly the case with really pungent oils like mustard oil or ghee used in Indian cooking. The temperature of the stove will also range between high to medium in cases like an Indian chicken korma recipe.

tasty food at home

However, if you are using butter to make a pasta, you will have to use medium heat. I do not fry the garlic when the butter is too hot. Instead, I let the garlic infuse into the fat so that the butter gets a beautiful and non-burnt garlic flavor, that eventually spreads to the entire pasta recipe.

Cooking is an art and it requires constant monitoring. Keep a check on the temperature you use. If you are a novice, follow the recipe to the T. Techniques will vary and the way you apply that knowledge will determine how good or bad your recipe turns out to be.

5. Invest in good cookware

I know this might sound weird but trust me, it’s important. The market is flooded with so many different varieties of cookware. Shiny metallic surfaces, bright colors and so many advertisements make it very appealing.

But cooking in the wrong vessel can not only deplete taste but also make you fall sick.

tasty food at home

I personally like to cook in traditional cookware, made of iron or good quality stainless steel. I never use plastic to store my food, and I also refrain from using non-stick pans and pots. They might look pretty but the Teflon layer on them is not the healthiest layer to cook food on. And most of them do not last.

So invest in good quality cookware. It might cost you slightly more, but it will last you forever. And you will not have to compromise on the health of taste.

As an example, I never cook Indian curries in a non-iron kadhai. A traditional vessel is needed to bring out the authentic flavors of a dish. So go ahead and buy the right cookware for your kitchen.

6. Garnish at the right time

tasty food at home

I share a lot of Indian food on my blog and Instagram handle, where I always add garam masala in the end. I get asked this question a lot – why in the end? That’s because the ingredients in a garam masala, primarily cardamom, clove, and cinnamon (along with a few others) are powerful in terms of flavor, but have a tendency to evaporate if added too early into the process. And because I really enjoy the zing that a fresh garam masala adds to a dish, I add it right at the end.

The truth is a garnish can make or break a dish. Depending upon what you are adding to your dish, you need to know the timing of the garnish.

The same goes for herbs. If you are using hardy herbs such as thyme or kaffir lime in your dish, you can add it early and let it cook with the rest of your ingredients. This will let it infuse its flavor into the recipe as it cooks with time. However, for something such as coriander leaves or basil, you need to add it right in the end because they are very delicate and their flavor and color will get lost if added too early in the recipe.

6. Cook with love, and share!

This might sound too cliche but it is so true! Cooking is therapy to me and a lot of other people. It lets me be creative, enjoy wonderful flavors, keep learning and most importantly, share the joy with people I love.

tasty food at home

You will notice the difference. Just imagine a time when you cooked with a lot of enthusiasm versus one time when you just cooked to stop your stomach from grumbling. When you cook for others or yourself in a good and happy mood, the energy passes on to the food as well. And it gives it those extra brownie points because when you cook with love, you are more aware of the cooking process and you give it your best.

Share your food and call your friends over for a feast. Because food is best enjoyed when shared with loved ones. And the compliments will make your day!

I hope this post inspires you to cook your own food and limit the use of preservatives. Do let me know what you think of this and you can always ask me any questions that you might have. I am also open to discussions in the comments section.

Connect with me on Facebook, Instagram, Twitter.

You can find all my recipe videos on YouTube.

Happy cooking!

Related – 4 Hard to Ignore Benefits of Cooking at Home

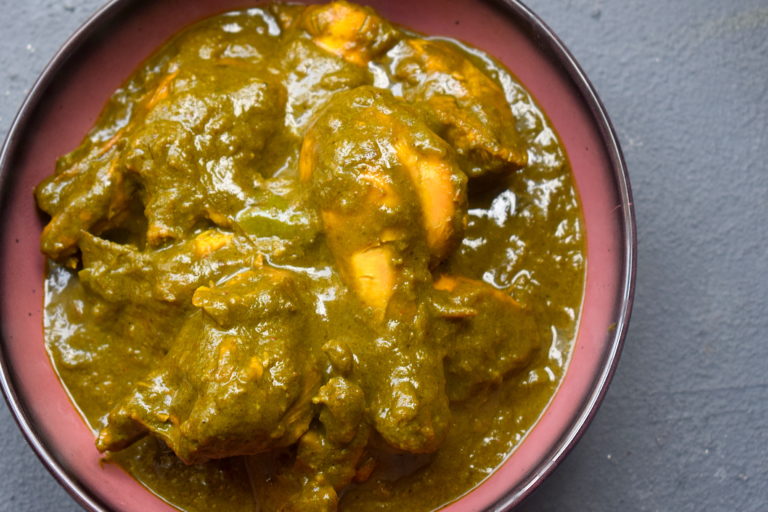
Palak Chicken

I absolutely adore seasonal produce in my meals. The freshness of seasonal and fresh ingredients remains unmatched. And winter brings with it a variety of colorful produce. And spinach has to top that list.

This palak chicken recipe uses spinach in all its glory, highlighting its creamy texture, wonderful taste, bright green colour and a dollop of good health. Its combination with juicy, succulent pieces of chicken is a match made in heaven. I urge you to try this recipe as it is a regular in my kitchen at this time of the year. It is full proof and tastes absolutely delicious.

palak murgh

This recipe is a little on the techniques side. Don’t get nervous already. It is just a few steps which might not be very familiar to you, but it still very easy to execute. I cook the spinach leaves in some oil before blending it to a paste. This gives it a beautiful taste and texture and also gets rid of the rawness. The spices that I have used here are also very simple and basic. Most of the things will probably be there in your kitchen pantry!

Note it down and try it before this wonderful season ends.

Preparation time – 20 minutes

Cook time – 40-50 minutes

Serves – 3-4 people

[ingredients title=”Ingredients”]

  • 500 g chicken
  • 1 tbsp vegetable oil
  • 20 g ginger
  • 5 garlic cloves
  • 150 g spinach, washed and cut
  • 2 tbsp desi ghee
  • 2 bay leaves
  • 4 medium onions, finely chopped
  • 1 tsp sugar
  • 2 green chilies, slit in half
  • Salt to taste
  • 1 tsp turmeric powder
  • 1 tsp cumin powder
  • 1 tsp coriander powder
  • 1 tsp Kashmiri red chili powder
  • 1 tsp black pepper powder
  • 1 tsp garam masala
  • 2 tsp fresh cream
  • 1 cup warm water [/ingredients]

[directions title=”Directions”]

For the spinach puree:

  1. Heat oil in a pan. Add the ginger cubes, garlic cloves and stir for five seconds. Add the chopped up spinach and let it cook for five minutes.
  2. Transfer the spinach to a mixer. Add some water and form a thick paste. Save it for later.

palak murgh

For the recipe:

  1. Heat ghee in a kadhai. Add the bay leaves and give it a light stir.

palak murgh

2. Add the finely sliced onion and cook for five minutes till the onions turn translucent and start releasing its aroma.

3. Add the sugar and slit green chilies to the onion. Fry till onions are cooked.

palak murgh

4. Season with salt, turmeric powder, cumin powder, black pepper powder, coriander powder, and Kashmiri red chili powder. Stir well till all the spices come together with the onions.

palak murgh

5. Add the chicken pieces and mix well with all the spices. Cook for seven minutes till the oil starts to separate from the mixture.

palak murgh

6. Add the spinach puree and mix it well with the chicken pieces till every piece is coated with the green glaze. Stir well for five minutes.

palak murgh

palak chicken

7. Pour in a cup of warm water and give it a gentle stir. Cover and let it cook in medium flame for twenty minutes.

palak murgh

8. Open the lid, check the consistency, the softness of the chicken pieces and seasoning. Add more salt if needed.

9. Once you are happy with the consistency and the chicken pieces soften, add the fresh garam masala. Stir gently.

10. Finally, garnish with two teaspoons of fresh cream. One last stir and the gorgeous palak murgh is ready to be served.

palak murgh

11. Serve hot with parathas, jeera rice or plain rice. [/directions]

palak murgh

palak murgh

For more such delightful food, follow me on Facebook, Instagram, Twitter, and YouTube.

Schezwan Noodles With Homemade Schezwan Sauce

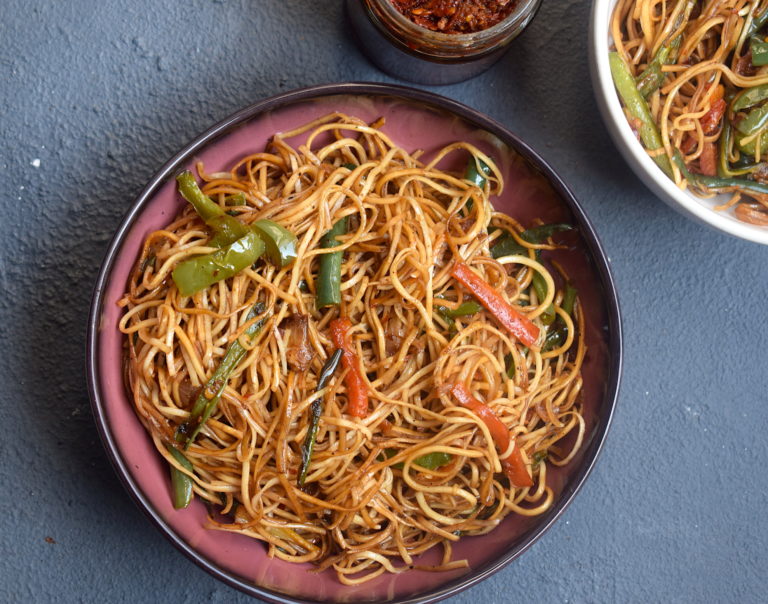
It’s time to raise your threshold for all things Schezwan! This Schezwan noodles with crunchy vegetables are going to fall in love with spicy food all over again.

What makes it special you ask?

The main ingredient of the recipe aka the Schezwan sauce isn’t store bought. It is as fresh and lively as a recipe can get.

I absolutely love these noodles. They are super simple to make, a great way to eat those vegetables and also not compromising on taste. Because we never want to do that, right? You can also go ahead and add your favorite protein to this. Chicken and scrambled eggs would be delightful in these noodles.

schezwan noodles

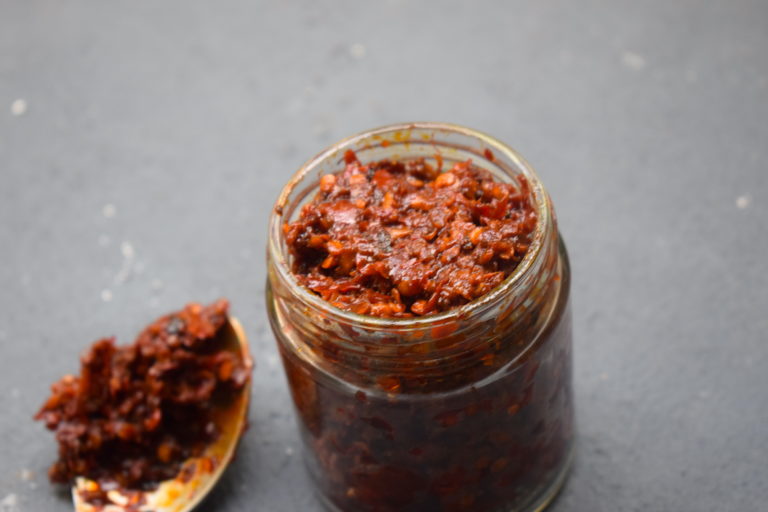
For these noodles, I have used my go-to Schezwan chutney which works like magic. It is way better than store bought sauce and will give your noodles that extra oomph and color.

schezwan noodles

So here is the recipe.

Preparation time – 30 minutes

Cook time – 40 minutes

Serves – 1-2 people

[ingredients title=”Ingredients”]

  • 150 g Chinese noodles
  • 3 tbsp vegetable oil
  • 7 garlic cloves, finely chopped
  • 1 medium onion, finely sliced
  • 80 g green beans, thinly sliced
  • 1 medium carrot, thinly sliced
  • 1/2 green bell pepper, thinly sliced
  • 1 tsp freshly ground black pepper powder
  • 1 tbsp Schezwan chutney/sauce
  • 1 tsp brown sugar
  • 2 tsp dark soy sauce
  • 1 tsp sesame oil
  • Salt to taste [/ingredients]

[directions title=”Directions”]

  1. Cook the noodles as per package instructions with some salt in boiling water. Set aside.
  2. Heat oil in a wok. Add the sliced onions, followed by the finely chopped garlic. Saute for a minute.
  3. Add the vegetables – carrot, green bell pepper, and green beans. Feel free to add any crunchy vegetable of your choice here. Cook for about two minutes till they are semi-cooked and still crunchy.
  4. Add some brown sugar and mix well.
  5. Add the Schezwan chutney to the vegetables and mix well for another minute. Do not add salt at this point since the Schezwan chutney will already have some salt and spices.
  6. Once the vegetables are coated in the Schezwan paste, add the cooked noodles to the wok. Use a pair of tongs to mix this well.
  7. Season with salt and pepper as required. Taste it beforehand to get an idea of how much seasoning is required.
  8. Add dark soy sauce to the noodles and bring it all together slowly.
  9. Drizzle a bit of sesame oil on the noodles for some extra glaze and flavor.
  10. Take off the heat and serve hot. [/directions]

Slurrp tip: Top it off with some scrambled eggs or a fried egg for more flavor.

schezwan noodles

schezwan noodles

For more such delightful food, follow me on Facebook, Instagram, Twitter, and YouTube.

Related recipe – Better-Than-Takeout Shrimp Fried Rice

If you are new to the kitchen or are confused about what to buy for my recipes/kitchen tools, I can help. I have curated a special list that you can order right from Amazon and get the best products for your kitchen. Click here to explore.

And as always, happy cooking! <3

Homemade Schezwan Chutney – It’s Hot!

I have tried it all. Affordable, expensive, beyond budget, free with groceries, outrageously cheap – every brand that the market has to offer when it comes to Schezwan sauce. But I have not been impressed too much because I really look for freshness in everything. And the addition of preservatives can only give you so much!

homemade schezwan chutney

Ever since I started blogging about recipes regularly, I have also started developing more interest in using fresh ingredients, even in case of chutneys and sauces. The difference is so huge in terms of taste, texture, freshness and of course, health! Now I am a big advocate of all things fresh and homemade. There are of course a few things I still buy from the market, but Schezwan sauce is definitely not one of those things.

homemade schezwan chutney

If you are a big fan of everything Schezwan, this is the chutney for you. Made with hot red chilies and a few very basic ingredients, you can have a big batch of this Schezwan chutney in no time. I always have a jar of this in my fridge to whip up spicy recipes on those days that demand it. So go ahead and make a giant batch for yourself.

Preparation time – 30 minutes

Cook time – 30 minutes

Makes – 200 g

[ingredients title=”Ingredients”]

  • 50 g dried red chilies
  • 1 tbsp vinegar
  • 1 tbsp soy sauce
  • 2 tsp sugar
  • 4 tbsp vegetable oil
  • 15 cloves of garlic, finely chopped
  • 20g ginger, finely chopped
  • Salt to taste
  • 1 cup water [/ingredients]

[directions title=”Directions”]

  1.  Soak the dried red chilies in lukewarm water for four to five hours. Keep it covered all the while. This step is very essential because we want the chilies to soften.
  2. Grind the soaked chilies with a little water till a thick and fine paste is formed.
  3. Heat oil in a pan. Once the oil is hot, add the finely chopped ginger and garlic. Saute for a minute. Make sure you don’t burn it.
  4. Add the chili paste to the oil and fry on medium flame for about ten minutes. Once it starts releasing the oil, add some water and stir. Cover and cook this for fifteen minutes.
  5. Take the lid off, add salt, sugar, vinegar and soy sauce. Stir well till you get the desired consistency. Add water accordingly.
  6. Let it cool completely and transfer to a jar. Refrigerate and use it for up to a month in your recipes to add a good dose of heat. [/directions]

This chutney is not a sauce, because it is thicker than a sauce would be. You can choose to make it your own consistency. I like mine thick like a pickle, and using just a little also goes a long way in adding the spice element.

homemade schezwan chutney

homemade schezwan chutney

For more such delightful food, follow me on Facebook, Instagram, Twitter, and YouTube.

Lauki Kofta Curry | Slurrp

I know most people would cringe even on the idea of lauki or bottle gourd. Though I do like lauki in all its forms, I will never argue with someone whether lauki kofta curry is one of the best ways to eat it. Because it is! And this particular recipe is simply stunning.

This is my own version of lauki kofta curry after many experimentations in the kitchen. I have done it all – from making soggy lauki koftas, to ones that break even before I add them to the curry and also thise that are harder than stone. But after multiple experiments, I finally have a full proof recipe of my favorite way to make (and eat) lauki kofta curry. I hope you try it.

lauki kofta

The curry is creamy, slightly sweet, luxurious and dreamy. It is thick as it is a smooth paste of a variety of elements.

Preparation time – 30 minutes

Cook time – 45 minutes

Serves – 3-4 people

[ingredients title=”Ingredients”]

For the koftas:

  • 1 medium bottle gourd
  • 1 tsp garam masala
  • Salt to taste
  • 1 tsp cumin powder (jeera)
  • Chopped coriander leaves
  • 4-4.5 tbsp gram flour (Besan)
  • 1 tsp red chili powder
  • 1 tbsp bread crumbs
  • Lukewarm water, as required
  • Oil (for deep frying the koftas)

For the lauki kofta curry:

  • 2 onions, ground to a paste
  • 2 tomatoes, ground to a paste
  • 2 green chilies, finely chopped
  • 20 g ginger paste
  • 20 g garlic paste
  • 1 bay leaf
  • 100 g cashews, ground to a paste
  • 1 tsp cumin
  • 1 tsp black pepper powder
  • 1 tbsp sugar
  • 1 tsp Kashmiri red chili powder
  • 1 tsp turmeric powder
  • 1 tbsp desi ghee
  • 1 tsp coriander powder
  • 1 tsp garam masala
  • 200 ml warm water
  • 1 tbsp Kasuri methi for garnish
  • Salt to taste [/ingredients]

[directions title=”Directions”]

  1. Rinse and peel the lauki. Finely grate it with a grater. Squeeze the excess water out. Save the water for later.
  2. Make the koftas by mixing the ingredients together. The breadcrumbs help to make the koftas firmer. Do not add too much water as you do not want a watery batter.
  3. Make small round shapes or patties.
  4. Heat oil in a kadhai or wok. Deep fry the koftas until golden brown and crispy from all sides. Set them aside.
  5. Keep the koftas on a tissue to drain the excess oil.
  6. In another kadhai, heat ghee. Add the bay leaf, followed by the onion paste. Saute the onions till the raw aroma disappears, they turn brown and the oil starts to separate from it.
  7. Add some sugar into the onions. This will help to give it a beautiful brown color and also enable the onions to cook faster. It will also add some sweetness to your final recipe.
  8. Add the chilies, ginger paste and garlic paste at this point and saute till its raw aroma disappears.
  9. Add the fresh tomato paste. It is important that you cook this tomato mixture with some patience as all the ingredients in it are raw at this point. Keep stirring till the tomatoes are thoroughly cooked and the oil starts to separate from the paste.
  10. Once the tomato is cooked, season with salt, turmeric powder, cumin powder, black pepper powder, coriander powder, and Kashmiri red chili powder. If you do not want too much chili flavor, skip adding the green chilies in the beginning.
  11. Add in some warm to avoid the paste from sticking to the pan.
  12. Time to add in the cashew paste. Stir well and make sure everything comes together well.
  13. Once everything is cooked, add some more warm water depending on the consistency you want.
  14. Season with garam masala and Kasuri methi just before turning off the gas. Give it one last stir.
  15. Add the koftas to the gravy just before serving.
  16. Enjoy with hot rotis, naan or jeera rice.[/directions]

lauki kofta

lauki kofta

I hope you try this really easy and delicious lauki kofta curry for yourself and enjoy it as much as I do. If you have any questions, feel free to reach out to me with a comment or connect with me on Instagram or Facebook.

Happy cooking!

Related recipe – Restaurant style alu matar


Pressure Cooker Alu Matar

I cannot imagine my life without the pressure cooker. To me, it is the most valuable cooking tool one can have to become a cooking ninja. And I am not just talking about just Indian recipes!

I swear by the pressure cooker because it makes cooking fast, easy, healthy and delicious at the same time. How many kitchen aids can actually boast of that? The instant pot is a crazy obsession in the food world today. But to me, it is exactly the same thing as a pressure cooker. So let’s talk more about the latter since it has been a part of every kitchen household.

alu matar

alu matar

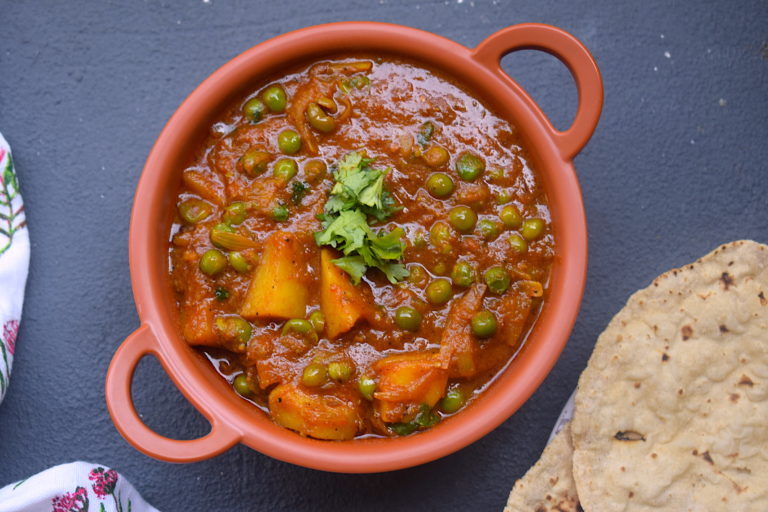
This pressure cooker alu matar is so delicious and easy to make. The results are going to shock you because even without using a pot or a pan, it tastes better than take away. No kidding! The cooking takes part in two steps. Step 1 is making the tomato sauce which is the base of the recipe. The second step is to put everything into the pressure cooker, fry well and let it dance together.

alu matar

Alu Matar is also a perfect recipe to have at the onset of winters. There is an abundance of peas or matar in the market, so get hold of some and get cooking! For best taste, use fresh peas and avoid anything frozen. It might take you some time to peel the peas but it will be so much worth your time and health.

Preparation time – 10 minutes

Cook time – 30 minutes

Serves – 2-3 people

[ingredients title=”Ingredients”]

  • 3 tomatoes, sliced into four halves each
  • 1 large potato, cut in cubes
  • 100 g green peas
  • 2 onions, finely chopped
  • 50 g ginger
  • 50 g garlic
  • 2 green chilies
  • 1 tbsp desi ghee
  • 1 tsp cumin seeds (jeera)
  • 1 bay leaf
  • 1 tsp sugar
  • 1 tsp coriander powder
  • 1 tsp black pepper powder
  • 1 tsp cumin powder
  • 1 tsp turmeric powder
  • 1 tsp dry mango powder (aamchur)
  • 1 tbsp black pepper powder
  • 250 ml warm water
  • 1 tsp garam masala
  • Chopped coriander leaves for garnish
  • Salt to taste [/ingredients]

[directions title=”Directions”]

  1. In a grinder, put the roughly chopped tomatoes, ginger, garlic and chilies. Grind it without adding any water and set aside.

alu matar

alu matar

2. Heat ghee in a pressure cooker. Add the bay leaf, followed by the cumin seeds. Let the seeds splutter and release their aroma. Do not burn.

alu matar

3. Add the chopped onions to the ghee and saute till they turn translucent. Add some sugar into the onions. This will help to give it a beautiful brown color and also enable the onions to cook faster. It will also add some sweetness to your final recipe.

alu matar

4. Once the onions are translucent and soft, add the tomato paste that you just ground. It is important that you cook this tomato mixture with some patience as all the ingredients in it are raw at this point. Keep stirring till the tomatoes are thoroughly cooked, the ginger garlic smell disappears and oil starts to release from the gravy. This will take about ten to fifteen minutes on a medium flame.

alu matar

5. Once the tomato paste is cooked, season with salt, turmeric powder, cumin powder, black pepper powder, dry mango powder, and red chili powder. If you do not want too much chili flavor, skip adding the green chilies in the beginning.

alu matar

6. Saute the masalas well with the tomatoes and onions. Once done, add the potato cubes and the peas. Give it one good mix.

alu matar

7. Add in some warm water at this point, give it one last mix and close the lid of the pressure cooker.

alu matar

8. Wait for the pressure cooker to release two whistles and let it cool down naturally till all the steam is released.

9. Take the lid off once cool, add garam masala and stir.  alu matar

10. Garnish with fresh coriander leaves. Enjoy with some hot ghee-laden rotis or parathas!  [/directions]

I hope you try this really easy and delicious alu matar for yourself and enjoy it as much as I do. If you have any questions, feel free to reach out to me with a comment or connect with me on Instagram or Facebook.

Street Style Chicken Cutlet | With Video

October is here and so is my favorite time of the year. What is going to follow is a season of festivities, holidays, colorful streets, lots of food and family time. Just the thought of it is so exciting!

Since Durga Puja is just around the corner, I wanted to share some recipes that remind me of this festival. I will take you through a ride of nostalgic memories through food, memories that made my childhood extremely special.

chicken recipes

Today’s recipe is a homemade chicken cutlet. This is my version of it where I used minced chicken and boiled potatoes to make some wonderfully crispy chicken cutlets. I have shallow fried them in a pan. You can also go ahead and deep fry or even bake. The choice is entirely yours.

chicken recipes

These chicken cutlets are something I have enjoyed a zillion number of times. I love street food, especially during Durga Puja, and these cutlets are served everywhere at that time. It tastes heavenly with some spicy coriander and mint chutney, or some spicy tomato-based sauce. I have gone with my usual homemade spicy green chutney which I made by crushing coriander leaves, mint leaves, garlic, ginger, salt, green chili and lime juice in a blender. So fresh!

This is an extremely easy recipe. It does require some preparation and it is also not a one-pot dish. But the slight effort is totally worth it!

I hope you try it.

Preparation time – 60 minutes

Cook time – 30-40 minutes

Serves – 2-3 people

[ingredients title=”Ingredients”]

  • 300 g raw minced chicken
  • 2 medium potatoes, boiled
  • 1 large onion, finely chopped
  • 2 tbsp vegetable oil
  • 400 ml oil for shallow frying
  • 1 tbsp ginger garlic paste
  • 1 tsp turmeric powder
  • 1 tbsp cumin powder
  • 1 tbsp red chili powder
  • 1 tbsp black pepper powder
  • 1 tsp garam masala
  • 1 egg
  • 150 g breadcrumbs
  • Salt to taste [/ingredients]

[directions title=”Directions”]

1. Heat 2 tbsp vegetable oil in a wok. Add the minced chicken and fry for three to four minutes.

chicken recipes2. Once the chicken releases all its water content, add the finely chopped onion and the ginger garlic paste to the chicken. Stir it till the raw aroma of the ginger and garlic disappear.chicken recipes3. Season with salt, turmeric powder, chili powder, cumin powder, black pepper powder,  and garam masala.

chicken recipes

4. Mix well till all the masalas completely assimilate with the chicken.

chicken recipes

5. Transfer the chicken mix to a bowl and let it cool.

chicken recipes

6. Once cool, mash two boiled potatoes into the chicken mixture. Mix well.

chicken recipes

7. Crack open one egg and mix it with the chicken and the potato mix. The egg will help bind the cutlets.

chicken recipes

8. As a final step, add breadcrumbs to the chicken and give it a good mix with your hands. The breadcrumbs will help eliminate any extra softness, as well as give the cutlets a crispy texture.

chicken recipes

9. Once the cutlet mix is ready, shape it in the form of round tikkis or any shape you desire.

chicken recipes

chicken recipes

10. Deep fry or shallow fry the tikkis until golden brown from all sides. I have shallow fried them in a pan as you can see in the video.

chicken recipes

chicken recipes

11. Serve hot with some spicy green chutney! [/directions]

chicken recipes

This chicken cutlet is one of my favorite chicken recipes. I hope you try it and enjoy it as much as I do. If you have any questions, feel free to reach out to me with a comment or connect with me on Instagram or Facebook.

Slurrp tip: Make a large batch of tikkis and freeze them. Fry them just before you want to serve or when guests are over.