Essential Spices in an Indian Kitchen

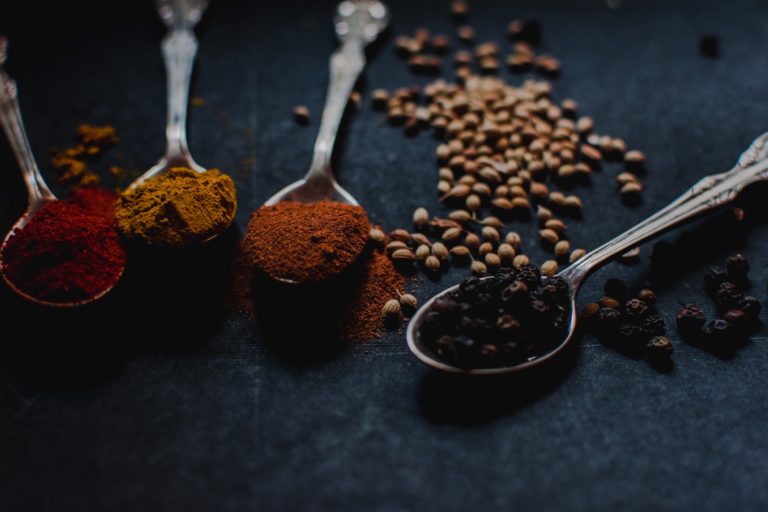
Spices are so integral to Indian cooking. They have the ability to completely transform a basic dish and give it that authentic touch. However, Indian cooking is also quite vast and a dish may or may not use many spices. And for a beginner, that might seem a bit confusing or overwhelming.

Indian food appeals to the entire globe but my non-Indian friends and colleagues keep mentioning how they cannot wrap their heads around the spices and the techniques of the cuisine. Indian cooking might also seem very intimidating for a beginner who loves to eat Indian food but does not necessarily know how to make it. While there is actually nothing that can be called as “Indian food,” some of the spices are common across all states. Each state in India does represent a mini country in itself, with their own disctict culinary heritage. It will not be possible to share each and every state’s spice mix, but the generic ones are pretty much the same everywhere.

So if you are a beginner and want to set up your pantry specifically for Indian cooking, you have landed at the right page. I have been cooking and eating Indian food and here is my two cents on essential spices in an Indian kitchen. This list is strictly on the basis of my personal knowledge and understanding of Indian spices. If you think I have missed out on anything, please let me know.

Ground Spices

1. Cumin powder – Jeera

I honestly have to think really hard if I have to name any Indian curry dish that does not have cumin in it. Cumin or jeera is an essential spice that Indians add to almost all of their “regular” dishes. If you’re thinking dals, curries, pulaos, biryanis or korma – cumin has to be there! So get hold of some cumin powder. And the fresher the better! I suggest you buy cumin seeds, dry roast them and grind them to a fine powder. The fragrance of fresh cumin powder is unmatched.

2. Turmeric powder – Haldi

Turmeric powder again is one of the key ingredients in Indian food. The yellow colour in any curry or gravy comes from turmeric, especially in all kinds of dal preparations. You can either get turmeric powder or also invest in raw turmeric. The benefits of adding turmeric in our diets has even been cited in Ayurveda. Turmeric contains several bioactive compounds that have powderful medicinal properties. Curcumin is the compound in it that is anti inflammatory, boosts immunity and protects the body against several diseases.

3. Coriander powder – Dhania

Coriander powder or dhaniya is another essential Indian spice which is used in all major curry preparations. Again, it’s best to buy the seeds, dry roast them and blend them to a powder than buy readymade coriander powder from the store. Croainder powder adds a lot of flavour to Indian preparations, and can also be used as a garnish to fresh chutneys and dips.

4. Black pepper powder – Kali mirch

Black pepper is also used in Indian cooking. While it may not be as common as thespices listed above, it is still a popular spice in Indian kitchens. I for one cannot deal with the absence of black pepper powder in my kitchen. I like to make my own black pepper powder by grinding black pepper seeds. Or just crush some seeds just in between cooking to add to my meals.

5. Red chili powder – Lal mirch

Indian food has the reputation of being extremely hot. While that might be the case for certain cuisines, it’s not a generic truth. The level of heat varies from region to region, and also as per personal preference. In my house for example, I never saw red chili powder in the pantry. We always used fresh or dried chillies as opposed to powder. But that’s not the case everywhere. But having said that, keeping some red chili powder is essential.

There are two kinds of red chili powder that goes into Indian cooking – deggi mirchi and Kashmiri mirchi. Deggi mirchi is the one which is actually hot. Kashmiri mirchi is not very hot but adds a beautiful red colour to dishes. It is used in tempering and also marination. You can keep a little of both as per your preference. Personally, I am a huge fan of Kashmiri chili powder.

6. Garam masala

Garam masala is a mixture of different whole spices that is usually added right at the end of the cooking process. It adds a beautiful flavour and warmth to dishes. The combination of garam masala spices varies from region to region. I come from the eastern part of India where our garam masala is a simple mix of cardamom, clove and cinnamon. But the spice mix can be a lot more than this simple ingredients. You can make your own garam masala or buy one from a really good brand.

7. Dried fenugreek – Kasuri methi

Dried fenugreek leaves or kasuri methi is a show stopper for many meals. It has an amazing flavour of its own that has the ability to change the game for a dish altogether. It is a garnish you must have in your kitchen and it makes way for amazing curries, dals, parathas or even subzis.

8. Dry mango powder – Amchur

Dry mango powder or amchur is used a lot in north Indian cooking. It adds a tang to curries and other preparations. It’s a personal favorite and I always keep some handy. It is also a great addition to koftas and parathas.

9. Cardamom powder – Elaichi

Green cardamom is used as a whole spice as well as in its powder form. It is an expensive spice as compared to the rest because of its superior flavour. The seeds are powdered to get a smooth powder that is added in many gravies as well as several Indian desserts. You can make it at home for best fragrance and flavour. Or you can buy it from a good brand.

10. Asafoetida – Hing

Asafoetida has a strong and pungent aroma that adds a beautiful flavour to curries and stews when tempered in oil.

Whole Spices

Here is a list of all the whole spices that go into making different Indian delicacies. It is used in tempering and garnishing in various dishes.

1. Green Cardamom – Elaichi

Whole green cardamoms are crushed and used to flavour many Indian dishes like pulao, biryanis, korma, curries, desserts and even for chai or tea.

2. Black Cardamom – Badi Elaichi

Black cardamoms have a tough skin and are mainly used as a part of garam masala to flavour savory dishes like curries, pilafs, stews or dals. They can also be used to flavour broths. It is vastly different from the green cardamom in terms of texture, aroma or flavour.

3. Cloves – Laung

Cloves are used for tempering dishes as well as to make tea. It has a refreshing aroma and is also used as a medicine for dental ailments.

4. Cinnamon – Dalchini

Cinnamon can be used for tempering as well as for flavouring some sweet dishes.

5. Cumin seeds – Jeera

Cumin seeds are used extensively as a tempering element in various Indian dishes. It’s always a good idea to keep some cumin seeds handy.

6. Nigella seeds – Kalonji

Mostly used in Eastern cooking (Benagli and Assamese) to flavour their briths and curries, kalonji is one of my favorite whole spices. It’s aroma is very subtle but unique. It is used to flavour pickles, added to curries and stews, added to paratha and puri doughs and also added as a garnish.

7. Fennel seeds – Saunf

Fennel seeds are used in pickles and also in curries and for tempering. It has several medicinal properties and adds a distinct flavour to dishes.

9. Carrom seeds – Ajwain

Carrom seeds are not cooked in oil, but added to doughs, pickles and also eaten as it is as a cure to digesive issues. I love adding them to my parathas!

10. Mace – Javitri

Another flavoring spice mostly added to biryanis and rich gravies. Mace has a distinct flavour and requires just a little usage at a time.

11. Mustard seeds – Rai

Mustard seeds are very common in Indian cooking as used as a tempering agent. It is added to curries, broths and is used to flavour chutneys and pickles too.

12. Saffron – Kesar

One of the most expensive spices in the world, the wonders of saffron are many. It is used in savory as well as sweet dishes. If you are making biryani or a royal phirni/kheer, saffron is a must.

13. Nutmeg – Jaiphal

Nutmeg has a very distinct and pungent flavour and fragrace. It is used to add warmth to several Indian curries and sweet dishes. The dried seeds will last in your kitchen forever.

This is obviously not the end of it all. There will be many more local varieties in different states. Indian food also uses a lot of condiments. This is my list as far as spices are concerned.

I hope this helps you and you find it easier to set up your pantry for Indian cooking. If you have any doubts, please reach out to me in comments or my social media handles.

Find me on Instagram – www.instagram.com/slurrpilicious

Find me on Facebook – www.facebook.com/slurrpilicious

Find me on Youtube – https://www.youtube.com/channel/UCA-cJoo27OLSCswI4sy6lzA?

Happy cooking!

Turkish Eggs (Cilbir) Recipe


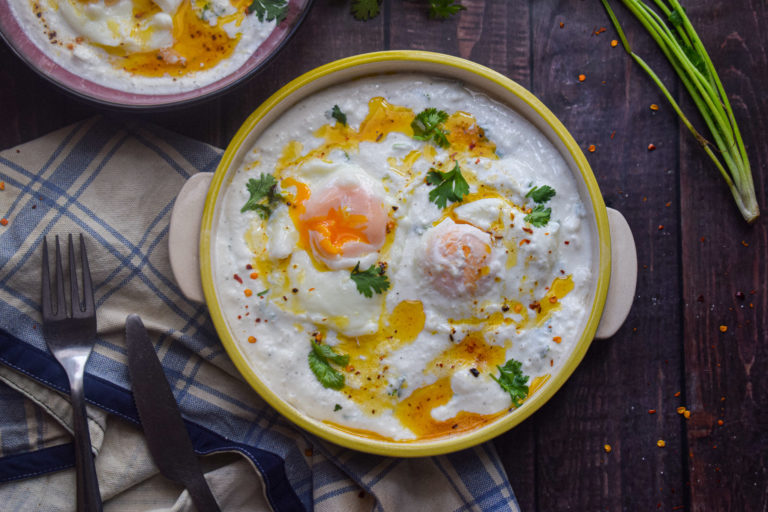
Pairing yogurt with steaming poached eggs might not be an idea that appeals immediately. But trust me, it is a bomb combination! Otherwise Turkish Eggs or Cilbir would not have been one of the world’s most favourite breakfasts, right? I will show you how you can make this amazing recipe very easily at home and try your hands at something completely fresh and new. Because these Turkish Eggs are to die for!

Turkish eggs

Because I am in India, this recipe has been adapted to what is available around me. The traditional recipe, for instance, uses Greek yogurt and fresh dill for garnish. I have replaced the greek yogurt with a thick homemade hung curd, and because dill is hard to find here, I garnished the dish with fresh cilantro. It tasted excellent both ways and you can go ahead with what you have around you.

Key Elements In Turkish Eggs

Turkish Eggs recipe essentially consists of three core elements. The base is a creamy garlicky yogurt, which is then topped off with jiggly poached eggs. The third element is a simple yet stunning chilli butter sauce which is drizzled all over the eggs and the yogurt with a final garnish of fresh herbs. Each bite must take a scoop of all the elements, and the taste is marvellous! To get the Turkish Eggs right, I have broken down the steps to make it simple for you.

Turkish eggs

Step 1 – Make the garlic yogurt

If you have greek yogurt, nothing like it. If you don’t (we are in lockdown after all), you can make your own hung curd at home. Put a sieve on top of a bowl and layer it with a clean cotton handkerchief or a muslin cloth. Put the curd on top, cover it up and place it in the refrigerator overnight for for at least four hours. The idea is to extract all the water out of the yogurt and give it a thick creamy texture.

Once your hung curd is ready, take it out in a bowl. Add the finely chopped garlic and season it with salt and freshly ground black pepper powder. Whisk it all up really well so that it’s smooth and creamy. Allow it to come to room temperature.

Step 2 – Make the chilli butter sauce

This simple yet stunning sauce gives that gourmet touch to the recipe of Turkish Eggs. It’s fairly simple to make, provided you follow a few techniques. First, add butter into the skillet and let it cook on the lowest temperature possible. If you increase the heat, it butter will burn. Let the butter melt and brown at its own pace in the skillet. Drizzle some good quality extra virgin olive oil onto the skillet to give the butter some company. The butter needs to be cooked till it acquires a beautiful brown and nutty colour, what we call as brown butter. Once the butter is browned, add good quality chilli flakes to it and let it unite in flavour. Once done, set the chilli butter sauce aside to cool down.

Step 3 – Making the poached eggs

The poached eggs are the star of this dish, but can get quite tricky. As much as we all love to order poached eggs in restaurants, we barely make it at home ourselves. I was also like that till I figured out the techniques that MUST be followed when making poached eggs. Follow these rules and you can make amazing poached eggs at home too.

  • Make sure your eggs are cold

This is a very important step in making poached eggs. Your eggs must be resting in the refrigerator before you make poached eggs. Having the eggs at room temperature will not make it hold its shape properly in the water, and it will disintegrate. So make sure your eggs are cold. And break open your eggs into ramekin bowl or a tea cup before putting it into the water to poach. Putting them straight into the water might break them.

  • The fresher the eggs, the better the shape

That’s the number one rule for perfect poached eggs. The eggs should be as fresh as possible. If your eggs are as fresh as a day old, you don’t even have the make that swirl in the water. It will hold its shape very easily. But I am being practical here and I know most of us will not hav super fresh eggs at home. Which is why my method is for eggs which have been with you fortwo to three days. But make sure the eggs are not too old also, otherwise even this method won’t bring desired results.

  • The temperature of the water

Poached eggs should be made in enough water that is hot enough that is starts to form little bubbles. Fill a wide mouthed pot with water and wait for it to start showing soft bubbles. The moment you see that turn the flame to its lowest. Now drop the egg just from the surface of the water while creating a swirl. And leave it undisturbed till it forms a solid shape.

  • Cooking the perfect poached egg

Once you drop the poached egg into the water, do not disturb it in ay way. While the egg is poaching, set up the bowl for the Turkish Eggs. Apply a generous dollop or two of the garlicky yogurt and be ready to transfer the poached egg to it. The yolk of the egg needs to be runny in this recipe. So the maximum time that you need to cook the egg in the water is two minutes. The moment you see that the yolk is surrounded by a sold layer of egg whites and the egg sits in a sturdy manner, gently take it out while releasing all the water you might be holding. Transfer it to the bowl of garlicky yogurt (see video for a visual tutorial).

Step 4 – Plating it up

On top of the jiggly eggs, drizzle the chilli butter sauce. I like to put three to four tablespoons in two eggs (see measurements below). And finally garnish it with fresh herbs. Eat it while it’s hot!

Turkish eggs

Turkish eggs

Preparation time – 15 minutes

Cook time – 20 minutes

Serves – 3

[ingredients title=”Ingredients”]

  • 6 large eggs
  • 600 g normal yogurt (I used Nestle)/1 cup Greek yogurt
  • 1/4 tsp black pepper powder
  • 1 tsp finely chopped garlic
  • Salt to taste (for the garlicky yogurt)
  • 100 g butter
  • 1 tbsp chilli flakes
  • Fresh coriander leaves for garnish (can substitute with dill)
  • 1 tbsp extra virgin olive oil [/ingredients]

[directions title=”Directions”]

  1. Make a hung curd with the yogurt as shown in the video. Or use greek yogurt.
  2. Transfer the thick curd to a bowl. Season with salt and black pepper powder. Add the fresh garlic and whisk it all up till smooth and creamy. Set aside.
  3. Heat butter in a skillet at the lowest temperature. Let it melt and brown. Add some olive oil to it. Once it acquires a brown and nutty colour, add the chilli flakes. Give it a light stir and cook for 30 seconds. Set aside and let the chilli butter sauce cool down.
  4. Heat oil in a wide mouthed pot. Once it starts developing small bubbles, turn the heat to low.
  5. Break open an egg into a ramekin or a tea cup. Make a swirl in the water with the end of a wooden spoon and gently drop the egg into the whirlpool. Let it sit undisturbed on low flame for two minutes.
  6. While the egg is poaching, put three tablespoons of garlicky yogurt on a bowl. Gently lift the egg out of the water, draining all the excess water around it and place it on the bed of garlic yogurt. I make two eggs for one serving.
  7. Drizzle the chilli butter sauce on top.
  8. Garnish with freshly chopped coriander or dill.
  9. Serve immediately with toasted bread. [/directions]

Turkish eggs

Every bite into the bowl of Turkish Eggs screams comfort. Make it over the weekend and enjoy something different and wildly popular. This recipe tastes amazing with some toasted bread on the side.

I hope you try out this Turkish Eggs recipe. If you do, let me know how it turned out for you. If you have any questions, suggestions or feedback, please leave me a comment here. Or connect with me Instagram, Facebook or YouTube.

Happy brunching!

Lemon Butter Garlic Pasta

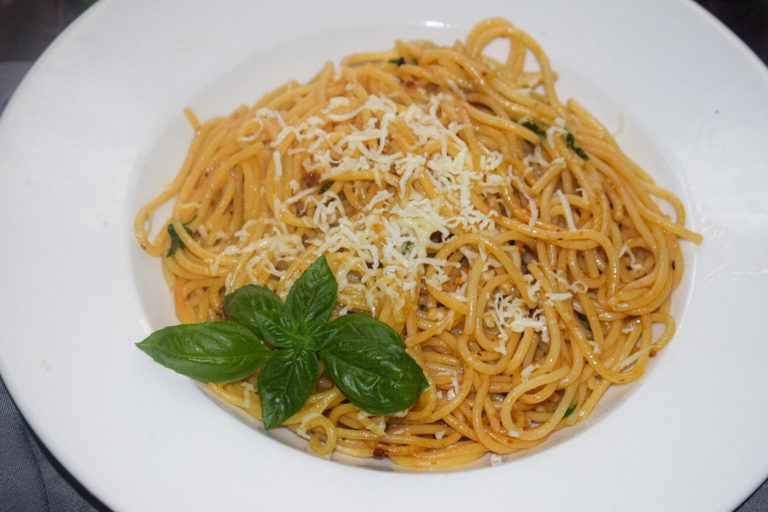
Whether you’re feeling drained to cook, or if you have very little time in hands, this lemon butter garlic pasta is a saviour. With a handful of ingredients and really less cooking time, this lemon butter garlic pasta has been a regular at my home this lockdown. Needless to say, it’s super simple to make, and tastes refreshing and delicious.

This lemon butter garlic pasta is simple to make, but it is essential to follow the little techniques that make this recipe stand out. I have explained it in detail in my video. These techniques matter a lot in getting the recipe right and make it taste like gourmet Italian food. For such a simple recipe, it is absolutely essential that you pick the choicest of ingredients. For instance, make sure you use high quality olive oil and go for a good brand of spaghetti. The amount of cheese required in this recipe is not too much, but if you do use cheese, Parmesan is the best option. I did not have any Parmesan since we are in lockdown, so I went ahead with just a touch of cheddar. But please use Parmesan if you have it.

lemon butter garlic pasta

Tips To Make This Lemon Butter Garlic Pasta Taste Gourmet

Here are a few tips you should follow to make sure you make that perfect plate of spaghetti for yourself.

  • Cook spaghetti as per package instructions till al dente

For this recipe, we cook the spaghetti first and once it’s almost done, we start making the lemon butter garlic sauce and mix them together in the last step. First tip is to make sure you buy good quality spaghetti. I personally love Borges that we get in India (not sponsored) because it really holds its shape and also tastes smooth. Del Monte also has some good range of spaghetti that you can try (not sponsored).

The idea is to cook the spaghetti till its al dente, or has that perfect bite. Each brand of pasta has its own cooking instrcutions, so make sure you follow them when you cook the spaghetti, and you will be good to go.

  • Add salt to pasta water

This little hack will elevate the level of your pasta from average to excellent! There is no bigger heartbreak than biting into pasta that has all the flavours in the sauce, but really a bland bite in those spaghetti strands. Sounds like a nightmare to me! It’s important to add a lot of salt to the water in which you boil the pasta because you do not want your spaghetti to be bland. In order for the spaghetti strands to absorb the flavour of the salt, it needs to cook in water that is almost as saline as sea water. This is because it does not absorb all of it, but just enough to flavour the spaghetti throughout. Adding salt in the water you boil the spaghetti in is the only time you will flavour the spaghetti so this step cannot be missed.

  • Pasta water makes all the difference

Have you ever wondered how restaurants get that perfect glaze over every strand of spaghetti that you order? While olive oil and butter play a major role, chefs also add a magic potion in the end while tossing the pasta. It’s the reserved pasta water. Reserved pasta water is nothing but the water in which you boil your pasta. This pasta water absorbs a lot of starch from the dry pasta and the addition of salt in it also helps flavour the final pasta sauce. So make sure you save two to three ladles of that starchy, saline and boiling pasta water to add that extra dose of magic to your dish.

  • Keep flame at low for the sauce

The sauce for the lemon butter garlic pasta is super basic and uses just a few ingredients. To get the most out of the sauce, it’s important to cook it at optimal temperatures. The flame should be kept at low throughout the process of making the pasta sauce as it’s very easy to burn the subtle ingredients or the oil. The flavour of the garlic needs to get infused into the butter gradually. The sauce is cooked till it turns a little brown and toasty, without any hint of burn. That’s when you know you have the perfect browned butter sauce with garlic and lime.

lemon butter garlic pasta

lemon butter garlic pasta

Preparation time – 15 minutes

Cook time – 30 minutes

Serves – 3

[ingredients title=”Ingredients”]

  • 300 g dried spaghetti
  • 3 tbsp finely chopped garlic
  • 1 tsp chili flakes
  • 1 tbsp lemon/lime zest
  • 2 tbsp lemon/lime juice
  • 3 tbsp butter
  • 6-7 fresh Italian basil leaves
  • 2 tbsp fresh cilantro
  • 3 tbsp extra virgin olive oil
  • Grated Parmesan cheese for garnish
  • Salt to taste [/ingredients]

[directions title=”Directions”]

  1. Fill a pot with water. Let it come to a boil. Add a tablespoon of salt and mix. Add the spaghetti and cook as per package instructions.
  2. Save two to three ladles of the pasta water.
  3. Once the pasta is almost done, cook the sauce simultaneously.
  4. Heat butter and olive oil in a skillet. Keep the flame at low. Before it heats up, add the finely chopped garlic. Give it a light mix, allowing the garlic to sweat. The oil should get infused with the aroma and flavours of the garlic. Let it stay like that for two to three minutes till the butter acquires a brown colour.
  5. Add the chili flakes and lemon zest.
  6. Drain the pasta and add it to the skillet. Add a ladle of the reserved pasta water (or as required). Keep the flame at low.
  7. Give the pasta a good toss. Garnish with fresh Italian basil leaves and cilantro (optional).
  8. Serve on a plate. Grate some cheese on top. Garnish with more basil. Serve immediately. [/directions]

lemon butter garlic pasta

lemon butter garlic pasta

I do hope you try this pasta recipe.

If you have any questions or suggestions, feel free to reach out to me with a comment or connect with me on Instagram or Facebook.

Paneer Butter Masala

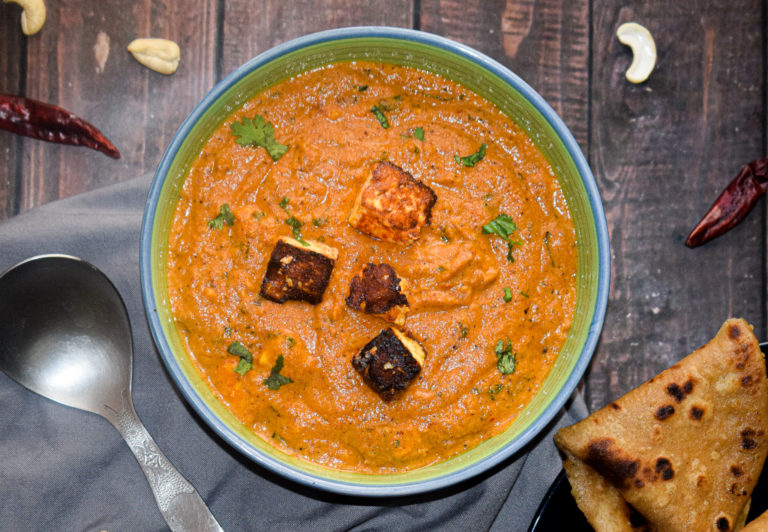
A dish that is a must order when at an Indian restaurant or dhaba is Paneer Butter Masala. A luscious tomato-cashew-cream gravy with chunks of soft paneer pieces is pure joy. It’s on the heavier side but feels absokutely worth every dunk with the butter naan on the side.

paneer butter masala

This recipe is my postcard to the city of Delhi, a place I have lived many lives in, since the last decade.  Because I have been living in the capital for so long, I have also started to love the food eaten here. This love did not happen overnight. It took many months (maybe years) for Delhi and I to accept each other. But we eventually made it. Ten years is a long time and within this time I have learned to love most of the things I detested as an 18 year old who first moved here. From someone who could not imagine the idea of eating rajma with plain rice, I am someone who finds utmost comfort in it now. Several other similar developments have taken place in the course of time. In fact, most things I cook are an amalgamation or a mix of all the kinds of food I’ve been exposed to in these 30 odd years. It’s probably a part of my unending quest to explore where do I really belong. With bits and pieces of my mind and soul scattered in so many places (real and imaginary), I guess that’s a question I should add to my list of life’s mysteries.

paneer butter masala

paneer butter masala

This Paneer Butter Masala recipe has been perfected over many failed attempts. So I can assure you this one if fail-proof. And for an Indian household, the ingredients that go into this amazing recipe might already be lying around. That’s the beauty of Indian cooking. Kitchens are mostly stocked with the basic masalas and vegetables. This is a version that tastes as good as your favourite restaurant. Trust me, there is absolutely no exaggeration there. The makhni gravy is TO DIE FOR and you will be astonished to know how easy it to put together.

Cooking this Paneer Butter Masala – 3 Stages

This paneer butter masala us cooked in three stages.

  • The first stage is marinating the paneer cubes in salt and red chilli powder and shallow frying them till they are brown and crispy on the edges. Doing this ensures that the paneer cubes in the gravy do not taste bland and have enough flavour on their own.
  • In the second stage, we make the makhni paste. This requires slow cooking onions, tomatoes, cashews, whole spices and Kashmiri dried red chillies (for the colour) for some time and blending it till it is super smooth. If you do not have Kashmiri red chillies, you can use normal dried chillies too. The Kashmiri chillies help give the gravy that wonderful orange colour.
  • The final stage is when we combine the makhni sauce with the fried paneer, and add some spices and garnishing.

paneer butter masala

Let’s take a detailed look at the recipe.

Preparation time – 30 minutes

Cook time – 40 minutes

Serves – 4

[ingredients title=”Ingredients”]

  • 200-250 grams paneer, cut into cubes
  • 1/2 tsp salt (to marinate the paneer cubes)
  • 1/4 tsp red chilli powder (to marinate the paneer cubes)
  • 3 tbsp oil
  • 1 bay leaf
  • 4 Kashmiri dried red chillies
  • 4 cardamoms
  • 1 thick cinnamon stick (1 inch)
  • 2 cloves
  • 2 medium onions, roughly chopped
  • 4 medium ripe tomatoes, roughly chopped
  • 12 cashews
  • Salt to taste
  • 1/2 tsp sugar
  • 2 tbsp butter
  • 1 tsp oil (for the gravy)
  • 1 tbsp ginger garlic paste
  • 1 tsp coriander powder
  • 1 tsp cumin powder
  • 1/2 tsp Kashmiri red chilli powder
  • 1 tsp garam masala
  • 1/2 cup water
  • 1/4 cup fresh cream
  • 1 tbsp kasuri methi [/ingredients]

[directions title=”Directions”]

  1. Cut the paneer into cubes. Gently absorb any excess water with a paper towel.
  2. Season the paneer cubes with 1/2 tsp salt and 1/4 tsp red chilli powder. Mix gently.
  3. Heat 2 tbsp oil in a kadhai or skillet. Shallow fry the paneer cubes till edges brown and become crispy. Set aside for later.
  4. In the same pan, add 1 tbsp oil. Temper the oil with a bay leaf and four Kashmiri dried red chillies.
  5. Temper with the whole spices – cardamom, cloves and cinnamon. Lightly roast it till they release their aroma.
  6. Add in the roughly chopped onions, roughly chopped tomatoes and cashews. Mix well. The idea is to cook this till the tomatoes and onions release their juices and soften. Season with salt and sugar. Cover and cook on low flame for ten minutes.
  7. Remove cover, give one last stir and let the mixture cool completely.
  8. Once cool, transfer the mixture to a blender and add three tablespoons of water to it. Now blend for as long as you need to get a super smooth and glossy paste. This is the makhni sauce.
  9. In the same skillet or kadhai, add the butter and one teaspoon oil. Let it melt. Now add the fresh ginger garlic paste and let it release its aroma. Keep the flame at medium to low because you don’t want to burn the paste. Saute for about a minute or two till the raw aroma of the ginger and garlic completely disappears.
  10. Roast some spices in the oil – coriander powder, red chilli powder, cumin powder and garam masala. Roast them on low flame with the rest of the ingredients for a minute.
  11. Once everything looks cooked, add the blended makhni sauce to the pan. Add half a cup of water. Stir and let the sauce come to a boil.
  12. Let the sauce simmer for another five minutes.
  13. Add the cream and stir well. It will get thicker. You can add more water if you like. But the sauce should preferably be a thick one.
  14. Garnish with kasuri methi or dried fenugreek leaves.
  15. Get the fried paneer and add it on the top. Save a few pieces for later.
  16. Once you reach your desired consistency, transfer the paneer butter masala to a bowl. Garnish with some extra fried paneer cubes and just a few coriander leaves.
  17. Serve hot with naan or paratha. Enjoy! [/directions]

I hope you try out this delicious and fail proof paneer butter masala for yourself. It’s absolutely divine. If you have any questions, feel free to reach out to me with a comment or connect with me on Instagram or Facebook. For all my videos, you can subscribe to me on YouTube.

paneer butter masala

Here’s another favourite north Indian recipe – Rajma Masala

Happy cooking!


Rajma Masala

Rajma Masala is one of my most favorite comfort foods of all time. It wasn’t always this way. I never even thought about rajma or kidney beans while growing up because it was never a major part of my diet. Assamese people consume rajma once in a while and we mostly have it with rotis. Savoring it with rice has only been recent.

My first exposure to proper Rajma Masala was when I moved to Delhi for my studies. I used to live as a paying guest in a house and rajma masala with rice or rajma chawal used to be the highlight of our Sunday meals. At first, I really didn’t get it as the definition of Sunday comfort meals for me comprised of so many things (including generous portions of fish and meat). Classmates in college would also fondly talk about this combination and the idea was non-relatable to me. I could not romanticize rajma chawal as comfort food.

rajma masala

Fast forward a decade later, I have started to love this combination. Also, you need to know how to make the perfect rajma masala to fall in love with it. I clearly wasn’t having good ones in my college days. But the rajma at a good dhaba or a north Indian eatery made me slowly realise why people love it so much. And I found the best rajma is found in people’s homes in Delhi. Friends moms and grandmoms who had magic in their hands. I could not crack the code for many years. I kept practicing for a long time until I finally cracked the code to the perfect rajma masala.

rajma masala

How To Make The Perfect Rajma Masala

So here I am sharing the perfect rajma masala recipe for you. This one is very close to my heart and this is how I make it. Here are some tips and tricks that I can give from my learning of this beautiful recipe.

  • Soak the rajma or kidney beans

It is important that you soak the kidney beans or rajma overnight. This step ensures that the cooking time of the beans becomes lesser and removed the possibility of having them raw in the curry. Soaking the kidney beans helps to fluff them up so that they bloom beautifully in the morning.

  • Season well

It is very important that you season the rajma and water well with salt when you boil them. And the amount of salt has to be enough for all the kidney beans to soak it as well as the broth to have a lot of flavors. It will ensure that each bite is seasoned and not bland when you add the boiled kidney beans to the masala.

  • Use fresh spices

A lot of spices go into the making of this rajma masala that lends it a distinct set of flavors, aroma, and taste. To get the best out of this recipe, I recommend you keep your spices as fresh as possible. By fresh I mean get the whole spices and grind them at home instead of using store-bought masalas. Trust me, there is nothing simpler you can do to make your food taste stunning every single time. This is the best tip for making any recipe taste gorgeous! I make a big batch of spices every month at my home – be it cumin, coriander, or garam masala! The fresh spices elevate the taste and quality of recipes to a whole new level.

  • Cook the masala well

This base of this rajma masala is a mixture of onions, tomatoes, ginger, garlic, and some wonderful spices. Everything is ground to a paste and to make sure the rawness fades completely. it’s important to be a little patient and cook the masala through. This requires 15-20 minutes of slow cooking until you see the oil release from the sides. The last thing you want in your rajma is an undercooked tomato base. A little investment in terms of time, but the results are absolutely worth it.

rajma masala

rajma masala

Techniques in making this version of Rajma Masala

In this particular version of rajma masala, there are four steps.

  1. Step 1 – Boiling the soaked rajma with salt and water in a pressure cooker.

  2. Step 2 – Making the masala in a kadhai

  3. Step 3 – Mixing the masala with the boiled rajma in the pressure cooker

  4. Step 4 – Cooking the rajma for two more whistles in the pressure cooker

These steps ensure you can get a thick and luxurious curry, that is packed with flavors and taste. I have been making rajma this way for many years now after having tried many other ways. And I have always found it to be the tastiest!

So without any further delay, let’s get straight to the recipe:

Preparation time – 30 minutes

Cook time – 60 minutes

Serves – 8

[ingredients title=”Ingredients”]

  • 2 cups rajma/kidney beans
  • 1 bay leaf (optional)
  • 1 1/2 tbsp salt (for boiling the rajma)
  • A liter of water
  • 2 medium onions
  • 4 medium ripe tomatoes
  • 1-inch ginger
  • 4 garlic cloves
  • 1 green chili
  • 3 tbsp mustard oil
  • Salt to taste
  • 1/2 tbsp coriander powder
  • 1/2 tbsp cumin powder
  • 1/2 tsp black pepper powder
  • 1/2 tsp amchur/dry mango powder
  • 1 tsp turmeric powder
  • 1/2 tsp Kashmiri red chili powder
  • 1 tsp garam masala
  • Kasuri methi, a handful
  • Fresh coriander for garnish
  • 1 tbsp ghee for garnish [/ingredients]

[directions title=”Directions”]

  1. Soak the rajma is enough water and leave them overnight (12-15 hours). Wash and drain.
  2. Make a paste of the onions, ginger, and chili.
  3. Grind the tomatoes to a paste.
  4. In a pressure cooker, add the soaked rajma, a liter of water and a bay leaf. Cook for 8-10 whistles. Let the pressure release on its own.
  5. Heat oil in a kadhai or skillet. Add the onion paste and saute for a few minutes.
  6. Add the ginger-garlic and chili paste and saute on medium to low flame till the raw aroma disappears.
  7. Season the masala with salt, cumin powder, coriander powder, black pepper powder, turmeric powder, and dry mango powder. Saute on low heat.
  8. Add a splash of water to prevent the masalas from sticking.
  9. Pour the tomato paste and stir. Cook on high heat for two minutes.
  10. Reduce the flame to low, cover, and let it simmer on low heat for 15 minutes.
  11. Take the lid off and check if the oil is separating from the masala. If yes, switch off the flame and trasfer the masala to the pressure cooker. Stir.
  12. Add some garam masala and kasuri methi. Stir well and cook for another two whistles.
  13. Once the pressure is released, open the lid of the pressure cooker. Give one last stir to the rajma masala.
  14. Garnish with a dollop of ghee and fresh coriander.
  15. Serve hot with jeera rice, plain rice or pulao. [/directions]

rajma masala

rajma masala

If you have any questions, feel free to reach out to me with a comment or connect with me on Instagram or Facebook. For all my videos, you can subscribe to me on YouTube.

Happy cooking!

Lemon Sponge Cake

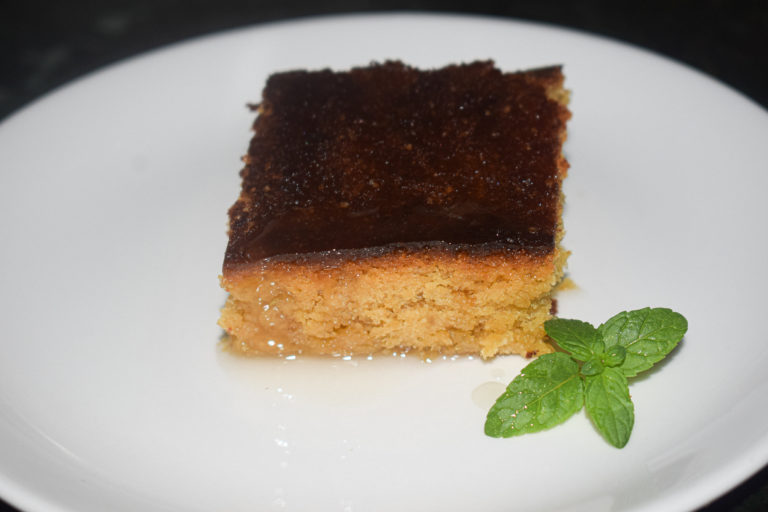
Lemon sponge cake makes for a wonderful option for tea time or brunch with friends and family. And this version is super easy to make, tastes refreshing and delicious and is very easy to make. This is a homemade version that is super comforting to say the least.

lemon sponge cake

You need a handful of ingredients and a few techniques to get perfectly moist and melt in the mouth sponge cake every single time. It all comes together in a single bowl. And I am also going to show you how to make the perfect lemon drizzle to pour on top of this cake. It’s like a match made in heaven!

Since this is a sponge cake, butter is one of the prime ingredients. Along with butter, we will use eggs, flour, sugar, lime juice, vanilla extract, and lime zest. That’s all that we need. Now let’s look at the little things that we need to consider to make this an unforgettable sponge cake every time you make it.

How to Make the Best Sponge Cake

There are a few basic tricks that can help you make a perfectly fluffy and moist sponge cake at home. It is no rocket science, just a few chemistry lessons up your sleeve. Almost all of them have to do with temperature. Let’s take a look.

  • Butter must be at room temperature

One of the most important factors to get a really good sponge cake is the way the butter is treated. Firstly, the butter has to be at room temperature. Make sure you take it out of the refrigerator well in advance so that it becomes soft. This soft butter then needs to be beaten until it acquires a creamy and luscious texture. This takes about four to five minutes. And the softer the butter, the better the sponge cake.

  • Eggs must be at room temperature and fresh

Eggs are used in this lemon sponge cake recipe. Eggs help bind the batter together and also add a lot of moistness and density to the cake. Make sure your eggs are also at room temperature and they are fresh.

  • Timing matters

Dairy and acidic elements like lime do not like each other. Adding lime to any dairy product exposes it to splitting immediately. That’s why the timing and the sequence of adding the ingredients matters a lot. For instance, the lime juice is added right in the end once the flour and the sugar are well combined. Adding the lime straight to the butter can make it split in no time. So make sure you follow the sequence.

lemon sponge cake

lemon sponge cake

Lemon Sponge Cake in One Bowl

This lemon sponge cake comes together in one bowl. An electric mixer is a requirement to get the best out of this cake, otherwise, you will have to whisk the butter with your hand for a long time. The batter comes together very quickly and you do not need to spend hours in the kitchen to get something out.

lemon sponge cake

Because this is such a simple cake, we also make a lemon drizzle as the topping. It is a super simple hack to elevate the taste of the cake to a whole new level. With just two ingredients, this lemon drizzle tastes refreshing and will shock you with how something so easy can be so good.

Preparation time – 15 minutes

Bake time – 30-40 minutes

Serves – 12

[ingredients title=”Ingredients”]

  • 200 g all-purpose flour (1 1/2 cups approx)
  • 4 large eggs
  • 200 g butter
  • 1 tsp vanilla essence
  • 1 tsp baking soda
  • Zest of 1 lime
  • Juice of 2 limes
  • 150 g granulated sugar (1/2 cup approx)
  • Juice of 7 lime (for the drizzle)
  • 1 cup icing sugar [/ingredients]

[directions title=”Directions”]

  1. Grease your baking tray with oil or butter and line it with parchment paper, leaving an overhang on all sides. Set aside.
  2. Take the butter in a large bowl and beat it for 4-5 minutes till it acquires a creamy and pale color.
  3. Add the granulated sugar and beat for another 2-3 minutes.
  4. Once the mixture is creamy, add the flour, eggs and vanilla essence. Beat till you get a smooth batter.
  5. Add in some fresh lime zest and lime juice. Mix.
  6. Add the baking powder right in the end and gently mix it all together with a spatula.
  7. Transfer the batter to the baking tray.
  8. Bake at 180-degree celsius for 30-40 minutes till you see a crusty top. You know your cake is done when it starts to come off the parchment paper.
  9. Allow the cake to cool completely. In the meanwhile, make the lemon drizzle.
  10. For the drizzle, squeeze out the juice of around 7 limes. Make sure there are no seeds. Add 1/4th cup of icing sugar in four batches, and keep whisking till you get a thick greyish liquid.
  11. Serve the cake with the drizzle on top and garnish with some mint leaves. Enjoy! [/directions]

lemon sponge cake

If you have any questions, feel free to reach out to me with a comment or connect with me on Instagram or Facebook. For all my videos, you can subscribe to me on YouTube.

Happy cooking!

Creamy Egg Curry

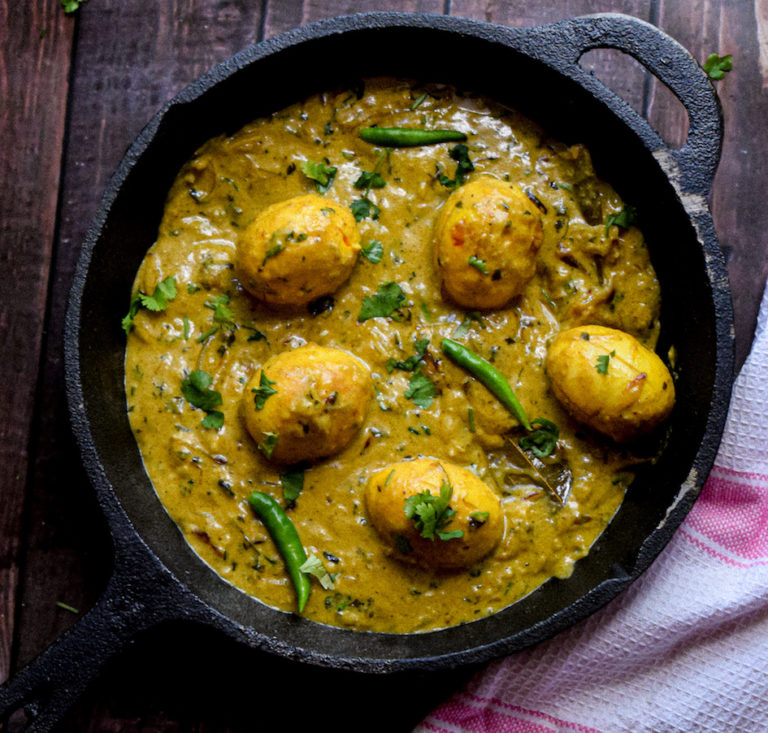
Here’s a welcome diversion from all the egg curries involving tomatoes. If you want to try out an egg curry that is different and tastes spectacular, you are surely going to love this creamy egg curry. The gravy is slightly thick and is enjoyed best when dunked into with some parathas or ghee laden rotis. Needless to say, this creamy egg curry is easy to make. So try something new with eggs and I promise you a wonderful cooking and eating experience.

Cooking this creamy egg curry will require just one pan or kadhai, once you have hard-boiled the eggs. To get the perfect eggs everytime, fill a wide mouthed pot with enough water so that the eggs get submerged. Add some salt into the water and stir. The salt prevents the eggs from breaking. Add the eggs and let it boil for 8-10 minutes on medium to high heat. As soon as it’s done, transfer the eggs to a bowl with water and ice. This step will prevent it from cooking further. Once it cools down a bit, de-shell the eggs and set them aside.

creamy egg curry

creamy egg curry

Ingredients in this Creamy Egg Curry

The ingredients for this creamy egg curry are basic ones that are easily available around you. The fundamentals of any Indian curry is the same – oil, onions, ginger, garlic, and some pantry spices. The same goes for this recipe. For the creamy texture, I have used some cashew paste as well as fresh cream. This recipe does not use any tomatoes.

creamy egg curry

The oil is first tempered with some whole spices like bay leaves, cinnamon, cardamom and cloves. after this, we add onions and cook them till they caramelise. The ginger and garlic paste adds a lot of flavour and pungency to the curry. All of this is cooked till they onions melt and assimilate well with the spices, and ended with the addition of cashew cream. The garnish of kasuri methi elevates the dish to a new level.

creamy egg curry

Preparation time – 15 minutes

Cook time – 20 minutes

Serves – 3

[ingredients title=”Ingredients”]

  • 5 hard-boiled eggs
  • 3 tbsp mustard oil
  • 1 tsp ghee
  • 2 bay leaves
  • 1 cinnamon stick
  • 2 cardamoms
  • 2 cloves
  • 120 g onions (around 3 medium onions)
  • 15 g ginger-garlic paste (1 tbsp)
  • 4 g sugar (1 tsp)
  • Salt to taste
  • 4 g cumin powder (1 tsp)
  • 2.5 g black pepper powder (1/2 tsp)
  • 30 g cashew paste (2 tbsp)
  • 250 ml hot water ( 1 cup)
  • 20 g fresh cream (1 1/2 tbsp)
  • 2 green chilies
  • 4 g garam masala (1 tsp)
  • 15 g Kasuri methi (1 tbsp)
  • Freshly chopped coriander leaves, for garnish [/ingredients]

[directions title=”Directions”]

  1. Fill a wide mouthed pot with enough water so that the eggs get submerged. Add some salt into the water and stir. The salt prevents the eggs from breaking. Add the eggs and let it boil for 8-10 minutes on medium to high heat. As soon as it’s done, transfer the eggs to a bowl with water and ice. Once cooled down, de-shell the eggs and make slits in it.
  2. Add a teaspoon of salt, turmeric and red chili powder to the boiled eggs. Mix well.
  3. Heat mustard oil in a kadhai or wok. Fry the marinated eggs till it browns evenly and the skin becomes golden and crispy. Set aside.
  4. In the same kadhai, add some ghee. Temper with bay leaves, cinnamon stick, cardamom and cloves. Stir for a second.
  5. Add the onions and saute for 2-3 minutes till they become translucent and start to sweat.
  6. Add the ginger garlic paste and stir till the raw aroma of it fades completely.
  7. Season with salt, turmeric powder, cumin powder, coriander powder and black pepper powder. Saute well.
  8. Make a paste of soaked cashews and add to the masala. Mix it really well so that it combines well with all the spices.
  9. Add hot water to make a thick gravy.
  10. Pour some fresh cream over the gravy and let it come to a boil.
  11. Slit some fresh chillies and add it to the gravy. You can add more hot water if you like more gravy. But this curry tastes best when kept thick.
  12. Garnish it with garam masala, kasuri methi and fresh coriander leaves. Stir.
  13. Add the fried eggs and let it simmer for 2 minutes.
  14. Serve hot with parathas or pulao. [/directions]

creamy egg curry

If you have any questions, feel free to reach out to me with a comment or connect with me on Instagram or Facebook. For all my videos, you can subscribe to me on YouTube.

Happy cooking!

The Best Egg Fried Rice

I know how much you guys love easy recipes. I am a big fan too! I love meals that require very little time and effort, yet give delicious and nutritious results. Because compromising on taste just for easy is a big no-no! So here I am to share with you all my go-to egg fried rice recipe that is better than takeaway! Why better? Because it is definitely fresh, and you can control the amount of oil, sugar, and vegetables! I love adding lots of colour in the form of vegetables and this way I ensure my body gets to eat them. And those eggs are a super fluffy and delicious addition to fried rice that is a sea of exciting flavours.

egg fried rice

How To Make Delicious Egg Fried Rice Every Single Time

Before we begin, let me share with you some tips on how to make the best egg fried rice every single time. Following these simple rules will help you understand the nuances of good and homemade fried rice and those additional tips and tricks will enhance the taste and flavor even more.

– Keep everything in arm’s reach

You must have seen how quickly the takeaway guy tosses fried rice and noodles for you, right? The reason why the cook moves so fast is that’s how fried rice needs to be made. The steps move really fast when making fried rice, so it’s best to keep all the ingredients right next to you because any kind of delay will hamper the results.

– A really hot wok

A wok works best for fried rice because it’s easier to toss everything together, and also the deep pan makes frying super quick. Make sure you get your wok really really hot before you add the oil and the rest of the ingredients. This will ensure you get the tastiest texture in the vegetables and because you will have to move really fast, you won’t burn anything.

– A day-old rice

The rice you use to make fried rice should be cold and at least a day old. If you add hot rice to the pan, it will stick and become all mushy because of the excess moisture. Using a day old rice helps the rice to disintegrate better and also separates the grains. If your rice has got clumped up in the refrigerator, use your hands or a fork to untangle it before you cook it in the wok.

Why this version of Egg Fried Rice?

  • Delicious and super easy!
  • Healthy and quick
  • Better than takeout
  • You need 20 minutes to make this
  • Made with basic Chinese pantry essentials.
  • Highly customizable!
  • Top it off with toasted sesame seeds for extra crunch.

egg fried rice

egg fried rice

Preparation time – 15 minutes

Cook time – 15 minutes

Serves – 3

[ingredients title=”Ingredients”]

  • 4 cups cooked white rice
  • 4 eggs
  • 3 tbsp vegetable oil
  • 1 tbsp sesame oil
  • 1 green chilli, slit in half
  • 1/2 cup onions
  • 1 tbsp ginger, very finely chopped
  • 1 1/2 tbsp garlic, very finely chopped
  • 1 cup green beans, finely chopped
  • 1 cup carrots, finely chopped
  • 1/2 cup fresh green peas
  • 1 tbsp Oyster sauce
  • 2 tbsp dark soy sauce
  • Salt to taste
  • 1 tsp black pepper powder
  • 1 tbsp red chilli sauce/Sriracha
  • Spring onion greens, for garnish
  • White sesame seeds, for garnish [/ingredients]

[directions title=”Directions”]

  1. In a bowl, mix the Oyster sauce and soy sauce together. Set aside.
  2. Break four eggs into a bowl. Season with salt and a pinch of pepper. Whisk for a minute.
  3. Heat a tablespoon of oil in a wok. Add the beaten eggs and scramble them gently. Disintegrate the pieces. Keep them soft, do not overcook. Set aside.
  4. In a fresh wok, add two tablespoons of vegetable oil and one tablespoon of sesame oil.
  5. Add a slit green chili while the oil gets hot. This helps infuse the oil with the flavor of the chili.
  6. Once the oil heats up and starts to smoke, add the onions. Saute on high heat for a few seconds.
  7. Add the finely chopped ginger and garlic and saute for a few seconds on high heat.
  8. Next, add the vegetables and continuously stir for 2-3 minutes. The idea is to cook the vegetables till it remains crunchy and its sides start to brown a little.
  9. Season with salt and pepper. Stir well.
  10. Add the hot sauce. Mix.
  11. Time to add the rice and the Oyster and soy sauce mixture. Mix very well ensuring each grain of the rice coated in all the sauce, without any lumps.
  12. Once the rice is done, add the fried eggs and give it one last mix.
  13. Garnish with spring onion greens and white sesame seeds.
  14. Serve hot and enjoy! [/directions]

egg fried rice

egg fried rice

If you have any questions, feel free to reach out to me with a comment or connect with me on Instagram or Facebook. For all my videos, you can subscribe to me on YouTube.

Related recipe – 30 Minute Stir Fry Noodles

Happy cooking!

Falafel Recipe

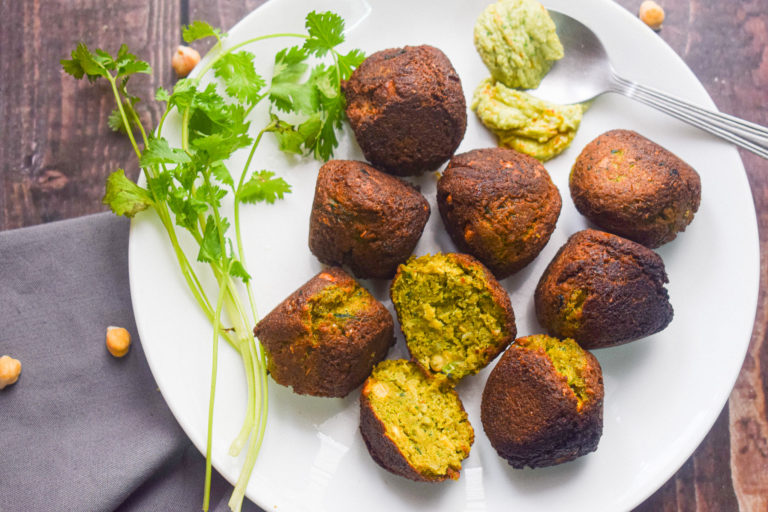
If you ask me what is one of my favourite vegetarian snacks, I will definitely pick falafel. I love them with hummus or tahini, and I make them very often in my house. As opposed to what it might seem, making falafels is actually very easy. It involves some very basic ingredients and chances are high that you have all of them in your pantry right now. The best kind of falafels are ones that are crispy on the outside and delicious and moist on the inside. It does not crumble and tastes absolutely delicious!

This is my Falafel recipe that is spot on and absolutely full proof. It is also the most basic, as I have only used ingredients that are easily available to most of us. Falafels are naturally gluten-free and can be made vegan like this version. You can enjoy them with pita bread, in sandwiches or just as a healthy snack. The process of making it is extremely simple as it combines soaked chickpeas with herbs and basic spices, blending it all together and frying or baking them.

falafel

Making the perfect falafel every single time

Even though the process of making falafel is fairly simple, following some tips will give you the best results every single time. Because we make a mixture that is fried or baked, it is important that the consistency is perfect. A mixture that is too wet or too dry will not give the desired results. Here are some of the things I do when making falafels.

  • Soak the chickpeas

Falafels are made with soaked chickpeas. Make sure you soak your chickpeas for at least 12-15 hours. The best way is to soak them at night and then make them in the morning. Their volume should double up by morning. Make sure you soak them in enough water so that the chickpeas submerge in it. In the morning, drain the water and wash the chickpeas and they are ready to be ground with the rest of the herbs and spices.

  • Look our for the consistency

Falafels are made by pulsing soaked chickpeas with herbs and spices. The excess moisture from the pulsed mixture is soaked by besan or gram flour. The consistency needs to be absolutely perfect so that the balls do not break, crumble or stick to the pan while frying. The mixture cannot be too wet or too dry. It needs to be pulsed in multiple rounds until you get a sand-like coarse structure. Over blending it will make it runny and it will disintegrate while frying.

  • Freeze before frying/baking

This step is absolutely essential to get the perfectly crisp and flaky falafel. Once the chickpeas are pulsed with the rest of the ingredients, let the mixture rest in the fridge for at least an hour. The mixture also needs to be kept covered so that its moisture does not release. You can also freeze the mixture for four to five days in an airtight jar. You can take it out as and when you like some falafels. But the minimum time is 30 minutes to one hour.

falafel

Here’s the recipe:

Preparation time – 15 minutes

Cook time – 10 minutes

Makes – 8 falafels

[ingredients title=”Ingredients”]

  • 1 cup soaked chickpeas
  • 1 cup fresh coriander leaves (with stems)
  • 1/2 cup onions, finely chopped
  • 3 cloves of garlic
  • 1/4 tsp Kashmiri red chilli powder/paprika
  • 1/4 tsp cardamom powder
  • Salt to taste (I used 1 tsp)
  • 1/2 tsp freshly ground cumin powder
  • 4 tbsp gram flour/besan
  • 1/2 tsp baking soda
  • 1 green chilli
  • 4 tbsp oil (for shallow frying [/ingredients]

[directions title=”Directions”]

  1. Soak chickpeas in water overnight. Wash and drain them in the morning.
  2. In a small mixer or a food processor, add the chickpeas, coriander, onion, garlic, salt, cumin powder, red chilli powder, chilli and garlic.
  3. Grind/pulse it in parts till you get a coarse sand-like texture. Do not over blend.
  4. Transfer the chickpea mixture to a bowl. Add the gram flour (besan) and baking soda. Mix well.
  5. Cover and refrigerate for at least one hour.
  6. Take the mixture out of the fridge. See the consistency. If it is too dry, add some lemon juice. If it is too wet, add some more gram flour.
  7. Make balls or patties with your hand or an ice cream scooper. The mixture should not stick to your hand.
  8. Heat oil in a wok. This recipe shallow fries the falafels. If you want to deep fry, you can add a lot more oil.
  9. Keep the heat at low to medium so that the falafels do not burn or remain unevenly cooked. Add the balls gently. Fry on low flame till all sides turn crunchy.
  10. Serve hot with hummus or pita bread along with pickles. [/directions]

falafel

falafel

falafel

For more such delightful food, follow me on Facebook, Instagram, and YouTube.

Spinach Hummus

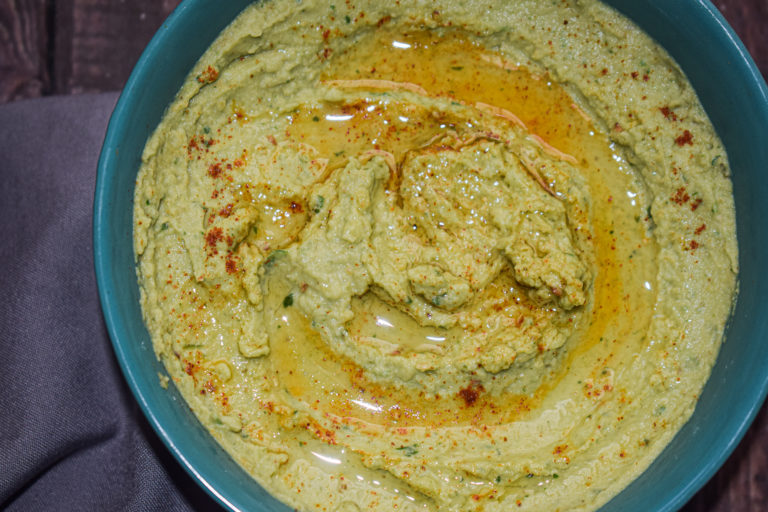
Hello! Thanks for visiting this page. Since you are looking for a hummus recipe, I can assure you your search ends here. This is the easiest, most delicious spinach hummus recipe which has been in my personal book for longer than I can remember. And the light green colour comes from some beautiful spinach that I have added. But this recipe is a two in one, if you want the classic hummus recipe, just ditch the spinach.

green hummus

This spinach hummus is very easy to make, and super simple too. Requires just a handful of ingredients, which are most probably already lying in your pantry. But because simple things often are the hardest to crack, I am sharing all my tips and tricks to ensure you hit just the right spot.

Tips to Get That Perfect Spinach Hummus Every Time

While making hummus seems like a fairly simple thing, taking care of some small details are absolutely crucial. I am sharing my tips after all the disasters in the kitchen, so that you don’t make them.

1.Boil the chickpeas

When I was a novice in the field of making hummus, I wondered about how the chickpeas are used in the recipe. For many months I kept wondering whether chickpeas are supposed to be boiled or just soaked in water! And do I boil the chickpeas directly? I was just too confused!

Well, the key to a good hummus is to have boiled chickpeas. Soak the chickpeas in enough water for 12-15 hours. Their volume will double or triple. Drain the water off and rinse the chickpeas well. And then boil them till they are soft. Do not over boil as you don’t want them to turn mushy. Boil them just till you can mash them in between your two fingers and the chickpea doesn’t break. I usually boil the soaked chickpeas in a pressure cooker for 8 whistles.

2. Wait for the chickpeas to cool down

I have also made the mistake of using hot and boiled chickpeas to make hummus only to get a cake batter! Yes, it’s a mistake most of us have made. So make sure your chickpeas cool down and come to room temperature before you grind it with the rest of the ingredients.

3. Remove the skin of the chickpeas

Another technique to get the creamiest hummus is to remove the skin of the boiled chickpeas. It’s a very easy process and it takes about a second to remove the skin from each chickpea. I would recommend you do this as it removes any kind of obstruction towards making the it the creamiest version possible.

4. Use ice cubes

Yes, you read that right! Ice cubes actually help make the hummus very very creamy. So when you put all your ingredients in the blender, throw in some ice cubes to change the whole creaminess game. I discovered this only recently and I cannot believe how efficient this process is.

Ingredients in this spinach hummus

The number of ingredients in this hummus recipe is absolutely minimal. The main ingredients are the chickpeas, the sesame seeds and good quality olive oil. Lime juice adds to the zest and freshness. For spices, it’s just cumin powder and some red chilli powder or paprika for the heat. You can also use sumac or any kind of spices you love. The amount of garlic in this recipe is also less and not overpowering.

green hummus

Coming to another most important ingredients of hummus – tahini, this recipe actually does not use it. What I have done instead is used toasted sesame seeds and added it to the chickpeas and grind them all up. It works the same way, is easier than making tahini separately and saves time. The final result is also pretty much the same. But if you have tahini with you, go ahead and add it.

green hummus

We also use the chickpea stock in this recipe instead of water, as it gives it that extra level of creaminess and taste. So here’s the recipe to my spinach hummus. I hope you try it and love it as much as I do.

Preparation time – 15 minutes

Cook time – 10 minutes

Serves – 4

[ingredients title=”Ingredients”]

  • 1 1/2 cups boiled chickpeas
  • 2 tbsp toasted sesame seeds
  • Juice of 1 lime
  • 1 garlic clove
  • 1/2 tsp cumin powder
  • Salt to taste
  • 3 ice cubes
  • 1 cup fresh spinach
  • 5 tbsp extra virgin olive oil
  • 5 tbsp chickpea stock [/ingredients]

[directions title=”Directions”]

  1. Soak chickpeas in water overnight. Boil them till they are soft, but not mushy. Cool completely.
  2. In a blender, add the chickpeas, the lime juice, the toasted sesame seeds, olive oil, chickpea stock, garlic clove, salt, cumin powder, ice cubes and the fresh spinach.
  3. Blend it till it all forms into a creamy paste.
  4. Transfer it to a bowl. Top it off with some extra olive oil and paprika powder. [/directions]

green hummus

For more such delightful food, follow me on Facebook, Instagram, and YouTube.