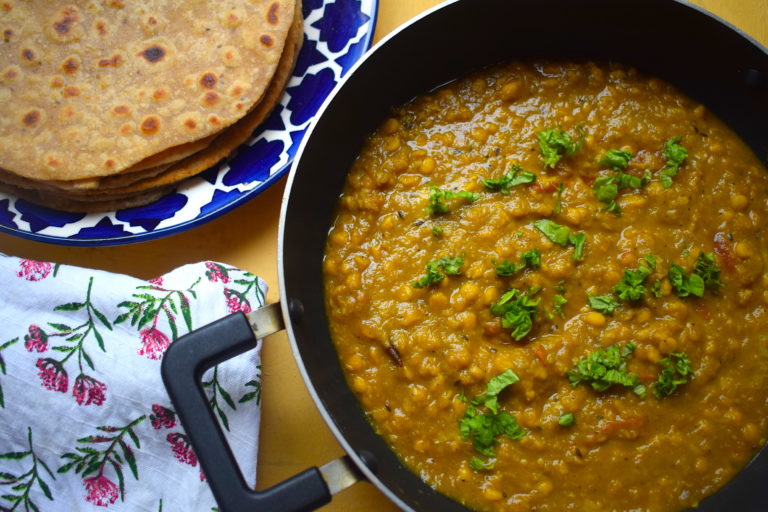
Split chickpeas or Chana is a mouth-watering Indian pulse. It is cooked in different Indian states in different ways. Being an Assamese, I am going to share this wonderful chana dal recipe known as “butor dali” back home. It is made on special occasions or when guests would drop by unannounced. It is usually had with luchis. But I love mine with plain white rice or some flaky parathas.
I have added a twist to it by adding a few extra ingredients. Hope you like it!
INGREDIENTS
100 gm spilt chickpeas, soaked in water for 2-3 hours
30 gm ginger
5-6 garlic cloves
1 green chili
A handful of coriander leaves
3 tbsp refined oil
1 bay leaf
2 medium onions, chopped
1 tsp sugar
1 tsp turmeric powder
1 tsp cumin powder
1/2 tsp black pepper powder
1 tsp garam masala
1 tomato, chopped
50 gms desiccated coconut
100 gm curd
Salt to taste
PROCEDURE
Boil the soaked chana dal in a pressure cooker with water and salt for about 15-20 minutes till it is cooked. Keep it aside.
Make a paste out of ginger, garlic, chili and coriander leaves.
In a pan, heat oil. Add the bay leaf followed by the onions. Fry for about a minute.
Add some sugar and fry for another ten seconds.
Add the green paste and fry for about another minute.
Season with the spices – turmeric, cumin and black pepper powder. Fry all of this till the raw aroma disappears.
Throw in the chopped tomato and fry it till it melts and comes together with the rest of the ingredients.
Once done, add the coconut, followed by the curd. Stir for about a minute or two. Ensure all of this comes together and gets cooked.
Once you feel the masala is ready, add the boiled chana dal to this straight from the pressure cooker.
Now let this come to a boil. Cover and cook for 20 minutes till you get the desired consistency.
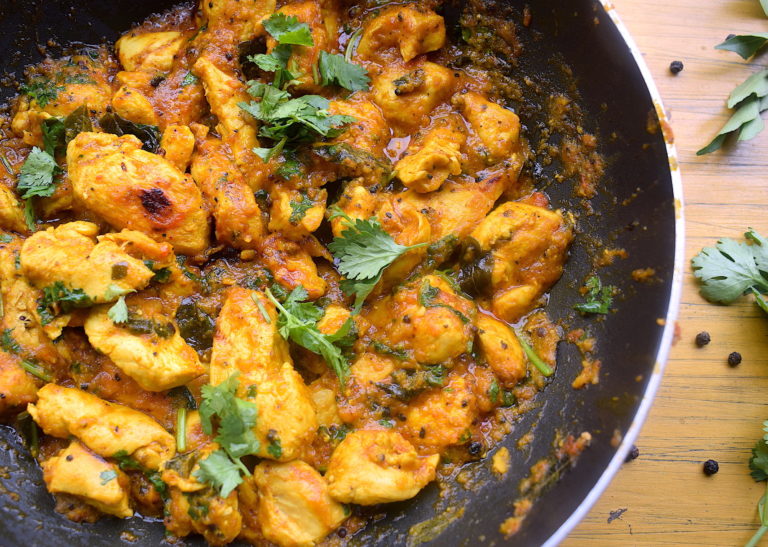
This pepper chicken recipe is extremely quick and perfect for those days when you just do not have the time or energy to make an elaborate meal. I have made this with boneless chicken breast, which reduces its cook time by almost 30 minutes. Feel free to use chicken with bones if you enjoy that more, but that will take longer to cook.
Going by its name, the hero ingredient of this recipe is lots of pepper. Now, the main thing to consider here is to use fresh peppercorns, as opposed to the black pepper powder directly from the store. Using fresh pepper will give you a much sharper taste, packed with flavor and the health benefits that pepper offers. This recipe also works wonders if you have a cold or are feeling under the weather.
Like all my other recipes, this recipe is packed with flavor and taste but does not take too much time or effort. The number of ingredients is also very limited.
Here’s a look at the ingredients and procedure.
Preparation time – 20 minutes
Cook time – 30 minutes
Serves – 3-4 people
[ingredients title=”Ingredients”]
500 g boneless chicken
2 tbsp ghee
2 tbsp oil
15 g black peppercorns
10 g ginger
10 g garlic
2 green chilies
1 onion
2 tomatoes
1 tsp mustard seeds
A handful of fresh green curry leaves
1 tsp cumin powder
1 tsp turmeric powder
1 tsp fennel powder
250 ml water
Salt to taste
Fresh coriander leaves for garnish [/ingredients]
[directions title=”Directions”]
This recipe is a dry version. It is made in two steps. The first step is making the masala for the curry with a few basic vegetables and spices. The second step is mixing the chicken with this curry paste to make the final dish.
For the paste:
Heat oil in a pan.
Add the peppercorns, chopped ginger, garlic, onion, chilies, and tomato.
Cook this for about five minutes.
Transfer the mixture to a grinder and grind it all to form a fine paste. This is the paste we will use in the next step to cook the chicken.
For the curry:
In a kadhai, heat ghee. Add the mustard seeds and let them splutter. Do not burn the seeds, keep the flame on medium heat.
Add the fresh curry leaves to the ghee and give it a stir with the already spluttered mustard seeds.
Add the boneless chicken pieces and cook for about ten minutes. Keep stirring so that the chicken does not stick.
Once the chicken releases all its water, add the pepper and tomato paste. Cook this till the raw aroma disappears and the chicken cooks in the paste completely.
Season with salt, cumin powder, fennel powder, and turmeric powder.
Cover and cook for another ten minutes. Add water as per the consistency that you want.
Remove cover and garnish the chicken with freshly chopped coriander leaves.
Serve hot with plain rice, pulao or parathas. [/directions]
The total time taken for this recipe is 30 minutes. It is a burst of flavors in the mouth, be it the fieriness of the fresh pepper, the creaminess of the tomato, the unique scent of the curry leaves or the heat of the green chilies.
Want the recipe on the go? Download the image below and save it for later use! 😀
Do try it and I am sure you will not be disappointed. And for more such delightful food, follow me on Facebook, Instagram, Twitter, and YouTube.
Like most of us, I too have struggled with maintaining a healthy diet all my life. I always thought I understand food and its nutritional aspect. I have mostly relied on what my parents have taught me and what I have seen in the kitchen in my own family and culture. But nutrition can still be a tricky concept.
Even though I have been cooking my own meals since college, I have struggled. Because it is not just about cooking, it is also about eating the right food that our body needs. In the past, whenever I have actually managed to get fit without killing myself with a weird diet, was when I have taken care of what I eat and combine it with some form of an active lifestyle. But I truly discard and loathe diets. We should eat what we have grown up eating, and never restrict our bodies of food. I am a big fan of Rujuta Diwekar and I swear by her notions around food.
There is so much information out there with so many different kinds of diets. But I feel diet food is a wrong notion, to begin with. What we need to look at our healthy recipes that can be a part of a rich and nutritious diet. A diet that is sustainable and can be made a part of our hectic lifestyle.
I now finally understand what works best for me when it comes to a sustainable diet. A good diet for me is where I am not killing myself of deprivation, but one where I am able to achieve a fine balance in regards to my understanding and consumption of diet food. A good diet is one where I am eating local, fresh and seasonal produce, I am also eating what my body is used to for decades and also enjoying the occasional spill.
Trust me guys, it is all about the mind. Once the mind is trained to form a habit, more than half the job is done.
This recipe is one of those that can come under a good diet food plan. Though I do not believe in “dieting,” I firmly believe this is a great dish for a meal not only lower in calories, but also very high in nutrition. Also I should state clearly right here that I have never counted my calories and I am alive.
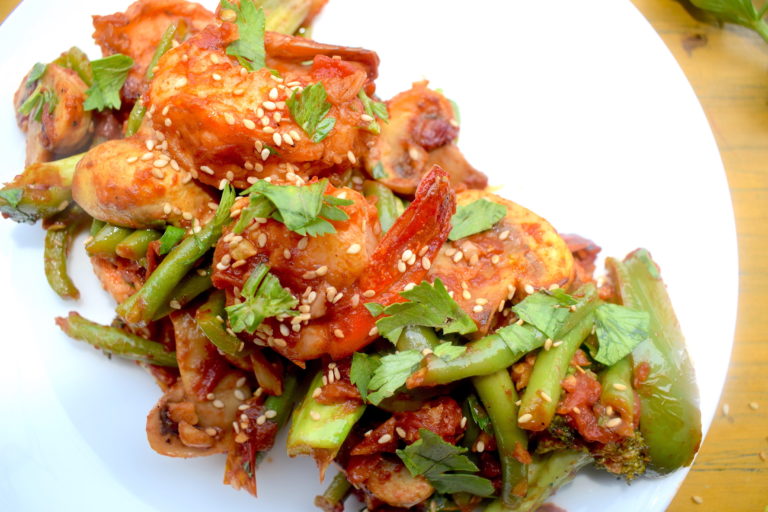
This recipe is a great snack with the goodness of prawns and vegetables cooked in a spicy, tangy sauce.
It comes together in a matter of minutes, and you have to yourself and epic healthy meal. It is a perfect quick recipe for a weeknight dinner or lunch. Golden prawns tossed with vegetables in a wok, with fresh herbs and spices. Aah, life is good.
So without any further ado, let me list down what all you need for this recipe.
Preparation time – 15 minutes
Cook time – 20 minutes
Serves – 1-2
[ingredients title=”Ingredients”]
150 g medium prawns, deveined with tail on
3 tbsp olive oil
1 tbsp butter
100 g broccoli
100 g green beans
100 g button mushroom
1/2 green bell pepper, thinly sliced
6 garlic cloves, finely chopped
2 green chilies, finely chopped
3 tomatoes, finely chopped
1 tsp black pepper powder
Salt to taste
Freshly chopped celery for garnish
Lime juice for garnish
Sesame seeds for garnish [/ingredients]
[directions title=”Directions”]
Heat 2 tbsp olive oil in a pan. Add 1 tbsp butter to it. Mix.
Fry the prawns in this oil, two minutes each side. Set it aside.
In a wok, add 1 tbsp olive oil. Saute the chopped garlic and green chilies for a minute.
Add the tomatoes. Cook till tomatoes melt and a thick sauce is formed.
Add the green beans and broccoli florets. Cook this for five minutes.
Add the mushroom to this and cook for another five minutes.
Time to add the fried prawns. Mix the prawns with all the vegetables.
Season with salt and pepper. Cover and cook in low flame for another three to four minutes.
Take off the heat and garnish with fresh celery, a generous dash of lime juice and sesame seeds.
Serve hot! [/directions]
I hope you try this out and like it. It can be prepared by anyone, no need to be an ace chef for this.
Let me know if you have any questions about this or any other recipe of mine. Here is another healthy dinner recipe.
Like most of us, I am also a big fan of potatoes. I love them in all their glory.
In Assamese households, potatoes are added to every single dish, be it vegetarian or non-vegetarian. We take our potatoes very seriously and get offended when people say it’s too much consumption!
Having said that, dum aloo has been an absolute favorite of mine ever since childhood. There is something so special about this recipe, that its craze is completely justified.
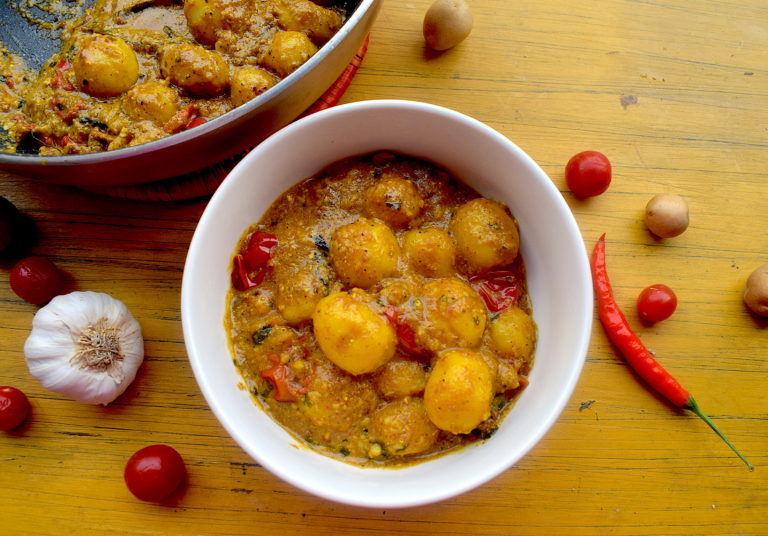
This Indian recipe involving potatoes is, however, slightly different. This is because I have used baby potatoes here, which are slightly sweeter. For this delicious shahi dum aloo recipe, the baby potatoes need to be boiled and peeled beforehand. They are then marinated with salt and turmeric powder and fried before adding it to the creamy curry.
The spices and condiments used here are quite basic. As I always say, try to use every ingredient in its freshest form, be it your ginger garlic paste or your spice powders. For this shahi dum aloo, I have also used cashew paste, which gives it a luxurious touch and glaze. I have also used cherry tomatoes instead of regular tomatoes in this dum aloo, which adds a natural sweetness and zing.
Here’s the recipe:
Preparation time – 25 minutes
Cooking time – 40 minutes
Serves – 4
[ingredients title=”Ingredients”]
200 g baby potatoes, boiled and peeled
4 tbsp oil
1 dry bay leaf
2 onions, ground to a paste
2 green chilies, finely chopped
1 tsp sugar
1 tbsp fresh ginger garlic paste
100 g cherry tomatoes, cut in half
1 tsp black pepper powder
1 tsp cumin powder
1 tsp turmeric powder
Salt to taste
8 cashews, soaked and ground to a paste
100 g curd
1 tsp fresh garam masala
250 ml water
A handful of kasuri methi or dry fenugreek leaves [/ingredients]
[directions title=”Directions”]
Marinate the boiled baby potatoes in salt and turmeric. Heat oil in a pan and fry them till they brown. Set aside.
In another kadhai, add two tablespoons of cooking oil. Add bay leaf followed by the onion paste and chopped green chilies. Fry for about a minute.
Once the onions brown, add sugar and ginger garlic paste. Stir this in medium heat till the raw aroma of the ginger garlic paste fades away.
Once the smell disappears, add the cherry tomatoes to the onion mixture.
Season with salt, pepper powder, and turmeric powder. Do not add too much salt as the potatoes already will have some salt in them from the marination.
Once the cherry tomatoes start to melt and mix well with the onions and spices, add the cashew paste and the curd. Mix well till everything assembles really well.
Time to add the fried baby potatoes, the essence of this shahi dum aloo. You can also add some water at this point for your desired consistency.
Add some fresh garam masala before you cover and cook this in low heat for about ten minutes.
After ten minutes, add some kasuri methi leaves as garnish and serve hot with rotis or luchi! [/directions]
Want to save a copy of this shahi dum aloo recipe on your phone? Just download this image below and save for later!
Prawns are so good! Not only are they tasty, but they have a host of health benefits. Prawns are a low-fat source of protein. They are also low in calorie content and offers a rich source of calcium, potassium, and phosphorus. It is also super quick to make.
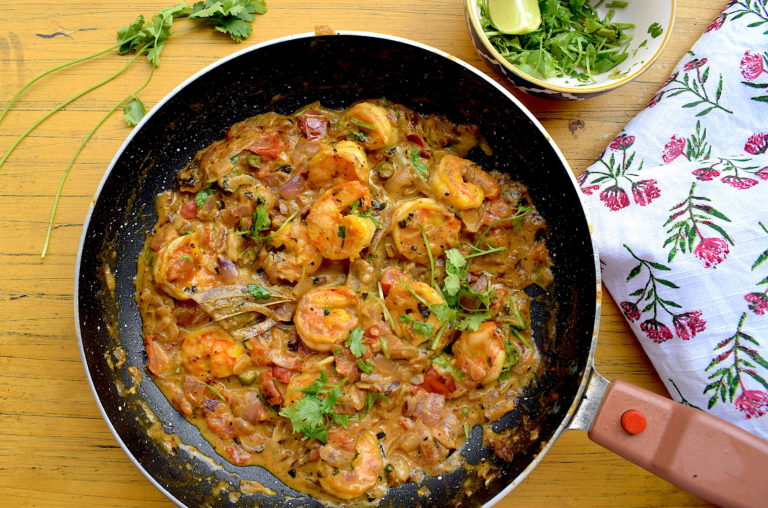
I have a few recipes with prawns and the videos always go viral! People just can’t get enough of them. Today I am going to share an Indian prawn recipe with you because let’s face it, we all love Indian food! This masala cream prawn is an Indian recipe you will fall in love with!
So let’s talk more about this recipe. Because it involves prawn, this recipe comes together in about 30 minutes. The cream and the basic Indian spices make this Indian recipe a perfect choice for a weekend meal with friends and family.
Since I am a home cook myself, the ingredients that I have used here are easily available in Indian households. Just get hold of some of that delicious cream!
The main highlight of this dish is the masala. It needs some time to cook and come together to bring out the flavors of all the ingredients. I also fry the prawn in advance till they are slightly brown. This keeps them crispy even in the curry and also helps reduce its strong aroma.
And since it is Indian food, it is incomplete without some yummy and healthy ghee! And like I always emphasize, good food is all about fresh ingredients. So make sure that ginger garlic paste or that garam masala is homemade.
INGREDIENTS
250 g prawns, washed and deveined
1 tsp turmeric powder
2 tbsp oil
2 tbsp ghee
1 bay leaf
2 onions, finely chopped
1 green chilies, finely chopped
1 tbsp ginger-garlic paste, fresh
2 small tomatoes, finely chopped
1 tsp cumin powder
1 tsp black pepper powder
Salt to taste
250 ml water
2 tbsp kasuri methi or dry fenugreek leaves
3 tbsp fresh cream
1 tsp fresh garam masala
A handful of freshly chopped coriander leaves
PROCEDURE
For the prawns:
In a bowl, marinate the prawns with some salt and turmeric powder.
Mix well and set aside for 15 minutes.
Heat oil in a pan and fry the prawns for 4- 5 minutes till both sides are brown. Do not overcook.
For the curry:
Heat ghee in a pan. Add bay leaf followed by chopped onions. Fry this till onions are soft and caramelized.
Add the chopped green chilies and ginger garlic paste to this.
Stir for another minute in medium heat till the raw aroma of the ginger and garlic disappears.
Once onions are cooked and soft, add the chopped tomato. Cook this tomato mixes well with the onions and cooks completely.
Season with salt, cumin powder, and black pepper powder. Give it a good stir.
Add water if required.
Once it comes to a boil, add cream and some kasuri methi to the curry. Mix well.
Once the gravy is nice and thick, add the fried prawns.
Season with fresh garam masala and give it one last good stir.
Garnish with freshly chopped coriander leaves. Serve hot with rice or rotis.
Want to save a copy of the recipe? Download the image below and save it for later 🙂
Okay, here’s the truth. This recipe actually gets ready in 15 minutes or less. Provided you cook the scampi and the pasta simultaneously of course!
What is scampi?
Scampi refers to a luxurious sauce that is made with garlic, butter, lime juice, and olive oil. This simple, yet exotic sauce is what makes everything that goes with it a clear winner! With just a handful of ingredients, scampi is a secret everyone should know when it comes to making amazing dinner recipes.
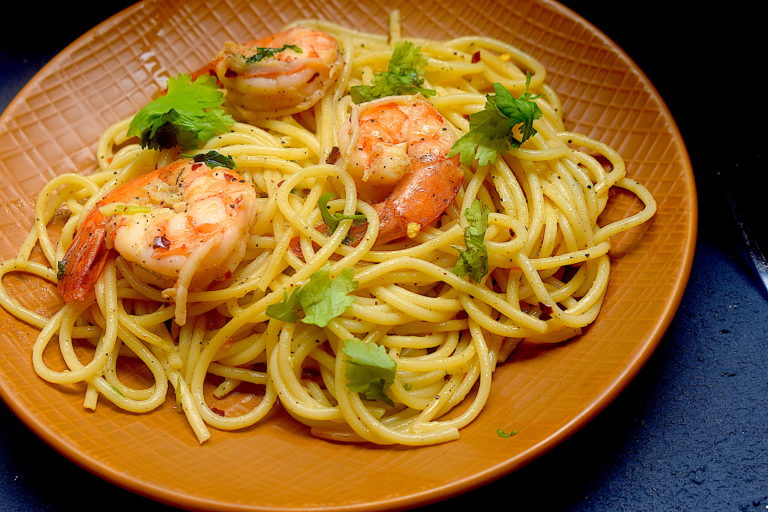
Shrimp scampi is all the more special because it has this beautiful and glazy butter garlic sauce infused into those juicy shrimps. Oh, my mouth is salivating at just the thought of it!
Follow the basic rules
I think everyone has their own version of shrimp scampi. Mine is a little different than the usual, and I have never been disappointed by it. There are some 101’s when it comes to making this extremely simple dish. while this recipe is super simple and has minimal steps, you also need to get each step right.
The garlic is the champion – Let’s start with the garlic. The most important step in this recipe is infusing the flavors of the garlic into the olive oil right in the beginning. You don’t want to burn the garlic or make it crispy in hot olive oil. You need to infuse the flavors emanating from the garlic into the olive oil. Also, olive oil does not have a very high smoking point. Caution needs to be exercised while cooking dishes with it so that the oil retains its aroma and taste. For this, I put the finely chopped garlic into the olive oil before even starting the stove, letting it cook slowly so that the garlic gets infused into the oil.
Perfectly cooked pasta – The second rule is obviously cooking the spaghetti to perfection. There is no universal rule to cook pasta right, it varies as per the product you are using. So make sure you follow the instructions in your package and cook the pasta in hot boiling water. The most common way is to cook the pasta till al dente (almost cooked, but not completely cooked) and then drain it. The rest of the cooking happens in the final pan.
NEVER overcook the shrimp – Shrimps cook super fast and overcooking them can make them chewy and hard. Here’s how you get the perfect shrimp – Always keep the tails on, because it has so much flavor! Second, wash and pat your shrimps dry with a paper towel so that there is no water on it. Third, marinate the shrimps with salt and black pepper powder and use your hands to mix it well. Last and most important – cook each side in olive and butter for 30 seconds each. That’s it!
Simultaneous cooking – The sauce needs to be prepared while you cook the pasta on the side. This will make you utilize time in the best possible way like a ninja. Oh yeah!
Should I add salt to the pasta?
Yes, yes and a million times yes. This is such a crucial step for a good plate of pasta. You do not want the sauce to have all the seasoning correct, and the actual spaghetti strands to be bland!
The reason why you need to boil pasta in salty water is that that’s the only time you are going to actually season the pasta. The spaghetti needs to have its own flavor too, and adding salt during the boiling process can give that elevated feel to your recipe.
Preparation time – 15 minutes
Cooking time – 15 minutes
Serves – 2
[ingredients title=”Ingredients”]
50 g spaghetti
200 g shrimps, tail on
4 tbsp extra virgin olive oil
8 garlic cloves, finely chopped
150 ml white wine
1 tbsp chili flakes
20 g butter
Juice of 1 whole lime
1 tsp black pepper powder
Finely chopped fresh parsley for garnish
Salt to taste [/ingredients]
[directions title=”Directions”]
Cook the spaghetti in a pot as per instructions in the package till al dente.
Prepare the sauce simultaneously. For the sauce, pour olive oil in a pot and add the garlic in it. Put it on the stove in medium flame and stir for a minute. This is done so that the garlic does not burn, but instead, its flavor gets infused into the oil.
Add the shrimps to this oil, and cook for three minutes each side.
Once the shrimps are golden brown, pour in the white wine and give it a light stir. To this sauce, add chili flakes and butter. Season with salt and black pepper powder. Let it simmer till the sauce reduces to a thick consistency.
Add some fresh parsley into the sauce and give it a light stir. Add the cooked spaghetti to this and give it a light stir.
Turn off the stove and drizzle lime juice over the pan. Give it one last toss, garnish with some more parsley and serve![/directions]
I love my shrimp scampi with loads of chili, so I add quite a lot. The number of ingredients is so limited, and hence you can adjust them depending on what flavor or taste you like best.
I hope you try this delicious shrimp scampi for yourself. This is my version and I like it this way. If you have any questions, do leave me a comment 🙂
If you have any questions, feel free to reach out to me with a comment or connect with me on Instagram or Facebook. For all my videos, you can subscribe to me on YouTube.
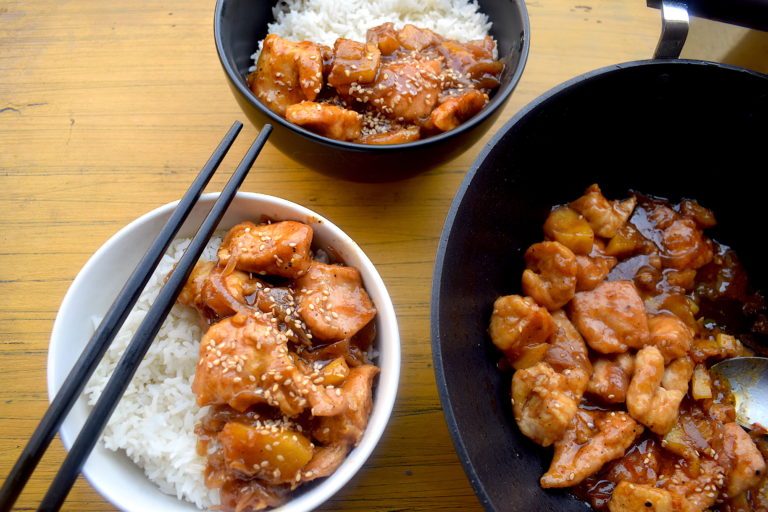
Ditch your favorite Chinese takeaway place this weekend and make yourself an amazing pineapple chicken meal bowl. This recipe is so simple and ultra delicious!
I actually never thought such a combination could work. But I had the most amazing pineapple chicken recipe a few years ago in Shillong and I have been making this for myself ever since. One of the best things about this pineapple chicken recipe is that it has so many flavors within it. Sweet, spicy, tangy – every bite is an explosion inside the mouth!
I have used a couple of Chinese sauces here, including Oyster and the regular soy sauce. I prefer using dark soy sauce as it has more punch, flavor, and color to it. For the spicy element, I have used a red chili sauce which is quite hot! If you do not like it spicy, you can add a usual sesame sauce or hoisin sauce or maybe skip it altogether. Just do not add more sweetness to it as the pineapple and the sugar kind of already has the sweet elements.
So without any further ado, here is the recipe:
The important thing to remember about this recipe is to not overcook or undercook the pineapple. It needs to be soft, yet slightly crunchy in each bite. That brings out the perfect taste.
For garnish, I have used sesame seeds. You can also add fresh herbs like spring onion or celery to this.
Summers have officially arrived. This also means the winter bounty is no longer going to be available. But that in no way means that there aren’t tasty options!
I agree that summers do not give us too many vegetable options. But the good news is that the minimum availability can be made extremely delicious with some very simple hacks. Today’s summer recipe is with bhindi or okra as the hero ingredient. Also known as ladies finger, bhindi is a very popular summer vegetable in India. I have started growing fond of okra over the years because of its uniqueness in taste and texture.
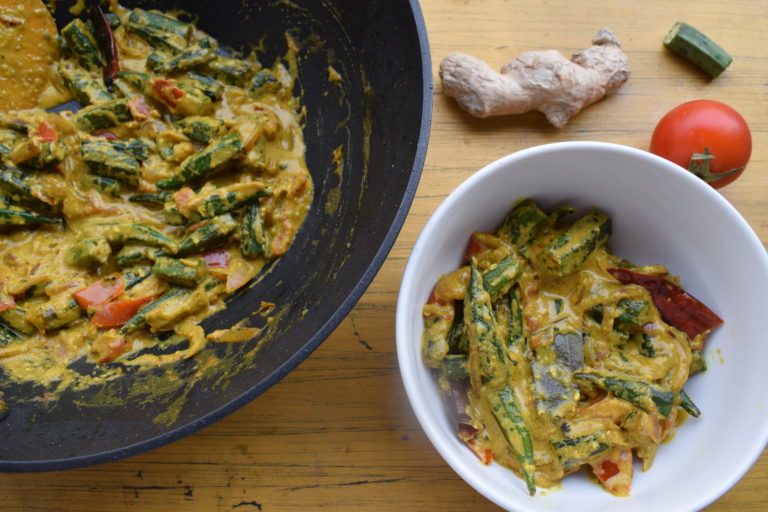
The most common way to eat bhindi in India is a nice stir fry with tomato, onions and the basic spices. The crispy or karari bhindi is also a huge hit in North India. Today’s bhindi recipe that I am going to be sharing with you is called malai masala bhindi. This special and extremely tasty recipe uses cream, curd and a lot of other Indian spices.
Here is the step by step recipe to malai masala bhindi. You can also save this image for the future.
This recipe goes amazingly well with parathas or hot rotis!
Slurrp pro tip: While cutting the bhindi, make sure you soak them first in water for about 15 minutes. This will enable you to get rid of the sliminess while cutting the bhindi.
Want more such Indian recipes? Check out our entire section of Indian delicacies.
To me, there is nothing more satisfying than being able to make everything at home. The sense of making your own fresh food and not buying every single thing from the market is oddly gratifying. And of course, it is way more healthy, cooked without preservatives and filled with love!
As a kid, I used to be so fascinated with jams and jellies. My mother used to make jam every once in a while and I used to think of it as something magical. This continued for a while. In college, I had visited a jam factory as a part of an excursion. This jam factory is a big name now and they make all kinds of jams possible – blueberries, strawberries, guava, apple, gooseberry…you name it and they make it. Even that fascinated me a lot! But I still did not start it on my own until recently.
It all started when I began baking my own bread. Once that happened, I asked myself why shouldn’t the complements to bread also be made at home! So my journey of making homemade jams, jellies and marmalades started. And the journey is still on.
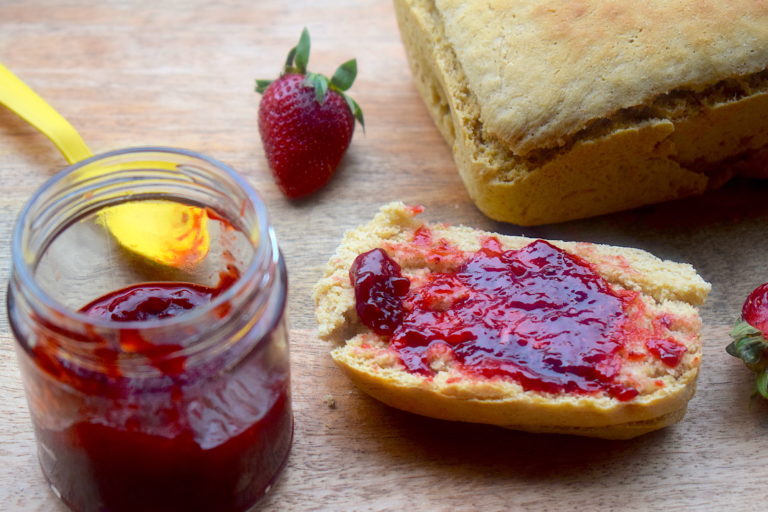
So here I am sharing all of them with you one by one. The first one this is chunky strawberry jam. I call it chunky because it has the crunch in each bite because of the seeds. Another way to make this is by grinding the strawberries in a mixer with some water and then cooking it. I have kept it a little more rustic by just cutting the strawberries into chunky pieces and then cooking it.
All you need is four key ingredients and then magic! I wish I knew how easy this is earlier in life. Better late than never!
Here’s a look at the recipe.
Preparation time – 10 minutes
Cook time – 10-12 minutes
[ingredients title=”Ingredients”]
250 g fresh strawberries, cut into thin slices
1/4 cup sugar
1 tsp lime/lemon juice
1/4 tsp cinnamon powder [/ingredients]
[directions title=”Directions”]
Place a pan on the stove on medium flame and add the chopped strawberries and sugar.
Let it simmer on low heat and allow the ingredients to slowly combine and start to melt.
Once the strawberries start to melt and the sugar starts to caramelise, add the lime juice.
Wait for the jam to turn sticky. Keep stirring continuously on low heat.
Once the jam is thick, garnish with cinnamon powder and turn off the heat.
The jam will be done when it sticks to your spoon and does not drip off.
Transfer jam immediately to a glass jar or it will stick to the pan. [/directions]
Make sure once your jam is cooked, you test it out with a spoon. If the jam sticks to the spoon and does not drip off, it means it is ready. Do not overcook it.
Transfer the jam immediately to a jar while hot or else it will stick to the pan. Save up for up to a week! Enjoy and let me know how it turned out for you.
Summers have officially kicked in and it’s time to think of tasty ways to deal with the winter weight. If you are someone like me who loves food and is also trying hard to shed the holiday fat, I have some tasty recipes for you. These ideas play with food and taste without any compromise on taste! Let’s start with this chicken salad.
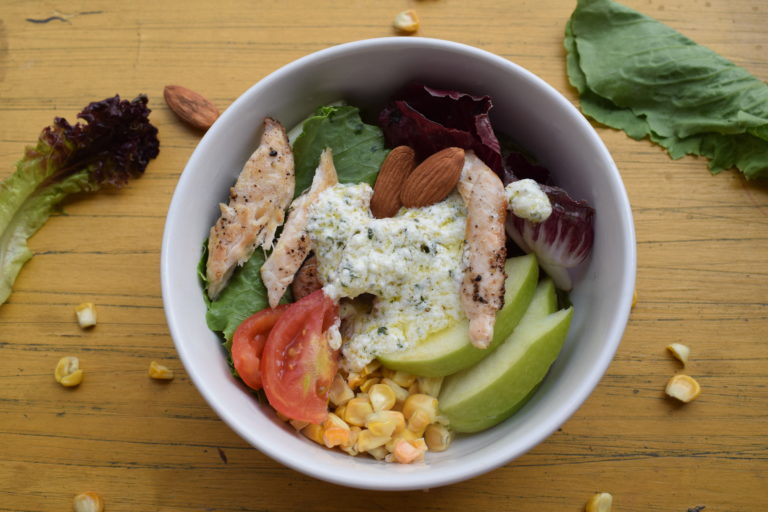
This chicken salad recipe has so many reasons to be one of my most favorite. It is filling, supremely high on the health quotient and so very tasty! The dressing for this includes elements that are tangy, sweet, sour and a whole lot of other flavors. The crunch of the fruits and vegetables in the salad, along with the juicy shreds of chicken makes my mouth water just at the thought of it.
Here’s the recipe:
I have used hung curd in this recipe. You can go ahead and use Greek yogurt also if you like. The special thing about this chicken salad is that it is highly customizable. Throw in your favorite crunchy elements or go vegetarian with some tofu or slightly pan fried cottage cheese. Just get this dressing right and feed on your imagination with various combinations.