It is the season of oranges! I can see them everywhere right now and they are just so delicious and beautiful. I am a big fan of oranges. One of my favorite things to do is to chew on some fresh oranges in the winter sun. Beautiful!
In Delhi, we get a lot of the kinnow variety of orange. Also known as Mandarin, this orange is bright, softer, super sweet and very juicy. I have used freshly squeezed kinnow juice in this recipe. You can use any variety available locally near you.
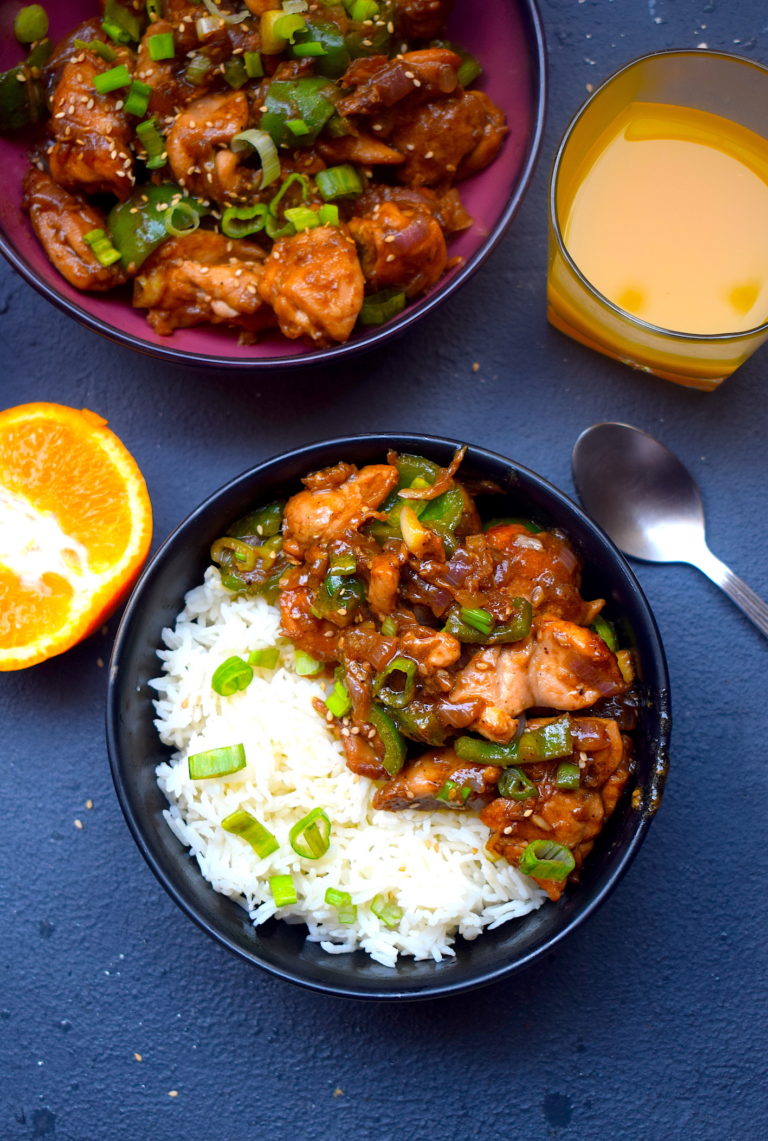
This orange chicken is one of my favorites. Super simple to make and very aromatic. The combination of brown sugar and orange juice makes for a sticky syrup, which adds a perfect glaze as well as taste to the orange chicken recipe. The chicken is shallow fried here. You can deep fry it as well if you want an extra crispy version.
Here’s a look at the ingredients and procedure.
Preparation time – 20 minutes
Cook time – 30-40 minutes
Serves – 2-3 people
[ingredients title=”Ingredients”]
For marination:
Boneless chicken thighs cut into equal pieces, 500 g (make sure they have been patted dry)
Fresh ginger paste, 1.5 tsp
Fresh garlic paste, 1.5 tsp
Sesame oil, 1 tsp
Dark soy sauce, 3 tbsp
Cornflour, 30g
Salt to taste
For the recipe:
Vegetable oil, 4 tbsp
2 green chilies, finely chopped
3 medium onions, finely chopped
Brown sugar, 1 tsp
Crushed garlic, 1 tsp
Crushed ginger, 1 tsp
1 medium capsicum, cut in cubes
Black pepper powder, 1 tsp
Salt to taste
150 ml freshly squeezed orange juice
2 tsp dark soy sauce
Chopped spring onion greens for garnish
Toasted sesame seeds, for garnish [/ingredients]
[directions title=”Directions”]
Mix the boneless chicken thighs with ginger paste, garlic paste, sesame oil, dark soy sauce, cornflour, and salt. Marinate this for 20 minutes.
Heat 3 tbsp vegetable oil in a wok. Shallow fry the marinated chicken in batches, till they are crispy from all sides. Set aside.
Heat 1 tbsp vegetable oil in another wok. Add the chopped green chilies, followed by the chopped onions. Saute for a minute.
Add the brown sugar and mix well. Saute for another two minutes till onions turn translucent.
Add the ginger and garlic and stir. Cook this till the raw aroma of the ginger and garlic disappears.
Once the onions merge well with the ginger and garlic, add the chopped capsicum. Cook this for another minute.
Season with salt and black pepper powder. Stir well.
Pour in the freshly squeezed orange juice. Cook till it reduces by half.
Wait for the orange juice to turn into a sticky and thick sauce. Add the fried chicken to the mixture.
Gently mix the fried chicken with the rest of the ingredients.
Drizzle in some dark soy sauce and stir well till the color changes to a darker version of the original.
Take the wok off from heat.
Garnish with spring onion greens, sesame seeds, and orange zest.
Serve hot with plain rice or fried rice. Enjoy! [/directions]
I hope you do try this simple, mouth-watering recipe.
If you have any questions, feel free to reach out to me with a comment or connect with me on Instagram or Facebook.
Nasi Goreng literally translates to fried rice in Indonesia. I have had several versions of this delicious dish in India and Thailand. But the one you get in its place of origin, i.e. Indonesia is at a different level.
My recent trip to Bali consisted of eating Nasi Goreng for almost every meal. I just couldn’t stop eating it wherever I went. It was just so darn delicious! I had to learn the basics there and make it for myself.
What makes this Nasi Goreng unique?
Making Nasi Goreng is really simple and you do not really need to hunt down for any ingredients. The Indonesian addition to this unique fried rice is the Sambal. Sambal is a hot sauce or a paste made with chilies, garlic, oil, salt, sugar, and a few other spices. You can call it the Indonesian version of a Schezwan paste. You can either make your own or get it directly from the store. I used the store bought Sambal which was quite good.
I learned this recipe from a local chef in Bali. And that’s when I realized Nasi Goreng is pretty much like any fried rice. Only the addition of Sambal sauce gives it an edge.
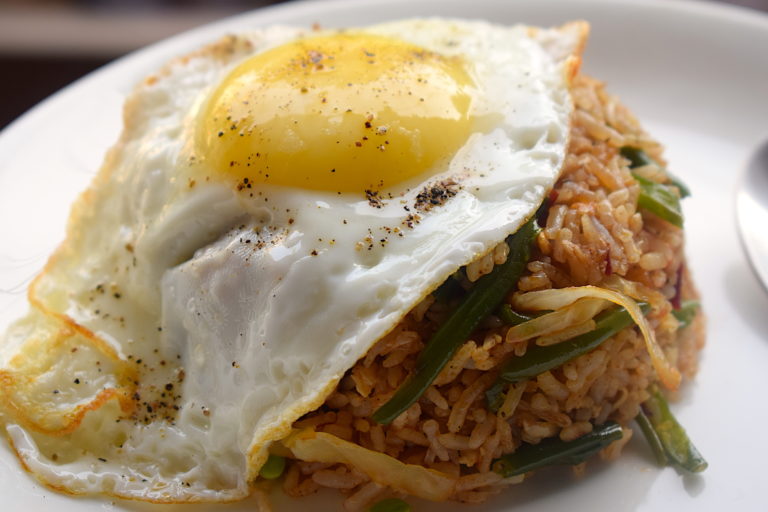
Nasi Goreng is usually served with an egg on top, some cucumbers on the side and some prawn crackers. It is spicy and sweet at the same time. The dark brown color of the sauce comes from sweet Indonesian soy sauce, which can be replaced with regular dark soy sauce mixed with some sugar.
How to make the perfect fried rice every time
Fried rice might be a simple dish but it requires a few things done right every single time. Since Nasi Goreng is also a version of fried rice, the same rules apply to this as well.
Always use a wok for making fried rice because it helps is faster and uniform cooking.
Make sure your wok is really hot before you add oil and other ingredients.
Make sure the vegetables you add are chopped finely so that they can cook quickly.
The rice that you add to any fried rice should always be cold. Otherwise, it will stick to the wok and become lumpy.
If you add any protein like chicken or shrimp, cook them before you add the vegetables.
Add the soy sauce and vinegar just before you remove the wok from the gas stove.
There are obviously many variations of Nasi Goreng like every other recipe. This is my homemade version for a comforting weeknight dinner. This version is also without shrimp, and just with some moist chicken and lots of vegetables. And the best part? It’s all done at lightning fast speed in 20 minutes.
Why this version of Nasi Goreng?
Delicious and super easy!
Healthy and quick
Better than takeout
You need 20 minutes to make this
Made with basic Chinese pantry essentials, except the Sambal sauce.
Highly customizable!
Top it off with toasted sesame seeds for extra crunch.
Preparation time – 15 minutes
Cook time – 25-30 minutes
Serves – 3
[ingredients title=”Ingredients”]
200 g chicken thighs, cut into small pieces
250 g rice
50 g butter
8-9 garlic cloves
4 tbsp vegetable oil
2 eggs
100 g green beans, thinly sliced
100 g carrots, thinly sliced
100 g cabbage, thinly sliced
2 tbsp Sambal Paste
1 tbsp sugar
2 tbsp dark soy sauce
1 tsp black pepper powder
Salt to taste [/ingredients]
[directions title=”Directions”]
Heat oil in a wok. Add the butter and mix the oil and butter.
Add the sliced garlic and mix it together.
Add in the chicken pieces and cook for about two minutes. Season with some sugar and mix well.
Once the chicken is cooked 90 percent, add one beaten egg into the oil and cook till it’s done.
Next, add the beans, carrots, and cabbage and saute for a minute. Do not overcook the vegetables as they need to remain crunchy.
Add the Sambal paste and mix well with the vegetables.
Season with salt and pepper.
Add the boiled and cold rice to the mixture. Mix well till the rice is heated through and everything gets mixed together perfectly.
Pour in the soy sauce and mix well until every grain of the rice gets stained in the sauce.
Fry an egg sunny side up, one for each plate.
Transfer the nasi goreng onto a bowl and serve it on a plate upside down, as shown in the picture. Top it off with a fried egg.
Serve with cucumbers and tomatoes on the side. [/directions]
I hope you try this version of Nasi Goreng! Super simple and easy. Please feel free to substitute the chicken with any protein of your choice. If you are a vegetarian, you can skip the steps where I add chicken and egg, and substitute with tofu and more vegetables.
If you have any questions, feel free to reach out to me with a comment or connect with me on Instagram or Facebook. For all my videos, you can subscribe to me on YouTube.
My love for Thai cuisine has only grown recently. I was completely unaware of how amazing Thai food is until I actually started trying it out a lot at restaurants and Thailand itself. And man was I blown away!
The best part about Thai cuisine according to me is its freshness and the use of seasonal produce. There is way too much variety, be it for vegetables, herbs or fruits. Thailand is one place where I would even love to live for a while and learn about their cuisine from the local people. Any sponsors?
Why this Thai Basil Chicken?
This Thai basil chicken is an explosion of flavours in the mouth. It has all the elements that makes it a winner – sweetness, some fieriness to open your senses, crunch and colour. The use of just the right herbs and sauces make it taste like you’re eating at a professional pan-Asian restaurant. And it makes for a super doable weeknight meal. Here are some more reasons why you need to make this asap:
It is quick and super easy to make.
Tastes brilliant with some rice.
Ingredients can be found in any supermarket.
It makes for a wholesome meal.
It is healthy.
You can customize the flavors as per your wish.
A pleasant accident!
The background story to this chicken recipe is quite interesting. I had gone to my local farmer’s market on a whim and ended up buying a host of Thai spices and aromatics (along with other unplanned checks on my invisible food list). I was obviously craving for some Thai goodness in my mind. I came home and tried this stir-fry. I must say I was surprised by the results. It’s too good to be true kind of a chicken recipe!
What kind of basil can you use?
As the name suggests, basil is the star ingredient of this recipe. I absolutely love basil and do not leave any chance to use it in my food. Thai basil chicken is a very common dish in Thailand and found almost everywhere. Thai people usually make it with the holy basil (Indian tulsi) that grows abundantly over there. That is the traditional way of cooking it.
The holy basil is more pungent and sharp in its taste as compared to normal basil. But you can also use Italian basil, and the taste is still marvelous. I personally prefer Italian basil over the Thai basil.
Few techniques to keep in mind
Preparing the minced chicken
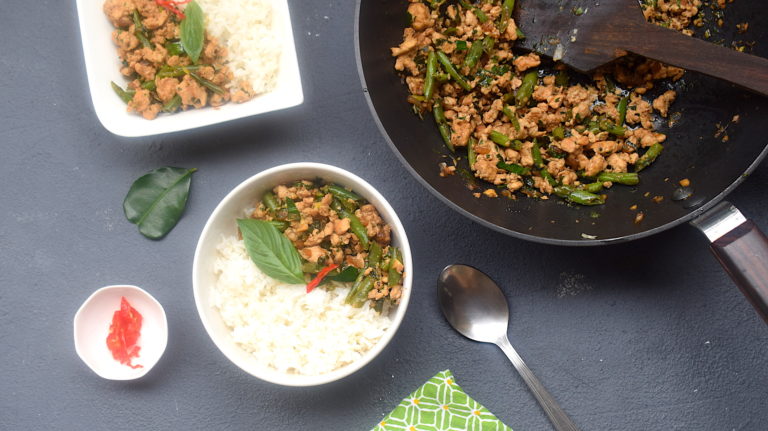
As you can see from the pictures, this recipe used chicken in its minced form. I have minced it myself because that way I know it is as fresh as it can get. Don’t fret already, it’s very simple!
All you have to do is take a chef’s knife and beat the boneless chicken breast till it flattens out. Then you need to mince the breast into tiny pieces by breaking it using vertical force with your knife. It is then cooked with Thai spices and aromatics, basil and kaffir lime being the best addition. Note them all down and surprise yourself with this amazing chicken recipe.
Adding the herbs
This recipe required the addition of two herbs – Kaffir lime leaves and basil leaves. The time of adding both these herbs will vary in the recipe. The addition of Kaffir lime leaves is before the basil leaves as it is a sturdy leaf that does not wilt. And the more you cook it, the more it releases its flavor. So the Kaffir lime leaves can be added to the chicken once it’s half cooked.
The basil leaves, on the other hand, are very tender. So they need to be added right at the end after switching off the flame. This ensures that their freshness is intact and you do not get a recipe with wilted leaves.
Use of chili
Over here, I have used just a bit of Naga chili or bhoot jolokia, which is also the hottest chili in the world. But you can add any chili you like. Just make sure it’s hot as this recipe tastes good when spicy. But again, that is also up to your taste. The traditional recipe uses bird’s eye chili, which a super hot Thai chili.
The Recipe
Preparation time – 15 minutes
Cooking time – 30 minutes
Serves – 3
[ingredients title=”Ingredients”]
500 g minced chicken
1 tbsp sugar
1 tbsp oyster sauce
2 tbsp dark soy sauce
1 tbsp fish sauce
150 ml chicken stock
2 tbsp cooking oil
1 large onion, finely chopped
7-8 garlic cloves, finely chopped
2 Thai green bird’s eye chilies, finely chopped
100 g green beans
2 fresh Kaffir lime leaves
50 g basil leaves, finely chopped
1/2 naga chili (bhoot Jolokia)
Salt to taste [/ingredients]
[directions title=”Directions”]
Make the Thai sauce first. In a bowl/cup, mix the following and stir well – oyster sauce, dark soy sauce, fish sauce, sugar, and chicken stock. This is the sauce we will use for cooking, and is the highlight of the flavors.
Heat cooking oil in a wok. You can also use sesame oil for extra punch. Add the minced chicken breast and fry it in the oil till it disintegrates completely.
Cook the minced chicken for about five minutes, till the water from the chicken evaporates. Add the onion, garlic, and chopped chilies to the same wok and fry till onions become translucent. You can use any kind of chilies here in case you do not have bird’s eye chili.
Add the green beans to this mix and stir until the chicken is cooked thoroughly.
Season with salt.
Pour in the sauce into the chicken and cook until the meat soaks in the goodness of the liquid. Make sure it does not become too dry.
Roughly chop two fresh Kaffir lime leaves and add to the chicken and give it a slight mix.
Turn the gas off and add the chopped basil to the chicken. Keep stirring till the basil turns into a beautiful dark green color.
Add some Bhoot Jolokia or Naga chili in the end, if you like it extra spicy like me.
Serve with white rice.
[/directions]
I hope you try this recipe out. I have been getting a lot of engagement from the video that I posted on my Instagram and Facebook page. I honestly love this Tha basil chicken recipe and it is so easy to pull it off. You can also make it with pork. Vegetarians can try the same with vegetables or tofu. And you will feel like you are at a great Thai restaurant.
I am all about quick and tasty dinners. And this, my friends, is the ultimate of all minced chicken recipes that are going to fill you up with comfort and happiness. Do let me know how you like it. Happy cooking! Here’s the video. Do subscribe to my YouTube channel for all my videos.
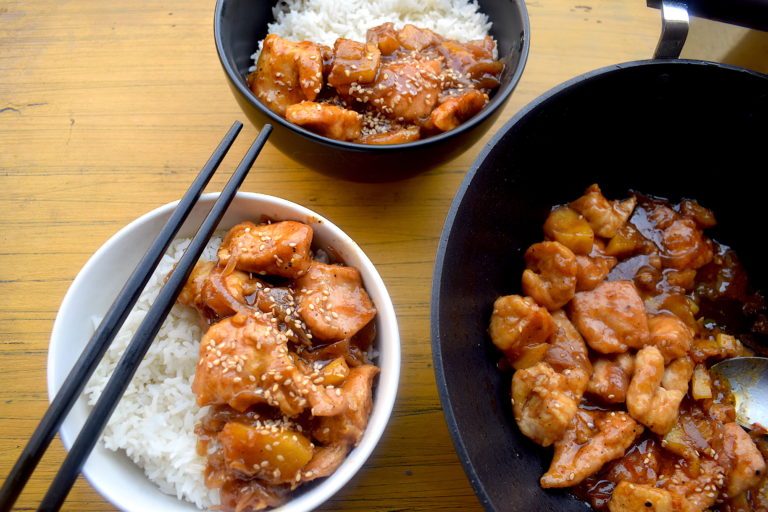
Ditch your favorite Chinese takeaway place this weekend and make yourself an amazing pineapple chicken meal bowl. This recipe is so simple and ultra delicious!
I actually never thought such a combination could work. But I had the most amazing pineapple chicken recipe a few years ago in Shillong and I have been making this for myself ever since. One of the best things about this pineapple chicken recipe is that it has so many flavors within it. Sweet, spicy, tangy – every bite is an explosion inside the mouth!
I have used a couple of Chinese sauces here, including Oyster and the regular soy sauce. I prefer using dark soy sauce as it has more punch, flavor, and color to it. For the spicy element, I have used a red chili sauce which is quite hot! If you do not like it spicy, you can add a usual sesame sauce or hoisin sauce or maybe skip it altogether. Just do not add more sweetness to it as the pineapple and the sugar kind of already has the sweet elements.
So without any further ado, here is the recipe:
The important thing to remember about this recipe is to not overcook or undercook the pineapple. It needs to be soft, yet slightly crunchy in each bite. That brings out the perfect taste.
For garnish, I have used sesame seeds. You can also add fresh herbs like spring onion or celery to this.
We all love Chinese food! In India, Chinese is cooked in unique ways and it leaves us wanting for more. This recipe is inspired by the various versions of Chinese food I’ve tasted across states and even countries! It is easy to make, power packed with flavors and will surely leave you wanting for more.
INGREDIENTS
500 gms boneless chicken
Two onions, cut into large pieces (see video)
8 cloves of garlic, crushed
1 capsicum, diced
1 tbsp roasted sesame seeds
5 whole green chillies
1/2 cup soy sauce
2 tbsp cornflour
1 tbsp pepper powder
1 cup water
Salt to taste
chopped spring onion leaves, for garnish.
PROCEDURE
Before cooking:
Dip the chicken pieces in cornflour with a little water and fry it in oil. Keep it aside.
Process:
Add oil to a pan.
Add the crushed garlic.
Put in the onions and fry for 3-4 minutes.
Add the chopped capsicum and cook.
Time to add the fried chicken.
Add soy sauce and sprinkle some sesame seeds over it.
Add salt and pepper.
Pour in some cornflour mixed with water for the desired consistency.
What is a get-together or a party without some amazing snacks to go with, right? And what can be better than some Chinese food at home?
As an ode to how much we all love house parties, here is a quick Chinese food recipe you can whip up. A honey chicken snack that you can prepare for your own guest party for a weekend, and delight your friends and family!
Preparation time – 10 minutes
Cook time – 20 minutes
Serves – 2-3
[ingredients title=”Ingredients”]
Shredded boneless chicken, 500 gms
5 tbsp honey
1 tbsp sugar
2 tbsp cornflour
3 tbsp soy sauce
2 tbsp vinegar
8 garlic cloves, sliced
1 tbsp chopped ginger
1 tbsp sesame seeds
1 tsp black pepper powder
Chopped spring onion leaves for garnish
Peanuts for garnish
Salt to taste [/ingredients]
[directions title=”Directions”]
In a glass bowl, add salt, pepper, and cornflour to the chicken, mix it well and keep it aside.
Take another bowl and mix sugar, ginger, garlic, soy sauce, honey, and vinegar together and set it aside.
In a pan, heat oil and fry the chicken pieces.
Once crisp enough, add the sauce already made and mix well.
Cook till chicken is tender.
Garnish with chopped spring onion leaves and peanuts. [/directions]
Would love to know your thoughts on this one. Let me know if you try 🙂