
Tomato Grilled Cheese Sandwich

A rich, cheesy and buttery bite for breakfast or a snack, this Grilled Cheese Tomato Basil Sandwich can be your holy grail. With just some basic items straight out of your fridge and a handful of fresh basil leaves plucked from your home garden (or store bought), you can put together this perfect, tangy, cheesy sandwich in less than 10 minutes. It is super quick, insanely easy to whip up and you wouldn’t believe how heavenly it turns out with such minimal ingredients and efforts! That slight crisp of perfectly toasted buttery bread slices, layered with tangy savoury tomato filling and that tempting cheese makes this recipe nothing short of an absolute delight. 

With the goodness of tomatoes and richness of cheese, this recipe makes a heavy and filling breakfast, a quick Sunday brunch or even a perfect last minute picnic lunch. Since I am a big fan of Italian cuisine, with the star ingredients as tomato and basil, this sandwich also helps satiate those Italian cravings without putting in too much effort or an elaborate spread.

Ingredients in This Tomato Grilled Cheese Sandwich
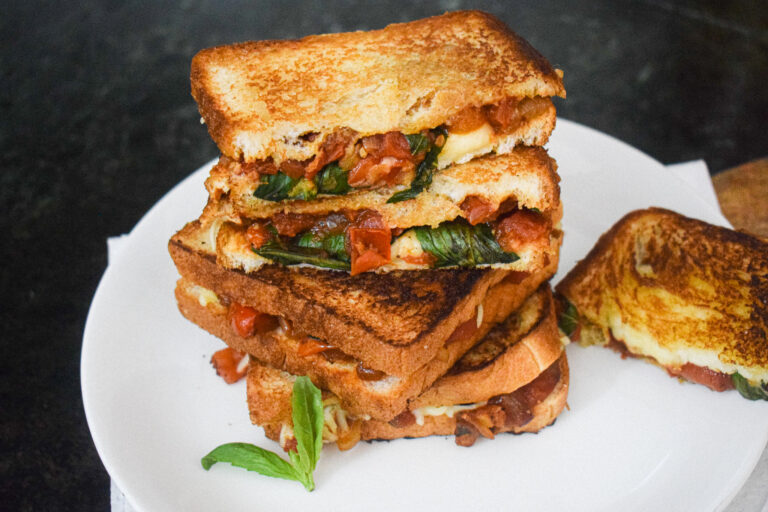
Tomato sandwiches make a perfect summertime meal. Throw in a little of olive oil, some basil and cheese and you have quite an ensemble. Let’s look at the key ingredients that make this recipe such a dream.

  • Tomato

As the name suggests, tomatoes are the star ingredient of this recipe. Tomatoes have a sweet, tangy flavour which elevates whatever dish you add them too. It is the base of most of the Italian cuisine and Indian curries. Tomatoes are very versatile- they can be had raw, blended into a salsa/dip, made into a base gravy/curry, cooked to perfection with herbs to make that perfect marinara/pizza/pasta sauce and in this case- stir fried and cooked till soft, seasoned and mixed with some fresh herb to make that perfectly gratifying sandwich filling. The sweet, bright, fresh flavour of tomatoes is unmistakable and they are also loaded with vitamins and antioxidants so eat well and feel better!

tomato grilled cheese sandwich

  • Basil

Basil is a culinary herb used in almost all Italian recipes, and several other cuisines worldwide. The flavour of basil is sweet and savoury, with hints of mint, anise and pepper; however the herb ultimately adds a hint of sweetness to any dish. While dried basil has more concentrated flavours and can be used in place of fresh, using fresh basil for your recipes is always better as dried uncooked herbs have a slight dusty taste to them and never fully substitute fresh herbs. Fresh basil is so good- it adds a punch of flavour, smells delicious and can add other dimensions to your dish. It is very easy to grow basil in your kitchen garden and pluck a fresh handful every time you need, just like me.

  • Cheese

Who doesn’t love cheese? It is literally the best food ever because it’s not just gloriously delicious and satisfying, but also good for your body because of its high calcium content. While it can be consumed raw, with a side of wine or as is, or melted into a dip, it also constitutes as the base of so many dishes. Think about it- Mac and cheese, grilled cheeses, cheeseburgers, mozzarella sticks, cheese fries. The list is endless, I mean, you just can’t beat it. All of these foods would not even be possible without the beauty of cheese. In this tomato basil sandwich, cheese really changes the whole game.

tomato grilled cheese sandwich

Why this Tomato Basil/Cheese Grilled Sandwich?

  • Super easy and quick
  • Can be whipped up in less than 10 minutes
  • All ingredients are most probably present in your fridge right now
  • Healthy breakfast/brunch
  • Fool proof recipe
  • Cheese!
  • Perfect for a picnic/ packed lunch

tomato grilled cheese sandwich

Let’s take a look at the recipe.

Preparation time – 10 minutes

Cook time – 10 minutes

[ingredients title=”Ingredients”]

For the filling:

  • 30ml olive oil
  • 10g finely chopped garlic
  • 100g finely chopped red onions
  • 500g chopped tomatoes
  • 3g black pepper powder
  • Salt to taste
  • 10g chopped Italian basil

For the sandwich:

  • 2 slices of white bread
  • Some more fresh basil leaves
  • Grated cheese (adjust quantity as per your liking)
  • Butter for grilling [/ingredients]

[directions title=”Directions”]

  1. Heat the olive oil in an iron cast skillet/pan. You can use any other oil but I’m using olive oil for that extra kick of flavour and slight Italian authenticity that it adds to the dish.
  2. Add the garlic to the oil and sweat it for a few seconds. Do not brown.
  3. Now add the chopped onions to the pan and cook stirring occasionally till they turn translucent. Again, do not brown.
  4. Throw in your chopped tomatoes and cook on high flame, stirring occasionally.
  5. When the tomatoes turn mushy and soft and loses all its raw smell, add in the chopped fresh basil leaves and mix well.
  6. Take it off the heat and let it cool down.
  7. Put a generous layer of filling on a slice of bread.
  8. Top it up with some more fresh basil.
  9. Now, add lots of grated cheese and cover it with another slice of bread.
  10. Heat some butter in a pan and place the sandwich on it.
  11. Grill on each side till crispy and golden brown.
  12. Once done, cut the sandwich in half or quarters and enjoy! [/directions]

tomato grilled cheese sandwich

tomato grilled cheese sandwich

Hope you try and enjoy this tomato grilled cheese sandwich.

Feel free to reach out for feedbacks, suggestions or connect with me on Instagram or Facebook. Subscribe to my YouTube channel for all my videos and upcoming recipes.

Chilli Cheese Mushroom Toast

An easy to make, filling and delicious snacking option, this chilli mushroom toast recipe is addictive! It requires minimal ingredients and a good quality loaf of bread is a must! The cheese on top balances out all the flavours and adds that extra gooeyness. Mushrooms are cooked till they absorb all the flavours of the sauces, aromatics and spices. The addition of green capsicum adds that extra crunch as well as pop of green. It’s really one of my favourite recipes and I love to include this in my lazy brunch options on weekends.

This chilli mushroom toast also makes for a great appetiser option if you are planning to host soon. You can also put this delicious filling on small bruschettas and serve them to your guests. They are going to love it!

chilli cheese mushroom toast

The chilli element of these toasts are a combination of red chilli sauce and chilli flakes. The quantity of these two ingredients can be adjusted as per your preference. If you would like to make it extra hot, please add more.

chilli cheese mushroom toast

Here’s the recipe:

Preparation time – 10 minutes

Cook time – 20 minutes

[ingredients title=”Ingredients”]

  • 2 tbsp oil
  • A loaf of bread
  • 5 garlic cloves, finely chopped
  • 1 medium onion, finely chopped
  • Salt to taste
  • 1/2 tsp black pepper powder
  • 1 large tomato, finely chopped
  • 100 g button mushroom, finely chopped
  • 1/2 capsicum, finely chopped
  • 1 tbsp hot sauce/Schezwan sauce/red chilli sauce
  • 1 tsp Oregano
  • 1 tsp chilli flakes (adjust as per liking)
  • Melted butter (to layer the bread)
  • 1 cup Grated mozzarella cheese (adjust as per your liking) [/ingredients]

[directions title=”Directions”]

  1. Heat oil in a pan. Add the finely chopped garlic and stir for a minute on low flame. The garlic should release its aroma and flavour the oil.
  2. Add the finely chopped onions and stir for a few minutes till they turn brown and translucent.
  3. Once the onions are have softened, add the tomatoes and cook for another 2-3 minutes till the tomatoes melt. Add a splash of hot water to prevent it from sticking.
  4. Season with salt and black pepper powder. Mix well.
  5. Add the chopped mushrooms and chopped capsicum. Mix and cook for 3-4 minutes.
  6. For the heat, add a tablespoon of any chilli sauce. I have used a red chilli sauce here, also known as hot sauce.
  7. Season with some Oregano and chilli flakes. Mix everything well together.
  8. Cut the loaf of bread into bruschetta slices. Melt some butter and apply on the bread with a brush (see video for reference).
  9. Put a few spoons of the mushroom filling on top of the bread, followed by a generous topping of grated cheese.
  10. Toast it in the oven for 10 minutes till its hot and crunchy. Enjoy while its hot. [/directions]

chilli cheese mushroom toast

chilli cheese mushroom toast

Every bite of this cheesy, crunchy and garlicky chilli cheese mushroom toast is so delicious!

I hope you try out this delicious recipe. If you do, let me know how it turned out for you. If you have any questions, suggestions or feedback, please leave me a comment here. Or connect with me Instagram, Facebook or YouTube.

Happy toasting!


The Best Homemade Salsa Recipe

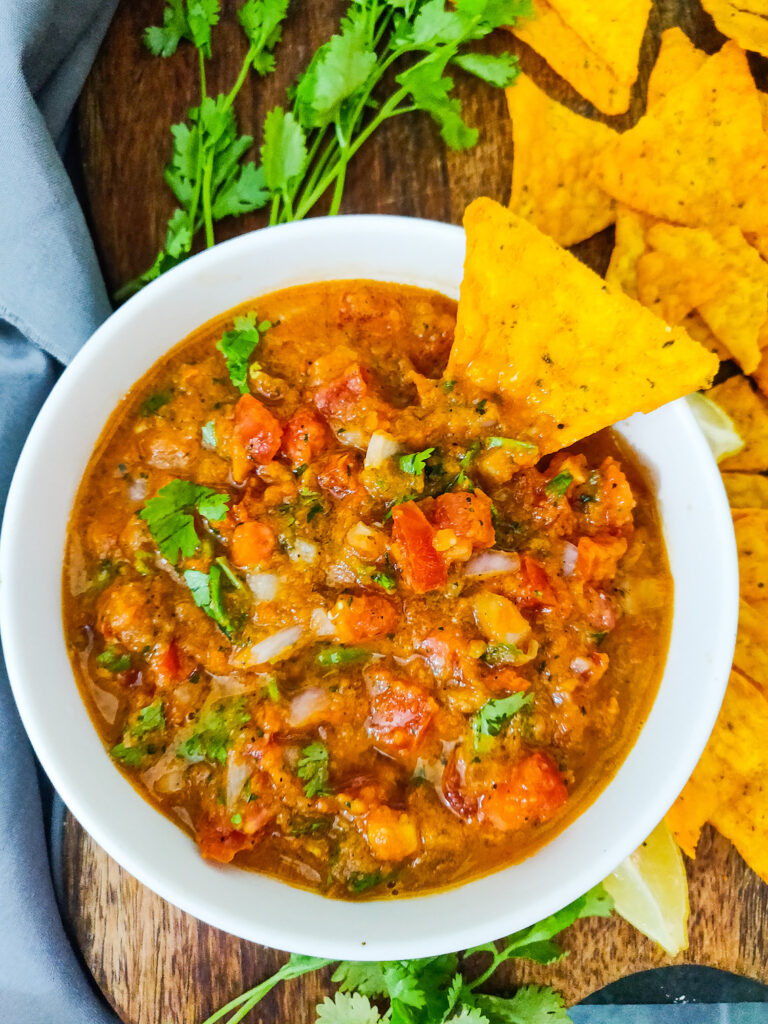
Are you ready to make the best salsa of your life? Once you make this salsa recipe, you will never go back to anything else. This salsa is really easy to make and requires just a handful of fresh ingredients – lime, cilantro, juicy fresh tomatoes – you know the drill. But the extra tricks just elevate it to a whole new level.

salsa recipe

salsa recipe

This salsa is saucy, crunchy and packed with tomatoes, all at the same time. The reason why you get so many textures is because this recipe is actually divided into two key steps, and both are merged in the end. The first step involves creating that jaw dropping sauce and the second step is assembling the raw tomatoes. Merging the two steps is what gives us a salsa recipe that is extremely flavourful and with a beautiful texture.

I have been making this for as long as I can remember. This is one salsa recipe that has been a favourite for years, and I make this every time I host. Spicy, sweet and so punchy, this salsa is refreshing and delicious, almost unreal. You will never buy salsa again as this is a recipe to keep forever. I had been tucking this in my heart for so long and finally sharing it here. It is super simple and barely requires any fancy ingredients. Just some of those juicy and ripe tomatoes can make magic happen! I hope you try this soon and fall in love with it. I can promise that it will make you a star host!

salsa recipe

Preparation time – 10 minutes

Cook time – 10 minutes

[ingredients title=”Ingredients”]

For the sauce

  • 4 ripe tomatoes, finely chopped
  • 1 cup finely chopped onions
  • 8-10 Italian basil leaves
  • 1 tbsp finely chopped garlic
  • 1 tbsp olive oil
  • One tbsp sugar
  • Two tbsp tomato puree
  • One green chilli, finely chopped
  • Salt to taste
  • 1 tsp black pepper powder
  • 1/2 tsp dried Oregano

For the final salsa

  • 2 finely chopped tomatoes
  • 1 tbsp lime juice
  • A handful of finely chopped coriander/cilantro
  • 1/2 cup finely chopped onions [/ingredients]

[directions title=”Directions”]

  1. Heat olive oil in a skillet or pan. Add the onion and mix for 2-3 minutes till the onions start to caramelise.
  2. Add the finely chopped garlic and stir for another minute.
  3. Finely chop the green chilli and add it to the pan. Mix well.
  4. Add the chopped tomatoes and cook for a few minutes till the tomatoes start to sweat and melt.
  5. Pour the tomato puree and stir well.
  6. For sweetness, add the sugar and mix well till the sugar dissolves completely.
  7. Season with salt, black pepper powder and dried oregano. Give it all a good mix.
  8. Garnish with fresh Italian basil leaves and stir for a few seconds. Turn the gas off and let the mixture cool down.
  9. Blend the mixture into a smooth paste. Set aside.
  10. In another bowl, add the chopped tomatoes, lime juice and chopped coriander. Add the blended paste to this and mix well. Your salsa is ready.
  11. Serve with chips or nachos. Enjoy! [/directions]

salsa recipe

salsa recipe

Every bite of this salsa with a nacho will knock your socks off! Make it over the weekend and enjoy something different and wildly popular when you host at home the next time. You can store this salsa for 2-3 days and enjoy it in sandwiches as well. It is quite multipurpose!

I hope you try out this salsa recipe. If you do, let me know how it turned out for you. If you have any questions, suggestions or feedback, please leave me a comment here. Or connect with me Instagram, Facebook or YouTube.

Happy hosting!

Spinach Hummus

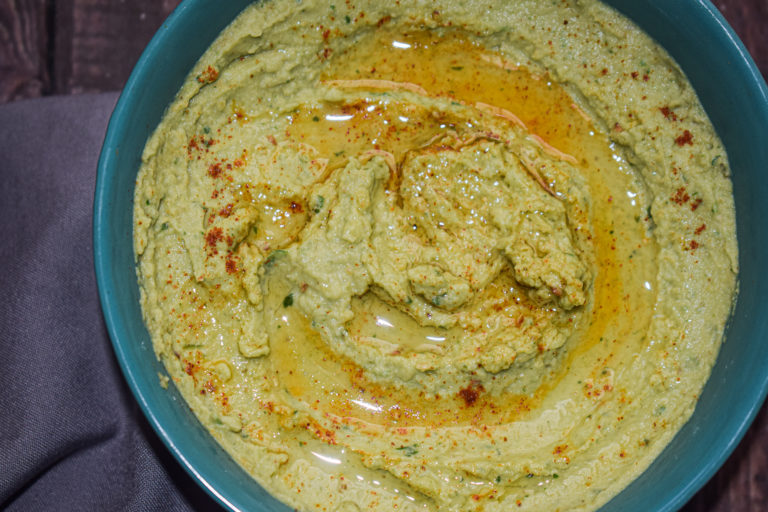
Hello! Thanks for visiting this page. Since you are looking for a hummus recipe, I can assure you your search ends here. This is the easiest, most delicious spinach hummus recipe which has been in my personal book for longer than I can remember. And the light green colour comes from some beautiful spinach that I have added. But this recipe is a two in one, if you want the classic hummus recipe, just ditch the spinach.

green hummus

This spinach hummus is very easy to make, and super simple too. Requires just a handful of ingredients, which are most probably already lying in your pantry. But because simple things often are the hardest to crack, I am sharing all my tips and tricks to ensure you hit just the right spot.

Tips to Get That Perfect Spinach Hummus Every Time

While making hummus seems like a fairly simple thing, taking care of some small details are absolutely crucial. I am sharing my tips after all the disasters in the kitchen, so that you don’t make them.

1.Boil the chickpeas

When I was a novice in the field of making hummus, I wondered about how the chickpeas are used in the recipe. For many months I kept wondering whether chickpeas are supposed to be boiled or just soaked in water! And do I boil the chickpeas directly? I was just too confused!

Well, the key to a good hummus is to have boiled chickpeas. Soak the chickpeas in enough water for 12-15 hours. Their volume will double or triple. Drain the water off and rinse the chickpeas well. And then boil them till they are soft. Do not over boil as you don’t want them to turn mushy. Boil them just till you can mash them in between your two fingers and the chickpea doesn’t break. I usually boil the soaked chickpeas in a pressure cooker for 8 whistles.

2. Wait for the chickpeas to cool down

I have also made the mistake of using hot and boiled chickpeas to make hummus only to get a cake batter! Yes, it’s a mistake most of us have made. So make sure your chickpeas cool down and come to room temperature before you grind it with the rest of the ingredients.

3. Remove the skin of the chickpeas

Another technique to get the creamiest hummus is to remove the skin of the boiled chickpeas. It’s a very easy process and it takes about a second to remove the skin from each chickpea. I would recommend you do this as it removes any kind of obstruction towards making the it the creamiest version possible.

4. Use ice cubes

Yes, you read that right! Ice cubes actually help make the hummus very very creamy. So when you put all your ingredients in the blender, throw in some ice cubes to change the whole creaminess game. I discovered this only recently and I cannot believe how efficient this process is.

Ingredients in this spinach hummus

The number of ingredients in this hummus recipe is absolutely minimal. The main ingredients are the chickpeas, the sesame seeds and good quality olive oil. Lime juice adds to the zest and freshness. For spices, it’s just cumin powder and some red chilli powder or paprika for the heat. You can also use sumac or any kind of spices you love. The amount of garlic in this recipe is also less and not overpowering.

green hummus

Coming to another most important ingredients of hummus – tahini, this recipe actually does not use it. What I have done instead is used toasted sesame seeds and added it to the chickpeas and grind them all up. It works the same way, is easier than making tahini separately and saves time. The final result is also pretty much the same. But if you have tahini with you, go ahead and add it.

green hummus

We also use the chickpea stock in this recipe instead of water, as it gives it that extra level of creaminess and taste. So here’s the recipe to my spinach hummus. I hope you try it and love it as much as I do.

Preparation time – 15 minutes

Cook time – 10 minutes

Serves – 4

[ingredients title=”Ingredients”]

  • 1 1/2 cups boiled chickpeas
  • 2 tbsp toasted sesame seeds
  • Juice of 1 lime
  • 1 garlic clove
  • 1/2 tsp cumin powder
  • Salt to taste
  • 3 ice cubes
  • 1 cup fresh spinach
  • 5 tbsp extra virgin olive oil
  • 5 tbsp chickpea stock [/ingredients]

[directions title=”Directions”]

  1. Soak chickpeas in water overnight. Boil them till they are soft, but not mushy. Cool completely.
  2. In a blender, add the chickpeas, the lime juice, the toasted sesame seeds, olive oil, chickpea stock, garlic clove, salt, cumin powder, ice cubes and the fresh spinach.
  3. Blend it till it all forms into a creamy paste.
  4. Transfer it to a bowl. Top it off with some extra olive oil and paprika powder. [/directions]

green hummus

For more such delightful food, follow me on Facebook, Instagram, and YouTube.

Italian Fish Cakes

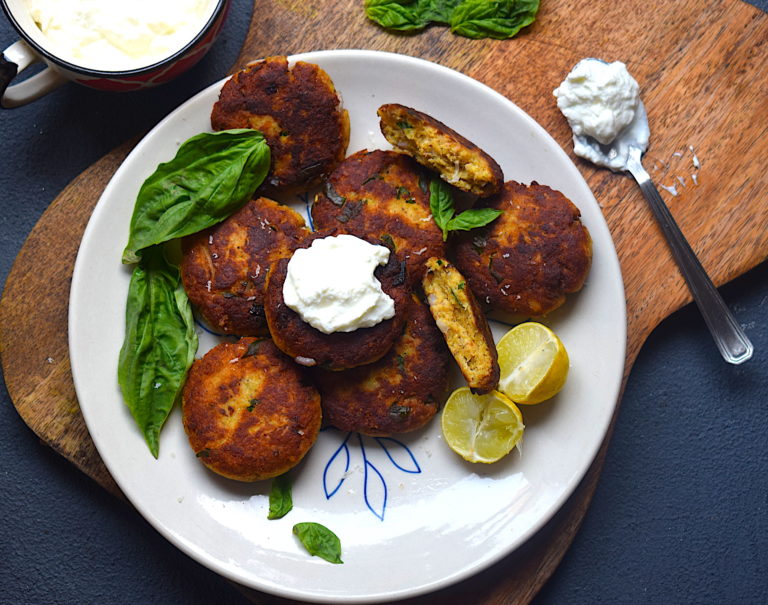
These Italian style fish cakes with Parmesan cheese and basil as the heroes served alongside a delicious yogurt dip is the perfect appetizer option for a get-together. Soft, fragrant, mushy and perfectly cooked, these fish cakes are every fish lover’s dream. This homemade version is so much better than anything you get out there. Try it for yourself and see the difference!

fish cakes

You can substitute tuna in this recipe if you prefer. I have used basa fillet. Since this is an Italian version, it has to involve some good amount of cheese! Over here, I have used Mozzarella and Parmesan, and these two ingredients just elevate the recipe to a whole new level.

fish cakes

Preparation time – 30 minutes

Cook time –  30 minutes

Serves – 4 people

[ingredients title=”Ingredients”]

  • Basa fish fillet, 800 gms
  • 500 g potatoes
  • 1 onion, finely chopped
  • 50 g Italian basil leaves
  • 4 garlic cloves, finely chopped
  • 1 tbsp black pepper powder
  • 1 egg
  • 100 g Mozzarella cheese, grated
  • 80 g Parmesan cheese, grated
  • 50 g breadcrumbs
  • 50 g butter
  • Sunflower oil, for shallow frying
  • 2 lemons
  • Salt to taste [/ingredients]

[directions title=”Directions”]

  1. Thoroughly wash and pat dry the basa fillet pieces. Heat water in a saucepan, add salt to it and bring it to a boil. Add the basa fillets to it and let it cook in water for ten minutes, till soft.
  2. Take the fish fillet pieces out of the water carefully and set them aside to cool. Put them on paper towels so that the excess water gets sucked into it.
  3. Peel the potatoes and cut them into 2cm chunks. Cook them in salted boiling water for ten minutes. Once done, set them aside.
  4. Mash the potatoes till there are no lumps. Add the boiled fish to it and combine it together.
  5. Beat in the egg into the mash.
  6. Season with salt and pepper. Make sure you taste it before you add more salt. Mix well.
  7. Add the finely chopped garlic and onion into the mash.
  8. Add chopped Italian basil leaves to the mix.
  9. Add the Mozarella and Parmesan cheese to the mash and give it a nice mix.
  10. Once everything is combined well, add the breadcrumbs and give it one last mix with a spatula. Be gentle.
  11. Make round shaped cakes or tikkis, or any shape you desire.

fish cakes

11. Freeze the fish cakes in the freezer for at least ten minutes. You can also cover them up and freeze them for longer, frying as and when needed.

12. Heat oil and butter in a pan. Shallow fry the cakes in the pan, about five minutes on each side till golden brown and crispy.

fish cakes

fish cakes

13. Serve on a plate with a generous drizzle of lemon juice on top.

14. Pat with a dollop of hung curd dip and some rocket leaves on top. [/directions]

fish cakes

fish cakes

I hope you try out this easy and delicious Italian fish cakes recipe for yourself. If you do, let me know how it turned out for you.

If you have any questions, suggestions or feedback, please leave me a comment here. Or connect with me Instagram, Facebook or YouTube.

Happy cooking!

Street Style Chicken Cutlet | With Video

October is here and so is my favorite time of the year. What is going to follow is a season of festivities, holidays, colorful streets, lots of food and family time. Just the thought of it is so exciting!

Since Durga Puja is just around the corner, I wanted to share some recipes that remind me of this festival. I will take you through a ride of nostalgic memories through food, memories that made my childhood extremely special.

chicken recipes

Today’s recipe is a homemade chicken cutlet. This is my version of it where I used minced chicken and boiled potatoes to make some wonderfully crispy chicken cutlets. I have shallow fried them in a pan. You can also go ahead and deep fry or even bake. The choice is entirely yours.

chicken recipes

These chicken cutlets are something I have enjoyed a zillion number of times. I love street food, especially during Durga Puja, and these cutlets are served everywhere at that time. It tastes heavenly with some spicy coriander and mint chutney, or some spicy tomato-based sauce. I have gone with my usual homemade spicy green chutney which I made by crushing coriander leaves, mint leaves, garlic, ginger, salt, green chili and lime juice in a blender. So fresh!

This is an extremely easy recipe. It does require some preparation and it is also not a one-pot dish. But the slight effort is totally worth it!

I hope you try it.

Preparation time – 60 minutes

Cook time – 30-40 minutes

Serves – 2-3 people

[ingredients title=”Ingredients”]

  • 300 g raw minced chicken
  • 2 medium potatoes, boiled
  • 1 large onion, finely chopped
  • 2 tbsp vegetable oil
  • 400 ml oil for shallow frying
  • 1 tbsp ginger garlic paste
  • 1 tsp turmeric powder
  • 1 tbsp cumin powder
  • 1 tbsp red chili powder
  • 1 tbsp black pepper powder
  • 1 tsp garam masala
  • 1 egg
  • 150 g breadcrumbs
  • Salt to taste [/ingredients]

[directions title=”Directions”]

1. Heat 2 tbsp vegetable oil in a wok. Add the minced chicken and fry for three to four minutes.

chicken recipes2. Once the chicken releases all its water content, add the finely chopped onion and the ginger garlic paste to the chicken. Stir it till the raw aroma of the ginger and garlic disappear.chicken recipes3. Season with salt, turmeric powder, chili powder, cumin powder, black pepper powder,  and garam masala.

chicken recipes

4. Mix well till all the masalas completely assimilate with the chicken.

chicken recipes

5. Transfer the chicken mix to a bowl and let it cool.

chicken recipes

6. Once cool, mash two boiled potatoes into the chicken mixture. Mix well.

chicken recipes

7. Crack open one egg and mix it with the chicken and the potato mix. The egg will help bind the cutlets.

chicken recipes

8. As a final step, add breadcrumbs to the chicken and give it a good mix with your hands. The breadcrumbs will help eliminate any extra softness, as well as give the cutlets a crispy texture.

chicken recipes

9. Once the cutlet mix is ready, shape it in the form of round tikkis or any shape you desire.

chicken recipes

chicken recipes

10. Deep fry or shallow fry the tikkis until golden brown from all sides. I have shallow fried them in a pan as you can see in the video.

chicken recipes

chicken recipes

11. Serve hot with some spicy green chutney! [/directions]

chicken recipes

This chicken cutlet is one of my favorite chicken recipes. I hope you try it and enjoy it as much as I do. If you have any questions, feel free to reach out to me with a comment or connect with me on Instagram or Facebook.

Slurrp tip: Make a large batch of tikkis and freeze them. Fry them just before you want to serve or when guests are over.

Navratri Special Recipe | Paneer and Alu Paratha | Slurrp

It’s Navratri season again! If you are hunting for some recipes to make this Navratri season, you have landed on the right page. This recipe follows all the rules and does not compromise with taste at all!

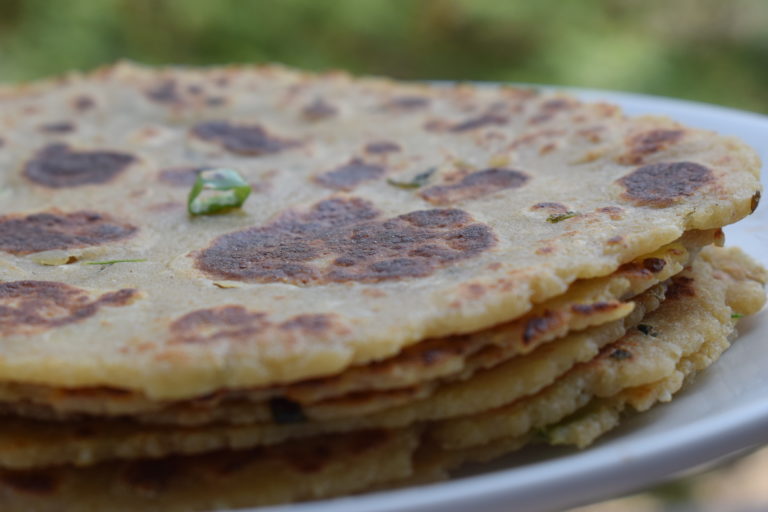
Navratri special recipe

Today’s Navratri special recipe is a paratha. The uniqueness of this paratha lies in its special ingredients. Instead of regular flour, I have used buckwheat flour or kuttu ka aata. The salt that I have used is also sendha namak or rock salt, ideal when fasting. The number of ingredients are extremely minimal and these parathas are soft and light on the stomach. As a result, they are extremely easy to digest. To keep it more organic, I have used 100% pure cow ghee as well. I know finding pure desi ghee can be quite a task in cities. But you can always find a few brands that offer organic clarified butter or ghee at stores or online. It is slightly more expensive, but the cause is greater – good health. And pure ghee tastes much better as well.

These parathas can be made in this exact same fashion with the use of regular flour as well (just in case you want to try it after the festive season is over).

So note this recipe down, watch the video and make it for your loved ones in times of fasting.

Navratri special recipe

Navratri special recipe

Navratri special recipe

Navratri special recipe

Related recipe – Delicious Navratri Tikki

For more such content, follow me on YouTube, Facebook, Twitter & Instagram.

Navratri Special Snack | Raw Banana & Paneer Tikki | Slurrp

Navratri for 2018 has begun. Amidst the festivity, we are always on the lookout for tasty snacks that we can have during this time. A lot of ingredients aren’t allowed to be had at this time. This is why the search for snacks becomes more filtered!

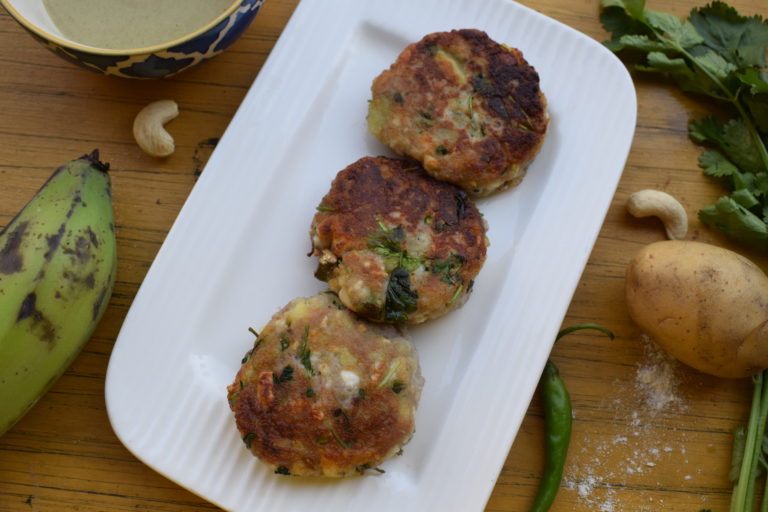
If you are also looking for a snack that is tasty, healthy and meant for Navratri consumption, you have come to the right place. Today’s recipe is a Navratri special snack. It is made with raw bananas, paneer, boiled potatoes and a few very basic ingredients.

The highlight of this recipe is, of course, the Navratri special ingredients. So instead of regular flour, I have used buckwheat flour or kuttu ka aata. And instead of regular salt, I have used rock salt or sendha namak. The rest of the ingredients are regular. So note it down and get cooking!

Navratri special snack

I hope you liked this recipe. Do let me know how it turned out for you. I always love to hear from you. Have a great Navratri with your family and loved ones.

Here is a video on how to make this recipe. If you like it, do follow my other videos on YouTube.

Navratri special snack

Navratri special snack

Navratri special snack

For more such content, follow me on YouTube, Facebook, Twitter & Instagram.

Go-Green Tikki | Healthy Hara Bhara Tikki Recipe | Slurrp

The best part about winter is the bounty that it offers in terms of vegetables. I love to visit the market in winters as I get to see so much variety and color. This is also the time to grab all you can of those beautiful flavors and goodness that the seasonal fruits and vegetables have to offer. This recipe is one of those simple ways in which you can cherish nature’s healthy vegetables and share it with your loved ones.

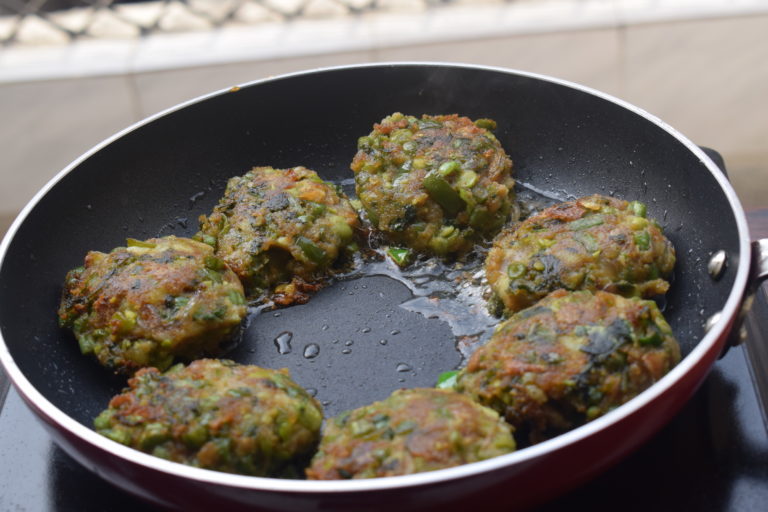
This hara bhara tikki (or go-green tikki as I like to call it) has the health benefits of green vegetables such as spinach, green beans, and capsicum. The preparation is extremely simple. This hara bhara tikki is also delicious and crunchy and can be a great way to make sure children eat their vegetables.

The seasoning that I have used is a very basic one with cumin, salt, and freshly ground garam masala. The garam masala has been made by dry roasting cinnamon, cardamom and clove in a pan in equal quantities, and then grinding them to form a fine powder. This is an important element of this dish, so make sure that you also use fresh masalas.

Here’s the recipe:

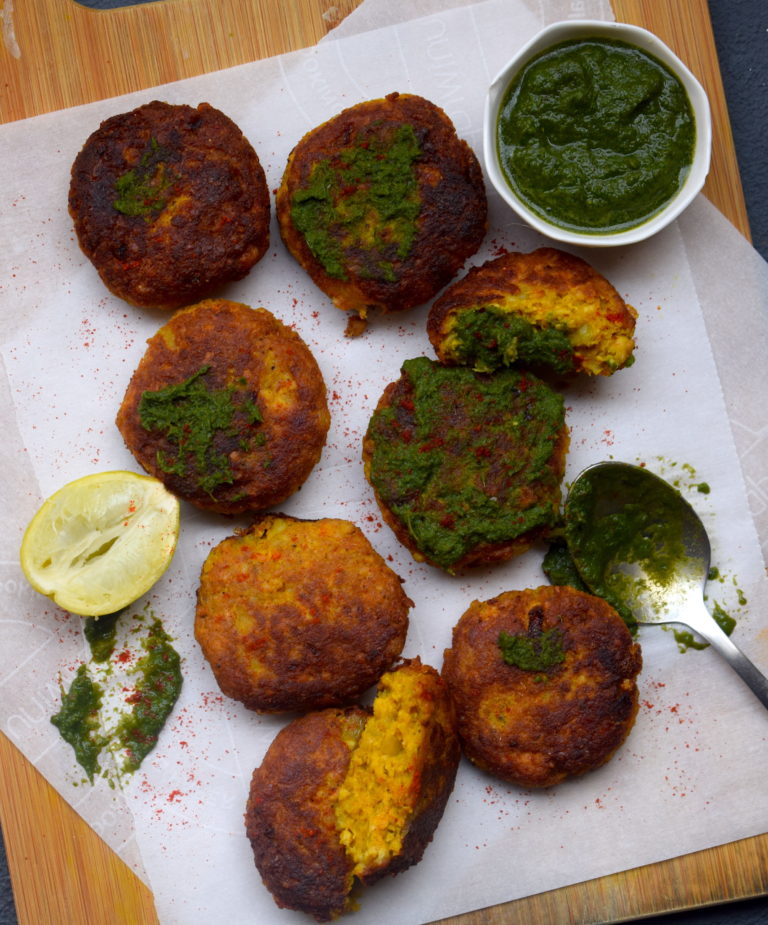
hara bhara kabab

para bhara kabab

hara bhara kabab

hara bhara kabab

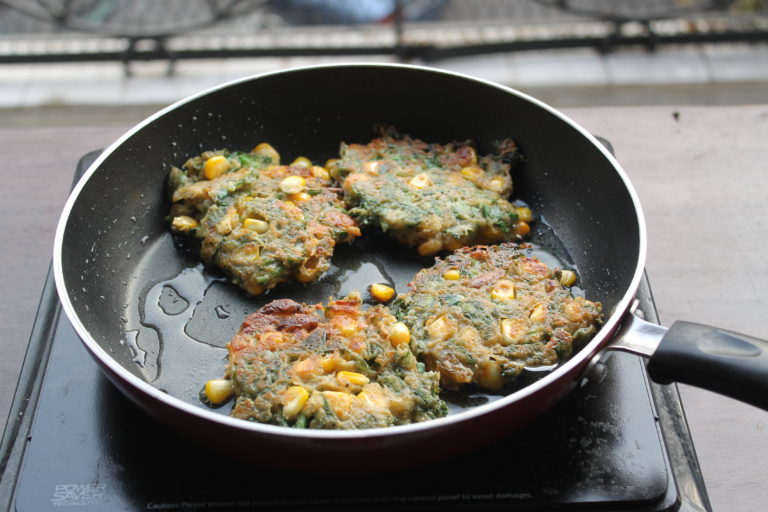
Related Recipe – Cheesy Corn Fritters

For more such delightful food, follow me on Facebook, Instagram, Twitter, and YouTube.

Cheesy Vegetarian Roll-Ups | Vegetarian Snacks

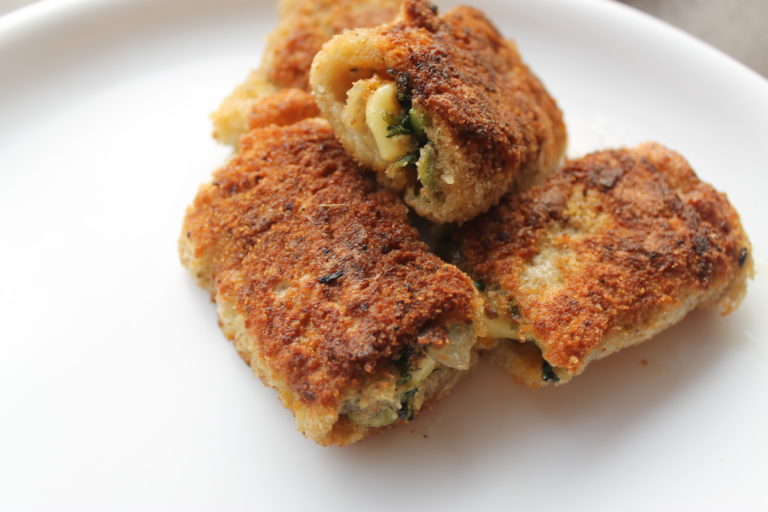
It’s January and getting super chilly outside. Winter evenings demand some pure fritter love. Enjoy these wonderful cheesy vegetarian roll-ups with your cup of chai in the evening. It is power packed with winter vegetables like spinach, broccoli, and mushrooms and has the crunch our heart desires for.

These cheesy vegetarian roll-ups are pretty simple to make – just a few fresh vegetables and of course, some cheese. This is a slightly spicy version, and I use some Schezwan sauce in this. You can replace it with your favorite sauce too.

Let’s snack right.

Cheesy Vegetarian Roll Ups

Here is the step by step video for this recipe:

Some more pictures:

cheesy vegetarian roll ups

cheesy vegetarian roll-ups

Related recipe video – Cheesy Corn & Spinach Fritters

For more such delightful food, follow me on Facebook, Instagram, Twitter, and YouTube.