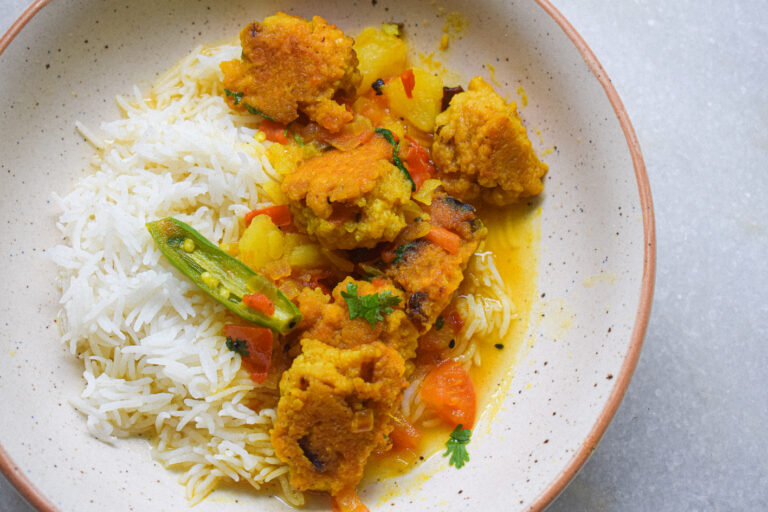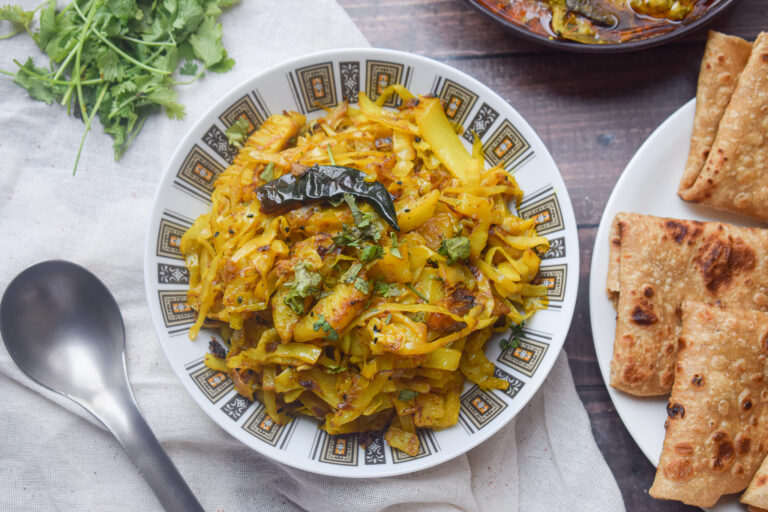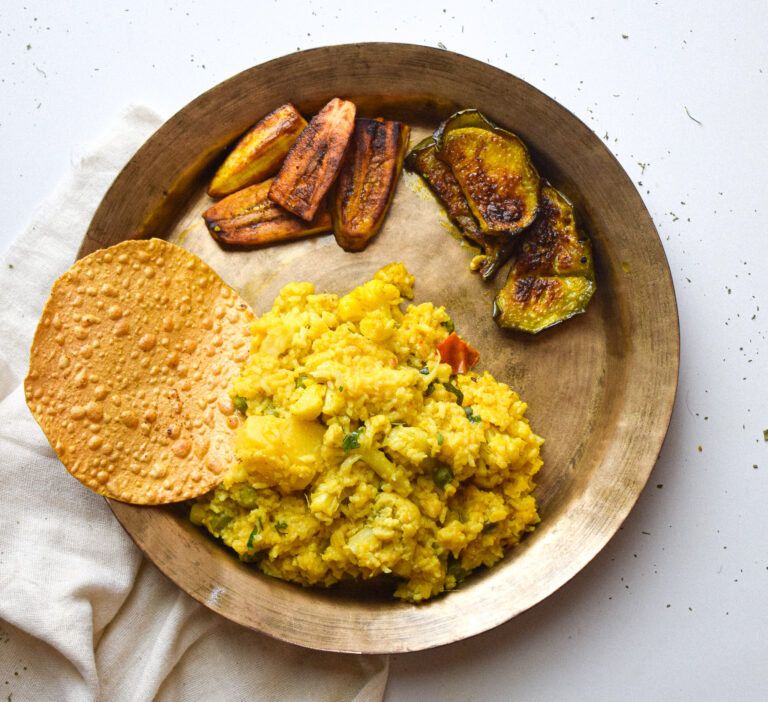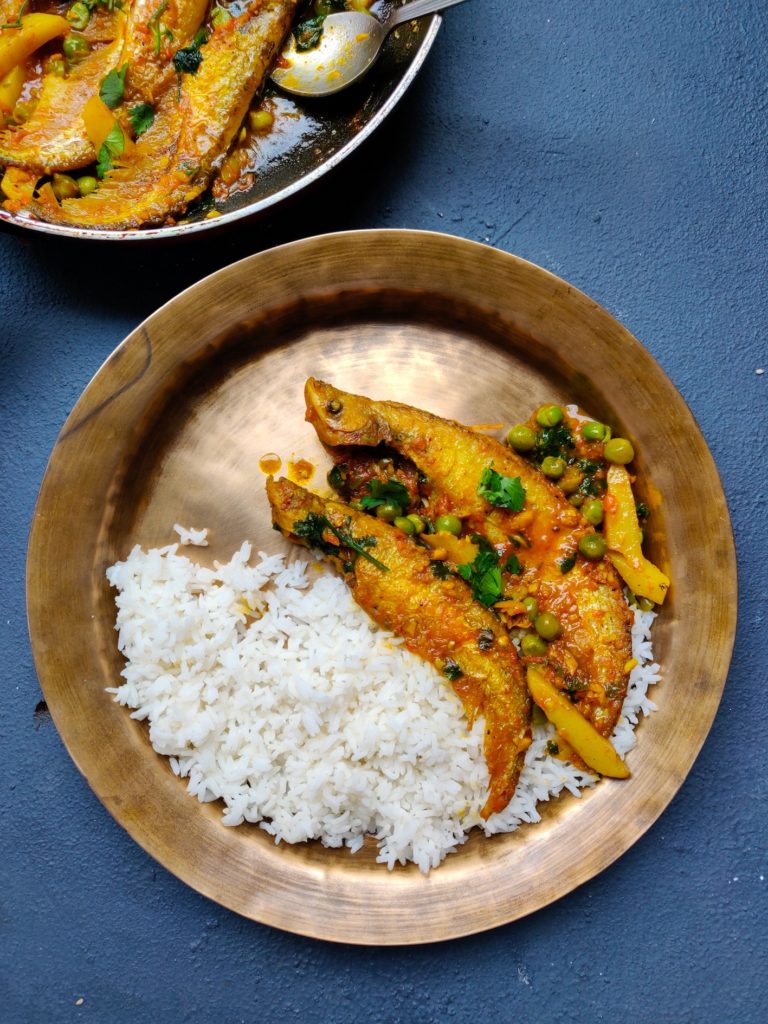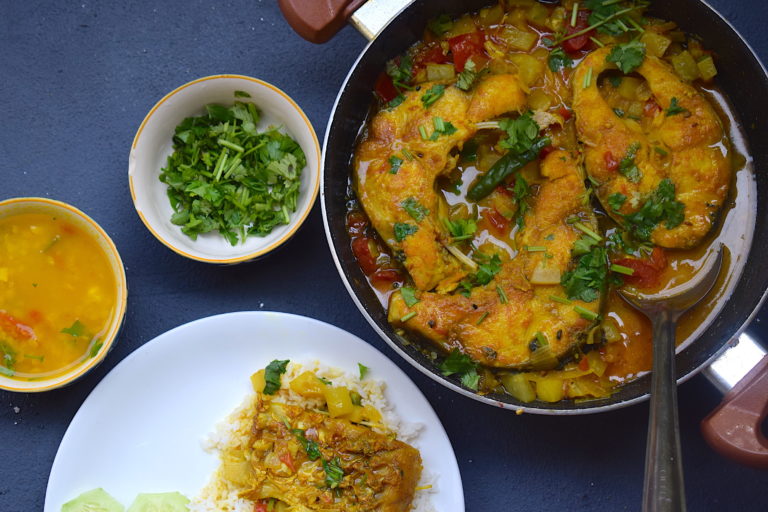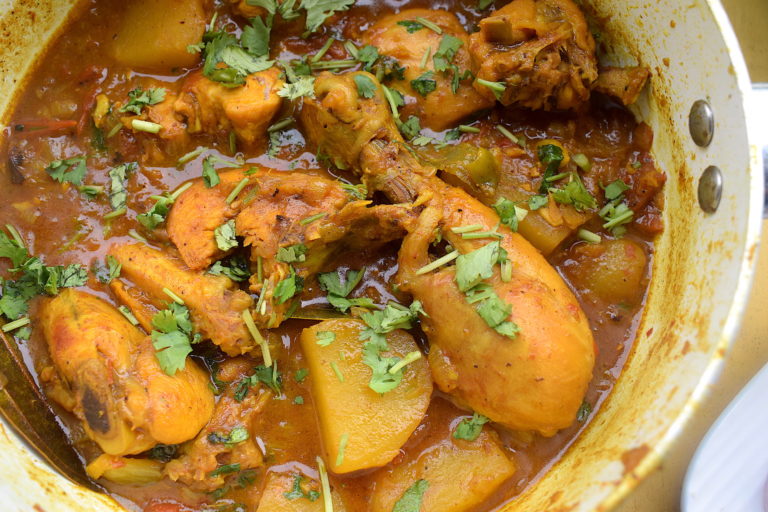
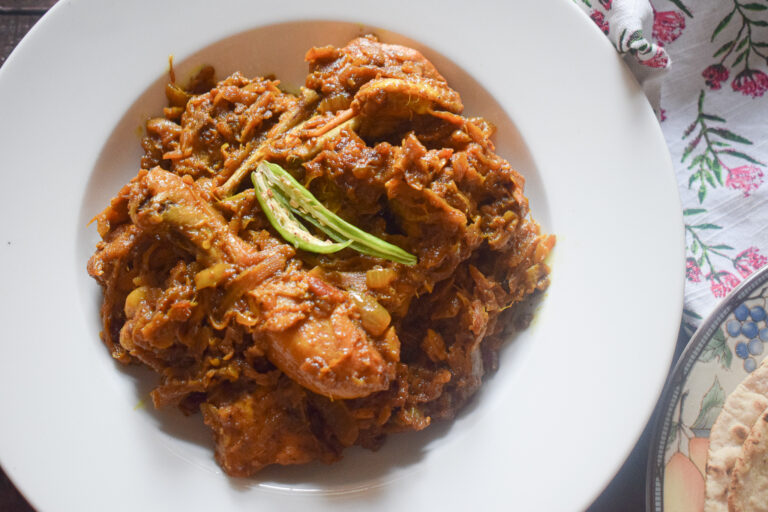
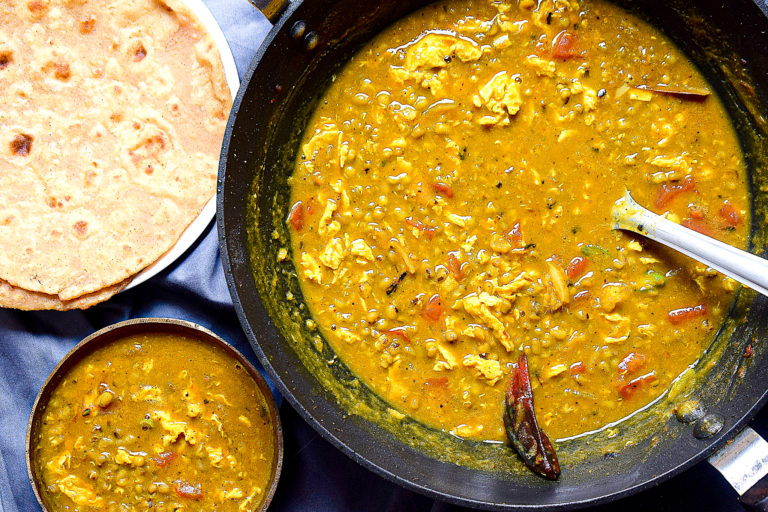
Assamese Masor Tenga Recipe

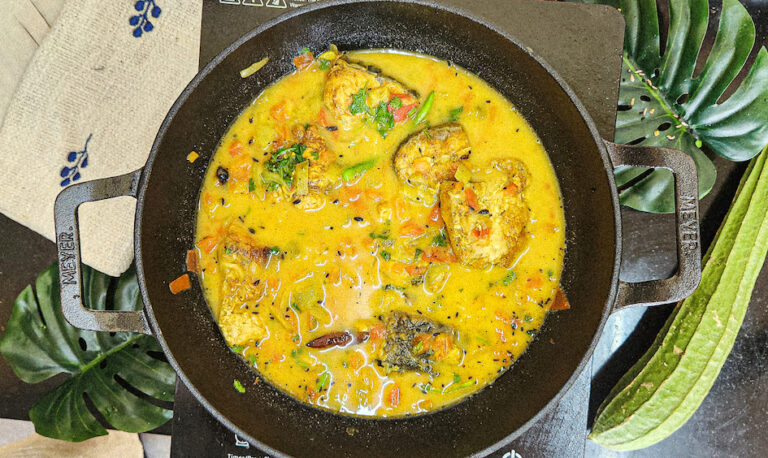
Summer in Assam brings with it the comforting aroma of Masor Tenga, a traditional fish curry that’s as vibrant as it is delicious. This recipe, passed down through generations, combines the freshness of fish with the tanginess of tomatoes and lime, creating a symphony of flavors that is sure to tantalize your taste buds.

Let’s dive into this culinary journey and learn how to make Masor Tenga, perfect for any summer meal.

Preparation time – 30 minutes

Cook time – 40 minutes

Serves – 4

[ingredients title=”Ingredients”]

  • 500g rohu fish
  • 1 tbsp salt
  • 1 tbsp turmeric powder
  • 4 tbsp mustard oil

For the curry:

  • 1 tbsp mustard oil
  • 2 dried red chillies
  • 1 tsp panchphoran
  • 1/4 cup finely sliced onions
  • 2 cups finely chopped tomatoes
  • 2 cups ridge gourd, finely chopped
  • 2 cups hot water
  • Salt to taste
  • 1/4 tsp turmeric powder
  • 2 slit green chillies
  • 4 tbsp lime juice
  • Finely chopped coriander for garnish [/ingredients]

[directions title=”Directions”]

  1. Prepare the Fish: Begin by washing the rohu fish pieces thoroughly and patting them dry with a kitchen towel. Marinate the fish with salt and turmeric powder, ensuring each piece is coated evenly. In a pan, heat 4 tbsp of mustard oil and fry the fish pieces until they turn golden brown and are 80% cooked. Set aside.
  2. Prepare the Curry Base: In the same pan, add another tablespoon of mustard oil and heat it. Once hot, temper the oil with dried red chillies and panchphoran. Add finely sliced onions and sauté them until they turn golden brown.
  3. Add Tomatoes and Spices: Add the finely chopped tomatoes to the pan and cook until they soften and blend into a thick paste. Season with salt and turmeric powder, stirring well to incorporate the flavors.
  4. Incorporate Vegetables: Now, add the finely chopped ridge gourd to the pan and sauté for a minute, allowing the flavors to meld together. Pour in 2 cups of hot water and cover the pan. Allow the vegetables to cook until they are completely soft and well-cooked.
  5. Final Cooking: Once the vegetables are tender, increase the heat and let the curry come to an aggressive boil. Add the fried fish pieces to the curry, cover the pan, and let it simmer on low flame for about 15 minutes or until the curry reaches your desired thickness.
  6. Finishing Touches: Turn off the flame and adjust the salt if needed. Garnish the Masor Tenga with slit green chillies and finely chopped coriander leaves. Wait for a minute before drizzling 4 tbsp of lime juice over the curry. Gently mix everything together to ensure the flavors are well combined.
  7. Serve: Masor Tenga is best enjoyed hot, served alongside steamed rice. The tangy and savory flavors of this Assamese delicacy are sure to leave you craving for more. [/directions]

masor tenga

masor tenga

You can follow me on Facebook, Instagram, Twitter, and YouTube for more food-related content and updates that excites you to try something new every day.

Assamese Bilahi Ombol | Bilahi Tok | Assamese Tomato Chutney

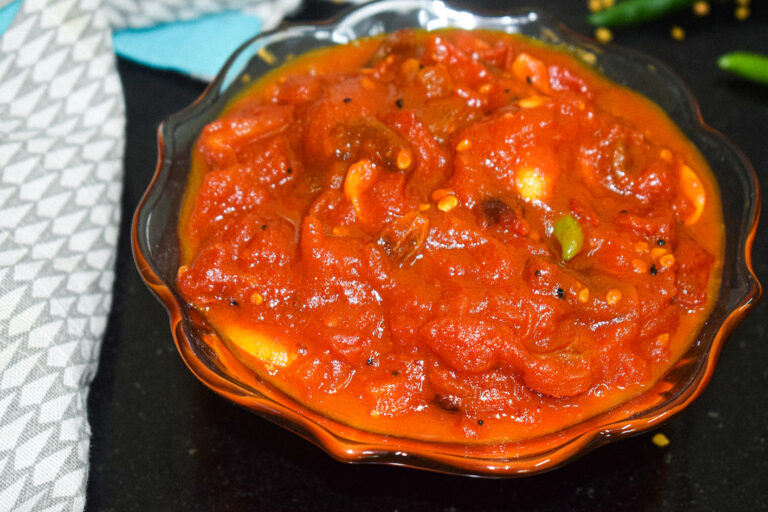
Assamese cuisine is renowned for its vibrant flavors and unique combinations of spices. One such delightful dish is an Assamese BILAHI OMBOL or BILAHI TOK, a tangy and sweet tomato chutney infused with traditional Assamese spices and jaggery. This chutney perfectly balances the heat of red and green chillies with the sweetness of ripe tomatoes and jaggery, making it a versatile accompaniment for various meals. Let’s dive into the recipe and bring a taste of Assam to your table!

Preparation time – 30 minutes

Cook time – 40 minutes

Serves – 4

[ingredients title=”Ingredients”]

  • 500g ripe tomatoes
  • 3 tbsp mustard oil
  • 2 cardamom pods
  • 3-4 dried red chillies
  • 3-4 slit green chillies
  • 1 tsp panchphoran (Assamese Spice Mix)
  • 1/4 cup cashews
  • 1/4 cup raisins
  • 3/4 cup jaggery
  • Salt to taste
  • 1/2 tsp turmeric powder [/ingredients]

[directions title=”Directions”]

  1. Prepare Tomatoes: Clean the tomatoes thoroughly and cut them into medium-sized chunks.
  2. Temper Spices: Heat mustard oil in a kadhai or deep pan over medium heat. Add dried red chillies, cardamom pods, slit green chillies, and panchphoran. Let them sizzle for a few seconds to release their flavors.
  3. Cook Tomatoes: Add the chopped tomatoes to the pan. Stir well to coat them with the spices and oil. Cook for about 5 minutes until the tomatoes start to soften and release their juices.
  4. Add Cashews and Raisins: Once the tomatoes begin to melt, add cashews and raisins to the pan. Mix them gently with the tomatoes.
  5. Seasoning: Season the mixture with salt and turmeric powder. Stir to combine all the ingredients evenly.
  6. Cooking with Jaggery: When the tomatoes are completely soft and excess water has evaporated, add the jaggery to the pan. Mix everything thoroughly to ensure the jaggery blends well with the tomatoes and spices.
  7. Simmer: Cover the pan and let the chutney simmer on low heat for another 5 minutes. This allows the flavors to meld together and the chutney to achieve a rich, dark color.
  8. Final Touch: Uncover the pan and give the chutney a final stir. Check for seasoning and adjust if needed.
  9. Serve: Your delicious Assamese BILAHI OMBOL/BILAHI TOK is ready to be enjoyed! Serve it hot with rotis, pooris, or alongside steaming khichdi for a delightful meal. [/directions]

assamese bilahi ombol

You can follow me on Facebook, Instagram, Twitter, and YouTube for more food-related content and updates that excites you to try something new every day.

Assamese Mosur Dali | Masoor Dal Assamese Style

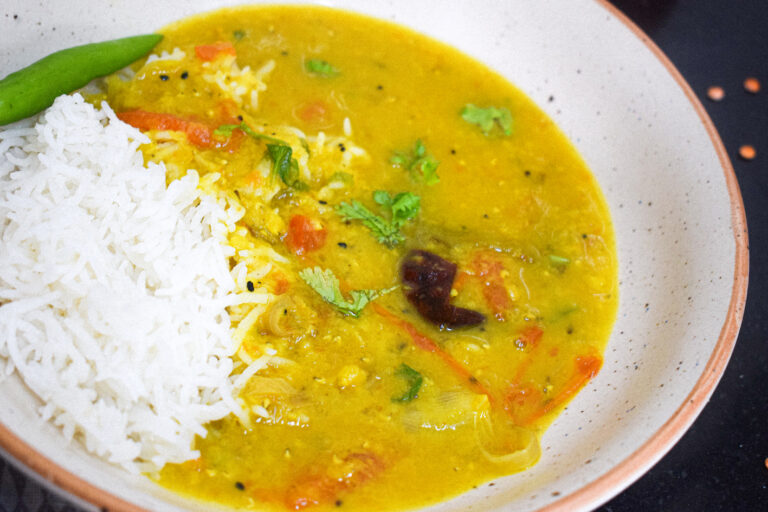
Welcome to my kitchen! Today, I’m excited to share my personal favorite Assamese recipe, Mosur Dali or Masoor Dal. This dish is a perfect blend of flavors and textures, bringing comfort to your table, especially when paired with steamed rice. Let’s dive into the delightful world of Assamese cuisine!

Preparation time – 30 minutes

Cook time – 20 minutes

Serves – 3

[ingredients title=”Ingredients”]

  • 1/2 cup masoor dal
  • Salt to taste
  • 1/2 tsp turmeric powder
  • 3 cups water
  • 1 large tomato, cut into chunks
  • 2 green chillies, slit in half
  • 2 bay leaves
  • 3 tbsp mustard oil
  • 2 dried red chillies
  • 1 tsp panchphoran
  • 1 medium onion, thinly sliced
  • 1 tsp ginger garlic paste
  • Finely chopped coriander leaves for garnish [/ingredients]

[directions title=”Directions”]

  1. Prepare the Dal: Start by soaking the masoor dal in water for about 30 minutes. After soaking, rinse the dal well under cold water until the water runs clear.
  2. Pressure Cook the Dal: In a pressure cooker, combine the soaked dal, salt, turmeric powder, slit green chillies, tomato chunks, and 3 cups of water. Close the lid and pressure cook for about 3-4 whistles or until the dal is soft and cooked through.
  3. Temper the Spices: In a separate kadhai or pan, heat the mustard oil over medium heat. Once the oil is hot, add the panchphoran, dried red chillies, and bay leaves. Let them splutter and release their aroma.
  4. Saute Onions and Aromatics: Add the thinly sliced onions to the tempering spices and sauté until they turn golden brown and caramelized. Add the ginger garlic paste and continue to sauté until the raw smell disappears, and the mixture is aromatic.
  5. Combine the Dal: Once the onions are golden and the aromatics are well sautéed, add the cooked dal to the kadhai. Bring it to an aggressive boil, stirring occasionally to mix all the flavors together.
  6. Adjust Consistency and Garnish: Adjust the consistency of the dal by adding more water if needed, based on your preference. Once you reach your desired consistency, turn off the heat and garnish the Mosur Dali with finely chopped coriander leaves.
  7. Serve Hot: Your delicious Assamese Mosur Dali is now ready to be served! Ladle the dal into serving bowls and enjoy it hot with steamed rice. The comforting flavors of this dish will surely delight your taste buds. [/directions]

assamese mosur dali

This Assamese Mosur Dali recipe is a celebration of simple ingredients and traditional cooking techniques, resulting in a wholesome and flavorful dish that’s perfect for any meal. Try it out and savor the essence of Assamese cuisine!

You can follow me on Facebook, Instagram, Twitter, and YouTube for more food-related content and updates that excites you to try something new every day.

Assamese Recipe: Maati Daali

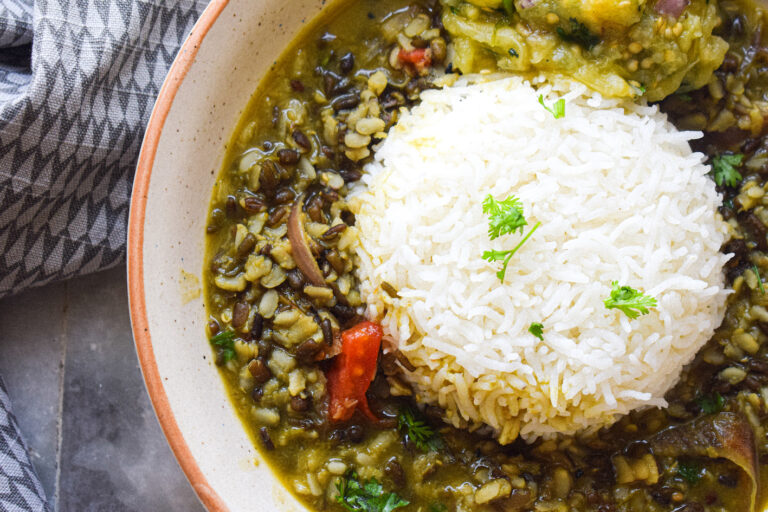
Maati Dali, a traditional Assamese dish, offers a glimpse into the rustic flavors of Assam. Made with spilt urad dal, this dish is simple yet packed with delightful tastes. The earthiness of the dal, combined with the aromatic tadka, creates a comforting meal that pairs perfectly with steaming rice. Let’s delve into the recipe and savor the essence of Assamese cuisine.

Preparation time – 60 minutes

Cook time – 20 minutes

Serves – 4

[ingredients title=”Ingredients”]

For the pressure cooker:

  • 1 cup urad dal, soaked in water for at least 1 hour
  • 1 tbsp salt (or as per your taste)
  • 1-2 green chilies
  • 4 cups water

For the tadka:

  • 3 tbsp mustard oil
  • 2 dried red chilies
  • 2 bay leaves
  • 1 tsp panchphoran (Assamese five spice mix)
  • 1 large onion, thinly sliced
  • 1 tsp ginger paste
  • 1 large tomato, cut into small cubes
  • 1/4 tsp turmeric powder
  • Chopped coriander leaves for garnish [/ingredients]

[directions title=”Directions”]

  1. Soak the maati dali or spilt urad dal for at least one hour. Rinse well and pressure cook for 2-3 whistles with salt, water, and green chilies.
  2. Heat mustard oil in a kadhai. Once it starts to smoke, temper with dried red chilies, bay leaves, and panchphoran.
  3. Add the onions and fry till they turn golden brown.
  4. Add the ginger paste and cook till its rawness fades completely.
  5. Add the tomatoes and cook till they melt and assimilate well with the onions.
  6. Sprinkle turmeric powder and mix well.
  7. Pour the boiled dal into the kadhai, mix it well, and let it come to a roaring boil.
  8. Once you reach your desired consistency, turn off the flame and garnish with chopped coriander leaves.
  9. Serve with steaming rice and enjoy the rustic Assamese flavors. So simple, so minimal, and so good.  [/directions]

maati dali

Enjoy the wholesome goodness of Maati Dali, a dish that celebrates the authentic flavors of Assam.

You can follow me on Facebook, Instagram, Twitter, and YouTube for more food-related content and updates that excites you to try something new every day.

Boror Tenga Recipe

Boror Tenga is a traditional Assamese delicacy that tantalizes the taste buds with its perfect blend of flavors and textures. This dish combines crispy fritters made from masoor dal with a tangy and spicy curry, creating a symphony of taste that is both comforting and satisfying. Bursting with aromatic spices and fresh ingredients, Boror Tenga is a culinary masterpiece that promises to elevate your dining experience. Let’s dive into the recipe and unlock the secrets of this delectable Assamese delight.

Preparation time – 30 minutes

Cook time – 30 minutes

Serves – 2

[ingredients title=”Ingredients”]

For the Bor/Fritters:

  • 1/2 cup masoor dal
  • 1/4 cup chopped onions
  • 1 tbsp finely chopped green chillies
  • Salt to taste
  • 1/2 tsp ginger paste
  • 1 cup mustard oil (for frying)

For the Tenga (Curry):

  • 2 tbsp mustard oil
  • 3 dried red chillies
  • 2 bay leaves
  • 1 tsp panchphoran (Assamese five spice mix)
  • 1/2 cup chopped onions
  • 1 cup chopped tomatoes
  • 2 small boiled potatoes, mashed
  • Salt to taste
  • 1/2 tsp turmeric powder
  • 2 tbsp lime juice
  • 1-2 slit green chillies
  • Chopped coriander leaves for garnish [/ingredients]

[directions title=”Directions”]

  1. Soak masoor dal in water for 1-2 hours. Rinse well and grind to a fine paste with ginger.
  2. Add chopped onions, green chillies, and salt to the ground paste. Mix well.
  3. Heat oil in a pan and make small fritters on medium heat till they are golden brown and cooked uniformly on the inside. Set the bor aside for later.
  4. Heat mustard oil in a kadhai. Once it starts to smoke, temper the oil with panchphoran, bay leaves, and dried red chillies. Mix quickly.
  5.  Add the onions and sauté till they are translucent.
  6.  Add the tomatoes and cook till they soften. Season with salt and turmeric powder. Mix well till the tomatoes melt.
  7.  Roughly mash two boiled potatoes and add them to the tomatoes. Mix well.
  8.  Pour hot water over it and let it all come to a boil.
  9.  Once the water starts to boil, dunk the bor or fritters and let them cook for 5 minutes.
  10.  Pour lime juice on top just before serving, along with slit green chillies and chopped coriander leaves.
  11.  Enjoy Boror Tenga with some hot rice for a delightful Assamese culinary experience.  [/directions]

boror tenga

This Boror Tenga recipe captures the essence of Assamese cuisine, blending traditional flavors to create a memorable dining experience. Whether you’re exploring new cuisines or seeking comfort in familiar tastes, Boror Tenga promises to delight your palate and leave you craving for more.

You can follow me on Facebook, Instagram, Twitter, and YouTube for more food-related content and updates that excites you to try something new every day.

 Assamese Style Cabbage Potato Fry

This Assamese Style Cabbage Potato Fry recipe is the perfect example to prove that Indian recipes aren’t as complicated and as time consuming as they are widely believed. It takes less than 30 minutes to whip up this delicious, fresh, and wholesome vegan Indian dish. Just like all Assamese vegetable stir-fries, this cabbage fry is also very simple and quick and devoid of tomatoes or excessive spices. We do not even use too much of red chilli powder in our cooking which helps most vegetable fries acquire a very subtle and simple flavour. It is super easy to put together as well as digest.

Cold Pressed Mustard oil is the medium of cooking in most Assamese and northeastern parts of India. It is a pungent and spicy oil with lends its own flavour to the stir-fries and curries. Tempered with dried red chilli and nigella seeds, it has a beautiful and subtle flavour throughout, and the roasted potatoes go perfectly well with the cabbage and add that element of satiety. You don’t need much. Just a few spices, oil, veggies, salt. You toss everything around, let it steam in its own juices, and you are done.

assamese style cabbage potato fry

assamese style cabbage potato fryThis recipe is extremely versatile and you can add more vegetables like peas or carrots or completely replace cabbage and potatoes with any vegetables of your choice and have yourself a brand new delicious dish. Cabbage is also an extremely healthy vegetable packed with nutrients and vitamins. It also assists in weight loss. Cabbage might not be your favourite vegetable but you make it this way and you’ll change your mind! Known as patta/bandh gobhi aloo sabzi in India, it’s easy, fresh, and wholesome. This is a perfect vegetarian delight to pair up with a bowl of hot rice and dal to take your comfort meal up a notch.

It is also important to cut the vegetables for the stir fry appropriately. Slice the cabbage as thin as possible and cut the potatoes into thin ¼ inch strips. Since cabbage cooks very quickly and potatoes take time, larger potato strips might leave you with cooked cabbage and raw potatoes. 

Why make this stir-fry?

  • Super quick and easy to make.
  • Needs the most basic off-the-shelf ingredients found easily in your pantry.
  • A versatile and adaptable recipe that can be recreated with any other vegetables. 
  • Super healthy and nutritious.
  • Foolproof
  • Extremely flavourful.

assamese style cabbage potato fry

Preparation time – 15 minutes

Cook time – 30 minutes

Serves – 3

[ingredients title=”Ingredients”]

  • 1 medium cabbage – shredded/thinly sliced
  • 2 medium onions – thinly sliced
  • 3 medium potatoes – cut into medium strips
  • 1 dried red chilli
  • 1 tsp. Nigella seeds/kalonji/kaljeera
  • 1 tsp. Fresh ginger paste
  • ¼ tsp. Turmeric powder
  • 1 tsp cumin powder
  • 2 tsp coriander powder
  • Salt to taste
  • Fresh coriander leaves for garnish [/ingredients]

[directions title=”Directions”]

  1. Take a fresh medium cabbage and start by removing the stem. Cut it in half, locate the stem which is slightly harder than the rest of the cabbage and make a triangular cut to get rid of the stem.
  2. Cut each of the halves into further halves and begin slicing. Slice as thin and even as possible and keep aside.
  3. Peel and wash your potatoes. Slice the potatoes into ¼th inch slices and then cut them into medium thick strips.  If the potato strips are too thick, you will end up with uncooked potatoes and cooked cabbage.
  4. Put the potato strips in a bowl of clean water for 5 minutes to get rid of the excess starch. 
  5. Now get your onions and cut them into thin slices.
  6. Once the vegetables are nicely chopped, heat a pan over medium heat.
  7. Add mustard oil to the pan and let it heat till it smokes.
  8. Once the oil is well heated, throw in the nigella/kalonji/kaljera seeds and the dried red chili.
  9. Saute for a few seconds.
  10. Add in your thinly sliced onions and saute them with the tempering, stirring occasionally to ensure they cook evenly.
  11. When the onions begin to become slightly golden-brown, add in your fresh ginger paste. Combine well and let it cook for another minute or two.
  12. Once the onions become softer, through in the potatoes.
  13. Stir for a minute and then add the thinly shredded cabbage.
  14. Turn the heat down to low and stir well to combine everything.
  15. Cover and allow it to cook on low flame for about 5 minutes.
  16. Keep the flame low throughout the process. 
  17. It is now time to add in our powdered spices. Season your stir-fry with coriander powder, cumin powder, turmeric powder, and salt.
  18. Give it a very good mix and make sure everything is well combined with the spices.
  19. Cover again and cook on low flame till the cabbage is tender.
  20. Take off the lid and give it a good mix, check if the potatoes are done.
  21. Cover it again for another 5 minutes and let it cook on low flame.
  22. Turn off the heat and mix it well and voila! There you have your simple yet flavourful Assamese style cabbage potato stir fry ready to be enjoyed in less than 30 minutes. [/directions]

assamese style cabbage potato fry

This is definitely one of my most favourite stir-fries. Serve it with a hot bowl of plain or tadka dal and a steaming plate steamed or jeera rice or simply pair it up with plain phulkas to whip yourself a plate of delicious comfort food filled with the goodness of health. I hope you try this recipe and fall in love with it.

Feel free to reach out for feedback, suggestions or connect with me on Instagram or Facebook. Subscribe to my YouTube channel for all my videos and upcoming recipes.

Bhog Khichri

Bhoger Khichuri or Bhog khichri is a traditional recipe, packed with flavours and a heavenly aroma that fills Bengali and Assamese houses around the time of Durga Puja and Saraswati Puja. Where in some houses Bhog Khichri is prepared with utmost love and dedication, with a personally curated recipe, it is something we look forward to having all year at the Puja pandals, along with Niramish labra (mix veg), paayokh (kheer), begun bhaja (eggplant fritters) and bilahi ombol (sweet and sour tomato chutney). This bhog khichri is my most favourite meal on the planet and sharing this recipe with you all is like sharing a piece of my culture, childhood and nostalgia.

It is not your ordinary khichri; it is a recipe that requires technique and patience. We do not use the pressure cooker to make this recipe. It takes time to cook but is absolutely worth every second. It tastes divine. We do not add onion and garlic to this khichri as it is a bhog recipe. However, following this recipe and using a handful of flavoursome spices, ingredients and condiments to curate this quintessential Bhog Khichri right in your kitchen.  

bhog khichri

bhog khichri

This Bhoger Khichuri prepared by cooking rice and moong dal along with spices and vegetables is hearty, delicious, nourishing and nothing short of a perfect comfort meal.

Ingredients in this Bhog Khichri

There is a long list of ingredients that goes into making this divine recipe and it is worth every effort. However, let’s look at the key ingredients of this khichdi:

  • Rice

This Bhog Khichri calls for a special rice – gobingbhog rice/joha rice/aromatic broken basmati rice and cannot be made using any ordinary rice. It is a short grain, white, aromatic, sticky rice having a sweet buttery flavour.

  • Moong Dal

Moong Dal or yellow lentil is one of the healthiest and flavourful dal that there is. Traditional Bhog Khichri is always prepared with moong dal. The dal and the rice are washed separately and are not mixed until the frying stage. The moong dal is also roasted and since it takes longer than the rice to cook, it is soaked separately for at least an hour.

  • Garam Masala and Ghee

Garam masala plays a major role in flavouring this khichri as it lacks any pungent condiment such as onion or garlic. Adding whole garam masalas in the beginning to the tempering as well as topping with garam masala powder and ghee at the end ensures maximum flavour.

  • Vegetables

Vegetables add extra flavour and bite to this bhog khichri. As this is a slow cooked recipe, cutting vegetables slightly bigger is advisable to prevent them from getting mashed in the khichri.

bhog khichri

bhog khichri

Here’s the recipe:

Preparation time – 20 minutes

Cook time – 45 minutes

Serves – 6

[ingredients title=”Ingredients”]

  • 1 cup yellow moong dal
  • 1 cup gobingbhog rice/joha rice/aromatic broken basmati rice
  • 4 tablespoons vegetable oil
  • 3 tablespoons mustard oil
  • 200g potatoes cut into big chunks
  • 1 small cauliflower cut into florets
  • 1 teaspoon ginger
  • 2 cloves
  • 2 cardamom
  • 2 small tomatoes cut into cubes
  • 4 slit green chilies
  • 1 inch cinnamon
  • 3 dried red chillies
  • 3 bay leaves
  • 1 teaspoon cumin seeds
  • ¼ cup grated coconut
  • ½ teaspoon turmeric powder
  • 1 teaspoon cumin powder
  • 4 – 5 cups of hot water (adjust if required later)
  • ¼ cup peas
  • 1 teaspoon ghee
  • ½ teaspoon garam masala powder
  • 1 teaspoon sugar
  • Salt to taste [/ingredients]

[directions title=”Directions”]

  1. Wash the rice thoroughly and set it on a strainer to dry.
  2. Heat a pan on medium flame, and dry roast the moong dal stirring occasionally (prevent from sticking to the base) for about 4-5 minutes.
  3. Wash it well and set it on a separate strainer to dry as well.
  4.  Heat some oil in a pan and add the rice.
  5. Lightly fry the rice for a few minutes and set aside.
  6. In the same pan heat some more oil and fry the potatoes till their sides turn brown.
  7. In the same pan, fry the cauliflower florets till the top turns golden brown.
  8. Now, in a deep dish, heat the mustard oil.
  9. To the hot oil, add the whole spices – cumin seeds, cloves, cardamom, cinnamon, dry red chilies, and bay leaves.
  10. Fry the whole spices for a few seconds then add the ginger paste.
  11.  To the ginger paste add the cumin powder, sugar, turmeric powder and cook the spices for a few seconds.
  12.  Add in the grated coconut and mix till well combined.
  13.  Add ¼ cup of hot water to homogenise the spices and cook for a while.
  14.  To this, add the fried uncooked rice and the roasted soaked dal.
  15.  Give it a good mix and combine the rice and dal with all the spices.
  16.  Add about 4.5 cups of hot water and mix thoroughly.
  17.  Add in the tomato cubes, fried potatoes, green chilies, peas and fried cauliflower florets.
  18.  Mix everything thoroughly.
  19.  Cook on high flame, stirring occasionally till the rice and dal are about 20-30% done.
  20.  Turn the heat down to low. Cover and cook for about 30 minutes.
  21.  Take the lid off and add the garam masala powder and mix it in.
  22.  Finish it off with salt to taste and ghee.
  23.  Cook for a few more minutes, stirring till it reaches desired consistency. [/directions]

bhog khichri

bhog khichri

Follow this fool proof recipe to make a hearty batch of this comfort meal for yourself and indulge in some divine deliciousness. You’re going to love it.

Feel free to reach out for feedbacks, suggestions or connect with me on Instagram or Facebook. Subscribe to my YouTube channel for all my videos and upcoming recipes.

Chicken with Bamboo Shoot(Dry) | Khorisa dia Murgir Mangso

Authentic Assamese dishes are my all-time favourite because they remind me of my roots and my home. Having a knick for experimenting with food and an undying love for home cooked meals, I do have my versions of several of my favourite authentic dishes; one of these dreamy experiments is this righteous Khorisa dia Murgir Mangso or Chicken with Bamboo Shoot recipe. This is a spicy, flavourful and extremely delicious dry chicken dish (which can easily be curried) made with minimal spices and a very flavourful variety of bamboo, constituting for a perfect dinner for the days you’re missing home a little too much. Once you try it with hot roti, naan or a piping hot bowl of steamed rice, there’s no going back; you will absolutely fall in love with everything about it. 

I understand how trying bamboo can be new and slightly scary for many of us. However, I am going to make sure that all these doubts disappear after you finish reading this and making this dish for yourself; just stay with me here. 

What is Bamboo Shoot?

Bamboo shoots or bamboo sprouts are the edible parts of the many different species of bamboo plants. These are used as vegetables in several Asian recipes, basically constituting a unique powerful and pungent flavour to the curries and broths, upping your overall curry game. 

chicken with bamboo shootBamboo shoots are edible when they’re young as they tend to harden as they mature. Monsoon is just round the corner and it is the best time to get your hands on some perfect tender bamboo shoots, however nowadays you can easily find bamboo in grocery stores any time of the year. Tender bamboo shoots that are collected, are defoliated, soaked in water for 2-3 days, then are boiled in water to remove its bitter taste after which it is ready for consumption, to go into a dish. The water used to cook fresh bamboo is discarded as it tastes bitter & unpleasant. These tender fresh bamboo shoots are then used in cooking. But again, you can find defoliated toxin free bamboos in stores easily these days, boil it and it’s good to go!

Ingredients in this Chicken With Bamboo Shoot

The ingredients of this recipe are so minimal; it’s almost unbelievable how it turns out to be so flavourful and fragrant. You can get almost everything at home, even bamboo shoots if you’re lucky, but what’s one quick trip to the grocery store in exchange of a wholesome comfort meal? Now, let’s look at the heroes, i.e. key ingredients: 

  • Khorisa or Bamboo Shoot

As the name suggests, Bamboo Shoot is the star of this dish, a powerful and pungent ingredient responsible for elevating several Asian dishes. In this recipe I use Khorisa, which is an ethnic fermented bamboo shoot product of Assam. It is generally made from young edible bamboo shoots of Bambusa balcooa ( Bholuka Bah) and Dendrocalamus hamiltoni (Kako/Pecha Bah).

chicken with bamboo shoot

chicken with bamboo shoot

These are fermented and after discarding the excess water and can then be stored in jars for almost a year and is known as poka Khorisa. The fermentation adds up to the pungent and strong sour flavour making it a beautiful addition to spicy curries. It can be dried in the sun to make Hukan Khorisa, used in curries and recipes like this one or be simply mixed with some mustard oil, chillies and salt to make pickles.

  • Chicken

For the chicken in this recipe, I have used a whole chicken in curry cut. You can make this with any kind of cut you prefer, even boneless. Because this is a traditional recipe usually made with local chicken varieties, making it with bones helps give more flavour to the recipe.

  • Mustard oil

The fat we use to cook our dishes makes a huge difference to the overall taste of it. Mustard oil is a strong, bitter oil slightly tending towards the hotter side of the spectrum. It enhances the flavour of curries and is the base of majority of authentic desi cuisines. Mustard oil with bamboo shoots is an absolute fool proof combination, be in curries or pickles.

  • Dry Spices

You need the most basic off the shelf spices that are found in all Indian kitchens like turmeric, coriander, salt and pepper. The taste would enhance if these spices are lightly roasted and freshly ground at home. Store bought spices do not lend the flavours fresh spices do.

chicken with bamboo shoot

chicken with bamboo shoot

Let’s take a look at the recipe:

Preparation time – 20 minutes

Cook time – 45 minutes

[ingredients title=”Ingredients”]

  • 3 tbsp mustard oil
  • 2 cups finely sliced onions
  • 1 tbsp fresh ginger paste
  • 2 green chillies, slit in half (add more if you want it spicy)
  • 2 tsp garlic paste
  • Salt to taste
  • 1 tsp turmeric powder
  • 1 tsp coriander powder
  • 1 tsp black pepper powder
  • 500 g chicken, curry cut
  • 1 cup bamboo shoot, finely sliced or chopped
  • 1 cup hot water
  • 1/2 tsp garam masala  [/ingredients]

[directions title=”Directions”]

  1. Heat some mustard oil in a deep pan.
  2. Add the sliced red onions and is cook it in two phases. Phase 1- Till the onions turn translucent. Phase 2- Till the onions completely turn brown.
  3. Once the onions are completely brown, add in the ginger paste, the slit chillies and the garlic paste. Mix well and cook till the raw smell of garlic is gone.
  4. At this point add in the salt and turmeric and cook for a few minutes.
  5.  Now add the rest of the dry spices- coriander and black pepper powder, and cook for another few minutes.
  6. Add a splash of water to help the spices cook better and homogenise in the mixture.
  7. Now, add in the chicken and cook it on high flame, stirring every so often.
  8. Once the chicken in almost half cooked, add in the bamboo shoot and mix.
  9. Add in the hot water. I am adding 1 cup for this recipe as it is a dry variation, however you can adjust the quantity of water depending on how much gravy you’d like.
  10. Cover and cook on low flame for 20 minutes.
  11. Take off the lid and give it one last mix before serving it hot with some plain roti, naan or steamed rice. [/directions]

chicken with bamboo shoot

chicken with bamboo shoot

This is one of my favourite comfort meals and you should definitely try it if you’re new to bamboo or just craving a hot plate of filling wholesome meal. 

Feel free to reach out for feedbacks, suggestions or connect with me on Instagram or Facebook. Subscribe to my YouTube channel for all my videos and upcoming recipes.

Ghugni

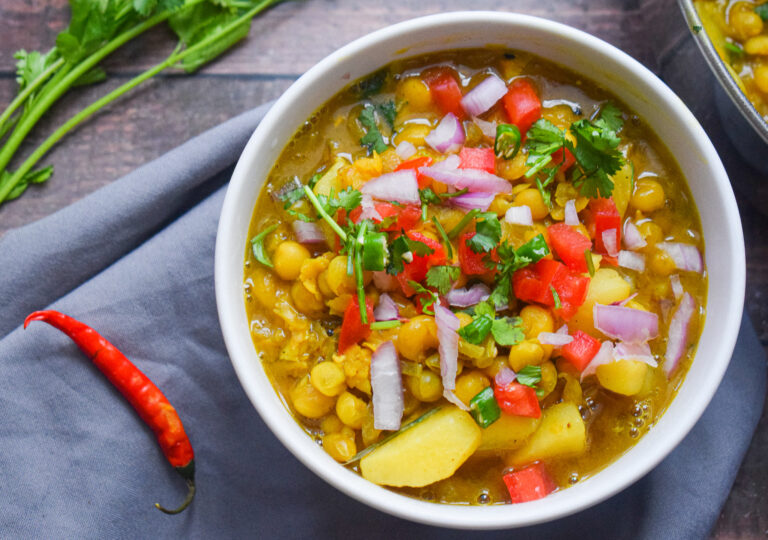
Some recipes have a special place in all our hearts. One look at it takes us home. And ghugni definitely makes it to the top of that list for me. For those who are not familiar, ghugni is a light curry made with yellow peas. It is wildly popular as a street food in Assam and West Bengal. It can be made as a dry snack or a curry, depending on what you are serving it with. My earliest memories of ghugni take me to Sundays when breakfast would be ghugni with lusi (Assamese deep fried flatbread). Or during Durga Puja pandal hopping when street vendors would be selling steaming types of ghugni topped with onions, chillies and coriander.

This ghugni recipe is my version with some potatoes that goes really well with rotis, parathas or luchi/lusi. You can also eat it as a snack with toppings of your choice. You can even make a ghugni chat out of it with by sprinkling some chat masala on top, along with onions, green chillies, mint and coriander.

Steps to Make the Perfect Ghugni

Here are some steps to make sure you are well prepared to make the perfect tasting ghugni. This recipe is very simple and easy, but taking care of these few things are essential.

  • Soak the peas overnight

Yellow peas are hardy and need a lot of soaking to cook uniformly. It is absolutely essential to soak them for a minimum of 12 hours before you decide to make them. I usually soak them overnight so that I can prepare this ghugni recipe for breakfast or lunch.

  • Add salt while pressure-cooking

Adding salt while pressure-cooking yelow peas (or any legumes for that matter) is very important as it helps ensure that the legumes also get seasoned uniformly (and not just the stock). Do not skip this step.

ghugni

ghugni

  • Use fresh spices

A few spices go into the making of this ghugni recipe that lends it a distinct set of flavours, aroma, and taste. To get the best out of this recipe, I recommend you keep your spices as fresh as possible. By fresh I mean get the whole spices and grind them at home instead of using store-bought masalas. Trust me, there is nothing simpler you can do to make your food taste stunning every single time. This is the best tip for making any recipe taste gorgeous! I make a big batch of spices every month at my home – be it cumin, coriander, or garam masala! The fresh spices elevate the taste and quality of recipes to a whole new level.

  • Cook the masala well

This base of this ghugni recipe is a mixture of onions, ginger, garlic, and some wonderful spices. It’s important to be a little patient and cook the masala through. This requires a few minutes of slow cooking until you see the oil release from the sides. The last thing you want in your ghugni is the smell of raw onions, ginger or garlic. A little investment in terms of time, but the results are absolutely worth it.

ghugni

ghugni

Now that you know all the secrets to making the perfect ghugni, let’s take a look at the recipe.

Preparation time – 30 minutes

Cook time – 40 minutes

Serves – 4

[ingredients title=”Ingredients”]

  • 200 yellow peas/white peas, soaked in water overnight
  • 1 tbsp salt
  • 900 ml water
  • 200 g potatoes, cut into cubes
  • 30 ml mustard oil
  • 2 bay leaves
  • 2 dried red chillies
  • 2g nigella seeds (kalonji)
  • 200 g onions, finely chopped
  • 4 g sugar
  • 2 chillies, cut into four parts
  • 15g ginger-garlic paste
  • Salt to taste, for the masala
  • 4g turmeric powder
  • 4g cumin powder
  • 4g black pepper powder
  • 4g coriander powder
  • 80ml hot water
  • Fresh coriander, 2 tbsp
  • 2g garam masala
  • More fresh coriander, for garnish
  • Finely chopped tomatoes, for topping
  • Finely chopped onions, for topping
  • Finely chopped green chillies, for topping
  • Finely chopped coriander, for topping [/ingredients]

[directions title=”Directions”]

  1. Soak the peas in room temperature water overnight. Wash and keep ready before cooking.
  2. Add the peas to a pressure cooker. Add the potatoes, salt and water. Give it a light mix with a spoon. Pressure cook for 7-8 whistles (or till peas are cooked).
  3. Heat mustard oil in a skillet or kadhai. Once it heats up, it will smoke and acquire a pale colour. Lower the flame and temper the oil with bay leaves, dried red chillies and nigella seeds or kalonji. Stir for three seconds.
  4. Add the finely chopped onions. Increase the flame to medium. Stir for 3-4 minutes till the onions start to turn brown. Do not burn.
  5. Add some sugar. The sugar will help the onions caramelise faster also add a little bit of sweetness to the curry.
  6. Add the ginger-garlic paste and stir till its raw aroma fades completely.
  7. Season with salt, turmeric powder, cumin powder, coriander powder and black pepper powder. Stir for a minute or two on low flame. Add a little but of water from the stock to prevent the masala from sticking to the pan.
  8. Add some fresh coriander leaves and mix it into the masala.
  9. Pour the boiled chickpeas along with the stock and mix well. Let the curry come to an aggressive boil.
  10. Once you have achieved your desired consistency, add some garam masala and mix.
  11. Your ghugni is ready. Pour onto a bowl and garnish with finely chopped tomatoes, onions, green chillies and coriander. Serve hot as it is or pair it with parathas or luchi/poori. [/directions]

ghugni

I hope you try this delicious and super easy ghugni recipe soon. It is entirely vegan and a healthy option for breakfast, lunch or dinner!

If you have any doubts, comments, or feedback, please reach out to me in comments or my social media handles.

Find me on Instagram – www.instagram.com/slurrpilicious

Find me on Facebook – www.facebook.com/slurrpilicious

Find me on Youtube – https://www.youtube.com/channel/UCA-cJoo27OLSCswI4sy6lzA?

Happy cooking!

One Pot Yellow Moong Dal

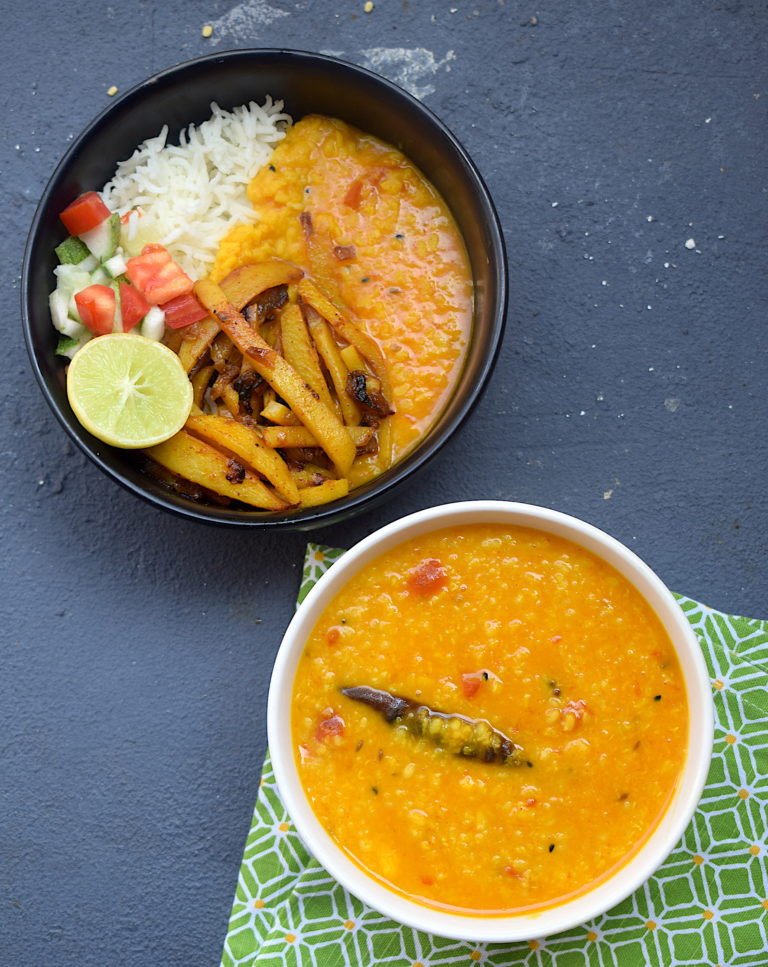
Try out this 30-minute yellow moong dal recipe and never go hungry again! I have been making this dal for years now, and it is a regular in my kitchen. Super simple and loved equally by all, this vegan dal is a crowd pleaser. Make this along with some rice and potato fry and you have a winning combo! I love cooking with yellow moong dal since it takes no time to get ready.

The key differentiator here is the panchphoran. For those new to this term, panchphoran is a Bengali five spice mix which is easily available in any Indian grocery store. You can make your own by mixing equal portions of the following whole spices – fennel seeds (saunf), mustard seeds (rai), fenugreek seeds (methi), cumin seeds (jeera) and nigella seeds (kalonji).

yellow moong dal

yellow moong dal

The ingredients in this vegan yellow dal are minimal, but the results are absolutely amazing. A hearty and comforting dal recipe ready to go in minutes. Here’s the recipe:

Preparation time – 10 minutes

Cook time –  30 minutes

Serves – 3-4 people

[ingredients title=”Ingredients”]

  • 200 g yellow moong dal
  • 2 tbsp mustard oil
  • 1 tsp panchphoran
  • 1 dried red chili
  • 1 tomato, finely chopped
  • 1 tsp crushed garlic
  • 1 tsp turmeric powder
  • 500 ml of water
  • 1 tsp Kashmiri red chili powder
  • Salt to taste [/ingredients]

[directions title=”Directions”]

  1. Thoroughly wash the yellow moong dal. Soak it in water for ten to fifteen minutes. This will help cook them faster and also get rid of preservatives or color if any. Set it aside once done.
  2. Heat mustard oil in a pressure cooker. Allow the heat to release smoke and turn into a pale yellow color.
  3. Add the dried red chili, followed by the panchphoran and garlic and stir for about five seconds. Do not burn.
  4. Finely chop the tomatoes and add to this mixture. Stir for a minute till onions soften.
  5. Once the onions soften, add the washed yellow moong dal into the pressure cooker. Stir well.
  6. Season with salt, turmeric powder and red chili powder. Stir well.
  7. Pour in the water and give it one last stir.
  8. Pressure cook the dal for two whistles and allow it to cool.
  9. Remove lid once al the pressure comes out of the cooker. Serve hot with boiled rice. [/directions]

yellow moong dal

yellow moong dal

yellow moong dal
Tastes perfect with alu bhaji, salad and lemon!

I hope you do try this vegan yellow moong dal for yourself. I promise it will not disappoint.

If you have any questions or suggestions, feel free to reach out to me with a comment or connect with me on Instagram or Facebook.

Happy cooking!

yellow moong dal