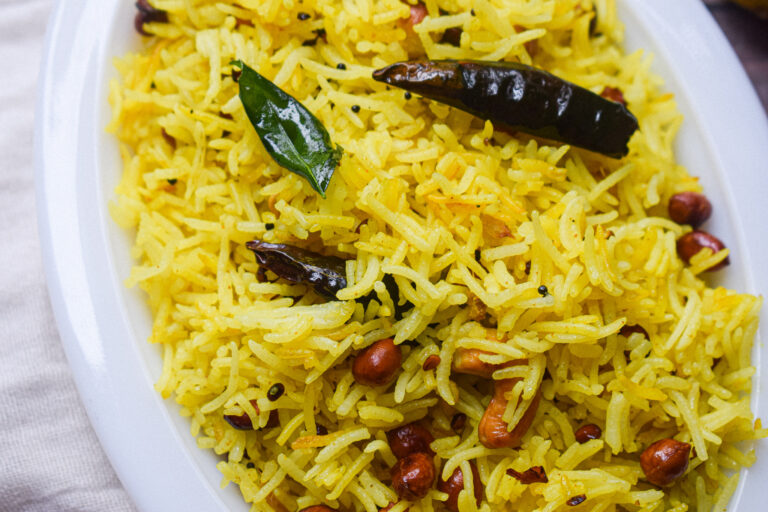
Lemon Rice

Get dinner ready in 10 minutes with this simple, easy and delicious lemon rice. It is a beautiful way to use up leftover rice and make a wholesome meal. The zing of the lemon along with flavourful rice and crunchy nuts make for a perfect bite. Try this easy recipe for this classic and you will make it a regular in your kitchen too.

Ingredients in this Lemon Rice Recipe

The ingredients in this lemon rice recipe are easy to find and very minimal. The nuts include cashews and peanuts which add a beautiful crunch to the recipe. The flavours in this lemon rice recipe comes from a simple tempering of pulses, mustard seeds, curry leaves, asafoetida or hing. The beautiful yellow colour comes from turmeric powder.

For the leftover rice, make sure you separate the grains before you add the to the tempering. This will ensure each grain of the rice remains separate. And lastly and the start of this recipe – the tanginess of lemon. It comes from fresh lime or lemon juice, along with a pinch of lemon zest for the additional pop of citrusy flavour.

When you make this recipe, make sure you have everything prepared and at an arm’s length because things move really fast. You can enjoy this lemon rice with some salad or any curry of your choice.

lemon rice

lemon rice

Let’s take a look at the recipe.

Preparation time – 10 minutes

Cook time – 10 minutes

Serves – 3

[ingredients title=”Ingredients”]

  • 3 cups cooked white rice
  • 3 tbsp oil/ghee
  • 1/4 cup cashews
  • 1/4 cup peanuts
  • 2 dried red chillies
  • 1 tsp mustard seeds
  • 1 tbsp chana dal
  • 1 tbsp split urad dal
  • 1/4 tsp hing
  • 1/2 tsp turmeric powder
  • 7-10 curry leaves
  • Salt to taste
  • 1 tsp lemon zest
  • 4 tbsp lime juice [/ingredients]

[directions title=”Directions”]

  1. Heat oil or ghee in a pan or kadhai.
  2. Add the cashews and fry them slightly till they turn golden brown and crunchy. Set aside.
  3. Fry the peanuts after the cashews till they are golden and crunchy. Set aside.
  4. Into the same pan, add mustard seeds and allow them to splutter. Keep the flame at low to prevent burning.
  5. Temper with dried red chillies, urad dal, chana dal, hing, turmeric powder, curry leaves and finely chopped ginger.
  6. Saute on low flame for a few seconds.
  7. Add the cooked rice and mix everything together.
  8. Pour the lime juice and add the lime zest, giving it all a good mix.
  9. Season with salt as per your taste. Mix till well combined.
  10. Add the fried cashews and peanuts and give everything one last mix. Serve hot. [/directions]

lemon rice

lemon rice

Hope you try out this delicious lemon rice in your own kitchen.

Feel free to reach out for feedback, suggestions or connect with me on Instagram or Facebook. Subscribe to my YouTube channel for all my videos and upcoming recipes.

Prawn Fried Rice

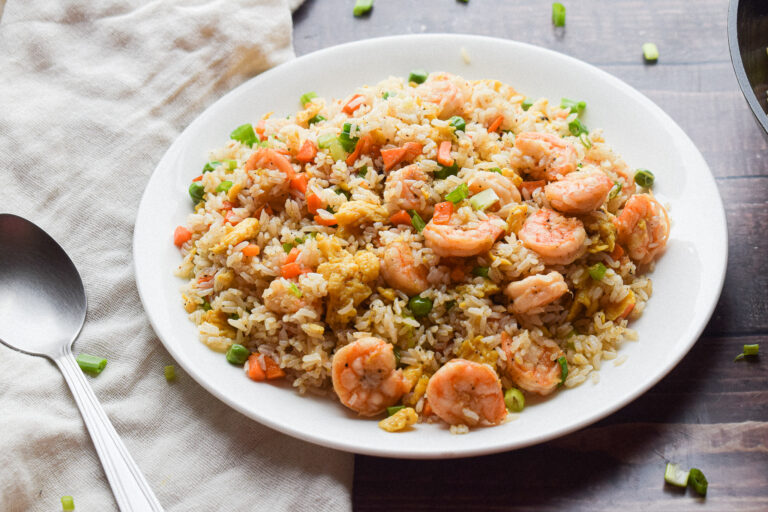
This Prawn Fried Rice is an easy way to whip dinner up in 30 minutes. Juicy, plump prawns with a slight tinge of garlic, along with fluffy eggs and crunchy vegetables, this fried rice is simple, easy to pull off, wholesome and a whole lot delicious. The taste of this recipe will further enhance with butter, so you can use that instead of oil.

This prawn fried rice is a perfect weeknight meal that you can toss up with leftover rice. To save more time, you can always keep chopped vegetables in your fridge and use them as and when you want to whip up a fried rice.

What Kind of Rice Should I Use?

While you can use any kind of rice for this recipe (depending on availability), I prefer using small grained aromatic rice that is typically used in Chinese fried rice recipes. You can use jasmine rice or any broken white rice. To get the best texture and even distribution of flavours, it’s better if the rice is cold and a day old. This prevents any kind of breakage and prevents the fried rice from turning into a ball of mush.

A Complete Meal

This prawn fried rice is a complete and wholesome meal – you have the rice for satiety, colourful vegetables for aesthetics and health, and of course, the juicy prawns and fluffy eggs for protein. You can make some chilli oil or spring onion oil on the side, and it would make for a fantastic meal.

prawn fried rice

prawn fried rice
A few points to keep in mind:

* The prawns need to be cooked just right, overcooking makes them rubbery.

* The vegetables need to find that perfect balance between cooked, and still crunchy.

* Keep all the ingredients ready as things move really fast.

* Cook on high flame preferably on a wok.

* Use a day old rice which is cold. Hot rice will stick and not lead to separate grains.

prawn fried rice

Let’s dive into the recipe.

Preparation time – 10 minutes

Cook time – 30 minutes

Serves – 3

[ingredients title=”Ingredients”]

For the scrambled eggs:

  • 2 eggs
  • 2 tbsp oil/butter
  • A pinch of salt
  • A pinch of black pepper powder

For the prawns:

  • 350 g prawns, cleaned, deveined and patted dry with kitchen towel
  • Salt to taste
  • 1/4 tsp black pepper powder
  • 3 tbsp oil/butter
  • 1 tsp finely chopped garlic

For the final fried rice (in the same wok):

  • 1 tbsp oil (for the veggies)
  • 2 cups cooked rice (preferably a day old)
  • 1/4 cup green peas
  • 1/4 cup finely chopped carrots
  • Salt to taste
  • 1/4 tsp black pepper powder
  • 1 tbsp dark soy sauce [/ingredients]

[directions title=”Directions”]

  1. Clean and devein the prawns. Pat them dry with a kitchen towel and keep ready.
  2. Keep all the rest of the ingredients within arm’s distance as everything moves really fast in this recipe.
  3. Crack open two eggs in a bowl. Season with salt and a pinch of black pepper powder and whisk till smooth.
  4. Heat oil in a wok. Once it gets hot, pour the eggs and gently scramble for a minute. Do not overcook or leave the eggs raw. They should be soft and fluffy, while cooked uniformly. Set them aside.
  5. In the same wok, heat some more oil, or butter. Add the prawns and fry for a minute till they start to turn pink.
  6. Add the finely minced garlic and season with salt and black pepper powder.
  7. Mix everything together and cook the prawns till they are soft (another 3-4 minutes).
  8. Once the prawns are nicely cooked, transfer them to one side of the wok and add the vegetables on the other side.
  9. Fry the vegetables on one side of the wok for two to three minutes. They should be slightly cooked, yet remain crunchy.
  10. Mix everything together and cook for another minute.
  11. Add the cooked white rice and disintegrate softly into the rest of the ingredients.
  12. Once every grain of rice is separate and well combined with the prawns and the vegetables, pour some dark soy sauce.
  13. Season with salt and black pepper powder and add the scrambled eggs.
  14. Give everything one last mix.
  15. Garnish with finely chopped spring onion greens and serve hot. [/directions]

prawn fried rice

prawn fried rice

Hope you try out this delicious recipe in your own kitchen.

Feel free to reach out for feedback, suggestions or connect with me on Instagram or Facebook. Subscribe to my YouTube channel for all my videos and upcoming recipes.

Cheesy Corn Pepper Fried Rice

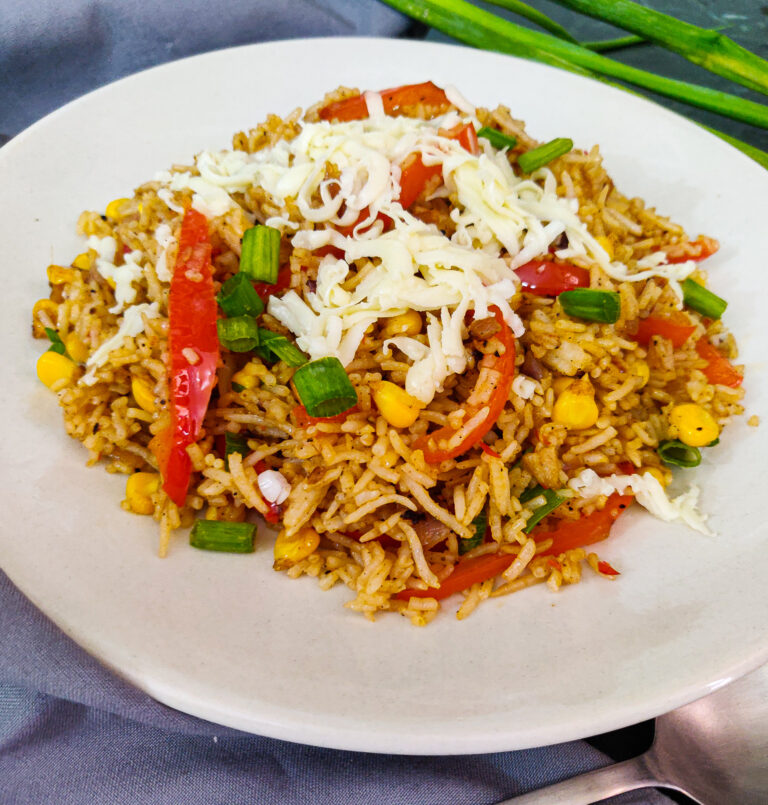
This Cheesy Corn Pepper Fried Rice is made with the most easily available ingredients that are most probably already in your fridge, comes together in just 10 minutes and is healthier and way yummier than takeout. Oh! And it has cheese. 

This Cheesy Corn Pepper Fried Rice is a very convenient and versatile recipe. It makes the perfect late night supper, a quick and amazing Sunday brunch, ideal for packing for a picnic or a go to lunch and is loved by everyone. It makes for a great tiffin box option for kids. Made with some seasonal corn and sweet bell peppers, I absolutely love how colourful and delicious this fried rice is.

cheesy corn pepper fried rice

This recipe is highly adaptable and can be customised according to one’s personal preferences. You can add sauces, seasonal vegetables and proteins of your choice or even increase the heat adding some red chilli powder or cayenne pepper to whip up a personal masterpiece. 

The best thing about this recipe is that it is full proof and hence, you can never go wrong with it. Being a stir fry, it can prove to be a boon to those who do not cook very often. Eat it as is, throw in a dash of your favourite sauces, accompany it with your favourite Indo-Chinese dishes or Thai Curries or pack it for a picnic, your call! It’s an adaptable and versatile dish that will make you fall in love with it. So, what are you waiting for?

Cooking the Perfect Fried Rice

In this recipe, I have used joha rice, which is a flavourful small grained rice found in Assam, India. It is starchy and has a beautiful fragrant. You can use jasmine rice too. The quality of rice can really affect your recipe. Basically any small grain rice available near you should do the trick. Broken basmati is a great choice!

cheesy corn pepper fried rice

For small grained rice: wash it thoroughly under running water till the water is clear. Once thoroughly washed, add it to a pan, instant pot or a pressure cooker. For 1 cup rice, use 1.5 cups of water to cook it. And once cooked, keep the rice covered for 10-15 minutes after turning off the gas. Keep the rice in the fridge for at least 2-3 hours before using or overnight, and use it the next day for the best results.

Why this fried rice?

  • Quick and health
  • Simple yet extremely flavourful
  • Kid-friendly
  • Super easy to pull off
  • Highly adaptable and can be customised as per your needs.
  • Lunch-box friendly
  • Home-cooked and wholesome
  • Takes 10 minutes to make.
  • Prepared with minimal ingredients easily available in your pantry

Ingredients in This Cheesy Corn Pepper Fried Rice

While this is a very simple and quick recipe that requires the most basic ingredients, a couple of ingredients make it special. Let’s take a look at those:

  • Corn

Corn is a very healthy vegetable which is high in fibre content and hence helps improve digestion. In this recipe, corn provides that bright yellow colour and a slight crunch in every bite. Along with all the other flavours, the butter and the pepper in the recipe complement the flavour of the corn the most and it is just as good as it gets. 

  • Bell Peppers

From green to red bell peppers, as the colour changes, the bitterness decreases and the sweetness increases. In this recipe I have used red bell peppers that have the fruitiest and sweetest flavour. They add natural sweetness, a pop of red colour as well as a slight crunch to every bite of this righteous fried rice recipe.

  • Cheese

Cheese makes the world a better place. It can be eaten as is, paired with wine, melted into a dip or in the case of this recipe, grated on to a hot plate of fried rice over which is slowly melts and elevates this dish by folds. Also, there’s no such thing as too much cheese so go crazy with the cheese or skip it if you like. 

corn pepper fried rice

cheesy corn pepper fried rice

Here’s the recipe:

Preparation time – 15 minutes

Cook time – 10 minutes

Serves – 3

[ingredients title=”Ingredients”]

  • 2 tbsp oil
  • 1 tbsp butter
  • 1 cup finely chopped onion
  • 1 tbsp finely chopped garlic
  • 1 cup boiled corn
  • 1 red bell pepper – thinly sliced
  • 1 tsp black pepper powder
  • Salt to taste
  • 1 tbsp sweet chilli sauce
  • 2 tbsp tomato ketchup
  • 3 cups cooked rice
  • A handful of spring onion greens
  • Lots of grated cheese [/ingredients]

[directions title=”Directions”]

  1. In a wok or a deep pan, heat the oil and add butter to it.
  2. Once the butter melts, add in the chopped onions.
  3. Sauté the onions on high flame till they turn translucent.
  4. At this point add in the finely chopped garlic and sauté till the garlic start turning brown.
  5. Add in the boiled corn followed by the sliced red bell peppers and sauté it for a few minutes.
  6. See to it that the vegetables don’t become soggy and retain their crunch.
  7. Once the vegetables are done, season with some black pepper and salt and mix well.
  8. Add in your condiments at this point – sweet chilli sauce and tomato ketchup and mix well.
  9. Add in the cold cooked rice and mix well to combine everything. Do not break the rice.
  10. Stir fry for a few seconds they take it off the heat and add the spring onion greens.
  11. Top it up with grated cheese and serve it hot as is or with a side of Indo-Chinese or Thai curry. [/directions]

cheesy corn pepper fried rice

Tips to get your fried rice perfect every time!

However, fried rice is a rather simple dish to make; there are certain things that need to be kept in mind. The best fried rice is the one where the vegetables are crunchy yet cooked and the rice grains are fluffy, separated and fragrant, packed with flavour and cooked to perfection. Sometimes in order to avoid a lumpy, soggy plate of fried rice, we undercook our rice, which results into half cooked rice and trust me, no one likes a bite in their rice. Here are some tips to get the perfect fried rice every single time.

  • Always use a deep dish for cooking, preferably a Wok or a deep pan. This promotes fast and uniform cooking.
  • Always start cooking once the oil is smoking hot and cook on high flame throughout.
  • Make sure you chop/ slice your ingredients finely to help them cook fast.
  • Always use cold rice. This point cannot be stressed enough. If the rice is not cold, it sticks to the pan and makes the fried rice lumpy. It is best to use leftover day-old rice.
  • Always garnish after turning the stove off to retain the freshness of the garnish.

cheesy corn pepper fried rice

Go make this dish for your next meal and trust me, you’re going to make it again and again because it’s unbelievable how something so simple can turn out to be so dreamy. It is one of quick comfort meals and I love it. I hope you will love it just as much!

Feel free to reach out for feedbacks, suggestions or connect with me on Instagram or Facebook. Subscribe to my YouTube channel for all my videos and upcoming recipes.

Mushroom Basil Fried Rice

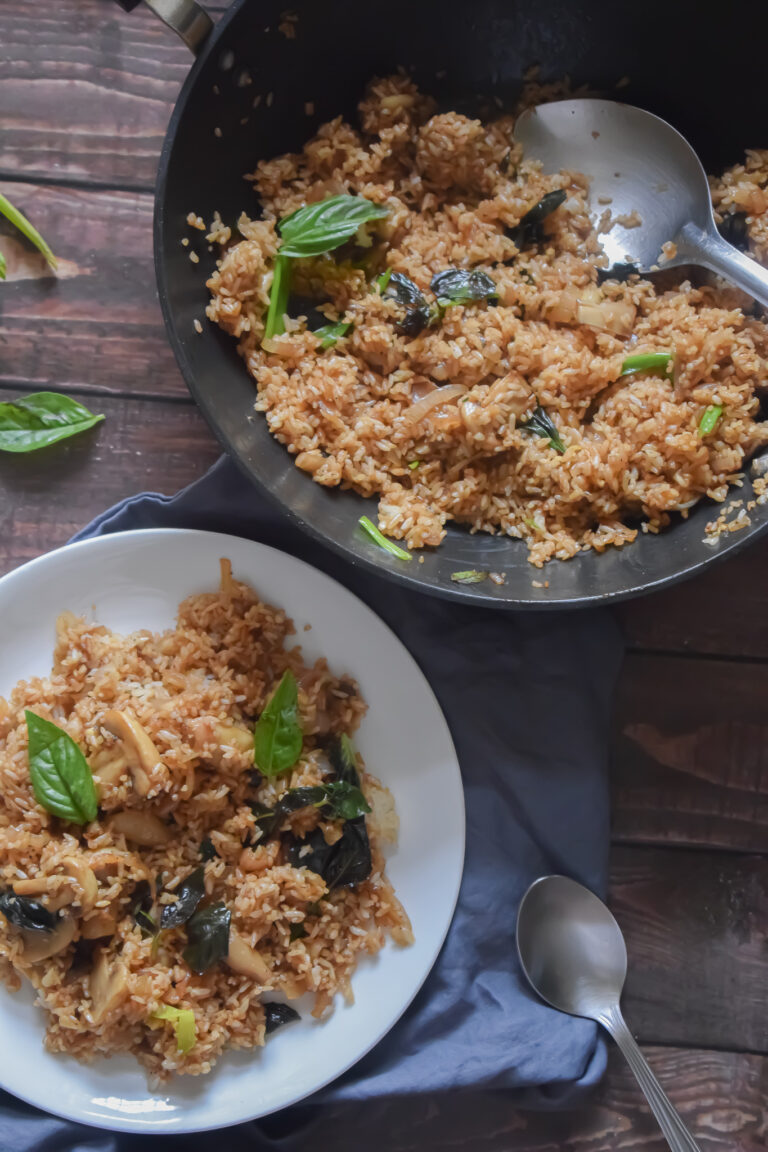
Mushrooms, red onion, garlic and fresh Italian basil leaves – what’s not to like? As a devotee of mushrooms, I love experimenting with it and coming up with recipes that fill me up with joy. This quick mushroom basil fried rice recipe is a wonderful hack for a meal prepared in 30 minutes. A one-pot meal, this is a keeper. Make sure you add it to your list of easy veg recipes.

This Mushroom Basil Fried Rice is a simple, quick and flavourful recipe made with minimal and easily available at home ingredients. A one pot meal prepared under 30 minutes, this fried rice is bound to fill your home with the delicious lingering aroma of fresh basil, mushroom and authentic Chinese sauces and leave you feeling satisfied and happy. 

This recipe is highly adaptable and can be customised according to your personal preferences. You can add sauces, vegetables and proteins of your choice or even increase the heat adding some red chilli powder or cayenne pepper to whip up a personal masterpiece. 

mushroom basil fried rice

I have been making this mushroom basil fried rice for a long time, so I can assure you it’s full proof. Being a stir fry, it can prove to be a boon to those who do not cook very often. Eat it as is, throw in a dash of your favourite sauces, accompany it with your favourite Indo-Chinese dishes or Thai Curries or pack it for a picnic, your call! It’s an adaptable and versatile dish that will make you fall in love with it. 

Mushroom Basil Fried Rice is a vegan recipe making it a healthier choice on the spectrum and can be made with leftover rice. So, you’re not just eating healthy, you’re also reducing waste and curating something so delicious! 

Cooking Rice Perfectly

In this recipe, I have used joha rice, which is a flavourful small grained rice found in Assam, India. It is starchy and has a beautiful fragrant. You can use jasmine rice too. The quality of rice can really affect your recipe. Basically any small grain rice available near you should do the trick. Broken basmati is a great choice!

mushroom basil fried rice

For small grained rice: wash it thoroughly under running water till the water is clear. Once thoroughly washed, add it to a pan, instant pot or a pressure cooker. For 1 cup rice, use 1.5 cups of water to cook it. And once cooked, keep the rice covered for 10-15 minutes after turning off the gas. Keep the rice in the fridge for at least 2-3 hours before using or overnight, and use it the next day for the best results.

Tips to Get your Fried Rice Perfect Every Single Time!

Fried rice might be a rather simple dish to make; however there are certain things that need to be kept in mind. The best fried rice is the one where the vegetables are crunchy yet cooked and the rice grains are fluffy, separated and fragrant, packed with flavour and cooked to perfection. Sometimes in order to avoid a lumpy, soggy plate of fried rice, we undercook our rice, which results into half cooked rice and trust me, no one likes a bite in their rice. Here are some tips to get the perfect fried rice every single time.

  • Always use a deep dish for cooking, preferably a wok or a deep Pan. This promotes fast and uniform cooking.
  • Always start cooking once the oil is smoking hot and cook on high flame throughout.
  • Make sure you chop/ slice your ingredients finely to help them cook fast.
  • Always use cold rice. This point cannot be stressed enough. If the rice is not cold, it sticks to the pan and makes the fried rice lumpy. It is best to use leftover day-old rice.
  • Always add soy sauce and vinegar at the end, right before you remove your pan from heat.
  • Always garnish after turning the stove off to retain the freshness of the herbs.

The Mushrooms are the Hero

Needless to say, the mushrooms are the hero of this mushroom basil fried rice. I have used button mushrooms which are easily and locally available around where I live. You can use any kind of mushrooms, or a combination of mushrooms. The mushrooms add a lot of earthy flavour to this fried rice and make it very delicious. One word of caution while cooking the mushrooms – do not salt them right in the beginning and do not touch them too much. These two tips ensure that the mushrooms turn crispy and not soggy.

mushroom basil fried rice

Why this Fried Rice?

  • Quick and Healthy
  • Vegan
  • Super Easy and Flavourful
  • Highly adaptable and can be customised as per your needs.
  • Travel pack friendly
  • Beats restaurant food
  • Home-cooked and wholesome
  • Takes less than 30 minutes to make.
  • Prepared with easily available at home ingredients.

mushroom basil fried rice

Let’s take a look at the detailed recipe:

Preparation time – 15 minutes

Cook time – 30 minutes

Serves – 3 people

[ingredients title=”Ingredients”]

  • 2 tablespoons Oil
  • 200 grams button mushrooms, each sliced in half
  • 2 medium onions, finely sliced
  • 1 tbsp finely chopped garlic
  • 2 tsp black pepper powder
  • Salt to taste
  • 1 tbsp Sriracha/Schezwan/Red Chilli sauce
  • A handful of green onions, finely chopped
  • 2 cups cooked rice (should be cold and well seperated, preferably a day old/leftover)
  • 1 tablespoon dark soy sauce
  • A handful of fresh Italian basil leaves [/ingredients] 

[directions title=”Directions”]

  1. Heat oil in a wok or deep pan. Allow it to get hot till it starts to smoke.
  2. Add the button mushrooms. Let the mushrooms sit on the wok for 3-4 minutes without touching them. This will help them to crisp up better. Do not burn.
  3. Add the sliced onions and cook till it starts turning brown and translucent.
  4. Add the chopped garlic and sauté till the rawness fades.
  5. Season with salt and pepper and mix well.
  6. Add the Sriracha sauce or red chilli sauce and cook.
  7. Chop the green onions and add to the rice. Mix well, but do not overcook as it needs to remain crunchy.
  8. Add the cooked rice and mix well till the rice combines well with everything else and heated thoroughly.
  9. Top it up with the soy sauce and mix gently to prevent the rice grains from breaking.
  10. Turn off the heat, add the fresh basil leaves and mix well.
  11. Garnish with scallions, coriander, more fresh basil or whatever you have!
  12. Serve it as is or with an Indo-Chinese or Thai side dish. [/directions]

mushroom basil fried rice

mushroom basil fried rice

I hope you try out this quick, easy and delicious Mushroom Basil Fried Rice recipe not only to satiate your taste buds but also to help your inner chef, lost in this fast, busy life, resurface. 

Feel free to reach out for feedbacks, suggestions or connect with me on Instagram or Facebook. Subscribe to my YouTube channel for all my videos and upcoming recipes.

Matar Pulao

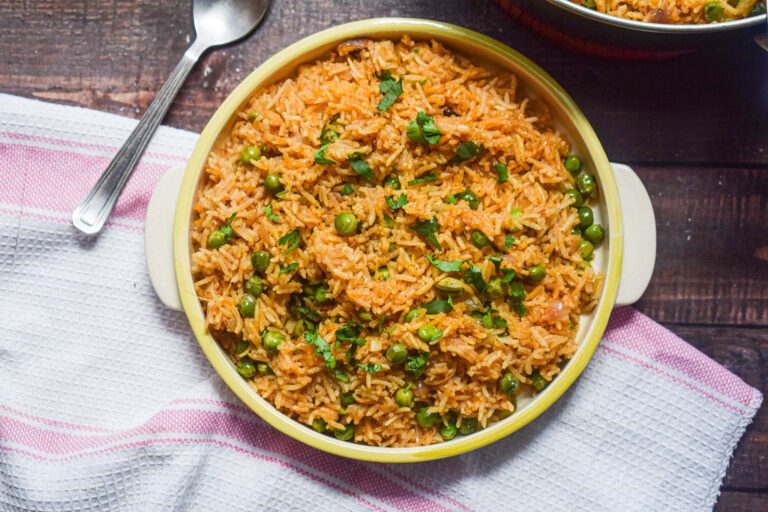
For all of you who have known me and my kind of food would know how much I love a good pulao. Pulao is such an amazing way to combine vegetables, protein, spices and rice to make delicious one-pot meals. I am a huge fan because pulaos help me eat healthy and at home, without compromising on taste or nutrition. They are super customisable and can be whipped up with any vegetable or protein you might have lying in your kitchen.

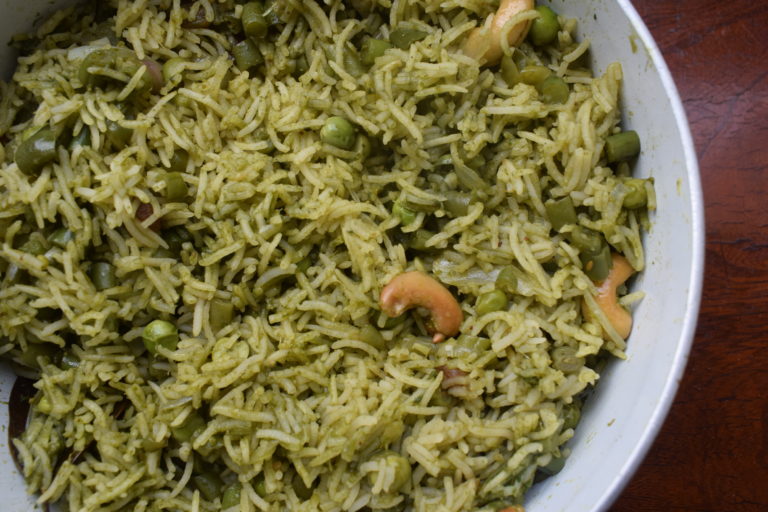
matar pulao

matar pulao

Since I resort to pulaos every other day. I want to share another favourite of mine – Matar Pulao. It’s a simple yet divine recipe that marries long grained and aromatic basmati rice to peas. I love making this in winters, when fresh peas are in season. This matar pulao is also a great side dish to have if you are planning to invite friends or family over for a meal. It pairs amazingly well with any curry or dal, and can also be enjoyed as it is with some raita, achar or salad.

Making the perfectly fluffy rice

The main aspect of this pulao is getting that perfect rice which is fluffy and light. This is possible once we remove excess starch during washing the rice and soaking it before cooking. Here is how you can get the best out of your rice and make the most airy grains.

Soaking

For this pulao, find yourself the best quality long grained basmati rice. Wash the rice thoroughly with water till its clear. Next, soak it for exactly 30 minutes in room temperature water. After that, strain the water and keep the rice as dry as possible. I used a sieve to release the water and keep it undisturbed. Do not soak for more than 30 minutes as the rice will become too wet and will cook very fast, and end up sticking to each other. Soaking for longer duration might also break the rice. Soaking is an essential pre-requisite to get the perfectly fluffy rice that you see in this egg pulao.

Correct water quantities

Next is the perfect amount of water for the rice to cook. I have added the exact measurements for this recipe, but the usual and easy rule to follow is – For every cup of rice that you use, use half cup more water than that. For example, if you use 1 cup of rice, use 1.5 cups of water. If you use 2 cups of rice, use 2.5 cups of water. And the water should always be hot if you’re making the rice in a pot. Otherwise, the temperature difference might ruin the rice. This rule applies only if you soak the rice for 30 minutes before cooking it.

Low flame and rest

Lastly, perfectly fluffy rice is always cooked in low flame. If you’re making rice in a pot, make sure you cover and cook it in the lowest flame possible. And once its done, do not serve immediately. Turn off the gas and let it rest for another 10-15 minutes. This will give the perfect edge to the rice and make it bloom to its best ability.

matar pulao

matar pulao

Now that you know all the secrets to making the perfect matar pulao, let’s take a look at the recipe.

Preparation time – 30 minutes

Cook time – 30 minutes

Serves – 4

[ingredients title=”Ingredients”]

  • 230 g basmati rice (1 cup approx)
  • 30 ml vegetable oil (2 tbsp approx)
  • 15 ml ghee (1 tbsp)
  • 1 inch cinnamon stick
  • 2 cardamoms
  • 3 cloves
  • 1 bay leaf
  • 200 g finely chopped onions (1 cup approx)
  • 10 g ginger paste (2.5 tsp approx)
  • 8 g garlic paste (2 tsp approx)
  • 200 g fresh green peas (1 cup approx)
  • Salt to taste
  • 4 g cumin powder ( 1 tsp)
  • 4 g Kashmiri red chilli powder ( 1 tsp)
  • 500 ml hot water (2 cups approx)
  • 5 g garam masala (1 tsp) [/ingredients]

[directions title=”Directions”]

  1. Wash the rice thoroughly under running water. Soak in water for 30 minutes.
  2. Heat oil and ghee in a skillet or pot. Lower the flame to low once hot.
  3. Temper with cloves, cardamom, cinnamon stick and bay leaf. Give it a light mix.
  4. Add the onions. Mix for a few minutes till the onions turn translucent.
  5. Once the onions are clear and start to sweat, add the ginger and garlic paste. Mix until the raw aroma of the ginger and garlic disappears.
  6. Add the fresh peas and mix it with the onions. Stir for 3-4 minutes on medium flame.
  7. Season with salt, cumin powder and red chilli powder. Stir everything until well combined.
  8. Once the spices are cooked, add the soaked rice and gently stir with a spatula. Do not break the grains with too much pressure.
  9. Fry the rice for a few minutes. Add the hot water and mix well.
  10. Cover and cook on low flame for 20 minutes. Take lid off and gently check on the rice with a fork.
  11. Turn the flame off and let the rice rest covered for another 15 minutes before you serve.
  12. Serve hot with any curry, raita, achar and salad. [/directions]

matar pulao

matar pulao

I hope you try this delicious and super easy matar pulao soon. You can make this vegan by skipping the ghee.

If you have any doubts, comments, or feedback, please reach out to me in comments or my social media handles.

Find me on Instagram – www.instagram.com/slurrpilicious

Find me on Facebook – www.facebook.com/slurrpilicious

Find me on Youtube – https://www.youtube.com/channel/UCA-cJoo27OLSCswI4sy6lzA?

Happy cooking!

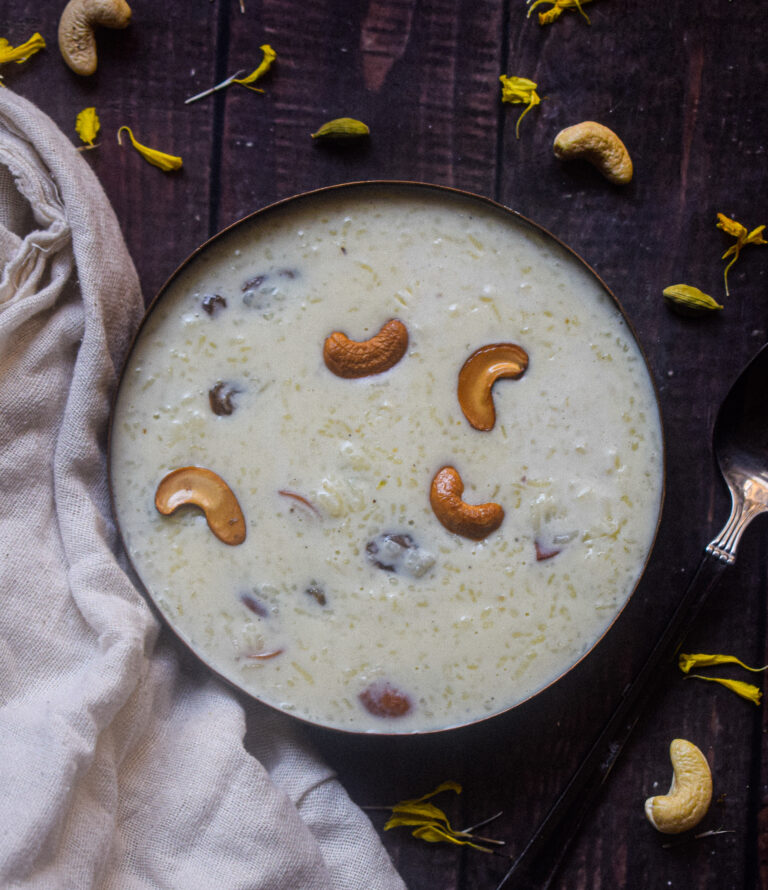
The Best Rice Kheer

Rice kheer is probably the most common sweet dish in every Indian household. Everyone has their own variations, but nothing can beat the classic one with white rice and full fat milk. As simple as the recipe is, it is also very easy to mess it up. Because more than anything else, the perfect rice kheer is a result of the right proportions of ingredients and a lot of love and patience. There are no shortcuts to making it. And 30-40 minutes of your time.

The secret to a good kheer is the perfect consistency and sweetness. I grew up eating paayokh, which is the rice pudding we make in Assam. It’s usually made with the aromatic joha rice, and can be sweetened with sugar or jaggery. It has taken me years to understand and create the perfect recipe for rice kheer, and this is exactly that. The consistency of this kheer is thick, and keeps getting thicker with time. However, it never reaches the point where it’s lumpy. It always has that extra bit of creaminess and the separation of the milk and rice. The texture remains uniform even if you freeze it. That’s the beauty of this recipe. As for sweetness, it is just the right amount of sweet for a festive occasion. You can always add more or reduce the amount of sugar as per your preference.

rice kheer

How to Make The Perfect Rice Kheer Every Single Time

Though this recipe is extremely simple and minimal, it can only taste so good if you take care of a few technicalities. These are very easy to follow, and important to keep in mind if you want the creamiest and tastiest kheer in your kitchen. Let’s take a look.

1.Get the ratio right

The secret to a great rice kheer is the correct ratio of milk to rice. The amount of rice is very less and we let it slow cook and merge with the reducing milk. If you get the ratio right, there is no stopping you from creating the best rice kheer at home.

2. Use the best ingredients

Like every simple recipe using a handful of ingredients, this rice kheer recipe also calls for sourcing the best ingredients. Make sure you use really good variety of aromatic rice. The grains should be small. I love to use joha rice, which is a local Assamese variety. You can opt for Bengali gobindbhog rice or a very good quality of broken basmati rice. The rice grains need to have their own scent.

This recipe cannot be replaced with low fat milk. The milk has to be full fat to get that perfectly thick and creamy consistency of the rice kheer. Get your hands on the best quality full-fat milk for this recipe.

3. Mind the heat

Cooking the rice kheer at the optimal temperature is very important to get it right. Once the milk comes to a boil, the flame will keep oscillating between low to medium, but it will never touch high. The temperature needs to be checked and regulated throughout the cooking process you would not want the milk to stick or worse, burn at any point. Keeping the flame high will also make the milk evaporate faster than it should, and affect the final consistency of the kheer.

4. Use a heavy bottomed pan

Make sure you use a heavy bottomed pan like a heavy stainless steel pot or kadhai or a cast iron pot. This will ensure that the kheer does not burn and cooks uniformly.

4. Be patient

This is probably the most important virtue to have while making kheer. I know it sounds exaggerated, but it is true! There are no shortcuts to making a good kheer. Trust me, I have tried it over many years. Nothing can match the taste and excellence of slow cooking. So you will have to have patience and give your undivided attention to this recipe for at least 30 minutes. The results will really be worth it, I promise.

rice kheer

rice kheer

Now that you know all the secrets to making the perfect rice kheer, let’s take a look at the recipe.

Preparation time – 15 minutes

Cook time – 30 minutes

Serves – 4

[ingredients title=”Ingredients”]

  • 2 tbsp ghee
  • 15 cashews, separated from the centre
  • 15 soaked raisins
  • 1/4 cup aromatic rice (gobindbhog rice/joha rice/jasmine rice/broken basmati rice)
  • 1 litre full fat milk
  • 1/4 cup sugar
  • 1/4 tsp cardamom powder [/ingredients]

[directions title=”Directions”]

  1. Soak raisins for an hour.
  2. Wash the rice thoroughly under running water. Set them out to dry on a sieve.
  3. Heat ghee in a kadhai. Once it heats up, add the cashews and fry on low flame for a few minutes till they turn golden brown. Set them aside.
  4. Heat milk in a heavy bottomed pan. Let it come to a boil.
  5. Once the milk comes to a boil, add the rice. Keep stirring continuously till milk reduces to half and rice cooks completely. The rice should disintegrate completely when you press it in between your index finger and thumb. This process will take time, so be patient and do not stop stirring. Keep the flame at medium to low.
  6. Once the rice is cooked completely and the milk has reduced by half (or more), add the sugar. The sugar has to be added once the rice is cooked, because the rice won’t cook after the sugar is added.
  7. Stir and cook till you achieve a creamy consistency (see video). The kheer should look slightly runny, yet be creamy. This is because it will keep getting thicker with time.
  8. Turn off the flame and add the fried cashews, soaked raisins and cardamom powder. Give it one last mix.
  9. Serve hot or freeze and serve cold. Enjoy! [/directions]

rice kheer

rice kheer

I hope you try this delicious and fool-proof rice kheer this festive season. If you have any doubts, comments, or feedback, please reach out to me in comments or my social media handles.

Find me on Instagram – www.instagram.com/slurrpilicious

Find me on Facebook – www.facebook.com/slurrpilicious

Find me on Youtube – https://www.youtube.com/channel/UCA-cJoo27OLSCswI4sy6lzA?

Happy cooking!

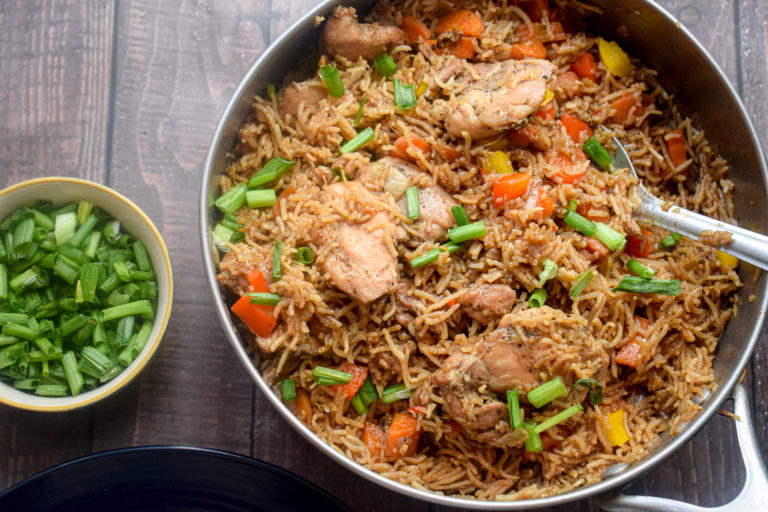
One-Pot Asian Chicken and Rice

How about a one-pot meal with Asian flavours? Succulent and perfectly seasoned bites of boneless chicken thighs on a bed of delicious and appetising rice with some sweet vegetables? This one-pot Asian chicken and rice truly tastes like a dream. I developed this recipe during this lockdown when the family craved for pan Asian food at home. Since time was limited and work kept piling up, I thought of this way of working for just one recipe that would combine a lot of flavours. And the results were so spectacular that I had to share it here.

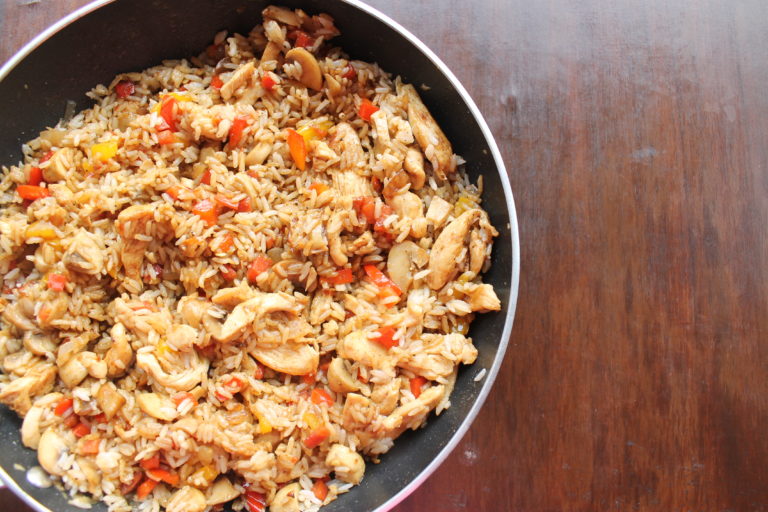
asian chicken and rice

asian chicken and rice

This Asian chicken and rice comes together real quick and with some basic Asian pantry essentials. I love adding vegetables to this meal as it makes it complete. It’s a quick and easy hack to satiate those pan Asian cravings we all have from time to time.

The secret to the power packed flavours in this recipe lies in its simple seasoning and fresh ingredients. Lots of aromatics and black pepper powder are used to marinate the succulent pieces of chicken. I have used boneless chicken thighs as they work really well in such recipes and remain moist and juicy throughout. The chicken pieces are first fried in the pan, and then added to the beautiful rice, vegetables and sauces towards the end. The whole mix is left to get slow cooked on the lowest flame possible and allowed a few more minutes of rest. The result is fluffy and separate grains of rice in a delicious sauce that is impeccable.

Making that perfectly fluffy rice

  • Soaking

For this pulao, find yourself the best quality long grained basmati rice. Wash the rice thoroughly with water till its clear. Next, soak it for exactly 30 minutes in room temperature water. After that, strain the water and keep the rice as dry as possible. I used a sieve to release the water and keep it undisturbed. Do not soak for more than 30 minutes as the rice will become too wet and will cook very fast, and end up sticking to each other. Soaking for longer duration might also break the rice. Soaking is an essential pre-requisite to get the perfectly fluffy rice that you see in this egg pulao.

  • Correct water quantities

Next is the perfect amount of water for the rice to cook. I have added the exact measurements for this recipe, but the usual and easy rule to follow is – For every cup of rice that you use, use half cup more water than that. For example, if you use 1 cup of rice, use 1.5 cups of water. If you use 2 cups of rice, use 2.5 cups of water. And the water should always be hot if you’re making the rice in a pot. Otherwise, the temperature difference might ruin the rice. This rule applies only if you soak the rice for 30 minutes before cooking it.

  • Low flame and rest

Lastly, perfectly fluffy rice is always cooked in low flame. If you’re making rice in a pot, make sure you cover and cook it in the lowest flame possible. And once its done, do not serve immediately. Turn off the gas and let it rest for another 10-15 minutes. This will give the perfect edge to the rice and make it bloom to its best ability.

asian chicken and rice

asian chicken and rice

Let’s take a look at the ingredients.

Preparation time – 30 minutes

Cook time – 40 minutes

Serves – 5

[ingredients title=”Ingredients”]

For the chicken marination:

  • 600 g boneless chicken thighs
  • 2 tbsp ginger garlic paste
  • Salt to taste
  • 1 tbsp black pepper powder

For the rice

  • 1 1/2 cups long grained rice
  • 2 tbsp oil (vegetable/olive)
  • 1 cup finely chopped onions
  • 2 cups roughly chopped carrots
  • 1/2 cup roughly chopped red bell pepper
  • 1/2 cup roughly chopped yellow bell pepper
  • Salt to taste
  • 1 tsp ginger garlic paste
  • 1/4 tsp black pepper powder
  • 2 cups hot water
  • 3 tbsp sweet chilli sauce
  • 1 tbsp Oyster sauce
  • 2 tbsp dark soy sauce
  • Chopped spring onion greens for garnish [/ingredients]

[directions title=”Directions”]

  1. Wash the rice thoroughly under running water till all excess starch is drained. Soak in water for 30 minutes.
  2. Wash and pat dry the boneless chicken thighs with a paper towel. Rub the chicken pieces with salt, black pepper powder and ginger garlic paste. Mix really well and set it aside for ten minutes till you chop the vegetables.
  3. Heat oil in a pan. Add the marinated chicken pieces and fry till they turn crispy from the sides. Cook the chicken for seven to eight minutes and set them aside once done.
  4. In the same skillet or pot, add the finely chopped onions. Fry them for a few minutes till they start to get translucent and brown on the sides.
  5. Once the onions are caramelised, add some ginger garlic paste and fry till the raw aroma of the paste dissipates.
  6. Add the carrots and stir for a minute.
  7. Gently add the soaked rice to the pan and mix. Do not break the grains.
  8. Season with salt and black pepper powder.
  9. Pour the Asian sauces – sweet chilli sauce, Oyster sauce and dark soy sauce. Mix well.
  10. Add 2 cups of hot water and once it starts to boil, add the fried chicken pieces on top.
  11. Cover and cook on lowest flame possible for 20 minutes.
  12. Lift the lid in 30 minutes and add the bell peppers on top. Do not disturb the rice. Cover and cook on lowest flame for another ten minutes.
  13. Check the rice with a fork. Turn the flame off and let the rice rest for another 15 minutes.
  14. Serve hot after garnishing with some spring onion greens. [/directions]

asian chicken and rice

asian chicken and rice

I hope you try this one pot Asian chicken and rice super soon! If you have any doubts, comments, or feedback, please reach out to me in comments or my social media handles.

Find me on Instagram – www.instagram.com/slurrpilicious

Find me on Facebook – www.facebook.com/slurrpilicious

Find me on Youtube – https://www.youtube.com/channel/UCA-cJoo27OLSCswI4sy6lzA?

Happy cooking!

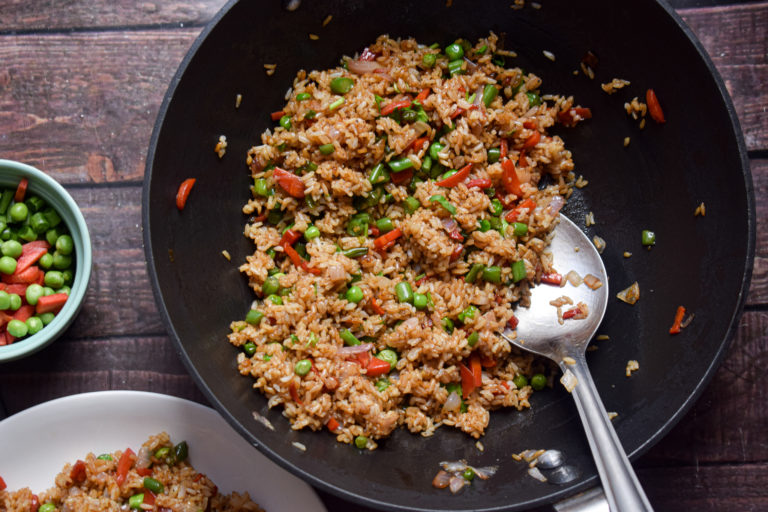
15 Minute Vegetable Fried Rice

Here’s an easy way to whip up dinner in 15 minutes, while also ensuring you eat your vegetables. This vegetable fried rice is one of my go-to recipes every other day and I can never get enough of it.

The best part about this recipe is its ease and highly customisable option. You can make a large batch and add eggs, chicken or more vegetables of your choice. This vegetable fried rice uses the most minimal ingredients and is as simple as it can get. The it’s beauty lies in the freshness of its ingredients.

How to make the perfect fried rice every time

Fried rice might be a simple dish but it requires a few things done right every single time. The best kind of vegetable fried rice are those where each grain of rice is separate and cooked to perfection. Nobody likes a soggy plate of fried rice, nor does one want half cooked rice bites in their spoon. Apart from that the way the vegetables are cooked also matter a lot! They cannot be soggy or raw – just the right amount of crunch.

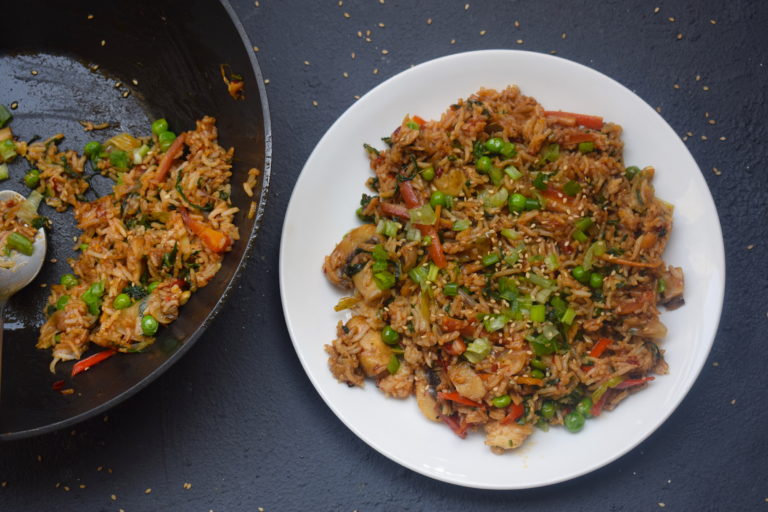
vegetable fried rice

vegetable fried rice

Here are some of the tips you might want to follow to make that perfect fried rice every single time.

  • Always use a wok for making fried rice because it helps is faster and uniform cooking.
  • Make sure your wok is really hot before you add oil and other ingredients.
  • Make sure the vegetables you add are chopped finely so that they can cook quickly.
  • The rice that you add to any fried rice should always be cold. Otherwise, it will stick to the wok and become lumpy. It’s best to use a day old rice.
  • If you add any protein like chicken or shrimp, cook them before you add the vegetables.
  • Add the soy sauce and vinegar just before you remove the wok from the gas stove.
  • Always garnish in the end after turning the gas off.

vegetable fried rice

vegetable fried rice

Cooking the perfect rice for frying

In this recipe, I have used joha rice, which is a flavourful small grained rice found in Assam, India. It is starchy and has a beautiful fragrant. You can use jasmine rice too. The quality of rice can really change the game. If you do not have jasmine rice, you can use any small grain rice available near you – broken basmati is a great choice!

vegetable fried rice

For small grained rice, wash them thoroughly under runnign water till the water is clear. Once they are thoroughly washed, add them to a pan, instant pot or a pressure cooker. If you are using 1 cup rice, use 1.5 cups of water to cook it. And once cooked, keep the rice covered for 10-15 minutes after turning off the gas. Keep the rice in the fridge overnight, and use it the next day for making fried rice.

Why this vegetable fried rice?

  • Delicious and super easy!
  • Healthy and quick
  • Better than takeout
  • You need 15 minutes to make this
  • Made with bare minimum pantry essentials.
  • Highly customizable!
  • Can be made in large batches.

vegetable fried rice

Preparation time – 15 minutes

Cook time – 15 minutes

Serves – 3

[ingredients title=”Ingredients”]

  • 30 ml vegetable/sesame oil
  • 2 slit green chillies (optional, add it if you like spicy food)
  • 100 g onions, finely chopped
  • 15 g garlic, finely chopped
  • 80 g carrots, chopped
  • 80 g green beans, chopped
  • 80 g fresh green peas
  • Salt to taste
  • 4 g black pepper powder
  • 150 g cooked white rice
  • 30 ml dark soy sauce
  • Coriander/spring onion greens for garnish [/ingredients]

[directions title=”Directions”]

  1. Heat oil in a wok. Let it smoke.
  2. Temper the oil with slit green chillies (optional).
  3. Add the chopped onions and fry till it starts to brown and becomes translucent.
  4. Add the sliced garlic and saute till its rawness fades.
  5. Next, add the beans, carrots, and peas and saute for about a minute or two on medium flame. Do not overcook the vegetables as they need to remain crunchy.
  6. Season with salt and pepper.
  7. Add the boiled and cold rice to the mixture. Mix well till the rice is heated through and everything gets mixed together perfectly.
  8. Pour in the soy sauce and mix well until every grain of the rice gets stained in the sauce.
  9. Garnish with fresh herbs – coriander or spring onion greens – whatever you have available!
  10. Serve with cucumbers and tomatoes on the side. [/directions]

vegetable fried rice

I hope you try this version of vegetable fried rice! Super simple and easy. Please feel free to add more vegetables or any protein of your choice.

If you have any questions, feel free to reach out to me with a comment or connect with me on Instagram or Facebook. For all my videos, you can subscribe to me on YouTube.

Related recipe – 30 Minute Stir Fry Noodles

Happy cooking!

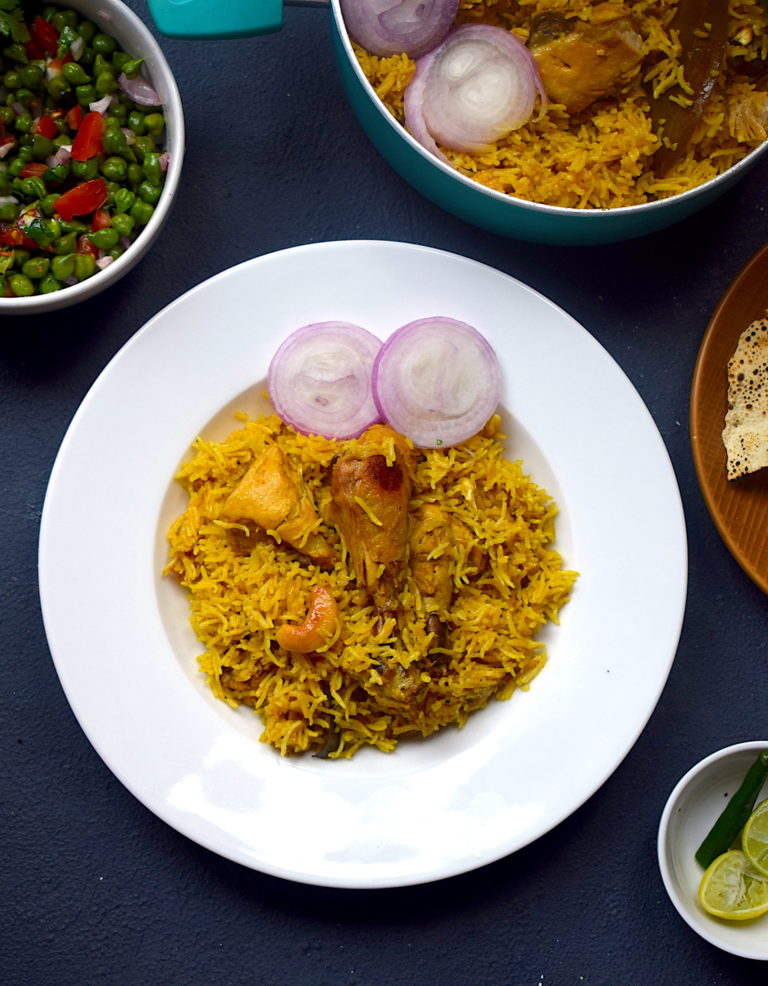
Chicken Pulao

Indian pulaos are one-pot dishes that combine wholesome flavours and spices to create magical tastes. The predominant ingredient in most pulaos is the garam masala. The most basic garam masala is a spice made by grinding dry-roasted cinnamon, cardamom and cloves.

This chicken pulao recipe is a quick fix for those special cravings. It is a one-pot recipe and comes out beautifully in about 40 minutes. It can be had as a meal in itself.

This recipe is very special to me because it was an essential part of my childhood. Pulao used to be served with chicken or mutton curry in birthday parties or to the guests. Although my family never really made chicken pulao, the fundamental ways to cook any pulao remains the same. Chicken pulao is something I have been making for myself and my loved ones over the years, and it has always remained a favourite.

chicken pulao

chicken pulao

The rice in this pulao can be any fragrant one. I prefer using broken rice for pulao, as it gives the entire meal a different flavor. Here, I have used good quality Basmati rice. The quality of the rice should be of supreme concern in this meal.

I mostly make chicken pulao with joha rice. Joha rice is a variety of rice grown in India and is notable for its aromatic and excellent taste. My home state, Assam, is the largest cultivator of this rice, and hence I am very particular about using it in most of my recipes involving rice. But you can go ahead and use high quality and aromatic broken basmati too.

chicken pulao

chicken pulao

I like my pulao to have a little sweetness since that is how I have eaten it throughout my life. There is a delicate hint of sugar and part of the flavor also comes from some dry fruits that this dish includes. Another important tip that I would like to share is to always use fresh ingredients. For example, the ginger garlic paste should be freshly ground. The only ready-made spice that I have used here is the meat masala.

Even though this recipe is made in a pressure cooker, you can also go ahead and make it this way. If the rice is soaked for some time, it takes lesser time to cook.

Making Perfectly Fluffy Rice

  • Soaking

For this pulao, find yourself the best quality long grained basmati rice. Wash the rice thoroughly with water till its clear. Next, soak it for exactly 30 minutes in room temperature water. After that, strain the water and keep the rice as dry as possible. I used a sieve to release the water and keep it undisturbed. Do not soak for more than 30 minutes as the rice will become too wet and will cook very fast, and end up sticking to each other. Soaking for longer duration might also break the rice. Soaking is an essential pre-requisite to get the perfectly fluffy rice that you see in this egg pulao.

  • Correct water quantities

Next is the perfect amount of water for the rice to cook. I have added the exact measurements for this recipe, but the usual and easy rule to follow is – For every cup of rice that you use, use half cup more water than that. For example, if you use 1 cup of rice, use 1.5 cups of water. If you use 2 cups of rice, use 2.5 cups of water. And the water should always be hot if you’re making the rice in a pot. Otherwise, the temperature difference might ruin the rice. This rule applies only if you soak the rice for 30 minutes before cooking it.

  • Low flame and rest

Lastly, perfectly fluffy rice is always cooked in low flame. If you’re making rice in a pot, make sure you cover and cook it in the lowest flame possible. And once its done, do not serve immediately. Turn off the gas and let it rest for another 10-15 minutes. This will give the perfect edge to the rice and make it bloom to its best ability.

Here is the recipe for my version of a Chicken pulao. Every step brings out a different flavour and uniqueness. I hope you enjoy it.

Preparation time – 30 minutes

Cook time – 60 minutes

Serves – 4-5 people

[ingredients title=”Ingredients”]

For the chicken marination:

  • 1 kg chicken (curry cut)
  • 1 tbsp salt
  • 2 tsp Kashmiri red chilli powder

For the rice

  • 500 g biryani rice
  • 3 tbsp vegetable oil
  • 2 tsp ghee
  • 1 inch cinnamon stick
  • 2 cardamoms
  • 2 cloves
  • 2 bay leaves
  • 20 raisins
  • 15 cashews
  • 1 green chilli, slit in half
  • 2 cups finely sliced onions
  • Salt to taste
  • 1 tbsp coriander powder
  • 1 tbsp cumin powder
  • 1 tsp black pepper powder
  • 1 tsp turmeric powder
  • 1 tsp garam masala powder
  • 1 tsp sugar [/ingredients]

[directions title=”Directions”]

  1. Wash the rice thoroughly under running water till all excess starch is drained. Soak in water for 30 minutes.
  2. Wash and pat dry the chicken pieces with a paper towel. Rub the chicken pieces with salt and Kashmiri red chilli powder. Mix really well and marinate for 30 minutes.
  3. Heat oil in a pot. Add the ghee. Temper with all the whole spices – cinnamon stick, cardamom, clove and bay leaves.
  4. Add the raisins and the cashews and fry it on low heat for just a few seconds, making sure they don’t burn.
  5. Add the onions and green chilli and fry on medium heat for 7-10 minutes till they turn translucent and start to brown.
  6. Add sugar at this point. Sugar will help the onions caramelise and also add a beautiful brown colour to them.
  7. Once the sugar is mixed, add the marinated chicken. Mix well for 10 minutes on medium flame.
  8. Cover and cook the chicken on low flame for 20 minutes.
  9. Take lid off and five one good mix. Season with salt, turmeric powder, black pepper powder, coriander powder and cumin powder. Mix well.
  10. Once done, add the soaked rice and mix everything gently so that rice grains remain intact.
  11. Pour hot water and mix. Add garam masala and stir it into the rice.
  12. Cover and cook on low flame for 1-20 minutes till rice is cooked.
  13. Take off flame and let it rest for 15-20 minutes before serving.
  14. Serve hot with salad and raita. [/directions]


chicken pulao

chicken pulao

I hope you try this delicious chicken pulao super soon! If you have any doubts, comments, or feedback, please reach out to me in comments or my social media handles.

Find me on Instagram – www.instagram.com/slurrpilicious

Find me on Facebook – www.facebook.com/slurrpilicious

Find me on Youtube – https://www.youtube.com/channel/UCA-cJoo27OLSCswI4sy6lzA?

Happy cooking!

The Easiest & Creamiest Mushroom Stroganoff

Creamy, delicious and comforting – this mushroom stroganoff is the ultimate idea for a meal in a bowl, especially in winters! It takes a handful of ingredients, and gets ready in absolutely no time! A personal favorite of mine, the mushrooms add their own unique flavor to the recipe, and the cream makes it velvety soft. Add a dash of fresh cinnamon powder and you have got yourself a winner!

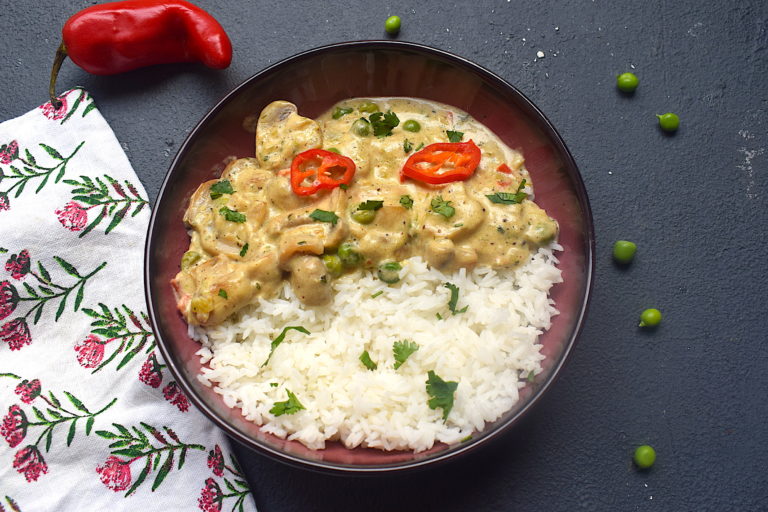
mushroom stroganoff

I love recipes that accommodate and adjust with local ingredients. This mushroom stroganoff is also highly customizable in my opinion. It’s winters right now so I have used some beautiful red cayenne pepper and some lovely peas that I found at my local market. The flavors that these two simple ingredients add is extraordinary. The idea is to not really play too much with the recipe and let the natural flavors of the seasonal ingredients do their magic. And the results are stunning!

mushroom stroganoff

Traditional stroganoff recipes are usually with beef or chicken. It also does not include garlic and uses stock (chicken or beef) as a base. But this mushroom and peas stroganoff is way easier, as it does not include any stock! Just some good quality cream. The taste and texture are no less when compared to its non-vegetarian counterparts.

The addition of seasonal peas makes the gravy naturally sweet, and the green adds a dash of freshness to the otherwise nude, creamy color. Here’s my homely version of mushroom stroganoff. I hope you try it, especially on one of those extra lazy days.

Preparation time – 15 minutes

Cook time – 20 minutes

Serves – 2 people

[ingredients title=”Ingredients”]

  • 200 g button mushrooms, cut in half
  • 50 g fresh green peas
  • 1 onion, finely chopped
  • 120 ml fresh cream
  • 1 tsp cinnamon powder
  • Salt to taste
  • 4 garlic cloves, finely chopped
  • 100 ml water
  • 1 tbsp butter
  • 1 tsp vegetable oil
  • 1 small cayenne pepper, finely chopped
  • 1 tsp black pepper powder
  • 1 tsp chopped parsley [/ingredients]

[directions title=”Directions”]

  1. Heat oil in a pan. Add butter to it and give it a light stir.
  2. Add the finely chopped garlic and stir. Saute the garlic for about ten seconds in low heat so that it does not get burnt. Next, add half of the chopped cayenne pepper to the oil. Stir for a minute.
  3. Once the garlic and cayenne pepper releases its aroma, add the chopped onion. Saute till onions are translucent and soft.
  4. Dice the mushrooms by cutting them in half and add them to the onions. Add the green peas along with it. Be gentle, stir and do not break them.
  5. The mushrooms will cook in about ten minutes (make sure they are crunchy and not soggy) after which you have to add some warm water. Give it a light stir and let it come to a boil.
  6. Pour in the cream and stir well.
  7. Season with salt and black pepper powder. The reason why we are adding salt towards the end is that doing it, in the beginning, will make mushrooms release all its water and make it soggy.
  8. Let this cook on medium heat till it reduces and you get a thick and creamy consistency.
  9. Garnish with a pinch of freshly ground cinnamon powder and chopped parsley. You can also add freshly chopped coriander leaves if parsley is unavailable.
  10. Serve hot with boiled rice.[/directions]

mushroom stroganoff

mushroom stroganoff

I hope you try this really easy and delicious mushroom stroganoff for yourself and enjoy it as much as I do. If you have any questions, feel free to reach out to me with a comment or connect with me on Instagram or Facebook.

Happy cooking!