Bombay Sandwich

A crispy coating, green chutney filled sponge bread, layered with the crunch of fresh cucumber, tomatoes, onions and boiled potatoes – this homestyle version of Bombay sandwich is what makes for a perfect snack when hunger strikes. It is so easy to put together, and makes for a filling meal. I absolutely cannot get enough of this Bombay sandwich, and I resort to it very often. It is also very easy to assemble if you have all the ingredients lying in your fridge.

Keep that green chutney and sliced vegetables ready, and assemble this delicious sandwich in 5 minutes or less. I love grilling it slightly on my cast iron skillet before serving. But it tastes good even without it. The sev on the side is an option if you want it, I have kept mine simple here.

bombay sandwich

Hope you try out this easy and drop dead gorgeous version of a Bombay sandwich. This is how I make it. Simple, elegant and so wholesome!

Ingredients in this Bombay Sandwich

There are a few things to take care of to make this street style Bombay sandwich at home. Here are the ingredients to look at:

  • Use white bread for authentic taste

Bombay sandwich tastes best when made with white bread. You can use whole grain bread to make it healthier, but it won’t taste as authentic. But it is an option.

  • Chat masala

Chat masala is India’s umami and a must in this Bombay sandwich. Keep it ready for generous sprinkle. This sandwich combines chat masala with black salt to give it that extra street-style kick.

  • Softened butter

Softened butter is a major ingredient in this Bombay sandwich. The key is to have it at room temperature, so that you can easily spread it around with a butter knife. If you are planning to make this sandwich, take your butter out of the fridge at least 3-4 hours in advance.

  • Green chutney

Green chutney is every Indian household’s go-to way to spice meals up. This Bombay sandwich celebrates the desi green chutney by adding it to every layer of the bread. It’s made with a mixture of mint leaves, coriander leaves, ginger, garlic, salt, lime juice, green chillies and chaat masala. I have used coriander, but you can use a mix of coriander and mint just mint leaves.

bombay sandwich

bombay sandwich

Here’s a look at the recipe:

Preparation time – 10 minutes

Cook time – 10 minutes

Serves – 2

[ingredients title=”Ingredients”]

For the green chutney:

  • 1 cup fresh coriander leaves (include the stems)
  • 1/2 inch ginger
  • 3-4 garlic cloves
  • 1 tsp chat masala
  • 2-4 green chillies (based on the level of heat you prefer)
  • 1 tbsp lime juice
  • 2 tbsp water

For the sandwich:

  • 3 slices of white bread
  • Softened butter
  • Cucumber slices (1/2 cucumber)
  • Tomato slices (1/2 tomato)
  • Sliced boiled potatoes (1 medium potato)
  • 1 tbsp chat masala
  • Black salt, to taste [/ingredients]

[directions title=”Directions”]

  1. To make the green chutney, combine all the ingredients and blend until smooth. You can adjust the level of heat or salt as per your preference. Set the chutney aside.
  2. Take three slices of jumbo white bread. Cut the edges off with a knife. Apply softened butter on each slice.
  3. Apply the green chutney generously on top of the butter on one slice. Top it off with sliced boiled potatoes and sliced tomatoes.
  4. Season with chat masala and black salt.
  5. Add the other layer of bread, with the butter side facing down. Add more green chutney on the other side of the second bread slice.
  6. Layer the second slice with sliced cucumbers and onion rings. Season with chat masala and black salt.
  7. Use the third slice to cover the sandwich. Press hard or keep a heavy pan on it to let it settle.
  8. You can enjoy it as it is, or grill it.
  9. For grilling, heat butter in a pan. Carefully place the sandwich and let it toast for a few minutes on one side till it turns crunchy. Keep the flame at medium.
  10. Apply butter on the top side of the sandwich. And then flip it to grill the other side till it turns golden brown and crunchy.
  11. Cut the sandwich into halves or quarters and enjoy! You can also use toothpicks to keep the sandwich and fillings in balance.
  12. If you want to serve it Bombay style, sprinkle some sev on top![/directions]

bombay sandwich

bombay sandwich

If you have any questions, feel free to reach out to me with a comment or connect with me on Instagram or Facebook. For all my videos, you can subscribe to me on YouTube.

Happy cooking!


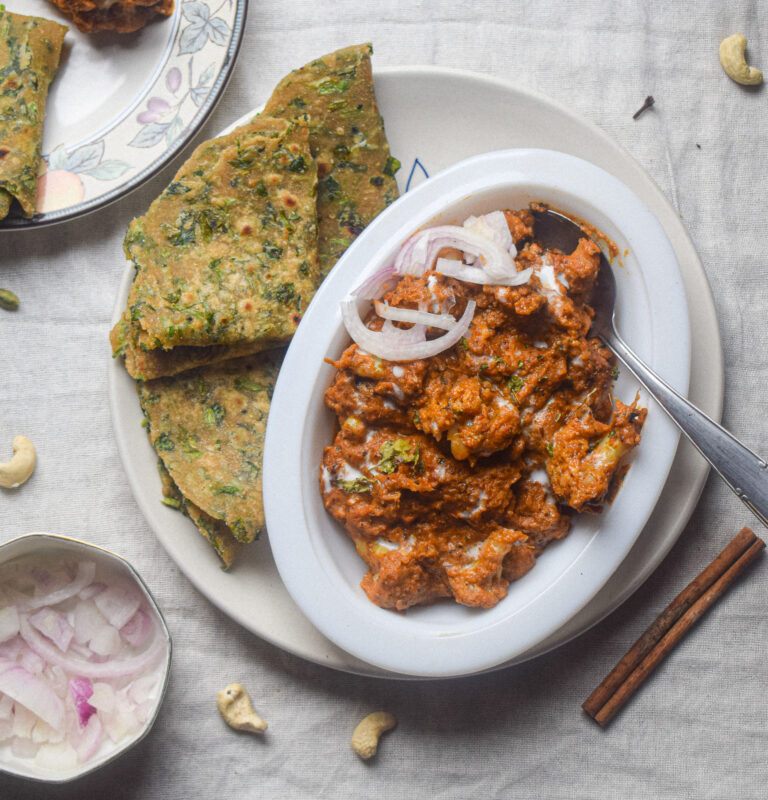
Vegan Gobhi Makhani

This vegan gobhi makhani is a vegan recipe that makes for a delicious main course meal. Try it with naan, paratha or roti and enjoy the beautiful flavours of a makhni gravy. The dairy elements in a makhni gravy is cream and butter, both of which have been substituted in this recipe. You can also make it non-vegan if that’s what you’re looking for. The best part about this recipe is that it does not taste any less good no matter which way you prefer it – dairy or no dairy.

This vegan gobhi makhani is luscious, rich and packed with delicious flavours. Making this creamy cauliflower curry requires a bit of steps, but walking that extra mile is really worth it when you taste it. This recipe is also fail-proof as it has been tried and tested in my kitchen several times, and always ends up being a conversation starter.

vegan gobhi makhani

Steps to Vegan Gobhi Makhani

This creamy cauliflower curry is cooked in three stages.

  • The first stage is marinating the cauliflower florets in salt and red chilli powder and roasting them on a skillet till they are brown and crispy on the edges. Doing this ensures that the cauliflower in the gravy do not taste bland and have enough flavour on their own. It also reduces the cook time of the vegetable as we roast it till it is half cooked before we add it to the gravy.
  • In the second stage, we make the makhni paste. This requires slow cooking onions, tomatoes, cashews, whole spices and Kashmiri dried red chillies (for the colour) for some time and blending it till it is super smooth. If you do not have Kashmiri red chillies, you can use normal dried chillies too. However, the normal dried chillies will be very spicy so add just two instead of four pieces if you do not want your curry to be too hot. The Kashmiri chillies help give the gravy that wonderful orange colour.
  • The final stage is when we combine the makhni sauce with the roasted cauliflower and add some spices and garnishing. For the luscious gravy, we use coconut milk and cashew paste as the base. We also skip the butter and use vegetable oil to make it vegan.

vegan gobhi makhani

Let’s take a detailed look at this vegan gobhi makhani recipe.

Preparation time – 30 minutes

Cook time – 40 minutes

Serves – 4

[ingredients title=”Ingredients”]

  • 300 g cauliflower, cut into florets
  • 1/2 tsp salt (to marinate the cauliflower)
  • 1/4 tsp red chilli powder (to marinate the cauliflower)
  • 3 tbsp oil
  • 1 bay leaf
  • 4 Kashmiri dried red chillies (Add 2 if you want it less spicy)
  • 4 cardamoms
  • 1 thick cinnamon stick (1 inch)
  • 2 cloves
  • 2 medium onions, roughly chopped
  • 4 medium ripe tomatoes, roughly chopped
  • 12 cashews
  • Salt to taste
  • 1/2 tsp sugar (optional)
  • 1 tbsp oil (for the gravy)
  • 1 tbsp ginger garlic paste
  • 1 tsp coriander powder
  • 1 tsp cumin powder
  • 1/2 tsp garam masala
  • 1/2 cup water
  • 1 cup coconut milk (200 ml)
  • 1 tbsp kasuri methi [/ingredients]

[directions title=”Directions”]

  1. Cut the cauliflower into florets. Gently absorb any excess water with a paper towel.
  2. Season the cauliflower with 1/2 tsp salt and 1/4 tsp red chilii powder. Mix gently.
  3. Heat 2 tbsp oil in a skillet. Roast the cauliflower florets till they char a bit and also cook halfway through. Once done, set aside for later.
  4. In the same pan, add 1 tablespoon vegetable oil (or any neutral oil of your choice). Temper the oil with a bay leaf and four Kashmiri dried red chillies. You can adjust the number of chillies as per your desired level of heat.
  5. Temper with the whole spices – cardamom, cloves and cinnamon. Lightly roast it till they release their aroma.
  6. Add in the roughly chopped onions, roughly chopped tomatoes and cashews. Mix well. The idea is to cook this till the tomatoes and onions release their juices and soften. Cover and cook on low flame for ten minutes.
  7. Remove cover, give one last stir and let the mixture cool completely.
  8. Once cool, transfer the mixture to a blender. Blend for as long as you need to get a super smooth and glossy paste. This is the makhni sauce. Set aside.
  9. In the same skillet or kadhai, add one tablespoon vegetable oil. Lower the heat to minimum and add the fresh ginger garlic paste and let it release its aroma. Saute for about a minute on low heat until the raw aroma of the ginger and garlic completely disappears.
  10. Add the blended makhni sauce to the pan. Add half a cup of water (add it to the remains in the blender). Stir and let the sauce come to a boil.
  11. Let the sauce simmer for another five minutes under a lid and on low flame.
  12. Once the oil starts to release from the sides and the makhani sauce looks cooked, add the cauliflower florets. Mix well.
  13. Season with salt, cumin powder, coriander powder. Stir well and cover and cook on low flame till the cauliflower is cooked.
  14. Remove lid and pour the coconut milk onto the gravy. Stir well. It will get thicker. You can add more water if you like. But the sauce should preferably be a thick one.
  15. Garnish with kasuri methi or dried fenugreek leaves.
  16. Serve hot with naan or paratha. Enjoy! [/directions]

vegan gobhi makhani

vegan gobhi makhani

I hope you try out this delicious and fail proof vegan gobhi makhani for yourself. It’s absolutely divine.

If you have any questions, feel free to reach out to me with a comment or connect with me on Instagram or Facebook. For all my videos, you can subscribe to me on YouTube.

Happy cooking!


Egg Chowmein

Everybody loves a good egg chowmein, but finding a good one is rare. I have grown up eating the best kind of chowmein in streets as well as restaurants in north-east India. And I still feel the quality and taste of Chinese food in that region goes unmatched. Having lived more than a decade in the capital, I am yet to find the taste in Chindian or Chinese food that takes me back home. But I do love whipping up something close to what I have grown up eating in my own kitchen. And here I am sharing my recipe of egg chowmein with you all.

The kind of egg chowmein I like is filled with vegetables and soft, scrambled eggs. The texture of the vegetables defines this dish, as it has to remain crunchy and not even a but soggy. The crunch also comes from a garnish of fresh onions, spring onion greens and raw cabbage (yes, you read that right) on top of a steaming plate of egg chowmein just before serving. The noodles also have to be cooked perfectly, with every strand being separate from the other.

egg chowmein

There are some tricks that I have learnt over years of cooking to get the perfect egg chowmein recipe. I am listing them down in detail here so that you do not have to waste any time learning them.

Here are my tips on how to get the perfect egg chowmein recipe out of your own kitchen every single time.

-Cooking the noodles

Making noodles the perfect way requires some amount of precision. You have to make sure that it is cooked just right – not over or under. Different kinds of noodles require different methods to get cooked perfectly. For lo mein or stir fry noodles recipe like this one, make sure you follow the package instructions.

egg chowmein

  • For this particular recipe, I boiled the egg noodles for 2-3 minutes in salted water (that’s what my package instructions said). Make sure the water is bubbling when you put in your noodles. The trick is to take it out when it is 80 percent cooked because the noodles will keep getting softer while they are still hot. So take it out immediately once they are 80 percent there. You can check it by tasting the noodles and take them out while they still have a bite to them.
  • Add enough water so that the noodles are completely submerged in it. I usually fill up the whole pot with water (about 1.5 litres of water). Otherwise, there is a chance of noodles getting stuck at the bottom or worse – getting burnt!
  • Use a heavy bottomed pan to boil your noodles so that there are no chances of them getting stuck to the bottom.
  • Strain off every last bit of water and mix any neutral oil without any smell. I use vegetable oil.  The oil prevents the noodles from sticking to each other and acquiring a lumpy texture.

– The vegetables

I love to add lots of vegetables to my egg chowmein recipe. It is a great way to consume colourful vegetables and also adds a lot to the flavour profile. I have used carrots, green beans, cabbage, capsicum and onions. All the vegetables need to be cut in the same manner so that they cook uniformly. As you can see in the video, I have cut the vegetables into thin slices. Finely chopping them too fine (like in fried rice) won’t add to the look and consistency desired in a noodles recipe. The longish shape helps the vegetables to assimilate well with the noodles, and also give it an aesthetic appeal.

egg chowmein

Keep all your vegetables cut and ready before you start making this recipe. We add the hardy vegetables like carrot and beans first, followed by the cabbage and capsicum. The vegetables only need to be stir fried for a minute or so to help them retain the crunch and not turn soggy.

– The eggs

Since this is an egg chowmein recipe, the eggs are the star. The eggs are seasoned with salt and freshly ground black pepper powder and beaten till smooth. They are then scrambled into medium chunks and added to the noodles right in the end. You can also make an omelette and slice them thinly to add to the noodles. You can also fry the eggs in butter to add more flavour to the recipe.

egg chowmein

– The sauce base

The secret to this delicious egg chowmein recipe is the sauce base that we use to bind it all together. Street style chowmein usually uses a mix of red chilli sauce, green chilli sauce, white vinegar (for the tang) and dark soy sauce. You can substitute the white vinegar with lemon juice but the rest of the sauces are essential. You can also add a teaspoon of sugar to balance all the flavours, but I have skipped that. Mix all the sauces well and keep it handy before starting to make the egg chowmein.

– Keep everything ready

Once of the most important things to remember in this recipe is to keep everything ready before you start making the recipe in a hot wok. Everything moves really fast in this recipe and keeping everything at your arm’s reach will ensure the vegetables remain crunchy, and the noodles cook perfectly overall.

egg chowmein

egg chowmein

Now that you know all the tips and tricks on how to make the perfect egg chowmein, let’s take a look at the recipe.

Preparation time – 15 minutes

Cook time – 15 minutes

Serves – 4 people

[ingredients title=”Ingredients”]

  • 250 g noodles
  • 4 eggs 1/2 cup onions, thinly sliced
  • 2 tbsp minced garlic
  • 1 cup carrots, thinly sliced
  • 1 cup cabbage, thinly sliced
  • 1 cup green beans, thinly sliced
  • 1/2 green capsicum, thinly sliced
  • 3 tbsp oil – to fry the noodles
  • 1 tbsp oil – to layer the cooked noodles
  • 2 tbsp oil – to fry the eggs
  • 3 tbsp dark soy sauce
  • 2 tbsp green chilli sauce
  • 2 tbsp red chilli sauce
  • 1 tsp white vinegar
  • 1 tsp black pepper powder
  • Salt to taste
  • Fresh spring onion greens, chopped – for garnish
  • Chopped onion, for garnish
  • Chopped cabbage, for garnish [/ingredients]

[directions title=”Directions”]

  1. Boil water in a pot. Add a handful of salt and stir. The water should be saline like you would want in a soup.
  2. Once the water starts to boil, add the noodles to it and cook for 2-3 minutes (or follow package instructions).
  3. Drain water using a sieve. Transfer the noodles to another vessel and layer it with vegetable oil so that the noodles don’t stick to one another. Use a pair of tongs to mix the oil uniformly. Tongs will ensure the noodles don’t break. Set aside.
  4. Break open the eggs into a bowl. Season with salt and a pinch of black pepper powder. Whisk until smooth.
  5. Heat oil in a pan or wok. Once hot, pour the egg mix. Gently scramble the eggs, disintegrating them into medium sized chunks. Once done, set aside for use later.
  6. Heat oil in a wok. Wait for the oil to get really hot. Once the oil starts to smoke, add the onions. Stir on high flame for a minute.
  7. Add the carrots and beans and stir on high flame for another minute.
  8. Finely grate or mince the garlic and add it to the wok. Stir for a few seconds until its raw aroma fades completely.
  9. Add the rest of the vegetables – capsicum and cabbage. Stir for another 30 seconds on high flame.
  10. Throw in the noodles and pour the sauce mix on top.
  11. Toss everything together, making sure the sauce and vegetables mix well with the noodles.
  12. Season with black pepper powder and salt (if needed).
  13. Turn off the fire and garnish with some onions, spring onion greens and cabbage (a tip to elevate your dish up a notch).
  14. Serve hot! [/directions]

egg chowmein

egg chowmein

If you have any doubts, comments, or feedback, please reach out to me in comments or my social media handles.

Find me on Instagram – www.instagram.com/slurrpilicious

Join me on Facebook – www.facebook.com/slurrpilicious

Watch me on Youtube – https://www.youtube.com/channel/UCA-cJoo27OLSCswI4sy6lzA?

Happy cooking!


Penne With Spinach and Corn

Making a steaming pot of delicious penne pasta cannot get easier than this. I absolutely love this penne with spianch and corn recipe. It is so easy and requires almost zero effort! Just plonking all the ingredients straight into one pot and we have a pasta dish of our dreams.

You can make this penne with spinach and corn for a quick meal fix. It is also customisable, as this recipe remains a very basic one. You can add your choice of herbs, cheese or type of pasta too. However, penne works best in a situation like this (personal recommendation). However, you can go with what you have (fusilli is a winner here too).

Ingredients in this Penne with Spinach and Corn Recipe

This recipe requires just a few basic ingredients, with spinach and corn being the two stars of the show. Ingredients are few but each one of them plays a crucial role in bringing the dish together.

The base of the pasta uses milk. If you want to skip the dairy, you can opt for coconut milk. Or if you want to take it a notch up higher, you can add cream. I like to add milk as it keeps the base lighter and does not make it too heavy to consume.

penne with spinach and corn

penne with spinach and corn

The cheese is absolutely essential in the end. You can use any cheese of your choice, and as much as you want. As you can probably make out from the video, I have not gone overboard with any ingredient here, even the cheese. Because I wanted to make it a simple, practical recipe which is not overtly indulgent. Having said that, if you are making it for a special night, please be generous with the cheese if you feel like it.

I have gone with normal cheddar here. You can use any kind of cheese. A combination of sharp cheddar and mozzarella works best in this recipe.

penne with spinach and corn

penne with spinach and corn

Here’s a look at the recipe.

Preparation time – 15 minutes

Cook time – 30 minutes

Serves – 4

[ingredients title=”Ingredients”]

  • 1 tbsp extra virgin olive oil
  • 15 g butter (1 tbsp approx.)
  • 12 g finely chopped garlic (3 tsp approx.)
  • 70 g finely chopped onions (2/3 cup approx.)
  • 60 g uncooked corn kernels
  • 120 g chopped spinach
  • 300 ml milk
  • 130 g penne pasta
  • 26 g toasted walnut paste (see directions)
  • Salt to taste
  • 2 tsp black pepper powder
  • 80 g grated cheese [/ingredients]

[directions title=”Directions”]

  1. Make the toasted walnut paste and keep ready. To make it, toast some walnuts on a pan till they are golden and crunchy. Cool them and grind them with a little bit of water till a fine paste forms. Keep this ready before you start making the pasta.
  2. Heat olive oil in a pot alongside butter. Keep the flame at low.
  3. Once the butter melts and assimilates with the olive oil, add the finely chopped garlic. Let the garlic simmer in the oil at low heat for a few minutes till it releases its aroma and flavours into the oil.
  4. Add the onions and increase the heat to medium. Stir for 3-4 minutes or till the onions are cooked and turn translucent.
  5. Add the corn kernels and cook for five to six minutes till they are nice and soft. Uncooked corn kernels do not take too much time to cook.
  6. Once the corn is cooked, add the spinach and stir it in for another two minutes.
  7. The spinach will wilt quickly. Pour the milk into the pot, alongside the penne and the walnut paste.
  8. Let the milk come to a boil. Then reduce the flame to low and cook covered till the penne is completely soft.
  9. Take lid off and add grated cheese. Mix and reduce till a thick consistency. At this point, you can add some fresh herbs like basil.
  10. Serve hot alongside some bread on the side. Enjoy! [/directions]

penne with spinach and corn

If you have any doubts, comments, or feedback, please reach out to me in comments or my social media handles.

Find me on Instagram – www.instagram.com/slurrpilicious

Join me on Facebook – www.facebook.com/slurrpilicious

Watch me on Youtube – https://www.youtube.com/channel/UCA-cJoo27OLSCswI4sy6lzA?

Happy slurping!


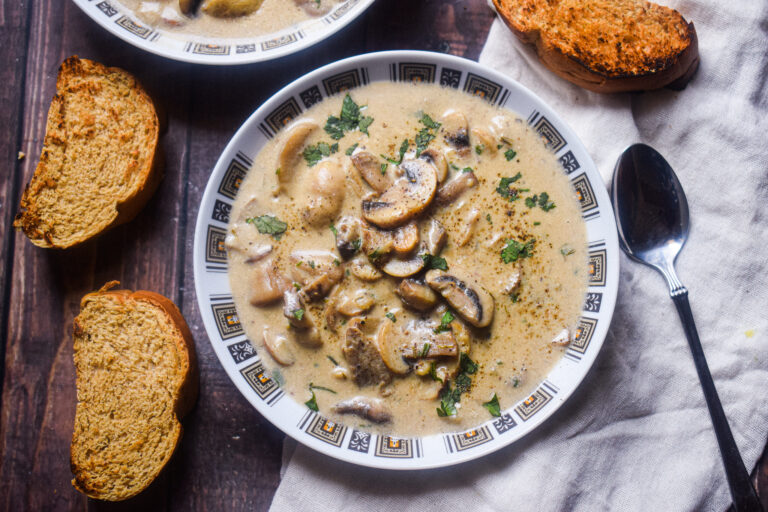
Cream of Mushroom Soup

A creamy, delicious and comforting soup made with pantry staples and easy techniques, this cream of mushroom soup is too good to be too (but very real). This cream of mushroom soup comes together easy with you needing to throw just a few pantry ingredients into a pot. It cannot get easier than this, and the flavour of the mushroom shines through. This soup is flavoured with onions, herbs, lots of freshly ground black pepper and of course, the mushrooms. This  cream of mushroom soup tastes best when steaming hot, with some toasted bread on the side.

This cream of mushroom soup is a hands-on recipe that uses very simple and basic ingredients. If you do not like the chunks of mushroom in your soup, you can go head and blend it. It tastes way better than any canned soup and is free of any kind of preservatives.

cream of mushroom soup

Ingredients in this Cream of Mushroom Soup

Like already mentioned, the ingredients in this cream of mushroom soup are minimal and very very easily available in most kitchens. I have skipped any ingredient that I felt would complicate it. This is honestly the easiest this recipe can get. Here’s a look at the key ingredients.

– Mushrooms

For the mushrooms, you can use any kind of mushrooms that are easily available around you – Portobello, Oyster, Button or a combination of them all. I have used button mushrooms as they are abundantly available all around me at this time of the year and are very easy on the pocket too.

– Cream

I have used thick Amul cream in this recipe as it is one of the main ingredients. The cream contributes towards the silky texture and taste of the soup to a great extent. You can use heavy cream, light cream, coconut cream (if you want it vegan), or heavy cream. But heavy cream really tastes the best.

– Herbs

This cream of mushroom soup recipe uses both dried and fresh herbs. You can choose the kind of fresh herbs you want to garnish it with. I chose a mix of Italian basil and cilantro. You can choose anything you have available like rosemary, fresh thyme, oregano and the likes. For dried herbs, I have used thyme. Again, go with what you have available and what you like. You can customise the flavours of the herbs as per your choice.

– Flour

The thickness of this soup for which it is loved comes from adding flour. I have added all purpose flour or maida which acts as a great binding agent and leads to a beautiful and thick soupy texture. All purpose flour also does not add any flavour of its own to the soup. If you want to skip using all purpose flour, you can also use roasted gram flour (besan) as a thickening agent. However, it will slightly change the flavour profile of the soup. Another substitute is cornstarch. Mix around 3 tablespoons of cornstarch to water to make a slurry and add it to the soup.

– Stock or hot water

This is an easy version to a cream of mushroom soup which uses hot water as the soup base. You can always use vegetable, chicken or any kind of stock that you might have handy. If you do not have stock at hand, go ahead with boiling hot water. The flavour won’t be the same as with stock, but it it pretty darn good irrespective. The soup needs time to boil and assimilate with all the flavours and ingredients, and even with hot water, the results are pretty incredible.

cream of mushroom soup

Cooking the Mushroom

This cream of mushroom recipe requires a bit of technique to get the maximum flavour out of the mushrooms. Here are some tips to make the best version possible.

  • Here’s a tip to make sure mushrooms cook without any excess water – wash and pat dry the mushrooms with a paper towel before you add them to the pot or skillet to cook. Excess water on the surface of the mushroom creates a lot of moisture, which released into the vessel you’re cooking them in. So make sure your mushrooms are dry from the surface.
  • The mushrooms need to be added to the onions and garlic, once the onions turn brown and transparent (see video for reference). Once you add the mushroom, give it a light stir and let it sit untouched for about 5 minutes. This technique ensures that the mushrooms do not become soggy, and instead have a crispy coating of the oil and butter in which it is cooked. Once the mushrooms reduce flip them over and do the same for another 5 minutes. Monitor the heat, keep it at medium to high.
  • Use a heavy bottomed pan or pot if you want that perfect char on the mushrooms. Using a less dense bottom will not give you good results. Go for cast iron dutch oven or a good quality stainless steel skillet/pot.

cream of mushroom soup

cream of mushroom soup

Here’s a look at the recipe.

Preparation time – 15 minutes

Cook time – 30 minutes

Serves – 4

[ingredients title=”Ingredients”]

  • 800 g button mushrooms
  • 1 cup finely chopped onions
  • 2 tbsp olive oil/vegetable oil
  • 2 tbsp butter
  • 1 tbsp finely chopped garlic
  • 200 g heavy cream
  • 1 tbsp dried/fresh thyme
  • 1/2 cup all purpose flour
  • 800 ml hot water/stock
  • Fresh basil
  • 1 tbsp black pepper powder
  • Salt to taste [/ingredients]

[directions title=”Directions”]

  1. Heat olive oil and butter in a heavy bottomed pot or skillet. Keep the heat at low.
  2. Add the finely chopped garlic and stir for another minute. Increase the flame to high to get a good char on the onions.
  3. Once the onions are golden brown and transparent, add the finely chopped garlic. Stir till the raw aroma of the garlic fades completely.
  4. Add the sliced button mushrooms and give it a light stir. Let it sit in the pot or pan for five minutes untouched.
  5. Stir after five minutes and repeat the process. Monitor the heat as you do this. This technique ensures the mushrooms get a golden brown char and do not become excessively soggy.
  6. Once the mushrooms are cooked through, add the all purpose flour and give it all a good mix.
  7. Add the dried thyme, salt and black pepper powder. Mix well.
  8. Pour the hot water or stock and mix well. Let it come to an aggressive boil.
  9. Boil the soup till you get your desired consistency.
  10. Once you have achieved your desired consistency, add chopped basil and serve.
  11. Garnish more herbs and freshly ground black pepper on top before serving. Enjoy with some toasted bread on the side. [/directions]

cream of mushroom soup

cream of mushroom soup

I hope you try this delicious cream of mushroom soup soon.

Related recipe – Creamy Butter Garlic Mushrooms

If you have any doubts, comments, or feedback, please reach out to me in comments or my social media handles.

Find me on Instagram – www.instagram.com/slurrpilicious

Join me on Facebook – www.facebook.com/slurrpilicious

Watch me on Youtube – https://www.youtube.com/channel/UCA-cJoo27OLSCswI4sy6lzA?

Happy slurping!

Butter Garlic Mushroom

Are you a mushroom lover? If yes, this recipe is for you. I mean what can seriously go wrong with butter, garlic and mushroom, right? These heavenly ingredients make for an easy, fuss-free and drop dead delicious butter garlic mushroom recipe that is packed with so much flavour. This recipe is different from my viral creamy butter garlic mushrooms recipe as it involves a few Asian ingredients. These butter garlic mushrooms scream comfort, and are juicy and infused with punchy flavours.

butter garlic mushroom

butter garlic mushroom

The best thing that I like about this recipe (apart from the amazing flavour profile of course) is how easy it is. Such a simple recipe and such great flavours equals the kind of food we do in this blog. Each bite into the mushrooms will ooze out so much flavour. And the best part about cooking button mushrooms in their whole form is that it soaks up the juices and spices of the base really well. The result is a delicious sauce that penetrates every bit of that mushroom, making the entire eating experience a divine one.

butter garlic mushroom

Here’s a look at the recipe.

Preparation time – 15 minutes

Cook time – 20 minutes

Serves – 3

[ingredients title=”Ingredients”]

  • 20 ml vegetable oil (any neutral oil like Sunflower/Canola etc.)
  • 15 g butter
  • 100 g finely chopped onions
  • 80 g chopped spring onions
  • 200 g whole button mushrooms, cleaned thoroughly and pat dried
  • 15 g finely chopped garlic
  • 3 g freshly crushed black pepper powder
  • Salt to taste
  • 80 ml hot water
  • 15 ml Schezwan sauce
  • 8 g butter (for later)
  • Chopped spring onion greens, for garnish [/ingredients]

[directions title=”Directions”]

  1. Heat a wok. Once it’s hot, add the oil and let it heat up well.
  2. Add the butter along with the onions and spring onions and stir for a few seconds on medium to high heat. Add the butter after the oil to prevent it from burning.
  3. Once the onions are brown and translucent, add the whole button mushrooms. Mix everything well together. Cook this on medium to high flame for 3-4 minutes.
  4. Add the garlic and mix it with the rest of the ingredients. Let it cook till the raw aroma of the garlic fades completely (should take about a minute).
  5. Season with salt and freshly ground black pepper powder. Mix well.
  6. Pour the hot water and mix everything together to prevent it from sticking to the pan or burning.
  7. Add the Schezwan sauce and butter and give it a last mix till all is well combined and you have a thick sauce for the mushrooms.
  8. Turn off the flame once the mushrooms cook completely.
  9. Garnish with spring onion greens. Serve hot with noodles or fried rice. [/directions]

butter garlic mushroom

butter garlic mushroom

I hope you try this delicious butter garlic mushrooms recipe soon.

If you have any doubts, comments, or feedback, please reach out to me in comments or my social media handles.

Find me on Instagram – www.instagram.com/slurrpilicious

Join me on Facebook – www.facebook.com/slurrpilicious

Watch me on Youtube – https://www.youtube.com/channel/UCA-cJoo27OLSCswI4sy6lzA?

Happy cooking!

Macaroni and Cheese Without Milk & Flour

Macaroni and Cheese is a classic recipe and everyone’s favourite. There are a thousand ways to make this recipe and this is mine. I no way do I claim this recipe to be an authentic version. This macaroni and cheese recipe is very personal and I have been making this for as long as I can remember. I usually skip the milk and the flour in this recipe, as I feel it makes the entire meal way too heavy. For a home cooked meal, I like to keep it simple, and use a little bit of cream and hot water as the binding agent, and there is absolutely no compromise on the amount of cheese!

macaroni and cheese

What makes this macaroni and cheese recipe so special?

There are several reasons why this macaroni and cheese recipe is special.

-Probably the easiest mac and cheese recipe there is!

It cannot get easier than this. This recipe is made straight in a skillet and there is no oven needed whatsoever. You can always put some extra cheese on the top and bake it until golden brown to make it a little more special. But if you want to skip that part, it is fine too!

-The best topping (other than cheese)

The second best part about this macaroni and cheese recipe is that delicious topping of panko breadcrumbs, seasoned with salt and pepper. This topping makes a world of a difference to the flavour profile and elevates this recipe to a whole new level. It is a must if you make this, as the recipe is otherwise pretty simple.

macaroni and cheese

Good quality macaroni is a must!

The market has a wide variety of macaroni, but this recipe requires for one that is sturdy and does not melt too quickly. Go for a brand that has superior quality elbow macaroni, and skip the flimsy ones that you might make for an Indian style macaroni pasta. This is because the macaroni will cook in the base of cream and hot water, and it needs to maintain its shape and not disintegrate into the sauce. Clumpy or mashed macaroni is a nightmare when it comes to a good macaroni and cheese.

macaroni and cheese

Here’s a look at the recipe.

Preparation time – 15 minutes

Cook time – 35-40 minutes

Serves – 4

[ingredients title=”Ingredients”]

  • 1 cup breadcrumbs
  • 1/4 tsp black pepper powder (for flavouring the breadcrumbs)
  • 1 cup elbow macaroni
  • 2 tbsp cooking oil (any neutral oil like Sunflower/Canola etc.)
  • 2 tbsp butter (25 grams)
  • 1 cup finely chopped onions
  • 3 medium cloves of garlic, finely chopped
  • 6 cups of boiling hot water
  • 3 cups elbow macaroni
  • 1/2 cup fresh cream
  • 1/2 tbsp freshly ground black pepper powder
  • 1/2 tsp Oregano
  • 1/2 tsp chilli flakes (optional)
  • 1 tsp dried mix herbs (if any)
  • Salt to taste
  • 150 g grated processed cheese [/ingredients]

[directions title=”Directions”]

  1. Heat a skillet and add the breadcrumbs. Keep stirring the breadcrumbs on medium to low flame till they start to turn golden brown. Do not burn.
  2. Season the breadcrumbs with salt and black pepper powder. Set aside for later.
  3. Heat oil in a skillet or pot. Add the butter and mix the two fats. Add the chopped onions and saute till they turn aromatic and slightly golden brown.
  4. Once the onions are soft, add the garlic and saute till it assimilates with the oils and the onion.
  5. Once the onions and garlic is cooked and do not contain any rawness, add the hot water and the cream. Mix well and let it come to a boil.
  6. Add the elbow macaroni into the boiling base and stir well.
  7. Season with salt, black pepper powder, and the herbs. I like to add chilli flakes for some heat, you can skip it if you do not want it.
  8. Once everything is well combined, cover and let the macaroni cook on medium to low flame for 10-15 minutes (or till soft). Keep checking from time to time to prevent it from burning.
  9. Take lid off and stir till you get a creamy consistency. Add in the rest of the cream and cheese and mix well.
  10. Serve hot with a generous topping of the toasted breadcrumbs. Enjoy! [/directions]

macaroni and cheese

macaroni and cheese

I hope you try this delicious macaroni and cheese recipe soon. It is a slight deviation from the traditional recipe, but tastes lighter and extremely delicious!

If you have any doubts, comments, or feedback, please reach out to me in comments or my social media handles.

Find me on Instagram – www.instagram.com/slurrpilicious

Join me on Facebook – www.facebook.com/slurrpilicious

Watch me on Youtube – https://www.youtube.com/channel/UCA-cJoo27OLSCswI4sy6lzA?

Happy cooking!

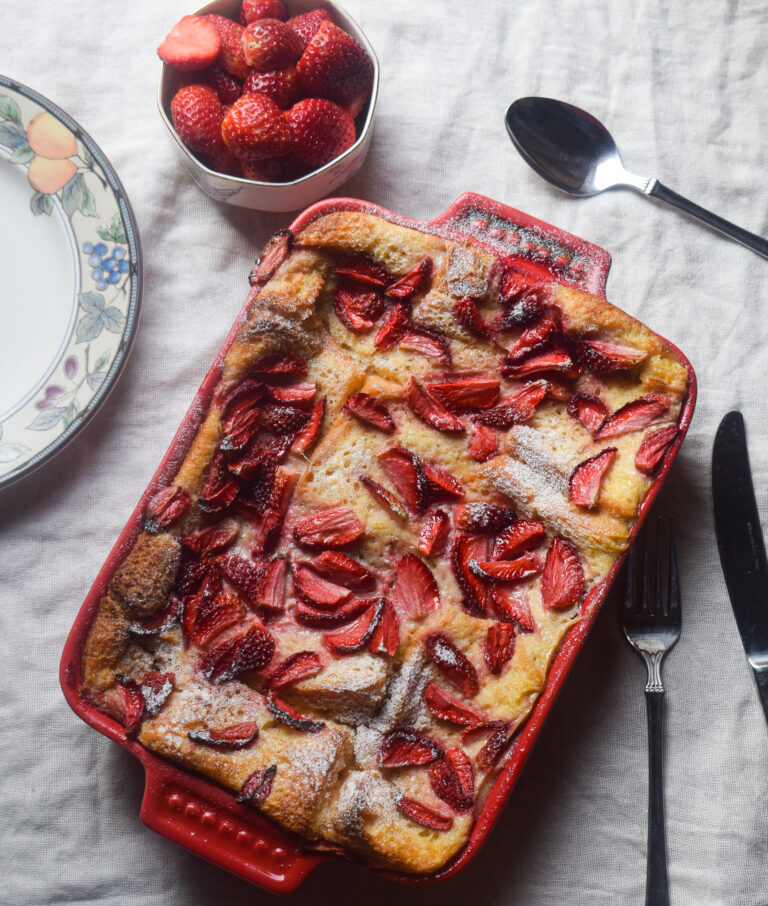
Strawberry Bread Pudding

I have the perfect dessert recipe for you if you’re planning to host or be in charge of dessert for your next social gathering at home. This strawberry bread pudding is so delicious, comforting and easy! You can make it with just a few ingredients and your kitchen will smell like a beautiful little bakery in no time. Every bite into this strawberry pudding feels like a warm hug. It’s soft, flavourful and has all the holiday flavours – vanilla, cinnamon and of course, strawberries.

This strawberry bread pudding is a perfect recipe to make in bulk if you are hosting or cooking for a large family. It really does not require any effort, and it comes together in no time. If you do not have strawberries, you can make it plain or add blueberries. You can also mix and match and customise it as per what fruit you have available.

How to Get The Perfect Pudding Texture

Bread puddings are very special to me and they remind of my childhood when my mom would make them for us kids when we wanted something special and sweet. I was such a huge fan of her bread pudding recipe, and every time I bite into a good pudding, it instantly reminds of those wonderful times. Even though a bread pudding might be the simplest dessert to pop in the oven, but it does require some crucial ticks to be checked.

strawberry bread pudding

strawberry bread pudding

Here are the tips I follow to make my pudding a little slice of heaven.

-Use the best quality of white bread possible

If you are making bread pudding, the #1 rule is to use the best kind of white bread possible. Do not try to substitute a good quality white bread with a brown or any other variant. The texture of the white bread will define how good your pudding it. So go for brioche, or any kind of superior, soft and fresh milk bread.

-Continuous whisking

This pudding is a delicious jelly filled sandwiches soaking in a pudding mix of eggs and milk. Because we add the eggs directly to the milk, it is important that the milk is stirred continuously while doing so. Doing this ensures that the egg disintegrates completely into the milk and mixes with the sugar, vanilla and cinnamon, making way for the perfect custard base for the pudding to cook in. Continuous whisking also ensures that the egg does not get a chance to cook in the warm milk.

strawberry bread pudding

strawberry bread pudding

-Temperature of ingredients

The perfect pudding is all about using ingredients in their right quantities and temperatures. The milk must be warm and not too hot. The eggs should be at room temperature. If the milk is too hot, the egg will not disintegrate, and instead start cooking as a result of the heat. This will result in an inconsistent batter for the bread to cook in, and might also lead to an overpowering “eggy” smell.

-Let it cool

Once you take the pudding out of the oven, let it sit on the rack and cool down for ten minutes before you serve it. It will help the pudding to cool, settle down and harden, making for the perfect consistency. This pudding can also be chilled and served just before dessert time. It makes for a delicious, cold dessert.

strawberry bread pudding

Now that you know all the secrets to making the perfect strawberry bread pudding, let’s take a look at the recipe.

Preparation time – 30 minutes

Cook time – 40-50 minutes

Serves – 4

[ingredients title=”Ingredients”]

  • 1 litre full fat milk
  • 100g fresh strawberries, sliced into medium chunks
  • 8 slices of white bread
  • 1 cup sugar
  • Apple cinnamon jelly for the bread sandwiches (or use any jam/jelly of your choice)
  • 4 eggs
  • 1 tsp vanilla essence
  • 1/4 tsp cinnamon powder [/ingredients]

[directions title=”Directions”]

  1. Apply the jelly in between two slices of bread and make sandwiches. You will need four to five jelly filled sandwiches.
  2. Cut each sandwich into four equal parts and set aside.
  3. Heat the milk and let it cool down for 5 minutes.
  4. Add the sugar to the milk, along with the vanilla essence and cinnamon powder. Whisk continuously.
  5. Add the eggs one by one. Keep stirring the milk continuously while you add the eggs. Whisk for around ten minutes till you get a smooth texture of the milk and everything is assimilated well into it.
  6. Thoroughly layer your baking tray with butter or oil.
  7. Place the jelly sandwiches on the tray as shown in the video. Make sure they are well packed and have filled the entire space.
  8. Gently pour the milk over bread, making sure each slice gets submerged in the milk.
  9. Garnish the top with some fresh strawberries, sliced into chunks. Pour some more milk on top of the strawberries.
  10. Bake at 180 degrees for 40-45 minutes. The time can vary in your oven, so keep a watch.
  11. Once done, carefully take out the tray and let it rest for ten minutes.
  12. Sprinkle powdered sugar on top.
  13. Cut and serve with more fresh strawberries on the side. You can also serve it with some whipped cream or custard. Enjoy! [/directions]

strawberry bread pudding

strawberry bread pudding

I hope you try this delicious strawberry bread pudding recipe soon. It is a great way to celebrate at home, something we all need this year.

If you have any doubts, comments, or feedback, please reach out to me in comments or my social media handles.

Find me on Instagram – www.instagram.com/slurrpilicious

Join me on Facebook – www.facebook.com/slurrpilicious

Watch me on Youtube – https://www.youtube.com/channel/UCA-cJoo27OLSCswI4sy6lzA?

Happy baking!


Ghugni

Some recipes have a special place in all our hearts. One look at it takes us home. And ghugni definitely makes it to the top of that list for me. For those who are not familiar, ghugni is a light curry made with yellow peas. It is wildly popular as a street food in Assam and West Bengal. It can be made as a dry snack or a curry, depending on what you are serving it with. My earliest memories of ghugni take me to Sundays when breakfast would be ghugni with lusi (Assamese deep fried flatbread). Or during Durga Puja pandal hopping when street vendors would be selling steaming types of ghugni topped with onions, chillies and coriander.

This ghugni recipe is my version with some potatoes that goes really well with rotis, parathas or luchi/lusi. You can also eat it as a snack with toppings of your choice. You can even make a ghugni chat out of it with by sprinkling some chat masala on top, along with onions, green chillies, mint and coriander.

Steps to Make the Perfect Ghugni

Here are some steps to make sure you are well prepared to make the perfect tasting ghugni. This recipe is very simple and easy, but taking care of these few things are essential.

  • Soak the peas overnight

Yellow peas are hardy and need a lot of soaking to cook uniformly. It is absolutely essential to soak them for a minimum of 12 hours before you decide to make them. I usually soak them overnight so that I can prepare this ghugni recipe for breakfast or lunch.

  • Add salt while pressure-cooking

Adding salt while pressure-cooking yelow peas (or any legumes for that matter) is very important as it helps ensure that the legumes also get seasoned uniformly (and not just the stock). Do not skip this step.

ghugni

ghugni

  • Use fresh spices

A few spices go into the making of this ghugni recipe that lends it a distinct set of flavours, aroma, and taste. To get the best out of this recipe, I recommend you keep your spices as fresh as possible. By fresh I mean get the whole spices and grind them at home instead of using store-bought masalas. Trust me, there is nothing simpler you can do to make your food taste stunning every single time. This is the best tip for making any recipe taste gorgeous! I make a big batch of spices every month at my home – be it cumin, coriander, or garam masala! The fresh spices elevate the taste and quality of recipes to a whole new level.

  • Cook the masala well

This base of this ghugni recipe is a mixture of onions, ginger, garlic, and some wonderful spices. It’s important to be a little patient and cook the masala through. This requires a few minutes of slow cooking until you see the oil release from the sides. The last thing you want in your ghugni is the smell of raw onions, ginger or garlic. A little investment in terms of time, but the results are absolutely worth it.

ghugni

ghugni

Now that you know all the secrets to making the perfect ghugni, let’s take a look at the recipe.

Preparation time – 30 minutes

Cook time – 40 minutes

Serves – 4

[ingredients title=”Ingredients”]

  • 200 yellow peas/white peas, soaked in water overnight
  • 1 tbsp salt
  • 900 ml water
  • 200 g potatoes, cut into cubes
  • 30 ml mustard oil
  • 2 bay leaves
  • 2 dried red chillies
  • 2g nigella seeds (kalonji)
  • 200 g onions, finely chopped
  • 4 g sugar
  • 2 chillies, cut into four parts
  • 15g ginger-garlic paste
  • Salt to taste, for the masala
  • 4g turmeric powder
  • 4g cumin powder
  • 4g black pepper powder
  • 4g coriander powder
  • 80ml hot water
  • Fresh coriander, 2 tbsp
  • 2g garam masala
  • More fresh coriander, for garnish
  • Finely chopped tomatoes, for topping
  • Finely chopped onions, for topping
  • Finely chopped green chillies, for topping
  • Finely chopped coriander, for topping [/ingredients]

[directions title=”Directions”]

  1. Soak the peas in room temperature water overnight. Wash and keep ready before cooking.
  2. Add the peas to a pressure cooker. Add the potatoes, salt and water. Give it a light mix with a spoon. Pressure cook for 7-8 whistles (or till peas are cooked).
  3. Heat mustard oil in a skillet or kadhai. Once it heats up, it will smoke and acquire a pale colour. Lower the flame and temper the oil with bay leaves, dried red chillies and nigella seeds or kalonji. Stir for three seconds.
  4. Add the finely chopped onions. Increase the flame to medium. Stir for 3-4 minutes till the onions start to turn brown. Do not burn.
  5. Add some sugar. The sugar will help the onions caramelise faster also add a little bit of sweetness to the curry.
  6. Add the ginger-garlic paste and stir till its raw aroma fades completely.
  7. Season with salt, turmeric powder, cumin powder, coriander powder and black pepper powder. Stir for a minute or two on low flame. Add a little but of water from the stock to prevent the masala from sticking to the pan.
  8. Add some fresh coriander leaves and mix it into the masala.
  9. Pour the boiled chickpeas along with the stock and mix well. Let the curry come to an aggressive boil.
  10. Once you have achieved your desired consistency, add some garam masala and mix.
  11. Your ghugni is ready. Pour onto a bowl and garnish with finely chopped tomatoes, onions, green chillies and coriander. Serve hot as it is or pair it with parathas or luchi/poori. [/directions]

ghugni

I hope you try this delicious and super easy ghugni recipe soon. It is entirely vegan and a healthy option for breakfast, lunch or dinner!

If you have any doubts, comments, or feedback, please reach out to me in comments or my social media handles.

Find me on Instagram – www.instagram.com/slurrpilicious

Find me on Facebook – www.facebook.com/slurrpilicious

Find me on Youtube – https://www.youtube.com/channel/UCA-cJoo27OLSCswI4sy6lzA?

Happy cooking!

Matar Pulao

For all of you who have known me and my kind of food would know how much I love a good pulao. Pulao is such an amazing way to combine vegetables, protein, spices and rice to make delicious one-pot meals. I am a huge fan because pulaos help me eat healthy and at home, without compromising on taste or nutrition. They are super customisable and can be whipped up with any vegetable or protein you might have lying in your kitchen.

matar pulao

matar pulao

Since I resort to pulaos every other day. I want to share another favourite of mine – Matar Pulao. It’s a simple yet divine recipe that marries long grained and aromatic basmati rice to peas. I love making this in winters, when fresh peas are in season. This matar pulao is also a great side dish to have if you are planning to invite friends or family over for a meal. It pairs amazingly well with any curry or dal, and can also be enjoyed as it is with some raita, achar or salad.

Making the perfectly fluffy rice

The main aspect of this pulao is getting that perfect rice which is fluffy and light. This is possible once we remove excess starch during washing the rice and soaking it before cooking. Here is how you can get the best out of your rice and make the most airy grains.

Soaking

For this pulao, find yourself the best quality long grained basmati rice. Wash the rice thoroughly with water till its clear. Next, soak it for exactly 30 minutes in room temperature water. After that, strain the water and keep the rice as dry as possible. I used a sieve to release the water and keep it undisturbed. Do not soak for more than 30 minutes as the rice will become too wet and will cook very fast, and end up sticking to each other. Soaking for longer duration might also break the rice. Soaking is an essential pre-requisite to get the perfectly fluffy rice that you see in this egg pulao.

Correct water quantities

Next is the perfect amount of water for the rice to cook. I have added the exact measurements for this recipe, but the usual and easy rule to follow is – For every cup of rice that you use, use half cup more water than that. For example, if you use 1 cup of rice, use 1.5 cups of water. If you use 2 cups of rice, use 2.5 cups of water. And the water should always be hot if you’re making the rice in a pot. Otherwise, the temperature difference might ruin the rice. This rule applies only if you soak the rice for 30 minutes before cooking it.

Low flame and rest

Lastly, perfectly fluffy rice is always cooked in low flame. If you’re making rice in a pot, make sure you cover and cook it in the lowest flame possible. And once its done, do not serve immediately. Turn off the gas and let it rest for another 10-15 minutes. This will give the perfect edge to the rice and make it bloom to its best ability.

matar pulao

matar pulao

Now that you know all the secrets to making the perfect matar pulao, let’s take a look at the recipe.

Preparation time – 30 minutes

Cook time – 30 minutes

Serves – 4

[ingredients title=”Ingredients”]

  • 230 g basmati rice (1 cup approx)
  • 30 ml vegetable oil (2 tbsp approx)
  • 15 ml ghee (1 tbsp)
  • 1 inch cinnamon stick
  • 2 cardamoms
  • 3 cloves
  • 1 bay leaf
  • 200 g finely chopped onions (1 cup approx)
  • 10 g ginger paste (2.5 tsp approx)
  • 8 g garlic paste (2 tsp approx)
  • 200 g fresh green peas (1 cup approx)
  • Salt to taste
  • 4 g cumin powder ( 1 tsp)
  • 4 g Kashmiri red chilli powder ( 1 tsp)
  • 500 ml hot water (2 cups approx)
  • 5 g garam masala (1 tsp) [/ingredients]

[directions title=”Directions”]

  1. Wash the rice thoroughly under running water. Soak in water for 30 minutes.
  2. Heat oil and ghee in a skillet or pot. Lower the flame to low once hot.
  3. Temper with cloves, cardamom, cinnamon stick and bay leaf. Give it a light mix.
  4. Add the onions. Mix for a few minutes till the onions turn translucent.
  5. Once the onions are clear and start to sweat, add the ginger and garlic paste. Mix until the raw aroma of the ginger and garlic disappears.
  6. Add the fresh peas and mix it with the onions. Stir for 3-4 minutes on medium flame.
  7. Season with salt, cumin powder and red chilli powder. Stir everything until well combined.
  8. Once the spices are cooked, add the soaked rice and gently stir with a spatula. Do not break the grains with too much pressure.
  9. Fry the rice for a few minutes. Add the hot water and mix well.
  10. Cover and cook on low flame for 20 minutes. Take lid off and gently check on the rice with a fork.
  11. Turn the flame off and let the rice rest covered for another 15 minutes before you serve.
  12. Serve hot with any curry, raita, achar and salad. [/directions]

matar pulao

matar pulao

I hope you try this delicious and super easy matar pulao soon. You can make this vegan by skipping the ghee.

If you have any doubts, comments, or feedback, please reach out to me in comments or my social media handles.

Find me on Instagram – www.instagram.com/slurrpilicious

Find me on Facebook – www.facebook.com/slurrpilicious

Find me on Youtube – https://www.youtube.com/channel/UCA-cJoo27OLSCswI4sy6lzA?

Happy cooking!