Jeera Rice

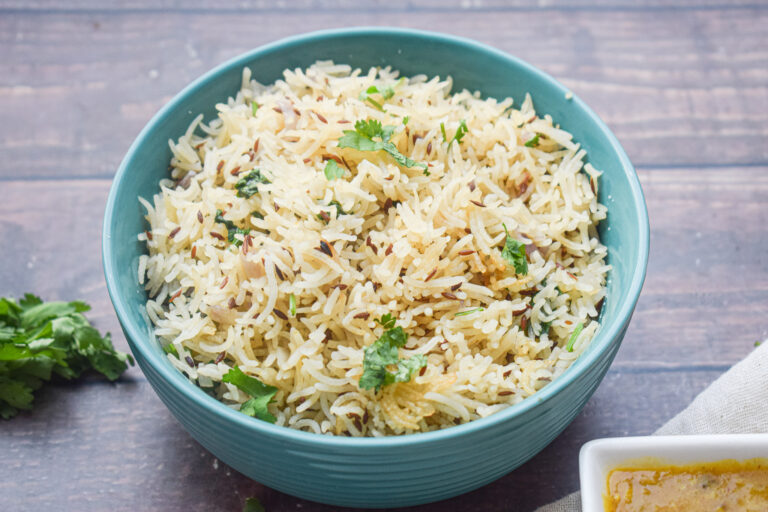
Whether we’re cooking at home or ordering at a restaurant, jeera rice seems to pair perfectly with any Indian curry or dal. The jeera rice we make at home, spluttering some cumin in a couple tablespoons of ghee, tossing the rice in it and boiling it till fluffy, is delicious but sometimes we crave that restaurant style taste. Today, I’ll be sharing with you the ultimate restaurant style jeera rice recipe. It is my holy grail and I’ve been making this for friends and family for atleast a decade!

jeera rice

The best part about this recipe is that it comes together in one single pan and does not involve a lot more steps than those involved in cooking the perfect basic basmati rice. If you wish to make it in a pressure cooker, you can follow the same steps and cook it for just one whistle.

Ingredients in This Jeera Rice Recipe

Even though the ingredients in this recipe are minimal, it is important to use the best quality ingredients that can constitute the maximum flavor to the dish. Keeping a few things in mind, you will end up with the perfect Jeera Rice every single time. Let’s take a look at the key ingredients of this recipe.

– Basmati Rice

Although, the name suggests that Jeera is the hero of this recipe, I would be lying if I said Basmati Rice isn’t just as important. Using basmati rice in this recipe is very vital as it is one of the most flavourful rice there is. We’ve all had restaurant style jeera rice and it is nothing but a steaming bowl of perfectly cooked aromatic basmati rice with every grain fully and separated, seasoned with flavourful spices. Cooking the basmati rice perfectly is the most crucial step in the making of this restaurant style jeera rice as well as in any recipe which calls for the same.

jeera rice

Basmati is fragrant, nutty-tasting long grain rice which gets better with age. Keeping in mind a few tips will help us make the perfect basmati rice every time:

  • Wash it thoroughly:  The key to making basmati rice that is light, tender and fluffy is to rinse it first; otherwise, the grains will be gummy and stick together. It only takes a minute or two. Simply place the rice in a bowl with water, and then swish it around to release any excess starch. The water will be cloudy at first but after several rinses, it will be clear.
  • Bring the rice along with all the spices, water and fat to a boil before covering and cooking it completely on low flame.
  • Rice to water ratio is extremely crucial: The perfect rice to water ratio for jeera rice is 1:2. The rice is steamed in a pan which is covered so that the steam does not escape. This rice to water ratio ensures that the rice is cooked just right – where every grain is fluffy and separate from each other. However, if you are cooking this in a traditional pressure cooker, increase the rice to water ratio to 1:2.25. In the Instant Pot, use a ratio of 1: 1.75. 
  • Let the rice sit for about 5 minutes after done and fluff gently before serving for best results.

– Jeera/Cumin Seeds

It goes without saying that Jeera or Cumin is the most dominant flavour in this recipe. Cumin seeds and ground cumin have been an integral part of Indian cooking. Spluttering the cumin seeds in hot ghee cracks it open and its smoky tone imparts so much flavour to this Jeera rice recipe. Apart from that it is one of the healthiest spices that there is. 

jeera rice

Note this recipe down, try it for yourself and you’ll never have to search for another recipe and get the perfect Jeera Rice every single time.

Preparation time – 30 minutes

Cook time – 30 minutes

Serves – 3 people

[ingredients title=”Ingredients”]

  • 1 cup basmati rice
  • 2 tbsp ghee
  • 2 bay leaves
  • ½ cup onions – finely chopped
  • 1 green chilli – slit in half
  • 1 tsp jeera (cumin seeds)
  • Salt to Taste
  • 1.5 cups hot water
  • Fresh coriander leaves – finely chopped [/ingredients]

[directions title=”Directions”]

  1. Thoroughly wash the basmati rice till the water runs clean.
  2. After washing, submerge it in sufficient water and soak it for 30 minutes.
  3. Heat some ghee in a pan.
  4. When the ghee is hot, add the bay leaves, the slit chilies and the jeera. Make sure the ghee is hot before you add the jeera; otherwise the jeera will absorb all the fat and not release its flavours into the ghee.
  5. Let it splutter. 
  6. Reduce the flame and gently stir.
  7. Once the jeera starts to smoke, add in the finely chopped onions.
  8. When the onions begin to brown, season with salt.
  9. Give it a good mix.
  10. It is time to add in the soaked basmati rice.
  11. Fry the rice with the spices for a few minutes, gently stirring to prevent breakage of the rice grains.
  12.  Add in the hot water and give it a gentle mix. 
  13. Cover and cook on a low flame for 10 minutes.
  14. Garnish with some fresh coriander leaves and fluff with a fork before serving.[/directions]

jeera rice

Make this Restaurant Style Jeera Rice for your next dinner party and impress everybody or maybe make it for a lazy afternoon meal and enjoy it with your loved ones!

Feel free to reach out for feedbacks, suggestions or connect with me on Instagram or Facebook. Subscribe to my YouTube channel for all my videos and upcoming recipes.

Prawns Omelette

Here’s a delicious way to combine eggs and prawns and make a light and healthy meal out of it. The delicious prawn omelette is so flavourful and makes for a light meal. I make both the prawns and the omelette on the same skillet. The fluffy omelette soaks up all the flavours of the butter garlic prawns and makes it gives it a delicious punch. Overall this prawn omelette is one of the recipes I am really proud of developing. Make sure the skillet or pan you use has a solid base, or else your omelette will get burnt.

While the flavours of this prawn omelette are fascinating, it is also extremely quick and easy to put together. The prawns slow cook themselves with the eggs and that lends it a beautiful, soft texture. You can pair this prawn omelette with a side salad and enjoy a light meal at any time of the day.

prawn omelette

prawn omelette

Ingredients in this Prawn Omelette

Let’s take a look at some of the key ingredients of this prawn omelette.

– Prawns

In this recipe, prawns provide that extra punch of flavour, protein and crunchy yet juicy bite to your soft and fluffy omelette. Prawns are extremely delicate and take no time to cook. There is a very thin line between undercooked (slimy and risky), perfectly cooked (crunchy, firm and yummy) and overcooked (chewy and rubbery) prawns and it is extremely important to cook the prawns just right for any dish.  

Here are some tips on how you can cook prawns perfectly.

  • Do not crowd the pan. It is advised to sear the prawns in batches if you’re making a large portion as crowding the pan will result into unevenly cooked prawns which is just a lump that no one likes. Lesser prawns in a pan means – better colour, easier to handle and will not overcook.
  • Use oil and butter. While butter provides the best flavour, a higher heat is required to make the prawns golden and butter tends to burn quickly. The oil prevents the butter from burning, hence resulting in the perfect buttery golden prawns every time.
  • Cook for a couple minutes on each side tops if working on a high flame. Cover and cook for 3-4 minutes if working on medium to low flame. If you go longer, you will overcook your prawns and they will become rubbery. The quicker the prawns cook, the crispier and juicier they will be.

– Eggs

It goes without saying that eggs are the base of this recipe. Eggs make our lives so much easier. They cook just as quickly as the prawns and hence make this dish a perfect go-to when you’re in a hurry. Make sure that the skillet or pan that you use has a heavy base or else your eggs run a very high chance of getting burnt.

– Flavouring agents

Butter, garlic, onion and basil are responsible for most of the flavour in this omelette. Butter pairs up beautifully with the prawns and gives it a luscious flavour, garlic provides the pungent kick of flavour, onion balances the strong flavour of garlic with its sweetness and basil gives a dash of freshness to the whole dish.

prawn omelette

Why make this scrumptious Shrimp Omelette?

  • Super quick. Comes together in less than 15 minutes.
  • Fool proof!
  • Made with the most basic pantry ingredients.
  • Extremely rich in protein.
  • Perfect for a packed lunch as is absolutely non-messy.
  • Tastes like a dream.

prawn omelette

prawn omelette

Note this recipe down, try it for yourself and you’ll never have to search for another recipe and get the perfect Prawn Omelette every single time.

Preparation time – 10 minutes

Cook time – 20 minutes

Serves – 3 people

[ingredients title=”Ingredients”]

  • 300 g prawns – cleaned, deveined and patted dry.
  • 2 tbsp oil
  • 2 tbsp butter
  • 1 cup onions – finely chopped
  • 2 tbsp garlic – finely chopped
  • Salt to taste
  • ¼ tsp black pepper powder
  • 4 eggs – whisked with a pinch of salt and black pepper powder
  • Fresh Italian basil leaves – chopped [/ingredients]

[directions title=”Directions”]

  1. Heat the oil in a heavy base pan or skillet. 
  2. Add the finely chopped onions and cook, stirring occasionally.
  3. Let the onions come to a golden brown colour.
  4. Once the onions are done, add the butter.
  5. As the butter starts to melt, add in the finely chopped garlic.
  6. Cook the garlic till it starts getting slightly golden.
  7. At this stage, add in your clean and dry prawns.
  8. Give it a good stir and season with salt and black pepper powder.
  9. Keep stirring for a few seconds.
  10. Cover and cook for 3-4 minutes.
  11. While the prawns are cooking, break 4 eggs in a bowl.
  12. Season the eggs with some salt and pepper and whisk thoroughly.
  13. Take off the lid and give the prawns another good stir.
  14. Add the chopped fresh basil and mix well.
  15. Take the prawns out and keep aside.
  16. In the same pan, add the whisked eggs. This will help the eggs absorb and retain the maximum flavour of the prawns.
  17. Add the butter garlic stir fried prawns to the eggs and spread them out as evenly as possible.
  18. Cover and let the eggs cook on low flame.
  19. Top with some freshly chopped basil and voila! 
  20. Serve this soft and flavourful omelet with crunchy bites of prawns with a side of salad.[/directions]

prawn omelette

prawn omelette

Try this recipe out to give yourself a break from the regular hard work and boring meals. I hope you’ll love this experiment of mine just as much as I do!

Feel free to reach out for feedbacks, suggestions or connect with me on Instagram or Facebook. Subscribe to my YouTube channel for all my videos and upcoming recipes.

Rasmalai

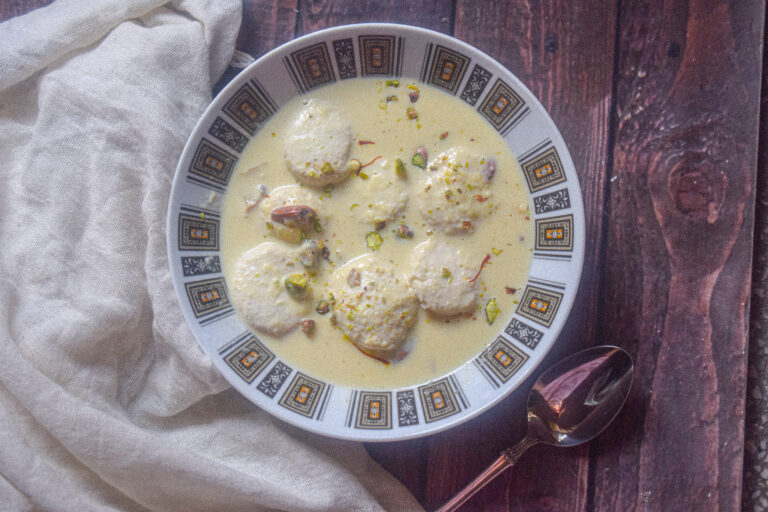
Any Indian festival is incomplete without a widespread variety of sweets. Rasmalai is one of the most popular classic Indian sweets – Soft, delicate and spongy chhena dunked in sweet, thick, creamy and flavoursome milk – it is nothing short of a dream.  Everyone loves Rasmalai. Opposed to how we think that making Rasmalai is a complex and elaborated process, it is actually extremely easy and requires only a handful of ingredients to not just replicate, but make better than the store bought version at home.

Rasmalai is a comfort soul food and all of us have our share of happy moments attached with it. I can’t stop but cherish my happy memories attached with this sweet. Rasmalai has always been my favourite mithai. Even though I never had a sweet tooth growing up, I could never say no to Rasmalai. The joy of biting into those soft and sweet sponges dipped in creamy, flavourful milk always made me happy. Rasmalai happens to be the favourite mithai of everyone in my family too. I remember those visits to mithai shops with my parents where we would always have a small kulhad of Rasmalai each. And every time we would exclaim how good it is. 

rasmalai

I would always find myself packing some for myself from a sweet shop, for that love of Rasmalai followed me even after I left home. But when I started making Rasmalai at home, there was no looking back. It’s very easy and this version tastes better than anything I have had all my life. And what better time than the festive season to share this recipe? Trust me, once you start making it yourself, you will get hooked and be amazed by how easy it is to curate such a delicacy. 

Ingredients in this Rasmalai

Only a handful of ingredients go into making this incredible mithai, however, each of them has their own significance. The key ingredient of this recipe is milk – solely. All the other ingredients are basically supporting actors in this dish.

Milk

Milk is without a doubt, the star ingredient of this recipe, as it is of most Indian sweets. In fact, milk is the single most important main ingredient of both the sponges as well as the broth. It is extremely important to use fresh full fat milk or whole milk for:

  1. The sponges/rasgullas – to extract the maximum chhena out of the milk and make perfectly soft and spongy rasgullas. Avoid using milk from tetra packs or low fat or skimmed milk as it will affect the spongy texture of your rasgullas. 
  2. The rabri – to make it thick and creamy.

rasmalai

rasmalai

Here’s the recipe:

Prep time – 20 minutes

Cook time – 30 minutes

[ingredients title=”Ingredients”]

For the sponges:

  • 1 litre full fat milk
  • 3 tbsp. lime juice or white vinegar
  • 1 cup sugar
  • 1 litre water

For the rabri

  • 1 litre full fat milk
  • 2/3rd cup condensed milk
  • 1 tbsp. chopped pistachios
  • 1 tbsp. chopped almonds
  • ¼ tsp. cardamom powder
  • A few strands of saffron [/ingredients]

[directions title=”Directions”]

For the rabri:

  1. In a large vessel, pour the milk.
  2. Keep stirring to prevent from burning at the bottom and bring it to a boil.
  3. After the first boil, add in the condensed milk and mix very well.
  4. Add in the chopped almonds and pistachios.
  5. Stir continuously and reduce the milk to half.
  6. Keep scrapping off the sides and bottoms to retain the maximum cream in the broth.
  7. Finish off by mixing in a few saffron strands and the cardamom powder into the reduced broth. 
  8. Set it aside to cool down completely while we make the sponges.

For the sponges:

  1. In a large vessel, pour the milk.
  2. Stirring continuously, bring the milk to a boil.
  3. Once the milk comes to a boil, add in the lime juice or white vinegar, one tbsp. at a time and take it off the heat.
  4. Stir well to separate the milk solids (chhena) from the remnant water.
  5. Place a strainer over a big bowl. 
  6. Line the strainer with a clean muslin cloth.
  7. Pour the curdled milk on the lined strainer and stir to drain the excess liquid.
  8. Wash the chhena with cold water.
  9. Pick up and twist the muslin cloth to squeeze out the excess liquid.
  10.  Take the chhena out on a plate and knead for about 5 to 7 minutes or till your fingers start to turn oily. 
  11.  Make even, equal sized, soft round balls. 
  12.  To another pot, add the water and sugar and boil it till the sugar dissolves.
  13. Then, cover and bring it to a roaring boil. 
  14.  Once the sugar syrup start vigorously boiling, add in your chhena balls to it.
  15.  Cover and cook for 5-8 minutes or till the rasgullas start floating on the surface of water.
  16.  Take it off the heat.
  17. Once it cools down, take one sponge ball at a time and squeeze between your palm and fingers gently to squeeze out excess water and give them a disc shape.
  18.  Dunk the sponges in the broth of pour the broth all over them. 
  19.  Chill in the fridge for a few hours before consumptions for the best taste! [/directions]

rasmalai

Tips to Make The Perfect Rasmalai

Making the perfect chhena can be a struggle sometimes. The sponginess and softness of the chhena is a game changer and hence it is extremely important to make the perfect chhena for your Rasmalai. The following tips will help you make that perfectly soft and spongy chenna every single time.

  • Always use full fat milk or whole milk to extract the maximum chhena out of the milk and make perfectly soft and spongy rasgullas. Avoid using milk from tetra packs or low fat or skimmed milk as it will affect the spongy texture of your rasgullas.
  • Turn off the heat after the milk comes to a boil and then add your acidic ingredient. If the milk doesn’t start curdling, put it back on the stove and let it curdle. 
  • Add ice cold water or ice cubes to the milk once it has curdled to stop the curdling process. This helps you get the softest chhena ever.
  • A perfectly drained chhena is very important. In order to test whether your chhena is perfect or not, smear a little portion of it on a smooth surface such as your kitchen countertop and check the consistency. If the chhena is too sticky, it still has whey in it and is not ready to be kneaded and needs to be hung and drained for a little longer, whereas if the chhena is too dry and crumbly, it has over-drained and need to be kneaded with wet/moist hands. The perfect chhena when smeared is non-sticky and grainy.
  • Do not over-knead or over-boil the chhena. This results in getting hard and dense chhena.

rasmalai

I hope you’ll try this divine, soft, and creamy Rasmalai that melts into the mouth recipe for yourself and fall in love with it, just like I did. 

Feel free to reach out for feedbacks, suggestions or connect with me on Instagram or Facebook. Subscribe to my YouTube channel for all my videos and upcoming recipes.

Beetroot Falafel

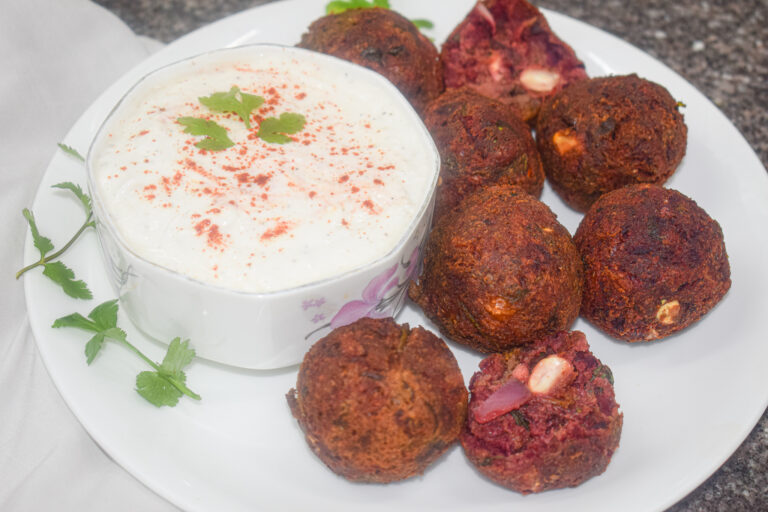
If you have been following me for quite some time, I’m sure you’ve noticed how I’ve been trying to incorporate more vegan and healthy recipes on my blog. These moreish beetroot falafels check both the boxes and make the perfect appetiser or a quick evening snack.

Typically found in the Middle Eastern or Mediterranean cuisines, falafels are traditionally fried or baked delicious balls or patties made of ground chickpea, herbs and spices. Crispy on the outside and soft on the inside, these are very popular street food and are often served as a part of an elaborate meal. Being a naturally vegetarian, gluten-free and vegan recipe, it is also high in healthy nutritional content. While the classic falafel recipe is no doubt the perfectly divine snack, I tried to experiment a fusion of beetroot with the same and I absolutely loved the results. Beetroot not just elevates the health factor in these falafels but also adds a delectable earthy flavour and a beautiful pop of colour to them.

beetroot falafel

These healthy and vegan Beetroot Falafels are one of my favourite snack options and they are so delicious! I make these very often at my house. As opposed to what it might seem, making falafels is actually very easy. It involves some very basic ingredients and chances are high that you have all of them in your pantry right now. These crunchy on the outside and beautiful, colourful and tender on the inside balls of goodness can be enjoyed with hummus or tahini, my hung curd dip, in wraps or sandwiches (just shape them into patties!). 

These are also very convenient and adaptable to today’s fast lifestyle where we don’t get time to prepare elaborate dishes every day – you can make the falafel rounds and freeze them in a zip lock or airtight container for up to 7 days! Pop them out of the freezer and fry them as and when you need them and enjoy! This snack is a keeper!

Ingredients in This Beetroot Falafel

While the list of ingredients might look big, they’re mostly herbs and spices and some of the most basic ingredients available in almost all Indian kitchens. Some of the key ingredients that give shape to this masterpiece of a snack are: 

  • Beetroot

Even though it is a falafel recipe, it is quite clear that beetroot is the star ingredient for it. Packed with essential nutrients, beetroots are a great source of fibre, manganese, potassium, iron, and vitamin C. Addition of beetroot to this healthy snack, takes the health factor to a whole new level. It also adds a very delightful earthy flavour and a beautiful pop of colour to the falafel.

  • Chickpeas

The innumerable health benefits of chickpea are no secret. High in protein content, chickpea is one of the healthiest vegan foods that there are. It is flavourful and extremely versatile. Chickpea can be processed into creamy humus, or rounded up to make crunchy and tasty falafels, cooked into a spicy Indian curry and can even be made into healthy and yummy pancakes! From breakfast to dinner, chickpea can be easily incorporated in all your meals throughout the day.

In this recipe we use dried chickpeas soaked overnight or at least 12-15 hours to get it to a good binding consistency that helps the falafel to hold its shape.

  • Green Chilli

A small green chilli adds a kick of flavour and spice without over-powering the falafel. You can adjust this to more or less according to preference, but don’t skip it without trying it first – trust me.

  • Cumin, Cardamom, Salt and Black Pepper

These aromatic spices are used often in Indian and Middle Eastern cooking and have an earthy, spicy, assertive flavour you’ll love.

  • Baking Soda

It is a key ingredient for helping to provide the fluffy inside texture of the falafel.

beetroot falafel

Why this Beetroot Falafel?

  • Very easy to make
  • Easily available pantry ingredients
  • Vegan
  • Gluten-free
  • Full proof recipe
  • Extremely healthy because of the addition of beetroot
  • Beautiful
  • Can be frozen up to a week!
  • Perfect evening or packed to-go snack.
  • Not to mention, just so delicious!

beetroot falafel

Here’s the recipe:

Prep time – 60 minutes

Cook time – 10 minutes

[ingredients title=”Ingredients”]

  • 1 cup chickpeas (soaked overnight)
  • ½ cup grated beetroot
  • 1 tsp lime juice
  • 1 cup fresh coriander leaves (with stem)
  • ½ cup onions, roughly chopped
  • 1 large clove of garlic/ two medium sized garlic pods
  • ¼ tsp Kashmiri red chilli powder or paprika
  • ¼ tsp cardamom powder
  • Salt to taste (I used 1 tsp.)
  • ½ tsp freshly ground roasted cumin powder
  • 4 tbsp gram flour/besan
  • ½ tsp baking soda
  • 1 green chilli
  • 4 tbsp of oil for shallow frying [/ingredients]

[directions title=”Directions”]

  1. Soak the chickpeas overnight and transfer into a blending jar.
  2. Add the onions, coriander, garlic and green chilli to the blender jar.
  3. Season with cardamom powder, and cumin powder.
  4. Squeeze in the lemon juice and blend into a coarse mixture.
  5. Take the ground mixture out in a bowl.
  6. Add in the grated beetroot to the mixture and mix well.
  7. Season with some salt.
  8. Add in our binding ingredient – gram flour or besan to the mixture and mix well.
  9. Add in the baking powder and give a final mix. 
  10.  Scoop out some of the mixture on your palm (oil the palms) with the help of a spoon or ice cream scoop and make equal sized round balls.
  11. Pop it in the freezer (covered) for at least 30 minutes before frying.
  12.  Heat some oil in a deep pan.
  13. Take out the falafels from the freezer and deep fry on medium flame till cooked uniformly and voilà! Enjoy it with hummus, my hung curd dip or as you like! [/directions]

beetroot falafel

Tips to make the perfect falafel every single time:

While making falafel is easier than thought, keeping a few tips in mind will help you get it just right every single time. Consistency of the mixture is everything! These tips will ensure a falafel that is perfectly crispy on the outside and neither too runny, nor too dry but just perfectly moist and tender on the inside, every time. Here are some of my personal steps while making a falafel. 

  • Use Soaked Chickpeas.

The key to achieving the perfect consistency is using chickpeas that have been soaked in enough water (enough to make them submerge completely and still leave some room because they double in volume when done) for at least 12 – 15 hours. The best thing to do is to soak it overnight, drain it and wash it and use to the next morning.

  • Use binding flour and do NOT Over blend.

I cannot stress enough on how essential it is to achieve the perfect consistency of the mixture before frying or baking the falafels. Blend it in multiple short rounds to get the coarse sand-like consistency – not too dry, not too wet. Over-blending the batter will result into a rather runnier mixture that’s stick to the pan and disintegrate while frying. Adding besan or gram flour helps absorb excess moisture and achieve the perfect consistency – that is coarse.

  • Freeze before frying or baking

This is a very essential step as freezing the falafel rounds give time for the ingredients to bind together and absorb the maximum flavour while also resulting into the perfect crispy and flaky falafel upon frying thereafter. You need to keep it covered in order to retain the moisture in the mixture. While you can also store it in the freezer up to a week and fry whenever needed, the minimum time to freeze is at least 30 – 60 minutes. 

beetroot falafel

Try it out as soon as possible and trust me, this dreamy beetroot falafel will become your go-to snack. It is healthy and yummy – what’s not to like? I hope you’ll all love it as much as you loved my classic falafel recipe. 

Feel free to reach out for feedbacks, suggestions or connect with me on Instagram or Facebook. Subscribe to my YouTube channel for all my videos and upcoming recipes.

Cheesy Corn Pepper Fried Rice

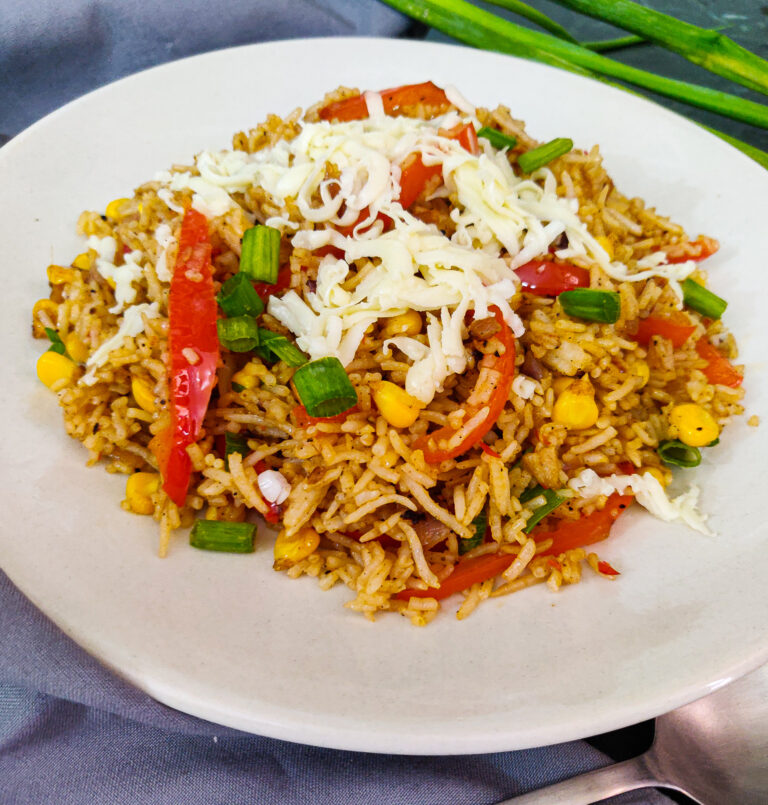
This Cheesy Corn Pepper Fried Rice is made with the most easily available ingredients that are most probably already in your fridge, comes together in just 10 minutes and is healthier and way yummier than takeout. Oh! And it has cheese. 

This Cheesy Corn Pepper Fried Rice is a very convenient and versatile recipe. It makes the perfect late night supper, a quick and amazing Sunday brunch, ideal for packing for a picnic or a go to lunch and is loved by everyone. It makes for a great tiffin box option for kids. Made with some seasonal corn and sweet bell peppers, I absolutely love how colourful and delicious this fried rice is.

cheesy corn pepper fried rice

This recipe is highly adaptable and can be customised according to one’s personal preferences. You can add sauces, seasonal vegetables and proteins of your choice or even increase the heat adding some red chilli powder or cayenne pepper to whip up a personal masterpiece. 

The best thing about this recipe is that it is full proof and hence, you can never go wrong with it. Being a stir fry, it can prove to be a boon to those who do not cook very often. Eat it as is, throw in a dash of your favourite sauces, accompany it with your favourite Indo-Chinese dishes or Thai Curries or pack it for a picnic, your call! It’s an adaptable and versatile dish that will make you fall in love with it. So, what are you waiting for?

Cooking the Perfect Fried Rice

In this recipe, I have used joha rice, which is a flavourful small grained rice found in Assam, India. It is starchy and has a beautiful fragrant. You can use jasmine rice too. The quality of rice can really affect your recipe. Basically any small grain rice available near you should do the trick. Broken basmati is a great choice!

cheesy corn pepper fried rice

For small grained rice: wash it thoroughly under running water till the water is clear. Once thoroughly washed, add it to a pan, instant pot or a pressure cooker. For 1 cup rice, use 1.5 cups of water to cook it. And once cooked, keep the rice covered for 10-15 minutes after turning off the gas. Keep the rice in the fridge for at least 2-3 hours before using or overnight, and use it the next day for the best results.

Why this fried rice?

  • Quick and health
  • Simple yet extremely flavourful
  • Kid-friendly
  • Super easy to pull off
  • Highly adaptable and can be customised as per your needs.
  • Lunch-box friendly
  • Home-cooked and wholesome
  • Takes 10 minutes to make.
  • Prepared with minimal ingredients easily available in your pantry

Ingredients in This Cheesy Corn Pepper Fried Rice

While this is a very simple and quick recipe that requires the most basic ingredients, a couple of ingredients make it special. Let’s take a look at those:

  • Corn

Corn is a very healthy vegetable which is high in fibre content and hence helps improve digestion. In this recipe, corn provides that bright yellow colour and a slight crunch in every bite. Along with all the other flavours, the butter and the pepper in the recipe complement the flavour of the corn the most and it is just as good as it gets. 

  • Bell Peppers

From green to red bell peppers, as the colour changes, the bitterness decreases and the sweetness increases. In this recipe I have used red bell peppers that have the fruitiest and sweetest flavour. They add natural sweetness, a pop of red colour as well as a slight crunch to every bite of this righteous fried rice recipe.

  • Cheese

Cheese makes the world a better place. It can be eaten as is, paired with wine, melted into a dip or in the case of this recipe, grated on to a hot plate of fried rice over which is slowly melts and elevates this dish by folds. Also, there’s no such thing as too much cheese so go crazy with the cheese or skip it if you like. 

corn pepper fried rice

cheesy corn pepper fried rice

Here’s the recipe:

Preparation time – 15 minutes

Cook time – 10 minutes

Serves – 3

[ingredients title=”Ingredients”]

  • 2 tbsp oil
  • 1 tbsp butter
  • 1 cup finely chopped onion
  • 1 tbsp finely chopped garlic
  • 1 cup boiled corn
  • 1 red bell pepper – thinly sliced
  • 1 tsp black pepper powder
  • Salt to taste
  • 1 tbsp sweet chilli sauce
  • 2 tbsp tomato ketchup
  • 3 cups cooked rice
  • A handful of spring onion greens
  • Lots of grated cheese [/ingredients]

[directions title=”Directions”]

  1. In a wok or a deep pan, heat the oil and add butter to it.
  2. Once the butter melts, add in the chopped onions.
  3. Sauté the onions on high flame till they turn translucent.
  4. At this point add in the finely chopped garlic and sauté till the garlic start turning brown.
  5. Add in the boiled corn followed by the sliced red bell peppers and sauté it for a few minutes.
  6. See to it that the vegetables don’t become soggy and retain their crunch.
  7. Once the vegetables are done, season with some black pepper and salt and mix well.
  8. Add in your condiments at this point – sweet chilli sauce and tomato ketchup and mix well.
  9. Add in the cold cooked rice and mix well to combine everything. Do not break the rice.
  10. Stir fry for a few seconds they take it off the heat and add the spring onion greens.
  11. Top it up with grated cheese and serve it hot as is or with a side of Indo-Chinese or Thai curry. [/directions]

cheesy corn pepper fried rice

Tips to get your fried rice perfect every time!

However, fried rice is a rather simple dish to make; there are certain things that need to be kept in mind. The best fried rice is the one where the vegetables are crunchy yet cooked and the rice grains are fluffy, separated and fragrant, packed with flavour and cooked to perfection. Sometimes in order to avoid a lumpy, soggy plate of fried rice, we undercook our rice, which results into half cooked rice and trust me, no one likes a bite in their rice. Here are some tips to get the perfect fried rice every single time.

  • Always use a deep dish for cooking, preferably a Wok or a deep pan. This promotes fast and uniform cooking.
  • Always start cooking once the oil is smoking hot and cook on high flame throughout.
  • Make sure you chop/ slice your ingredients finely to help them cook fast.
  • Always use cold rice. This point cannot be stressed enough. If the rice is not cold, it sticks to the pan and makes the fried rice lumpy. It is best to use leftover day-old rice.
  • Always garnish after turning the stove off to retain the freshness of the garnish.

cheesy corn pepper fried rice

Go make this dish for your next meal and trust me, you’re going to make it again and again because it’s unbelievable how something so simple can turn out to be so dreamy. It is one of quick comfort meals and I love it. I hope you will love it just as much!

Feel free to reach out for feedbacks, suggestions or connect with me on Instagram or Facebook. Subscribe to my YouTube channel for all my videos and upcoming recipes.

Bhog Khichri

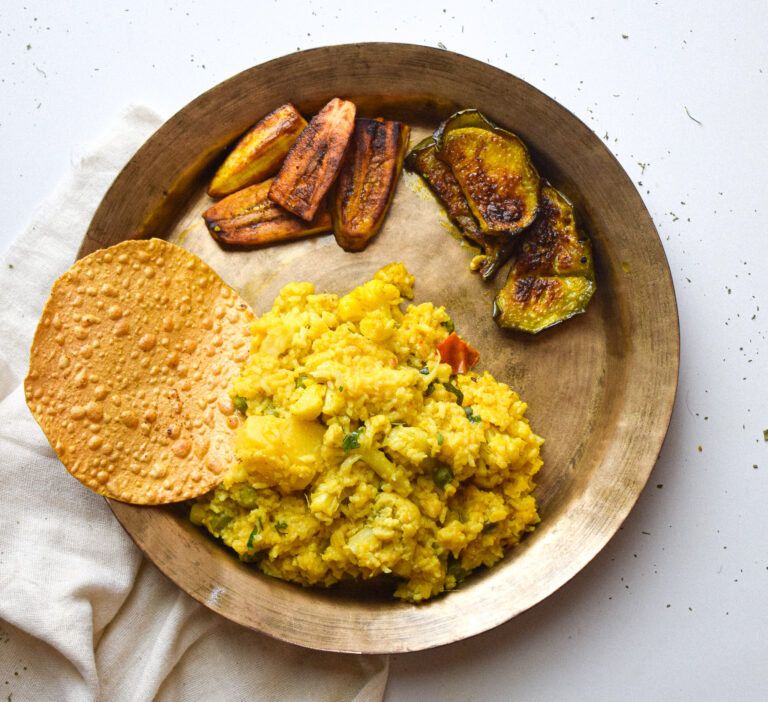
Bhoger Khichuri or Bhog khichri is a traditional recipe, packed with flavours and a heavenly aroma that fills Bengali and Assamese houses around the time of Durga Puja and Saraswati Puja. Where in some houses Bhog Khichri is prepared with utmost love and dedication, with a personally curated recipe, it is something we look forward to having all year at the Puja pandals, along with Niramish labra (mix veg), paayokh (kheer), begun bhaja (eggplant fritters) and bilahi ombol (sweet and sour tomato chutney). This bhog khichri is my most favourite meal on the planet and sharing this recipe with you all is like sharing a piece of my culture, childhood and nostalgia.

It is not your ordinary khichri; it is a recipe that requires technique and patience. We do not use the pressure cooker to make this recipe. It takes time to cook but is absolutely worth every second. It tastes divine. We do not add onion and garlic to this khichri as it is a bhog recipe. However, following this recipe and using a handful of flavoursome spices, ingredients and condiments to curate this quintessential Bhog Khichri right in your kitchen.  

bhog khichri

bhog khichri

This Bhoger Khichuri prepared by cooking rice and moong dal along with spices and vegetables is hearty, delicious, nourishing and nothing short of a perfect comfort meal.

Ingredients in this Bhog Khichri

There is a long list of ingredients that goes into making this divine recipe and it is worth every effort. However, let’s look at the key ingredients of this khichdi:

  • Rice

This Bhog Khichri calls for a special rice – gobingbhog rice/joha rice/aromatic broken basmati rice and cannot be made using any ordinary rice. It is a short grain, white, aromatic, sticky rice having a sweet buttery flavour.

  • Moong Dal

Moong Dal or yellow lentil is one of the healthiest and flavourful dal that there is. Traditional Bhog Khichri is always prepared with moong dal. The dal and the rice are washed separately and are not mixed until the frying stage. The moong dal is also roasted and since it takes longer than the rice to cook, it is soaked separately for at least an hour.

  • Garam Masala and Ghee

Garam masala plays a major role in flavouring this khichri as it lacks any pungent condiment such as onion or garlic. Adding whole garam masalas in the beginning to the tempering as well as topping with garam masala powder and ghee at the end ensures maximum flavour.

  • Vegetables

Vegetables add extra flavour and bite to this bhog khichri. As this is a slow cooked recipe, cutting vegetables slightly bigger is advisable to prevent them from getting mashed in the khichri.

bhog khichri

bhog khichri

Here’s the recipe:

Preparation time – 20 minutes

Cook time – 45 minutes

Serves – 6

[ingredients title=”Ingredients”]

  • 1 cup yellow moong dal
  • 1 cup gobingbhog rice/joha rice/aromatic broken basmati rice
  • 4 tablespoons vegetable oil
  • 3 tablespoons mustard oil
  • 200g potatoes cut into big chunks
  • 1 small cauliflower cut into florets
  • 1 teaspoon ginger
  • 2 cloves
  • 2 cardamom
  • 2 small tomatoes cut into cubes
  • 4 slit green chilies
  • 1 inch cinnamon
  • 3 dried red chillies
  • 3 bay leaves
  • 1 teaspoon cumin seeds
  • ¼ cup grated coconut
  • ½ teaspoon turmeric powder
  • 1 teaspoon cumin powder
  • 4 – 5 cups of hot water (adjust if required later)
  • ¼ cup peas
  • 1 teaspoon ghee
  • ½ teaspoon garam masala powder
  • 1 teaspoon sugar
  • Salt to taste [/ingredients]

[directions title=”Directions”]

  1. Wash the rice thoroughly and set it on a strainer to dry.
  2. Heat a pan on medium flame, and dry roast the moong dal stirring occasionally (prevent from sticking to the base) for about 4-5 minutes.
  3. Wash it well and set it on a separate strainer to dry as well.
  4.  Heat some oil in a pan and add the rice.
  5. Lightly fry the rice for a few minutes and set aside.
  6. In the same pan heat some more oil and fry the potatoes till their sides turn brown.
  7. In the same pan, fry the cauliflower florets till the top turns golden brown.
  8. Now, in a deep dish, heat the mustard oil.
  9. To the hot oil, add the whole spices – cumin seeds, cloves, cardamom, cinnamon, dry red chilies, and bay leaves.
  10. Fry the whole spices for a few seconds then add the ginger paste.
  11.  To the ginger paste add the cumin powder, sugar, turmeric powder and cook the spices for a few seconds.
  12.  Add in the grated coconut and mix till well combined.
  13.  Add ¼ cup of hot water to homogenise the spices and cook for a while.
  14.  To this, add the fried uncooked rice and the roasted soaked dal.
  15.  Give it a good mix and combine the rice and dal with all the spices.
  16.  Add about 4.5 cups of hot water and mix thoroughly.
  17.  Add in the tomato cubes, fried potatoes, green chilies, peas and fried cauliflower florets.
  18.  Mix everything thoroughly.
  19.  Cook on high flame, stirring occasionally till the rice and dal are about 20-30% done.
  20.  Turn the heat down to low. Cover and cook for about 30 minutes.
  21.  Take the lid off and add the garam masala powder and mix it in.
  22.  Finish it off with salt to taste and ghee.
  23.  Cook for a few more minutes, stirring till it reaches desired consistency. [/directions]

bhog khichri

bhog khichri

Follow this fool proof recipe to make a hearty batch of this comfort meal for yourself and indulge in some divine deliciousness. You’re going to love it.

Feel free to reach out for feedbacks, suggestions or connect with me on Instagram or Facebook. Subscribe to my YouTube channel for all my videos and upcoming recipes.

Cilantro Lime Chicken

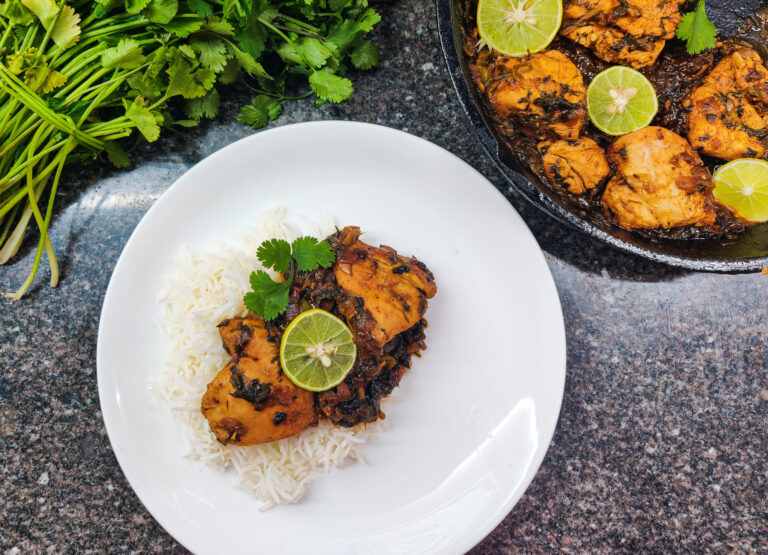
This Cilantro Lime Chicken is the kind of recipe for which this channel stands and particularly defines the ethos of why I started this channel. With the most minimal ingredients that bring out the explosive flavours of chicken and are probably already lying in your pantry, this recipe couldn’t be any easier to pull off. The zesty, moist and juicy chicken with a mouthwatering coriander/cilantro marinade is a sure-fire way to tantalise your palate and appetite with a burst of flavours in every bite! 

The marinade is where the magic happens. This Cilantro Lime Chicken is my version of a dish which marinades in no time, thanks to the rich flavour of lime, cilantro and some basic spices. With a side of rice or a quick salad, this chicken recipe makes for a perfect weekend dinner or a Sunday brunch. Who needs to go out or order takeout when you can whip up this tender and juicy on the inside, crispy on the outside, incredible chicken all by yourself in no time. Oh, and the sauce is so good, you’ll be licking your plates. 

Ingredients in This Cilantro Lime Chicken

I am sure you’ll find all the ingredients required for this recipe somewhere in your kitchen. This recipe calls for minimal ingredients and is yet packed with flavours. Let’s take a look at the key ingredients that make the magic happen:

  • Chicken

While I am using skinless and boneless chicken breasts in this recipe, you can use any cut you prefer. Boneless chicken tends to cook faster and is the best choice if you are in a hurry and have no time for meal prep. If you’re using chicken breasts like me, I’d recommend pounding your chicken breasts out to an even thickness till they’re not more than 3/4th of an inch before cooking. This will ensure than the chicken cooks evenly without drying out. You can always use chicken thighs if you prefer your chicken juicier or opt for skin on chicken for a crispier result. 

  • Cilantro or Coriander

Going by the name, coriander or cilantro is one of the two heroes of this recipe which contributes a major burst of flavour to this recipe.Coriander is one of the very widely used herbs in not just Indian kitchens, but all around the globe. It’s healthy, refreshing, extremely flavourful and easy to add to your diet.We will only use the tender leaves in this recipe. Don’t throw those stems away as they have the maximum flavour and use it for your chutneys. I omit the stems in this recipe as they tend to not dissolve as quickly as the leaves. 

  • Lime

Lime is another key ingredient of this recipe. It is no secret how lime has innumerable health benefits and a very powerful sour flavour. The tanginess of the lime balances the strong flavours of ginger, garlic and cilantro and complements the heat of the chilli powder and jalapeños/fresh green chillies. Use fresh lime for the best results.

  • Jalapeño Pepper

Jalapeños have a slight smoky, earthy flavour with good heat and also contain so many health benefits and assists in pain relief, weight loss and heart problems too. While the authentic recipe calls for jalapeño pepper, you can always replace it with the much easily available Indian substitute- green chilies; it turns out great either way.

  • Ginger and Garlic

As this recipe doesn’t require many ingredients, the handfuls of the ones used have extremely powerful flavours. Having one of the strongest, pungent flavours, garlic and ginger are one of the basic ingredients for any such recipe with minimal ingredients. They boost up the flavours of this Cilantro Lime Chicken and complement all the other flavours beautifully.

cilantro lime chicken

cilantro lime chicken

Why this Cilantro Lime Chicken?

  • Ridiculously easy to pull off and require minimal efforts.
  • Takes no time to marinade or cook
  • Minimal and easily available ingredients 
  • Packed with flavour
  • Makes a perfect date-night meal, picnic, brunch or comfort meal
  • A light and healthy recipe
  • Adaptable and customisable according to your preferences.

cilantro lime chicken

Here’s a look at the recipe.

Preparation time – 30 minutes

Marination time – 30 minutes

Cook time – 30 minutes

Serves – 3

[ingredients title=”Ingredients”]

  • 500 g of boneless chicken – cut into chunky pieces
  • 1 cup finely chopped onions
  • 1 cup finely chopped corianders or cilantro leaves
  • 2 tbsp. lime juice
  • 1 tbsp. salt (adjust as per taste if needed)
  • 1 tsp. black pepper powder
  • 1 tsp. red chilli powder
  • 1 chopped green chilli/jalapeños (add more if you want to increase the heat)
  • 1 inch ginger, ground to a paste
  •  2-3 big garlic cloves, ground to a paste
  • 3 tbsp oil [/ingredients]

[directions title=”Directions”]

  1. In a big bowl, add your chicken.
  2. To make the marinade, add the finely chopped cilantro and squeeze in the fresh lime juice.
  3. Season with salt, red chilli powder and black pepper powder.
  4. Add a splash of oil and give it a good mix.
  5. Let it sit while you prepare the tempering.
  6. In an iron cast skillet, heat some oil. You can also use a slightly deep pan.
  7. Throw in the finely chopped onions along with the finely sliced jalapeños or green chilies.
  8. Sauté the onions till they turn golden brown.
  9. Add in the crushed ginger and garlic and sauté for a few seconds.
  10.  Add the marinated chicken pieces and do not forget to add the juices in the marinade as well.
  11.  Cover and cook and low flame for 8 minutes.
  12.  Give it a gentle stir, keeping the flame at low.
  13.  Cover and cook again till the chicken is tender. That’s it!
  14.  Serve it hot on a bed of steamed rice or with a side of salad and garnish with fresh coriander leaves.[/directions]

cilantro lime chicken

cilantro lime chicken

That’s how super easy it was to make yourself a delightful, steaming hot plate of deliciousness. You can always mix in all of the ingredients and throw the skillet in the oven to bake to make this recipe even healthier. Make this Cilantro Lime Chicken for your next meal and do not forget to share it with me. I hope you will love it just as much I do!

Feel free to reach out for feedbacks, suggestions or connect with me on Instagram or Facebook. Subscribe to my YouTube channel for all my videos and upcoming recipes.

Watermelon Lemonade

Summer is officially here and so are these delicious, juicy watermelons. Celebrating this super fruit in all its glory, here’s a refreshing drink you can make with this fruit. A super simple, sweet and savoury drink put together in no time with a handful of ingredients – this dreamy Watermelon Lemonade will not just energise and rejuvenate you, but also serve you some nostalgia, in a chilled glass on a hot summer afternoon.  

Ingredients in This Watermelon Lemonade

The handful of ingredients going into this recipe are not just extremely refreshing and hydrating, but also packed with health benefits. Let’s take a look at the key ingredients of the Watermelon Lemonade:

  • Watermelon

As the name suggests, watermelon is the hero of this recipe and contributes to the sweetness of the same. It is a summertime fruit, which is super delicious and refreshing and has a ton of health benefits. Being 92% water, watermelon is super hydrating which makes it a perfect base for drinks and snacks.

  • Lemon

Lemon provides its nice sour flavour, balancing the sweetness of watermelons in this drink. They provide 90% more water content as well as electrolytes, therefore keeping you well hydrated under the searing sun. It also helps in detoxifying your body and has several other health benefits.

  • Spices

Mint, black salt and ginger powder are the only spices used in this recipe, which have their own set of health benefits such as detoxifying the body, aiding in weight loss and digestion and many more.

watermelon lemonade

watermelon lemonade

Here’s the recipe:

Prep time – 10 minutes

Juicing up time – 10 minutes

[ingredients title=”Ingredients”]

  • 1 medium sized watermelon
  • Juice of 2 small limes
  • 1 tsp black salt
  • Fresh mint leaves – slightly crushed
  • ½ tsp ginger powder
  • Ice cubes [/ingredients]

[directions title=”Directions”]

  1. Cut the watermelon into quarters; remove the seeds and separate pulp from the green skin.
  2. Dice the pulp and throw in a blender.
  3. Blend into a smooth puree and strain the juice in a bowl.
  4. Transfer the strained juice in a jar.
  5. Add in the lemon juice.
  6. Also Add in the spices- black salt, crushed mint leaves and ginger powder; and ice cubes
  7. Give it a good mix and Voila!
  8. Serve it with more ice and garnish with some lemon slices and whole mint leaves and enjoy! [/directions]

watermelon lemonade

watermelon lemonade

This delicious and rejuvenating Watermelon Lemonade makes a perfect drink for hot summer afternoons, beach parties and much more. 

Feel free to reach out for feedback, suggestions or connect with me on Instagram or Facebook. Subscribe to my YouTube channel for all my videos and upcoming recipes.

Chicken Club Sandwich

What if I give you a super easy, super quick recipe to not just replicate, but actually make a better Chicken Club Sandwich than takeout? This absolutely perfect Chicken Club Sandwich recipe, layered with crunchy lettuce, crispy and tender chicken, eggs cooked to perfection, veggies and condiments packed with flavours on large buttery slices of soft spongy bread tastes like a dream!

With some basic condiments and ingredients that are easily available in your pantry and the eggs and chicken ready, you can actually whip this chicken club sandwich in less than five minutes. This is perfect to pack for a picnic/lunch, midnight hunger pangs Sunday brunch or just an evening snack. It’s filling, flavourful and packed with goodness and tastes best when served with a side of potato wedges/fries/chips and some freshly squeezed juice or soda.

chicken club sandwich

chicken sandwich

Ingredients in this Chicken Club Sandwich

This is one of those recipes that you can get up and make right now because all the ingredients that go into making it are always available at home. Let’s take a look at the ingredients:

  • Chicken Breast

Crispy on the outside, tender and juicy on the inside, chicken is the protein element in this sandwich. The meat provides a soft yet crisp bite to the sandwich. If you wish to make it even healthier, instead of frying it, you can always boil and shred the chicken and use it for the sandwich. 

  • Large white bread slices

Using large white bread slices not just ensures an authentic taste, as the actual recipe uses white bread more often than brown/multigrain, but also helps layer and hold the stuffing better and prevent spilling. You can use the bread as it or toast it with butter. I like the toasted version more!

  • Eggs 

Eggs are known to be one of the most versatile, healthy and delicious ingredients ever and fried eggs are one of the most loved variations of it. Crispy fried eggs add that slight crunch with a soft semi-cooked interior to your sandwich that you enjoy with every bite. Eggs also contribute in making it a healthy option.

  • Lettuce and Tomatoes

The torn up lettuce adds that crunch and freshness to your sandwich, while the tomato slices contribute to the tang and sweetness of it. It is best to use freshly grown lettuce from your home garden if you have one (or start one? What’s better than growing your own food?)  

  • Mayonnaise and Mustard

A delightful mix of mayonnaise and mustard is used as the dressing of this sandwich. The mayo makes the base of the sandwich creamy and the mustard adds a spicy tang to it. You can always use honey mustard in place of regular mustard if you’re inclined towards the sweeter side of things.

chicken club sandwichWhy This Chicken Club Sandwich?

Super quick and easy to whip up

Keeps you full for hours

Easily available at home ingredients

Non messy- so perfect for a packed lunch/picnic.

Packed with nutrients- makes the perfect healthy breakfast

Absolutely delicious 

Adaptable- adjust quantities and choose condiments as per your preference

chicken club sandwich

Let’s take a look at the recipe.

Assembling time – 5 minutes

Cook time – 20 minutes

[ingredients title=”Ingredients”]

  • 3 large slices of white bread
  • 2 tablespoons butter
  • 3 tablespoons mayonnaise
  • 1 tablespoon mustard
  • 200 grams boneless chicken breasts- cut into strips
  • 2 whole eggs
  • 3 tablespoons oil- for frying the chicken
  • 2 tablespoons oil- for frying the egg
  • ½ teaspoon black pepper powder
  • 5-6 tomato slices
  • Fresh lettuce
  • Salt to taste [/ingredients]

[directions title=”Directions”]

  1. Season the boneless chicken strips with salt and black pepper powder. Rub and marinate for 30 minutes.
  2. Heat some oil in a pan/cast iron skillet and add the marinated boneless chicken strips to it.
  3. Flip the chicken strips occasionally and cook till its nice golden brown and crispy on the outside and perfectly cooked on the inside (check by inserting a skewer or knife).
  4. Set it aside once done.
  5. Heat another couple tablespoons of oil in the same pan and add the eggs, one at a time. 
  6. Season with salt and pepper and fry the eggs on both sides till they turn golden and crispy. Set aside.
  7. In the same pan, toast the slices of bread with butter on each side till they are toasted real nice and crisp.
  8. In a bowl, add mayonnaise and mustard and mix well to prepare the dressing of the club sandwich. 
  9. Apply the mayo mustard dressing on each bread slice and spread evenly.
  10. Line one slice of bread with lettuce and sliced tomatoes. Cover it completely.
  11. Top it over with another slice of bread, dressing side down.
  12. Layer the fried chicken strips on the second slice of bread, covering it completely.
  13. Then add the fried eggs overlapping one another.
  14. Cover it with the last slice of bread and insert skewers on diagonal edges to hold the stuffing in place and keep the sandwich together.
  15. Cut the sandwich in half or quarters and serve with a side of potato wedges/fries/chips and some freshly squeezed juice or soda. [/directions]

chicken club sandwich

Feel free to experiment with the condiments and dressings to customise this club sandwich per your preference and do try it.

Reach out for feedbacks, suggestions or connect with me on Instagram or Facebook. Subscribe to my YouTube channel for all my videos and upcoming recipes.

Chicken with Bamboo Shoot(Dry) | Khorisa dia Murgir Mangso

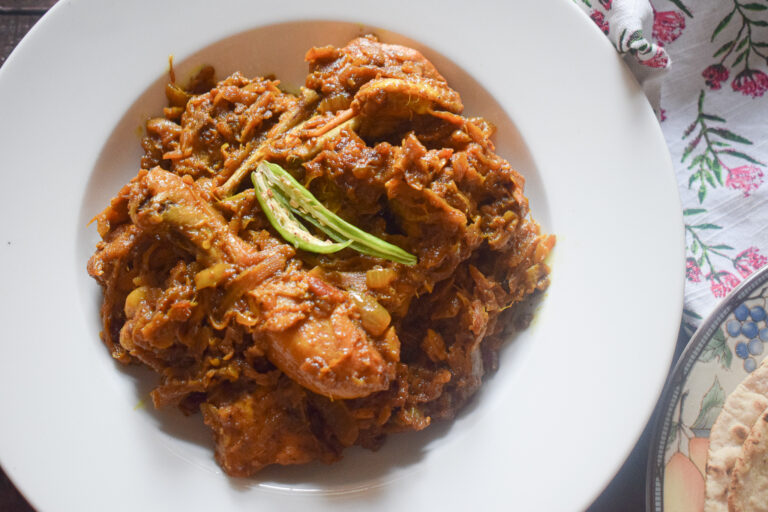
Authentic Assamese dishes are my all-time favourite because they remind me of my roots and my home. Having a knick for experimenting with food and an undying love for home cooked meals, I do have my versions of several of my favourite authentic dishes; one of these dreamy experiments is this righteous Khorisa dia Murgir Mangso or Chicken with Bamboo Shoot recipe. This is a spicy, flavourful and extremely delicious dry chicken dish (which can easily be curried) made with minimal spices and a very flavourful variety of bamboo, constituting for a perfect dinner for the days you’re missing home a little too much. Once you try it with hot roti, naan or a piping hot bowl of steamed rice, there’s no going back; you will absolutely fall in love with everything about it. 

I understand how trying bamboo can be new and slightly scary for many of us. However, I am going to make sure that all these doubts disappear after you finish reading this and making this dish for yourself; just stay with me here. 

What is Bamboo Shoot?

Bamboo shoots or bamboo sprouts are the edible parts of the many different species of bamboo plants. These are used as vegetables in several Asian recipes, basically constituting a unique powerful and pungent flavour to the curries and broths, upping your overall curry game. 

chicken with bamboo shootBamboo shoots are edible when they’re young as they tend to harden as they mature. Monsoon is just round the corner and it is the best time to get your hands on some perfect tender bamboo shoots, however nowadays you can easily find bamboo in grocery stores any time of the year. Tender bamboo shoots that are collected, are defoliated, soaked in water for 2-3 days, then are boiled in water to remove its bitter taste after which it is ready for consumption, to go into a dish. The water used to cook fresh bamboo is discarded as it tastes bitter & unpleasant. These tender fresh bamboo shoots are then used in cooking. But again, you can find defoliated toxin free bamboos in stores easily these days, boil it and it’s good to go!

Ingredients in this Chicken With Bamboo Shoot

The ingredients of this recipe are so minimal; it’s almost unbelievable how it turns out to be so flavourful and fragrant. You can get almost everything at home, even bamboo shoots if you’re lucky, but what’s one quick trip to the grocery store in exchange of a wholesome comfort meal? Now, let’s look at the heroes, i.e. key ingredients: 

  • Khorisa or Bamboo Shoot

As the name suggests, Bamboo Shoot is the star of this dish, a powerful and pungent ingredient responsible for elevating several Asian dishes. In this recipe I use Khorisa, which is an ethnic fermented bamboo shoot product of Assam. It is generally made from young edible bamboo shoots of Bambusa balcooa ( Bholuka Bah) and Dendrocalamus hamiltoni (Kako/Pecha Bah).

chicken with bamboo shoot

chicken with bamboo shoot

These are fermented and after discarding the excess water and can then be stored in jars for almost a year and is known as poka Khorisa. The fermentation adds up to the pungent and strong sour flavour making it a beautiful addition to spicy curries. It can be dried in the sun to make Hukan Khorisa, used in curries and recipes like this one or be simply mixed with some mustard oil, chillies and salt to make pickles.

  • Chicken

For the chicken in this recipe, I have used a whole chicken in curry cut. You can make this with any kind of cut you prefer, even boneless. Because this is a traditional recipe usually made with local chicken varieties, making it with bones helps give more flavour to the recipe.

  • Mustard oil

The fat we use to cook our dishes makes a huge difference to the overall taste of it. Mustard oil is a strong, bitter oil slightly tending towards the hotter side of the spectrum. It enhances the flavour of curries and is the base of majority of authentic desi cuisines. Mustard oil with bamboo shoots is an absolute fool proof combination, be in curries or pickles.

  • Dry Spices

You need the most basic off the shelf spices that are found in all Indian kitchens like turmeric, coriander, salt and pepper. The taste would enhance if these spices are lightly roasted and freshly ground at home. Store bought spices do not lend the flavours fresh spices do.

chicken with bamboo shoot

chicken with bamboo shoot

Let’s take a look at the recipe:

Preparation time – 20 minutes

Cook time – 45 minutes

[ingredients title=”Ingredients”]

  • 3 tbsp mustard oil
  • 2 cups finely sliced onions
  • 1 tbsp fresh ginger paste
  • 2 green chillies, slit in half (add more if you want it spicy)
  • 2 tsp garlic paste
  • Salt to taste
  • 1 tsp turmeric powder
  • 1 tsp coriander powder
  • 1 tsp black pepper powder
  • 500 g chicken, curry cut
  • 1 cup bamboo shoot, finely sliced or chopped
  • 1 cup hot water
  • 1/2 tsp garam masala  [/ingredients]

[directions title=”Directions”]

  1. Heat some mustard oil in a deep pan.
  2. Add the sliced red onions and is cook it in two phases. Phase 1- Till the onions turn translucent. Phase 2- Till the onions completely turn brown.
  3. Once the onions are completely brown, add in the ginger paste, the slit chillies and the garlic paste. Mix well and cook till the raw smell of garlic is gone.
  4. At this point add in the salt and turmeric and cook for a few minutes.
  5.  Now add the rest of the dry spices- coriander and black pepper powder, and cook for another few minutes.
  6. Add a splash of water to help the spices cook better and homogenise in the mixture.
  7. Now, add in the chicken and cook it on high flame, stirring every so often.
  8. Once the chicken in almost half cooked, add in the bamboo shoot and mix.
  9. Add in the hot water. I am adding 1 cup for this recipe as it is a dry variation, however you can adjust the quantity of water depending on how much gravy you’d like.
  10. Cover and cook on low flame for 20 minutes.
  11. Take off the lid and give it one last mix before serving it hot with some plain roti, naan or steamed rice. [/directions]

chicken with bamboo shoot

chicken with bamboo shoot

This is one of my favourite comfort meals and you should definitely try it if you’re new to bamboo or just craving a hot plate of filling wholesome meal. 

Feel free to reach out for feedbacks, suggestions or connect with me on Instagram or Facebook. Subscribe to my YouTube channel for all my videos and upcoming recipes.