Vegetable Korma

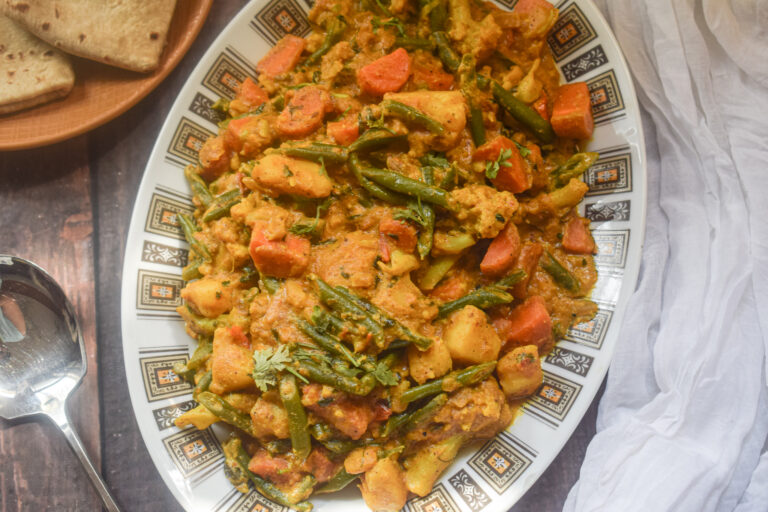
This vegetable korma recipe is a celebration of vegetables. A medley of colourful veggies, this vegetable korma is a thick, creamy and luxurious preparation that makes for a wonderful vegetarian treat! I absolutely love to eat my vegetables this way. Just mop this royal vegetable preparation off with some butter naan, rumali roti or plain parathas, and you’ve got yourself a heavenly meal.

vegetable korma

There are a few tips and tricks to get the vegetable korma taste the way it does. First up is the preparation of vegetables. The vegetables are cut in shapes and sizes that helps it retain its crunch even in the final bite. This korma has vegetables that are not soggy, but bright and crunchy from the blanching. The cauliflower florets should be medium to large sized, so that they do not cook immediately. Similarly, the potatoes and carrots need to be cut in cubes of the same size so that they take time to get soft.

I have used four seasonal vegetables here. You can add more vegetables of your choice. Even paneer is a great addition to this vegetable korma recipe. I have kept it very basic.

The trick to get the perfect crunch in vegetables

This vegetable korma is cooked in two batches. In the first batch, we blanch the vegetables. Blanching is a process in cooking where the vegetables are boiled for a few minutes. There are three advantages to blanching. First, it helps kill any bacteria or germs in the vegetables. Second, it helps vegetables retain their colour and taste. And finally, it prevents the vegetables from getting overcooked in the final recipe. I add some salt to the boiling water in the blanching process to flavour the vegetables a bit. Make sure you wash the vegetables thoroughly before blanching them.

vegetable korma

Another thing to ensure while making this recipe is to not overcook the vegetables. The process of blanching will cook the vegetables about 30% and the remaining cook time should also be as minimal as possible. The vegetables need to be added to the already cooked masala base and cooked only till the potatoes are done. Overcooking will make the vegetables soggy which this recipe does not call for.

Ingredients in the creamy base

Apart from the wonderful and seasonal vegetables, the other highlight of this vegetable korma recipe is its luscious gravy. The base of this gravy is a mixture of fresh cream and cashew cream. The cashew cream is made fresh by soaking some cashews in hot water for 30 minutes, and grinding them with a few tablespoons of water to get a thick paste. These two ingredients change the whole flavour profile and texture of this delicious recipe.

The other ingredients are normal Indian curry items such as onions, ginger-garlic paste and the usual spices – coriander, cumin, turmeric, black pepper, garam masala and red chilli powder. All these spices harmonise and create a recipe so delicious, it will make you lick your fingers!

vegetable korma

Let’s take a look at the ingredients and procedure to make this vegetable korma.

Preparation time – 20 minutes

Cook time – 20 minutes

Serves – 5 people

[ingredients title=”Ingredients”]

  • 12 cauliflower florets (medium to large)
  • 1 cup green beans
  • 1 cup carrots, cut into cubes
  • 1 cup potatoes, cut into cubes
  • 2 tbsp mustard oil/ghee
  • 2 bay leaves
  • 1 cinnamon stick
  • 2 cardamoms
  • 1 cup finely chopped onions
  • 1 1/2 tbsp ginger-garlic paste
  • 1 cup finely chopped tomatoes
  • Salt to taste
  • 1/2 tsp turmeric powder
  • 1/2 tsp black pepper powder
  • 1 tbsp coriander powder
  • 2 tsp cumin powder
  • 1 tsp Kashmiri red chilli powder
  • 1 tsp garam masala
  • 2 tbsp Kasuri methi
  • 1/4 cup fresh cream
  • 1/2 cup cashew paste
  • 1 cup hot water
  • Fresh coriander for garnish [/ingredients]

[directions title=”Directions”]

  1. Chop the vegetables and wash them thoroughly under running water.
  2. Heat water in a pot and let it come to a boil. Add salt to the water and add the chopped vegetables. Stir and boil for 3-4 minutes.
  3. Take the vegetables out with a sieve and set them aside.
  4. Heat oil in a kadhai or skillet. Once it starts to smoke, lower the heat and temper the oil with cardamoms, cinnamon and bay leaves.
  5. Add the chopped onions and stir till they turn brown.
  6. Once the onions are brown, add the ginger garlic paste and mix till the raw aroma of it disappears.
  7. Throw in the tomatoes and mix everything well.
  8. Season with all the spices – salt, turmeric, cumin, coriander, black pepper and red chilli.
  9. Cover and cook on low flame for five minutes till the masala is ready.
  10. Once done, add the blanched vegetables and mix everything well. Be gentle as to not break the vegetables.
  11. Pour the cream and the cashew paste once the vegetables are well coated with all the spices. Mix gently till you get a creamy base.
  12. Pour hot water and cover with a lid. Cook on low flame only till potatoes are soft. Make sure you do not make the cauliflower soggy.
  13. Once the potatoes are soft, garnish with kasuri methi and fresh coriander.
  14. Serve hot with rumali roti, butter naan or plain parathas. Enjoy! [/directions]

vegetable korma

Every bite of this delicious vegetable korma will instantly comfort you! I hope you try out this vegetable korma recipe soon. If you do, let me know how it turned out for you.

If you have any questions, suggestions or feedback, please leave me a comment here. Or connect with me Instagram, Facebook or YouTube.

Happy cooking!

Chicken Stew

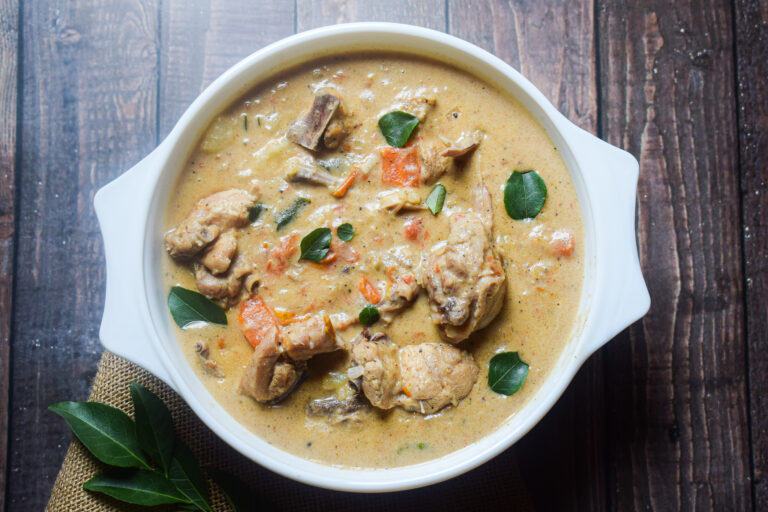
Here is my favourite way to make chicken stew. This recipe is extremely easy to make with a very few ingredients. The flavours are subtle and comforting. A warm bowl of this chicken stew with some dosas or appam is a match made in heaven. I love adding vegetables in my stew as it adds colour, flavour and a generous dollop of good health. I make this chicken stew very often and it always comforts me.

chicken stew

chicken stew

The base of this chicken stew is coconut milk. Coconut milk adds a beautiful texture to the dish and delivers a beautiful flavour and fragrance. Like I mentioned, this recipe is extremely simple, and requires just a few spices – freshly ground black pepper and some garam masala. I do not like to overburden this stew dish with too many spices and its simplicity is what sets the flavour apart.

Tips To Make The Best Chicken Stew

While the ingredients and methods to make this chicken stew are extremely simple, there are still a few things to take care of to get the perfect recipe. Here are some of the tips that will help you get the best chicken stew out of your kitchen every single time.

1. Prep the chicken pieces

For this chicken stew, I recommend curry cut chicken pieces. They should be washed and pat dried with a clean kitchen towel before marination. This step ensures there is no excess water in the chicken pieces as too much water can ruin the curry. For marination, we use salt, freshly crushed black pepper powder and lime juice. The chicken should be marinated for atleast 30 minutes to get the maximum flavour.

2. Cook the chicken halfway before adding the vegetables

This chicken stew recipe uses potatoes and carrots in it. It is important to know when to add the vegetables as they take far lesser time to cook than the chicken. Only once the chicken is cooked halfway should the vegetables be added. Otherwise they will dissolve into the curry which we don’t want.

3. Use good quality coconut milk

Coconut milk forms the base of this chicken stew and hence is a primary ingredient. Make sure you use good quality coconut milk so that the flavours do not get compromised. When ingredients are this minimal in a recipe, it is even more important to ensure that the best quality is sourced.

chicken stew

Let’s take a look at the ingredients and procedure to make this delicious chicken stew recipe:

Preparation time – 30 minutes

Cook time – 30 minutes

Serves – 5-6 people

[ingredients title=”Ingredients”]

For marination:

  • 1 kg chicken, curry cut pieces
  • 1 tbsp salt
  • 1/2 tsp black pepper powder
  • 1 tbsp lime juice

For the stew:

  • 3 tbsp oil
  • 400 ml coconut milk
  • 2 cups finely chopped onions
  • 1 1/2 tbsp ginger-garlic paste
  • 2 cups tomatoes, roughly sliced
  • Salt to taste (if needed)
  • 1/2 tsp black pepper powder
  • 1/2 tsp garam masala
  • 2 cups potatoes, cut into cubes
  • A sprig of fresh curry leaves
  • 2 cups carrots, cut into cubes [/ingredients]

[directions title=”Directions”]

  1. Wash and pat dry the chicken pieces thoroughly. Marinate with salt, black pepper powder and lime juice for 30 minutes.
  2. Heat oil in a pot or kadhai. Add the onions and fry for 3-4 minutes or till the onions start to sweat.
  3. Add the ginger-garlic paste and fry till the raw aroma of the ginger and garlic fades completely.
  4. Roughly slice the tomatoes and add to the mix. Stir till the tomatoes start to melt and release its juices.
  5. Time to add the marinated chicken to the mix. Fry for 10 minutes in medium to high flame.
  6. Cover with a lid and let the chicken cook on low heat for ten minutes.
  7. Take the lid off and give the chicken a good stir. Add the vegetables at this point. Mix the vegetables with the chicken and cover and cook for another ten minutes (or till the vegetables are 80% cooked).
  8. Pour coconut milk into the mix and stir gently.
  9. Garnish with some fresh curry leaves. Let it simmer for another five minutes.
  10. Season with salt to taste, some black pepper powder and garam masala. Mix well.
  11. Serve hot with dosas or appam. Enjoy! [/directions]

chicken stew

chicken stew

Every bite of this stew will instantly comfort you! I hope you try out this chicken stew recipe soon.If you do, let me know how it turned out for you.

If you have any questions, suggestions or feedback, please leave me a comment here. Or connect with me Instagram, Facebook or YouTube.

Happy cooking!


The Best Homemade Salsa Recipe

Are you ready to make the best salsa of your life? Once you make this salsa recipe, you will never go back to anything else. This salsa is really easy to make and requires just a handful of fresh ingredients – lime, cilantro, juicy fresh tomatoes – you know the drill. But the extra tricks just elevate it to a whole new level.

salsa recipe

salsa recipe

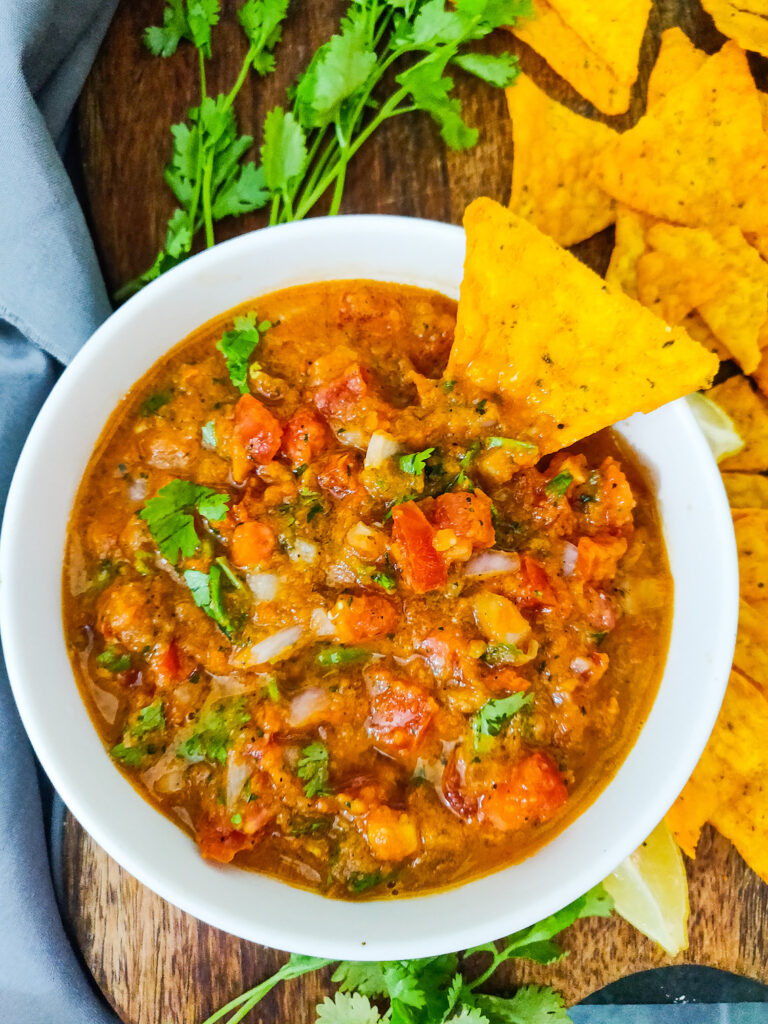
This salsa is saucy, crunchy and packed with tomatoes, all at the same time. The reason why you get so many textures is because this recipe is actually divided into two key steps, and both are merged in the end. The first step involves creating that jaw dropping sauce and the second step is assembling the raw tomatoes. Merging the two steps is what gives us a salsa recipe that is extremely flavourful and with a beautiful texture.

I have been making this for as long as I can remember. This is one salsa recipe that has been a favourite for years, and I make this every time I host. Spicy, sweet and so punchy, this salsa is refreshing and delicious, almost unreal. You will never buy salsa again as this is a recipe to keep forever. I had been tucking this in my heart for so long and finally sharing it here. It is super simple and barely requires any fancy ingredients. Just some of those juicy and ripe tomatoes can make magic happen! I hope you try this soon and fall in love with it. I can promise that it will make you a star host!

salsa recipe

Preparation time – 10 minutes

Cook time – 10 minutes

[ingredients title=”Ingredients”]

For the sauce

  • 4 ripe tomatoes, finely chopped
  • 1 cup finely chopped onions
  • 8-10 Italian basil leaves
  • 1 tbsp finely chopped garlic
  • 1 tbsp olive oil
  • One tbsp sugar
  • Two tbsp tomato puree
  • One green chilli, finely chopped
  • Salt to taste
  • 1 tsp black pepper powder
  • 1/2 tsp dried Oregano

For the final salsa

  • 2 finely chopped tomatoes
  • 1 tbsp lime juice
  • A handful of finely chopped coriander/cilantro
  • 1/2 cup finely chopped onions [/ingredients]

[directions title=”Directions”]

  1. Heat olive oil in a skillet or pan. Add the onion and mix for 2-3 minutes till the onions start to caramelise.
  2. Add the finely chopped garlic and stir for another minute.
  3. Finely chop the green chilli and add it to the pan. Mix well.
  4. Add the chopped tomatoes and cook for a few minutes till the tomatoes start to sweat and melt.
  5. Pour the tomato puree and stir well.
  6. For sweetness, add the sugar and mix well till the sugar dissolves completely.
  7. Season with salt, black pepper powder and dried oregano. Give it all a good mix.
  8. Garnish with fresh Italian basil leaves and stir for a few seconds. Turn the gas off and let the mixture cool down.
  9. Blend the mixture into a smooth paste. Set aside.
  10. In another bowl, add the chopped tomatoes, lime juice and chopped coriander. Add the blended paste to this and mix well. Your salsa is ready.
  11. Serve with chips or nachos. Enjoy! [/directions]

salsa recipe

salsa recipe

Every bite of this salsa with a nacho will knock your socks off! Make it over the weekend and enjoy something different and wildly popular when you host at home the next time. You can store this salsa for 2-3 days and enjoy it in sandwiches as well. It is quite multipurpose!

I hope you try out this salsa recipe. If you do, let me know how it turned out for you. If you have any questions, suggestions or feedback, please leave me a comment here. Or connect with me Instagram, Facebook or YouTube.

Happy hosting!

Egg Curry

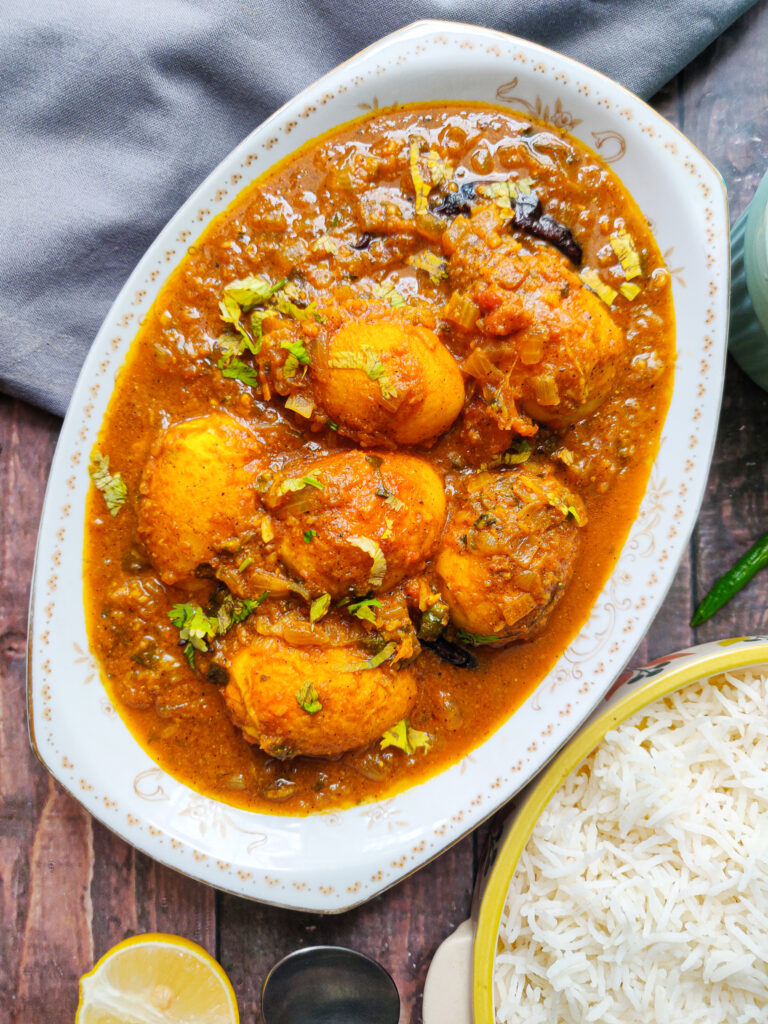
Egg curries are such a regular in my home. I cook them up whenever I am in no mood for an elaborate meal. And there are some versions of egg curries that I keep coming back to. This egg curry recipe is one of those homestyle and comforting version that reminds me of warmth and love of the times gone by.

The preparation of this egg curry is extremely simple. The taste of the curry is also quite subtle, but the flavours are on point. It’s not a loud recipe with a lot of oil or spices, but a simple one that you can make with the essentials in your pantry. The style of cooking is very Assamese as I grew up eating Assamese food and hence the cuisine has a big influence on my style of cooking. For instance, I love to use mustard oil in my cooking. And this recipe uses cold pressed mustard oil, that lends the curry a unique pungency and sweetness.

egg curry

The key to a good egg curry is boiling the eggs perfectly. Egg curries always have hard boiled eggs that are seasoned, deep fried and added to the gravy right towards the end. We follow a similar procedure in this recipe. Let’s take a look on how you can boil eggs perfectly for your egg curry.

How to Cook Perfectly Boiled Eggs

egg curry

Making a perfectly boiled egg has a few tips and tricks. Nobody wants a broken egg, de-shaped egg or an under-boiled or over-boiled egg in their egg curry. The egg has to be firm and evenly cooked. Here are the tips I always follow that can help you become a pro at boiling eggs specifically meant for an egg curry.

  • Add salt to water

Whenever you boil eggs, the first thing to do is to use a wide mouthed pot. Fill it up with water so that the eggs can be submerged completely in the water. Once the water starts to boil, add about two teaspoons of salt to it. Addition of salt prevents the eggs from cracking.

  • Boil the water before adding the eggs

Now let this water come to an aggressive boil before you add the eggs. Adding the eggs to room temperature water can give them a shock when the temperature rises, causing the skin to stick to the shell. So add the eggs only when the water is boiling hot.

  • Be gentle

Because we need to add the eggs to a boiling pot of water, you must be gentle. Raw eggs break very easily so make sure you use a spoon to gently place the eggs into the boiling water. Do not let go of the spoon till you drop the egg right at the bottom.

  • Check the timing

After placing the eggs into the pot of boiling water, I let it boil on high flame for exactly ten minutes. Remove the eggs and place it immediately in ice cold water so that it stops cooking. De-shell the eggs after ten minutes.

Okay, now that you know how to boil the perfect eggs, let’s get on to the ingredients in the curry. Note down the recipe and I hope you try this soon.

Preparation time – 15 minutes

Cook time – 40 minutes

Serves – 3

[ingredients title=”Ingredients”]

  • 6 large eggs
  • 3 tbsp mustard oil
  • 1/2 tsp Kashmiri red chilli powder
  • 1/2 tsp turmeric powder
  • 1 tsp salt (adjust as per taste)
  • 2 dried red chillies
  • 1 bay leaf
  • 1 green chilli, finely chopped
  • 2 cardamoms
  • 1 inch cinnamon stick
  • 2 cloves
  • 2 cups finely chopped onions
  • 1 tbsp ginger-garlic paste
  • 2 cups pureed tomatoes
  • 1 tsp cumin powder
  • 1/2 tsp black pepper powder
  • 1 tsp coriander powder
  • 2 cups hot water
  • 3 tbsp whisked curd
  • 2 tbsp Kasuri methi
  • 1 tsp garam masala
  • Fresh coriander (chopped) for garnish [/ingredients]

[directions title=”Directions”]

  1. Boil water in a wide mouthed pot. Add salt to it and mix well.
  2. Once the water starts to boil, gently add six eggs to it (see video for reference).
  3. Boil the eggs for ten minutes and transfer to ice cold water. De-shell the eggs after ten minutes. Set aside.
  4. Heat mustard oil in a kadhai. Once it starts to smoke gently, add Kashmiri red chilli powder, turmeric powder and salt. Give it a good mix.
  5. Add the boiled eggs into the kadhai and fry on high heat till all of the them are golden brown and crispy. Fry the eggs uniformly and set them aside.
  6. Reduce the heat to low and temper the same oil with bay leaves, dried red chillies, chopped green chilli, cardamoms, cloves and cinnamon. Give it a quick stir.
  7. Add the finely chopped onions and cook for around five minutes till they turn translucent and start to brown.
  8. Throw in the ginger garlic paste and cook this for another five to seven minutes on medium to low flame till everything combines well and the rawness disappears.
  9. Once the onions and ginger garlic paste cook well, add the pureed tomatoes. Stir for two minutes.
  10. Season with cumin powder, coriander powder and black pepper powder. Mix well.
  11. Cover and cook on low flame for five to seven minutes.
  12. Take off flame and pour hot water. Mix well and let it come to a boil.
  13. Add whisked curd and kasuri methi to the boiling gravy. Mix well.
  14. Once you have achieved your desired consistency, add the fried eggs and boil for another two minutes.
  15. Garnish with freshly coriander. Serve hot with steamed rice. Enjoy!  [/directions]

egg curry

I hope you try this egg curry recipe super soon! If you have any doubts, comments, or feedback, please reach out to me in comments or my social media handles.

Instagram – www.instagram.com/slurrpilicious

Facebook – www.facebook.com/slurrpilicious

Youtube – https://www.youtube.com/channel/UCA-cJoo27OLSCswI4sy6lzA?

Happy cooking!

Pressure Cooker Arhar Dal | Toor Dal in Pressure Cooker

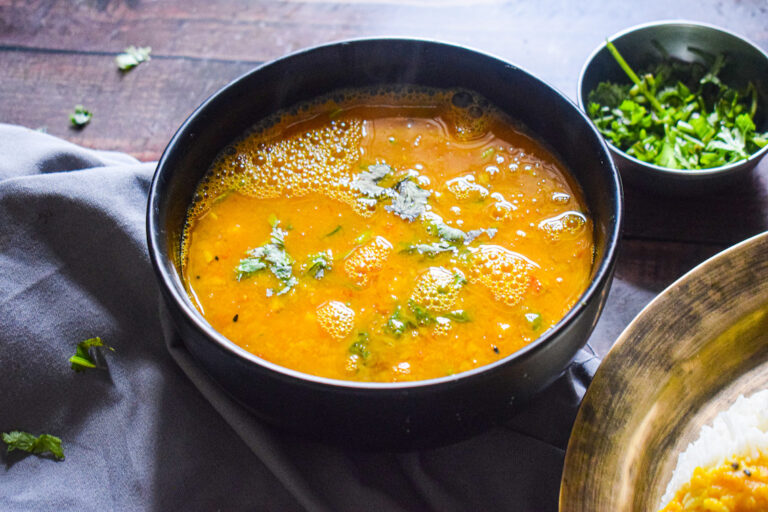
Whoever said necessity of the mother of invention is a cent percent right. We come up with creative hacks to easy solutions when we do not have too many options available with us. Just like how I came up with this pressure cooker arhar dal recipe when I was in college. All I had was a pressure cooker and a few spices to make food, and this technique of making dal always came in handy. I love this pressure cooker arhar dal recipe so much that I still make it whenever I am hard pressed for time. It is so simple to make, and the taste is so subtle and delicious. And arhar dal or toor dal with rice is a nourishing and wholesome meal in itself.

Arhar dal, also known as toor dal is a favourite in Indian households. It can be cooked in a variety of ways, and the most popular way to eat it is probably the Arhar Dal Fry that you get in dhabas. I love this dal in all its forms, as it has its own distinct taste and flavour. This pigeon pea lentil curry is extremely light and easy on the stomach. Made with a handful of spices, this recipe is extremely easy to make.

pressure cooker arhar dal

pressure cooker arhar dal

The secret to the flavour in this dal lies in its tempering. The tempering is a mix of the five spice mix called panchphoran (fennel, nigella, fenugreek, black mustard and cumin seeds), garlic and dried red chillies. The mustard oil adds the kick and pungency to the dal. The spices include Kashmiri red chilli powder, turmeric and salt. that’s it.

It is very important to soak toor dal before cooking it. Wash the lentil thoroughly under running water and submerge it in water for 2-4 hours till it softens. This is a very important step before you make this recipe.

pressure cooker arhar dal

Here’s the recipe.

Preparation time – 10 minutes

Soaking time – 2 hours

Cook time – 30 minutes

Serves – 3

[ingredients title=”Ingredients”]

  • 2 tbsp mustard oil
  • 1 dried red chilli
  • 1 tsp panchphoran
  • 8 g garlic/2 tsp finely chopped garlic
  • 1/2 cup roughly chopped tomato
  • 120 g/1 cup soaked arhar dal/toor dal/pigeon pea
  • Salt to taste
  • 1 tsp turmeric powder
  • 1/2 tsp Kashmiri red chilli powder
  • 500 ml hot water / 2 cups hot water
  • Finely chopped coriander leaves for garnish [/ingredients]

[directions title=”Directions”]

  1. Thoroughly wash the arhar dal under running water till Clean. Soak in water for 2-4 hours.
  2. Heat mustard oil in a pressure cooker. Once it smokes, lower the heat and temper with dry red chilli, panchphoran and garlic. Stir for 5-10 seconds.
  3. Add the roughly chopped tomato and mix for another ten seconds.
  4. Now add the soaked pigeon pea/arhar dal and mix well on medium flame.
  5. Season with salt, turmeric powder and red chilli powder. Mix well.
  6. Pour the hot water and stir.
  7. Cover and let it cook for 5-6 whistles.
  8. Let the pressure cooker release all steam on its own. Once all the steam is out, open the lid. Garnish with fresh coriander leaves.
  9. Serve hot with steaming white rice. Enjoy! [/directions]

pressure cooker arhar dal

pressure cooker arhar dal

I hope you try this delicious and easy pressure cooker arhar dal soon! If you have any doubts, comments, or feedback, please reach out to me in comments or my social media handles.

Find me on Instagram – www.instagram.com/slurrpilicious

Find me on Facebook – www.facebook.com/slurrpilicious

Find me on Youtube – https://www.youtube.com/channel/UCA-cJoo27OLSCswI4sy6lzA?

Happy cooking!

Roasted Bell Pepper Pasta

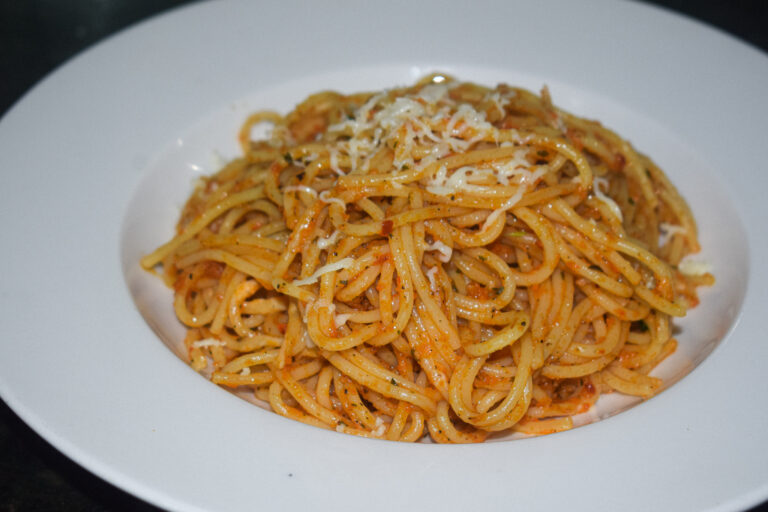
So the other day I had to use two bell peppers that were in my fridge. All of us at home wanted to eat some pasta so I thought of combining the peppers with some spaghetti. But it had to be interesting too. So I charred one each of red and yellow bell peppers on my gas stove, along with two tomatoes. I removed the seeds and the char and blended it all to a bright paste with salt. I started cooking the pasta in lots of salt and water by this time. I then put some olive oil and butter in a pan in very low heat, added lots of garlic and allowed it to cook together. The garlic released its oils into the butter and EVOO, filling my kitchen with an appetising aroma. I then added the blended roasted bell peppers and tomato sauce and cooked it on low flame will oil started to accumulate on the sides. And in went the al dente pasta, along with salted pasta water (the secret weapon to any great pasta).

roasted bell pepper pasta

roasted bell pepper pasta

For this recipe, I didn’t have any fancy cheese or fresh herbs, so I added whatever I had – Amul cheese blocks grated on top and dried herbs (it was the second week of Lockdown). Chilli flakes is a must! Well, all I can say is we licked everything off our plates and the effort was worth it. I hope you try this recipe to see what I’m talking about. Also, special thanks to the husband who has been helping me with all the pictures. Be prepared to see some of me in the coming days 😀

roasted bell pepper pasta

Here’s the recipe:

Preparation time – 30 minutes

Cook time – 30 minutes

Serves – 4

[ingredients title=”Ingredients”]

  • 1 red bell pepper
  • 1 yellow bell pepper
  • 3 medium sized tomatoes
  • 300 g spaghetti
  • Salt to taste
  • 3 tbsp extra virgin olive oil
  • 20 g butter (1 1/2 tbsp approx)
  • 8-10 garlic cloves, thinly sliced
  • 1 tbsp dried basil/fresh Italian basil leaves
  • 1 tbsp dried Oregano
  • 2 tsp chili flakes
  • 1 tbsp black pepper powder
  • Fresh herbs, if any (basil/cilantro)
  • Grated cheese [/ingredients]

[directions title=”Directions”]

  1. Wash the bell peppers tomatoes and pat them dry with a kitchen towel or cloth. Rub oil on them. Char them directly on fire till they blacken. Let them cool down.
  2. Once cooled down, remove the blackened parts of the bell peppers and tomatoes. Don’t worry if a few tidbits are left. De seed the bell peppers and roughly chop them with a knife. Do the same with the tomatoes.
  3. Blend all the vegetables together to a fine and thick paste.
  4. Heat water in a wide mouthed pot. Allow it to boil. Add enough salt to it so that it tastes saline.
  5. Cook the spaghetti in this pot as per package instructions till al dente. Reserve some of this hot and starchy pasta water for later use.
  6. While the pasta is cooking, start the sauce simultaneously. Heat olive oil and butter in a skillet on very low heat. Add the thinly sliced garlic and let it cook slowly. Let the garlic release its aroma and juices into the oil.
  7. Once the butter starts to brown and the flavour of the garlic is assimilated into the oil, add the blended bell pepper and tomato puree. Stir on high heat for two to three minutes.
  8. Season with dried basil, oregano, salt, black pepper powder and chilli flakes. Mix well.
  9. Cover and cook on low flame for seven to eight minutes till the oil starts to release from the sides.
  10. Add the cooked spaghetti into the sauce along with a ladle or two of reserved pasta water. Mix well on low flame till it all comes together. Add more starchy water if required. It helps keep the noodles soft and glazy.
  11. Garnish with any fresh herbs of choice like basil, parsley or cilantro.
  12. Garnish with grated Parmesan cheese (or cheddar if you’re out of Parmesan) [/directions]

roasted bell pepper pasta

roasted bell pepper pasta

I hope you try this delicious roasted bell pepper pasta super soon! If you have any doubts, comments, or feedback, please reach out to me in comments or my social media handles.

Find me on Instagram – www.instagram.com/slurrpilicious

Find me on Facebook – www.facebook.com/slurrpilicious

Find me on Youtube – https://www.youtube.com/channel/UCA-cJoo27OLSCswI4sy6lzA?

Happy cooking!

One-Pot Asian Chicken and Rice

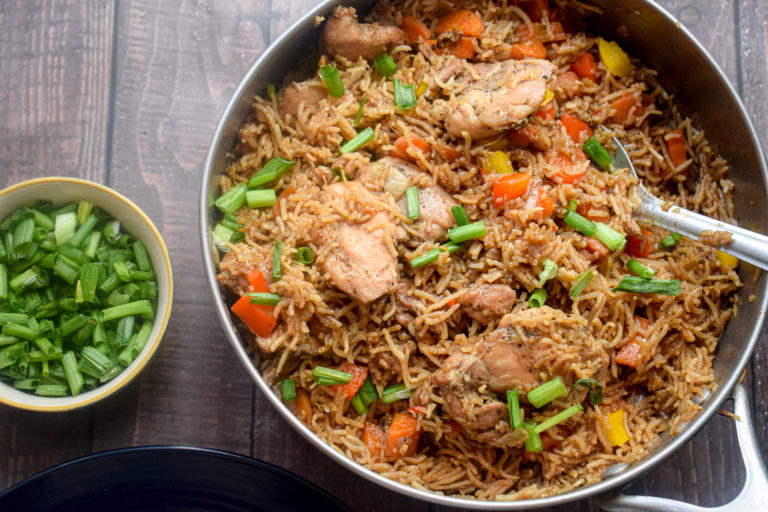
How about a one-pot meal with Asian flavours? Succulent and perfectly seasoned bites of boneless chicken thighs on a bed of delicious and appetising rice with some sweet vegetables? This one-pot Asian chicken and rice truly tastes like a dream. I developed this recipe during this lockdown when the family craved for pan Asian food at home. Since time was limited and work kept piling up, I thought of this way of working for just one recipe that would combine a lot of flavours. And the results were so spectacular that I had to share it here.

asian chicken and rice

asian chicken and rice

This Asian chicken and rice comes together real quick and with some basic Asian pantry essentials. I love adding vegetables to this meal as it makes it complete. It’s a quick and easy hack to satiate those pan Asian cravings we all have from time to time.

The secret to the power packed flavours in this recipe lies in its simple seasoning and fresh ingredients. Lots of aromatics and black pepper powder are used to marinate the succulent pieces of chicken. I have used boneless chicken thighs as they work really well in such recipes and remain moist and juicy throughout. The chicken pieces are first fried in the pan, and then added to the beautiful rice, vegetables and sauces towards the end. The whole mix is left to get slow cooked on the lowest flame possible and allowed a few more minutes of rest. The result is fluffy and separate grains of rice in a delicious sauce that is impeccable.

Making that perfectly fluffy rice

  • Soaking

For this pulao, find yourself the best quality long grained basmati rice. Wash the rice thoroughly with water till its clear. Next, soak it for exactly 30 minutes in room temperature water. After that, strain the water and keep the rice as dry as possible. I used a sieve to release the water and keep it undisturbed. Do not soak for more than 30 minutes as the rice will become too wet and will cook very fast, and end up sticking to each other. Soaking for longer duration might also break the rice. Soaking is an essential pre-requisite to get the perfectly fluffy rice that you see in this egg pulao.

  • Correct water quantities

Next is the perfect amount of water for the rice to cook. I have added the exact measurements for this recipe, but the usual and easy rule to follow is – For every cup of rice that you use, use half cup more water than that. For example, if you use 1 cup of rice, use 1.5 cups of water. If you use 2 cups of rice, use 2.5 cups of water. And the water should always be hot if you’re making the rice in a pot. Otherwise, the temperature difference might ruin the rice. This rule applies only if you soak the rice for 30 minutes before cooking it.

  • Low flame and rest

Lastly, perfectly fluffy rice is always cooked in low flame. If you’re making rice in a pot, make sure you cover and cook it in the lowest flame possible. And once its done, do not serve immediately. Turn off the gas and let it rest for another 10-15 minutes. This will give the perfect edge to the rice and make it bloom to its best ability.

asian chicken and rice

asian chicken and rice

Let’s take a look at the ingredients.

Preparation time – 30 minutes

Cook time – 40 minutes

Serves – 5

[ingredients title=”Ingredients”]

For the chicken marination:

  • 600 g boneless chicken thighs
  • 2 tbsp ginger garlic paste
  • Salt to taste
  • 1 tbsp black pepper powder

For the rice

  • 1 1/2 cups long grained rice
  • 2 tbsp oil (vegetable/olive)
  • 1 cup finely chopped onions
  • 2 cups roughly chopped carrots
  • 1/2 cup roughly chopped red bell pepper
  • 1/2 cup roughly chopped yellow bell pepper
  • Salt to taste
  • 1 tsp ginger garlic paste
  • 1/4 tsp black pepper powder
  • 2 cups hot water
  • 3 tbsp sweet chilli sauce
  • 1 tbsp Oyster sauce
  • 2 tbsp dark soy sauce
  • Chopped spring onion greens for garnish [/ingredients]

[directions title=”Directions”]

  1. Wash the rice thoroughly under running water till all excess starch is drained. Soak in water for 30 minutes.
  2. Wash and pat dry the boneless chicken thighs with a paper towel. Rub the chicken pieces with salt, black pepper powder and ginger garlic paste. Mix really well and set it aside for ten minutes till you chop the vegetables.
  3. Heat oil in a pan. Add the marinated chicken pieces and fry till they turn crispy from the sides. Cook the chicken for seven to eight minutes and set them aside once done.
  4. In the same skillet or pot, add the finely chopped onions. Fry them for a few minutes till they start to get translucent and brown on the sides.
  5. Once the onions are caramelised, add some ginger garlic paste and fry till the raw aroma of the paste dissipates.
  6. Add the carrots and stir for a minute.
  7. Gently add the soaked rice to the pan and mix. Do not break the grains.
  8. Season with salt and black pepper powder.
  9. Pour the Asian sauces – sweet chilli sauce, Oyster sauce and dark soy sauce. Mix well.
  10. Add 2 cups of hot water and once it starts to boil, add the fried chicken pieces on top.
  11. Cover and cook on lowest flame possible for 20 minutes.
  12. Lift the lid in 30 minutes and add the bell peppers on top. Do not disturb the rice. Cover and cook on lowest flame for another ten minutes.
  13. Check the rice with a fork. Turn the flame off and let the rice rest for another 15 minutes.
  14. Serve hot after garnishing with some spring onion greens. [/directions]

asian chicken and rice

asian chicken and rice

I hope you try this one pot Asian chicken and rice super soon! If you have any doubts, comments, or feedback, please reach out to me in comments or my social media handles.

Find me on Instagram – www.instagram.com/slurrpilicious

Find me on Facebook – www.facebook.com/slurrpilicious

Find me on Youtube – https://www.youtube.com/channel/UCA-cJoo27OLSCswI4sy6lzA?

Happy cooking!

Chana Dal Pulao

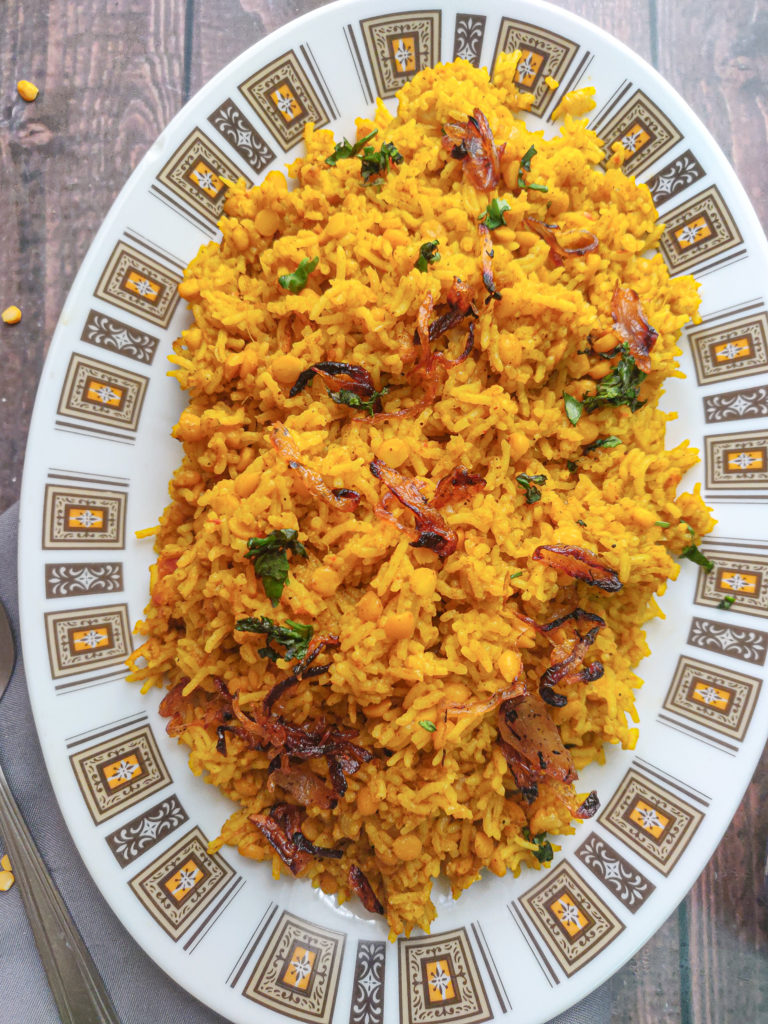
It’s lockdown day 5738821 and peak summers isn’t helping. With all of us being homebound and going on with our worklives from home, we are also facing an increasing burden of domestic work. I have been getting a lot of messages on my Instagram lately where you all are asking me to add more easy recipes that do not take much time, are delicious and can be made in large batches. So here I am adding another personal recipe from my own kitchen that has saved me a lot of time, especially in this lockdown.

This chana dal pulao is extremely flavourful and delicious and will fill you up. I usually make a large batch that easily goes for two meals (we are three people). Having food ready in the fridge for the next meal is a different kind of relaxation, right? I completely understand the hassle of cooking everyday and sometimes we just don’t feel like going through that ordeal again. And peak summers does not really help in any case. So here is a one pot rice recipe that you will defintely love if you are also someone looking for easy meal options for yourself and those you live with.

chana dal pulao

While this recipe is easy, it does require some preparation in advance. Here’s what you need to keep ready before you start making the pulao.

  • Soak the rice – This step is very crucial to get rice that is fluffy and light. Wash the rice thoroughly under running water at least 5-6 times till the water that drains out is crystal clear. This step is very important as it helps to ensure that all the excess starch is removed so that you get rice that is fluffy and also not too heavy. Pro tip – Do not waste the starchy water. It is full of nutrients. Use it to water your plants. Once your rice is washed, soak the rice in clean water for 30 minutes to one hour. Till step will ensure that the rice fluff up to its maximum potential.
  • Boil your chana dal – To reduce the cook time of the pulao, we will have to keep the chana dal or split chickpeas ready. Wash the chana dal and soak them in water for 2 hours. Once they are soft, boil them in a pressure cooker for five to six whistles till they are soft (and not mushy).

chana dal pulao

Here’s the recipe.

[ingredients title=”Ingredients”]

  • 1 1/2 cups basmati rice
  • 1 1/2 cups chana dal (split chickpeas)
  • 1 cup finely chopped onions
  • 3 tbsp vegetable oil
  • 2 cardamoms
  • 2 cloves
  • 1/2 inch cinnamon stick
  • 1 cup fresh coriander leaves, roughly chopped
  • 5 garlic cloves
  • 1 inch ginger
  • 2/3 cup fresh tomato puree
  • Salt to taste
  • 1 tbsp coriander powder
  • 1 tbsp cumin powder
  • 1 tsp turmeric powder
  • 1 tsp Kashmiri red chili powder
  • 1/2 tsp black pepper powder
  • 1/3 cup whisked curd
  • 1 tsp garam masala [/ingredients]

[directions title=”Directions”]

  1. Wash and soak the rice for 30 minutes.
  2. Wash the chana dal and soak them in water for 2 hours. Once they are soft, boil them in a pressure cooker for five to six whistles till they are soft.
  3. Make a paste of the ginger, garlic and coriander with about three tablespoons of water.
  4. Heat oil in a skillet or pot. Temper with cardamom, cloves and cinnnamon.
  5. Add the finely chopped onions and saute till they turn translucent and golden brown.
  6. Pour the ginger, garlic and coriander paste and cook on medium flame till you see the oil release from the sides.
  7. Add the fresh tomato puree and mix well. Cover and cook for a few minutes till rawness disappears and oil splits from the masala.
  8. Uncover the skillet and give it all a good mix. Season with Kashmiri red chili powder, coriander powder, black pepper powder, cumin powder, turmeric powder and salt. Mix well.
  9. Add the boiled chickpeas and mix well till it gets coated well with the masala. Add two cups of hot water. Cover and let it cook till the dal comes to a luscious gravy.
  10. Add the soaked rice and gently mix everything together. Add two more cups of hot water and some garam masala. Mix and cover and cook for 30 minutes on the lowest flame possible.
  11. Check the rice after 30 minutes. Turn off the gas and let it rest undisturbed for another 15 minutes.
  12. Garnish with fried onions and fresh coriander.
  13. Serve hot with some raita and salad. [/directions]

chana dal pulao

chana dal pulao

I hope you try this chana dal pulao super soon! If you have any doubts, comments, or feedback, please reach out to me in comments or my social media handles.

Find me on Instagram – www.instagram.com/slurrpilicious

Find me on Facebook – www.facebook.com/slurrpilicious

Find me on Youtube – https://www.youtube.com/channel/UCA-cJoo27OLSCswI4sy6lzA?

Happy cooking!

Chilli Paneer

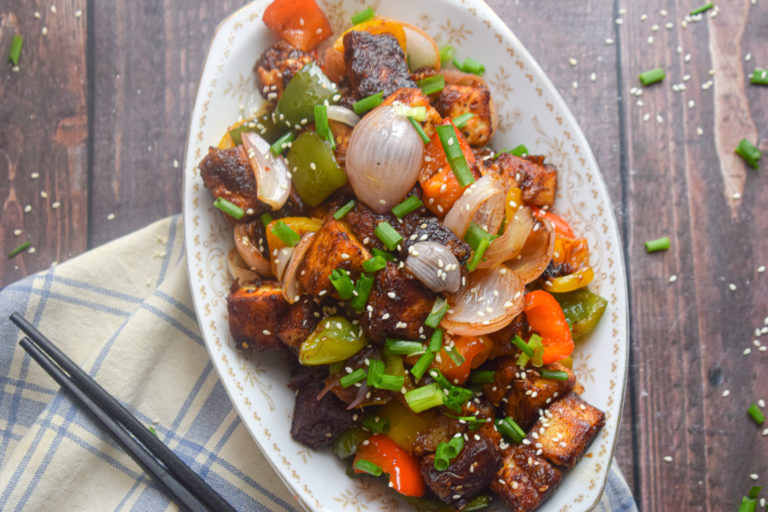
I love Desi Chinese and Chilli Paneer is one of my favourite things to order. This restaurant style chili paneer version is as good as your favorite takeaway. I usually like my chilli paneer in a semi gravy. The special part about this chilli paneer recipe is that we make the chilli paste from scratch. That’s what lends it an amazing array of flavours.

This chilli paneer recipe comes together in 15 minutes. Everything needs to be kept ready before you fry everything in the wok. The only hard work that needs to be done is frying the paneer pieces in batches, till they are super crispy and flavourful from the outside, yet soft from the inside. Make the chilli paste, vegetables (onions and bell peppers) ready before you cook the chilli paneer as it all happens really quick once the paneer cubes are fried.

chilli paneer

I hope you try this recipe and make for yourself this weekend. I am sure you are going to love it!

Preparation time – 30 minutes

Cook time – 15 minutes

Serves – 5

[ingredients title=”Ingredients”]

  • 350 g paneer, cut into cubes
  • 1/4 cup corn flour
  • 1/2 cup all purpose flour(maida)
  • 2 cups red onions (chopped)
  • 1 cup red bell pepper (chopped)
  • 1 cup yellow bell pepper (chopped)
  • 1 cup green capsicum (chopped)
  • 4 dried red chillies
  • 20 g ginger
  • 15 g garlic
  • 3 tbsp dark soy sauce
  • 1 tbsp white vinegar
  • 1/2 cup hot water
  • Salt to taste
  • 1/2 tsp black pepper powder (for the batter)
  • 1 tsp black pepper powder (for the final gravy)
  • Spring onion greens for garnish
  • Sesame seeds for garnish [/ingredients]

[directions title=”Directions”]

  1. Soak dried red chilies in hot water for three hours. Once soft, grind them with the ginger and garlic. Set aside.
  2. In a large bowl, mix the corn flour and all purpose flour together. Season with salt and half teaspoon of black pepper powder. Mix well. Now keep adding water till you get a batter with a smooth consistency. Don’t keep it too thick.
  3. Add the paneer cubes to the batter in two batches and mix them till they are completely submerged in it.
  4. Heat oil in a wok. Once it gets hot, take out the paneer cubes one by one, dripping off all the excess batter, and fry them till they are golden brown from all sides. Fry the paneer in batches so that they crisp uniformly and the wok does not get overcrowded. Once all the paneer cubes are fried, set them aside for later.
  5. In the same pan add the chilli paste and fry on high heat till they release its rawness.
  6. Add the onions and the bell peppers and toss everything on high heat for a minute.
  7. Season with salt and pepper and give everything a good mix.
  8. Pour dark soy sauce and vinegar and toss everything well.
  9. Add the left over flour batter, along with half a cup of hot water and mix everything well. Add the fried paneer and toss it till it soaks all the flavours from the sauce. Once done, turn the flame off. If you want more gravy, you can add some more hot water at this point and cook it till it thickens.
  10. Serve on a plate with some garnish of fresh green onions and sesame seeds. Enjoy!  [/directions]

chilli paneer

chilli paneer

I hope you try this chilli paneer recipe super soon! If you have any doubts, comments, or feedback, please reach out to me in comments or my social media handles.

Find me on Instagram – www.instagram.com/slurrpilicious

Find me on Facebook – www.facebook.com/slurrpilicious

Find me on Youtube – https://www.youtube.com/channel/UCA-cJoo27OLSCswI4sy6lzA?

Happy cooking!

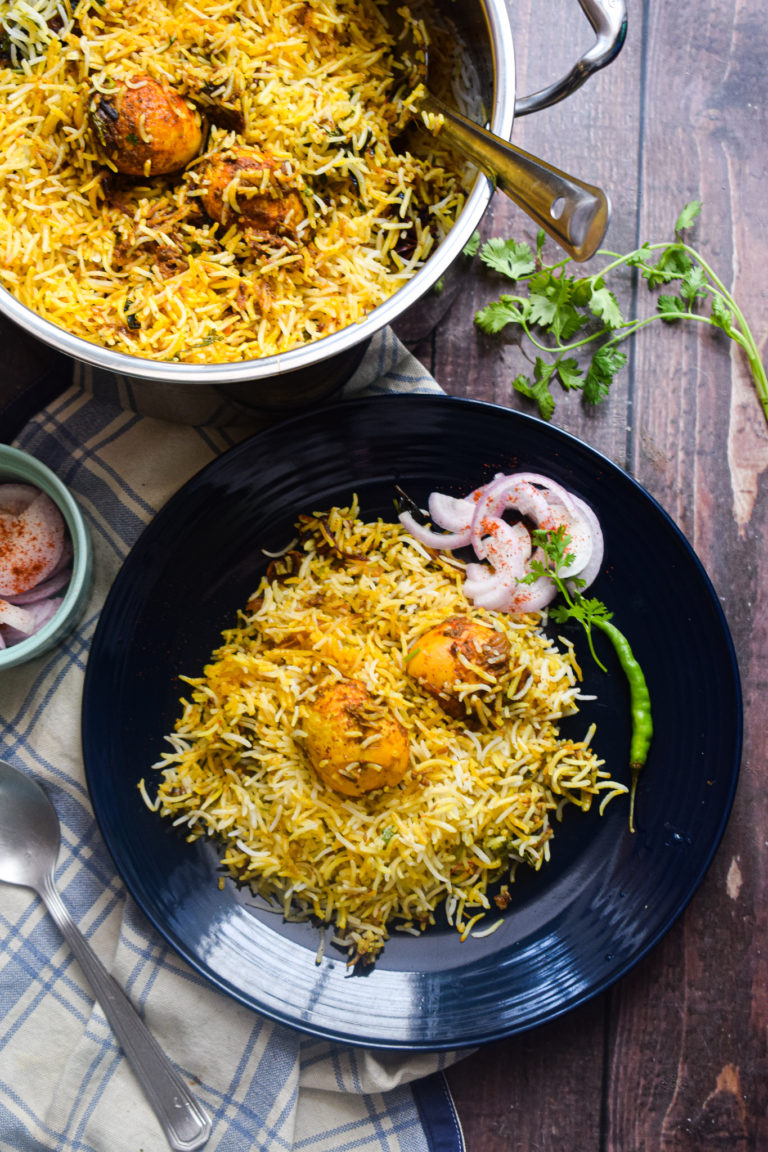
Egg Dum Biryani

It’s finally here! I am so excited to finally upload a biryani recipe on the blog. Honestly, it has been nothing short of a dream for someone like me who loves creating videos and sharing recipes. I am a huge biryani fan myself and I can eat it every day. I honestly don’t know why I waited so long to upload this egg dum biryani recipe. But better late than never!

egg dum biryani

This egg dum biryani is so amazing and super professional! I always found making biryani very intimidating before I actually started making them at home. It’s definitely not as easy as making a pasta or dal rice, but the effort is so worth it! And you know what is the best part about this particular egg biryani? It does not require any marination! So it’s way simpler than a biryani with meat.

egg dum biryani

egg dum biryani

I have tried to be as particular and detailed as possible with this recipe so that you have all the knowledge to get this right on your first trial. I have made several bad biryanis in my life and trust me, a lot of practice has got me to develop this recipe. And it’s 100 percent full proof. Just think about biryani from your favorite place and this can totally match up to that! So let me get straight to the top tips in ensuring that you get that perfectly flavourful and amazing biryani every single time.

How to Make The Best Biryani Ever

Making biryani is an art. It involves some real techniques which need to be followed no matter what. And guess what? They are not that hard! The techniques for this egg dum biryani are pretty straightforward. Let’s see what they are.

  1. Making that perfectly fluffy rice

A good biryani is one in which the rice is cooked to perfection and every single grain is separate from the other. To achieve this, you have to follow certain steps without fail.

  • Thoroughly wash your rice. Once you get your raw rice, wash it thoroughly under running water at least 5-6 times till the water that drains out is crystal clear. This step is very important as it helps to ensure that all the excess starch is removed so that you get rice that is fluffy and also not too heavy. Pro tip – Do not waste the starchy water. It is full of nutrients. Use it to water your plants.
  • Soak the rice for at least 30 minutes. Once your rice is washed, soak the rice in clean water for 30 minutes to one hour. Till step will ensure that the rice fluff up to its maximum potential.
  • Buy biryani rice, not long-grained basmati rice. To make restaurant-style biryani, make sure you purchase rice which is known as biryani rice. This rice is actually perfect for making biryani and is really thin, light, and long-grained. Buying basmati rice might not give you the same results as this rice would. There are many brands in the market that offer “biryani rice” in particular. Choose one of those.
  • Make room for a lot of water. Your rice will cook perfectly when it gets a lot of water to swim in. So make sure you fill up your pot with lots of water so that the rice gets submerged in it. In this recipe, I have used 500 grams of rice and 3 liters of water.
  • Salt your water well. This is crucial to make sure every grain of rice is well seasoned. Add enough salt in the pot of water as much as you would want in your soup. Mix it well and taste it before you add the rice.
  • Cook the rice before layering it only till it’s 70 percent done. This step can honestly make or break your biryani. When we cook the rice before layering it, make sure it’s cooked just enough that it still has a bit of a bite to it.
  • Strain the semi-cooked rice well. When you take the rice out of the water to save it for the layering, make sure you strain every bit of that excess water in which it was cooking. Leaving the rice in water will make it lumpy and stick to one another and that’s no good!
  • Be gentle when using the spoon. At all points of handling the rice, be it raw or semi-cooked, be gentle so that you don’t break the grains.
  • Use a cast iron pot or a good quality stainless steel pot/handi to cook the biryani. The last thing you would want is burnt rice at the bottom.

egg dum biryani

egg dum biryani

2. The Birista (fried onions) is the hero

While this egg dum biryani recipe uses a lot of ingredients, the one thing that makes the most impact is the birista or the fried onions. Birista refers to onions that have been fried in oil for a long time till it becomes crunchy and brown. The oil that is used to make the birista is packed with flavor. I have used the oil to flavor the biryani rice as well as the gravy. This birista is used for topping, as well as in the biryani gravy. You can buy birista as they are available in the market. But I make my own.

Here’s how I made the birista. You can also make this in advance and keep it for later use, as it is a time-consuming process.

Cut 300 grams of onions into thin slices. Separate them by crushing them with your hands. Heat 1 cup refined oil in a wide skillet. Add the onions to it. Cook on a medium flame for about an hour till the onions turn from translucent to brown and cook uniformly. the onions will be done when they turn crispy. Take them out on a paper towel and let them cool. You should be able to crush them with your hands when cooled down.  Store them or use them fresh.

3. The gravy

The taste and flavors in the gravy define a biryani. A lot goes into making the gravy for this egg dum biryani. For the creaminess, we add whisked curd and cashew paste. The biryani masala and garam masala also add a lot of flavors. And my personal touch of the chili, ginger and garlic paste gives it a super spicy kick and spin. It’s really the best!

4. The accompaniments in layering

A lot goes into making the biryani perfect. The layering involves many ingredients so make sure you do not miss out on any of the following ingredients as each one of them plays a very crucial role in making the biryani what it is.

  • Fresh coriander leaves
  • Fresh mint leaves
  • Ghee
  • Kewra water
  • Saffron infused milk
  • Starchy rice water

egg dum biryani

egg dum biryani

So those were my tips to make the perfect biryani. You can see more details in the video. Now let’s take a look at the ingredients.

Preparation time – 60 minutes

Cook time – 90 minutes

Serves – 6

[ingredients title=”Ingredients”]

  • 6 large eggs
  • 500 g biryani rice
  • 3 dried red chilies (soaked in warm water for three hours)
  • 20 g ginger
  • 15 g garlic
  • 4 tbsp vegetable oil
  • 1 tbsp ghee
  • 2 tbsp birista oil
  • Mace or javitri
  • One star anise
  • Cinnamon stick
  • Three cardamoms, slightly crushed
  • 1 tsp shah jeera
  • 3 cloves
  • 300 g onions (to make birista)
  • 2 tbsp biryani masala
  • 1 tbsp coriander powder
  • 1 tsp cumin powder
  • 1/2 tsp red chili powder (to fry the eggs)
  • 1/2 tsp turmeric powder (to fry the eggs)
  • 1 tbsp Kashmiri red chili powder (for the gravy)
  • 1 tbsp garam masala
  • Salt to taste
  • 1/2 cup whisked curd
  • 1 cup reserved rice water
  • 12 cashews ground to a paste
  • Fresh coriander leaves
  • Fresh mint leaves
  • Kewra water
  • Ghee (for layering)
  • Birista oil (for layering)
  • 8 tbsp warm milk
  • Few saffron strands
  • 1/2 cup hot water (for the gravy) [/ingredients]

[directions title=”Directions”]

  1. Soak dried red chilies in hot water for three hours. Once soft, grind them with the ginger and garlic. Set aside.
  2. Thoroughly wash the rice till the water from it becomes clear. Soak in water for 30 minutes to one hour.
  3. Heat water in a wide pot. Add shah jeera, salt, birista oil, mace, star anise, cardamom, cloves, and cinnamon. Stir well till it boils. Check the salt, add more if required. The water should be as salty as soup.
  4. Add the soaked rice to the boiling pot of water. Cook it till it’s 70 percent done. Save a cup of the rice water for later use. Strain well and set aside.
  5. Boil six eggs and poke it with a knife to make small holes for the masala to enter the eggs.
  6. Pour vegetable oil in a kadhai. Add salt, red chili powder, and turmeric powder. Mix it gently and fry the eggs for 2-3 minutes till they are evenly crisp from all sides.
  7. In the same kadhai add some ghee and birista oil. Add the chili and ginger garlic paste. Saute on high flame till aromatic.
  8. Add half of the birista. Saute till it starts to melt.
  9. Season with more salt, coriander powder, cumin powder, red chili powder, biryani masala, and garam masala. Mix well.
  10. Add whisked curd and cashew paste, along with a cup of hot water. Mix everything together till you see the oil separates from the masala.
  11. Throw in the fried eggs and mix it all up along with some fresh coriander. Time to layer.
  12. Take a wide-mouthed pot and fill the bottom with a layer of rice. Add a second layer of eggs and gravy. Add another layer of rice on top.
  13. Drizzle ghee, saffron-infused milk, kewra water, and starchy rice water (2 tbsp each) over the rice. Garnish with fresh coriander leaves, mint leaves, and top it off with birista.
  14. Repeat the process three more times. Once done, cover the pot with a lid. Make sure there is no room for air to escape.
  15. Heat an iron tawa on the gas. Once hot, lower the flame and put the biryani pot on top. Let this cook for 30 minutes. Once done, let the biryani rest for another 30 minutes.
  16. Gently take the lid off and mix all the layers of the egg biryani. Make sure you take all of it together.
  17. Serve hot with raita, salan, and salad on the side. Enjoy! [/directions]

egg dum biryani

egg dum biryani

I hope you try this egg dum biryani recipe super soon! If you have any doubts, comments, or feedback, please reach out to me in comments or my social media handles.

Find me on Instagram – www.instagram.com/slurrpilicious

Find me on Facebook – www.facebook.com/slurrpilicious

Find me on Youtube – https://www.youtube.com/channel/UCA-cJoo27OLSCswI4sy6lzA?

Happy cooking!