Makhana Kheer

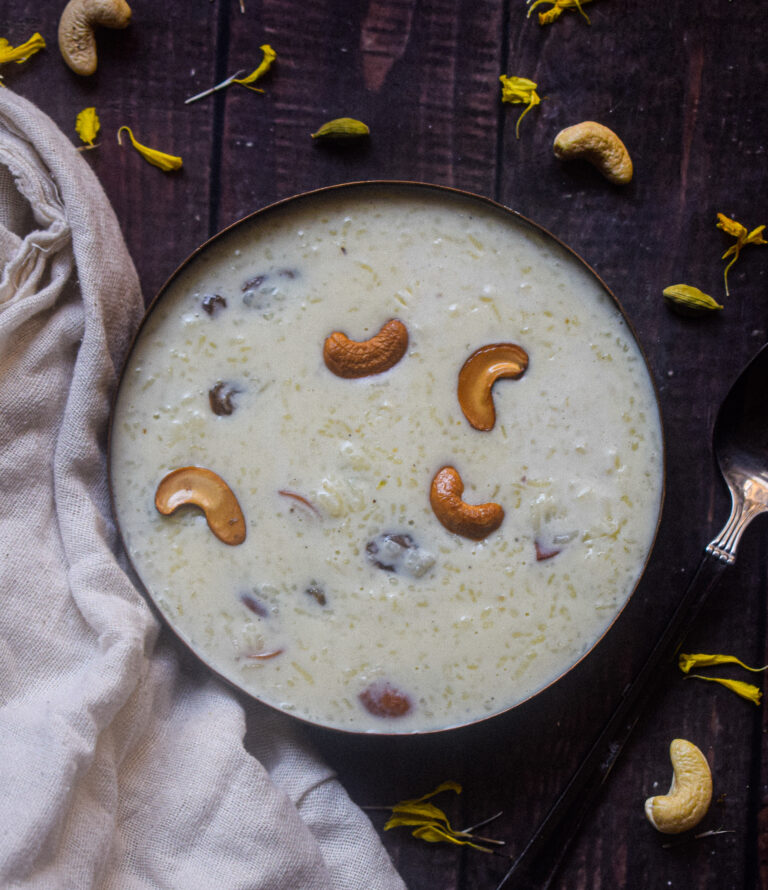
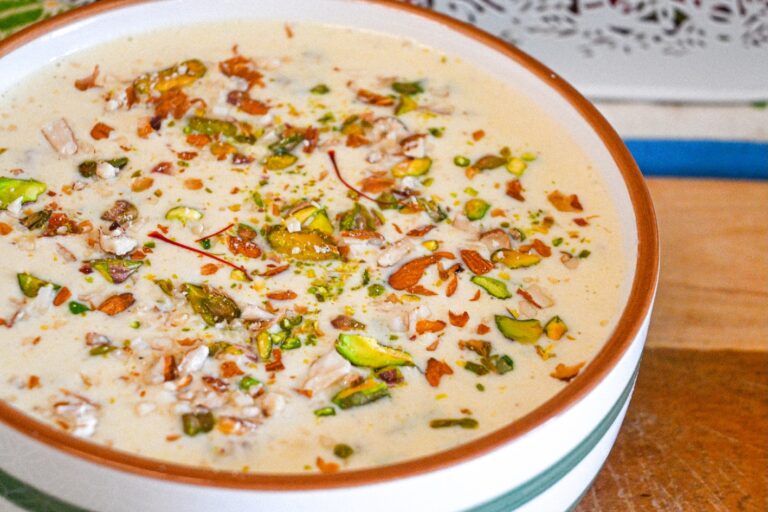
This Makhana Kheer recipe strikes the perfect balance between health and taste. Made with roasted makhanas (fox nuts) simmered in rich, creamy milk and flavored with saffron, cardamom, and dry fruits. It’s a comforting, nutrient-rich dessert that’s perfect for festivals like Navratri or for a cozy family treat.

Makhanas are rich in protein, calcium, and antioxidants, making this kheer not just delicious but also a great guilt-free dessert option. Whether served chilled or warm, this Phool Makhana Kheer is sure to win hearts at your dining table.

Preparation time – 20 minutes

Cook time – 40 minutes

Serves – 4 – 6 people

[ingredients title=”Ingredients”]

  • 2.5 cups makhana (fox nuts)
  • ½ cup cashews
  • 2 tbsp ghee
  • 1.5 litres full-fat milk
  • 1 bay leaf
  • ½ tsp cardamom powder
  • ¼ cup finely chopped almonds
  • ¼ cup finely chopped pistachios
  • 4–5 saffron strands
  • ½ cup sugar
  • 3–4 tbsp chopped almonds and pistachios [/ingredients]

makhana kheer

[directions title=”Directions”]

  1. Heat ghee in a thick-bottomed kadhai on medium-low flame.
  2. Add the makhanas and roast them until they turn crisp and slightly golden. Keep stirring continuously to avoid burning.
  3. Add cashews and continue roasting for another 2–3 minutes until they too turn golden.
  4. Remove from heat and let them cool.
  5. Once cooled, take half of the roasted makhanas and all the cashews and grind them into a fine powder.
  6. Keep the rest of the makhanas whole for texture.
  7. In the same kadhai, pour 1.5 litres of milk and bring it to a gentle boil.
  8. Add the bay leaf and keep stirring to prevent sticking.
  9. Add the makhana-cashew powder to the boiling milk and mix well.
  10. Stir continuously on medium-low heat until it thickens slightly.
  11. Add saffron strands, chopped almonds, and pistachios.
  12. Mix in the remaining whole roasted makhanas and cardamom powder.
  13. Let the kheer simmer until the milk reduces by about half.
  14. Add sugar and stir until completely dissolved.
  15. Turn off the heat and remove the bay leaf.
  16. Allow the kheer to cool — it will thicken further as it rests.
  17. Garnish generously with chopped almonds and pistachios.
  18. Refrigerate for 2–3 hours and serve chilled. [/directions]

makhana kheer


🍯 Pro Tips

  1. You can substitute sugar with jaggery or date syrup for a “no refined sugar” version.
  2. For a richer flavour, add a tablespoon of condensed milk towards the end.
  3. Always stir the kheer gently while boiling to prevent it from sticking to the bottom.

🥄 Serving Suggestion

Serve this Makhana Kheer after a light meal, during festive celebrations, or as a wholesome dessert for fasting days. Its creamy texture and subtle sweetness make it a perfect treat for all ages.

You can follow me on Facebook, Instagram, Twitter, and YouTube for more food-related content and updates that excites you to try something new every day.

Related Recipe: Rice Kheer Recipe


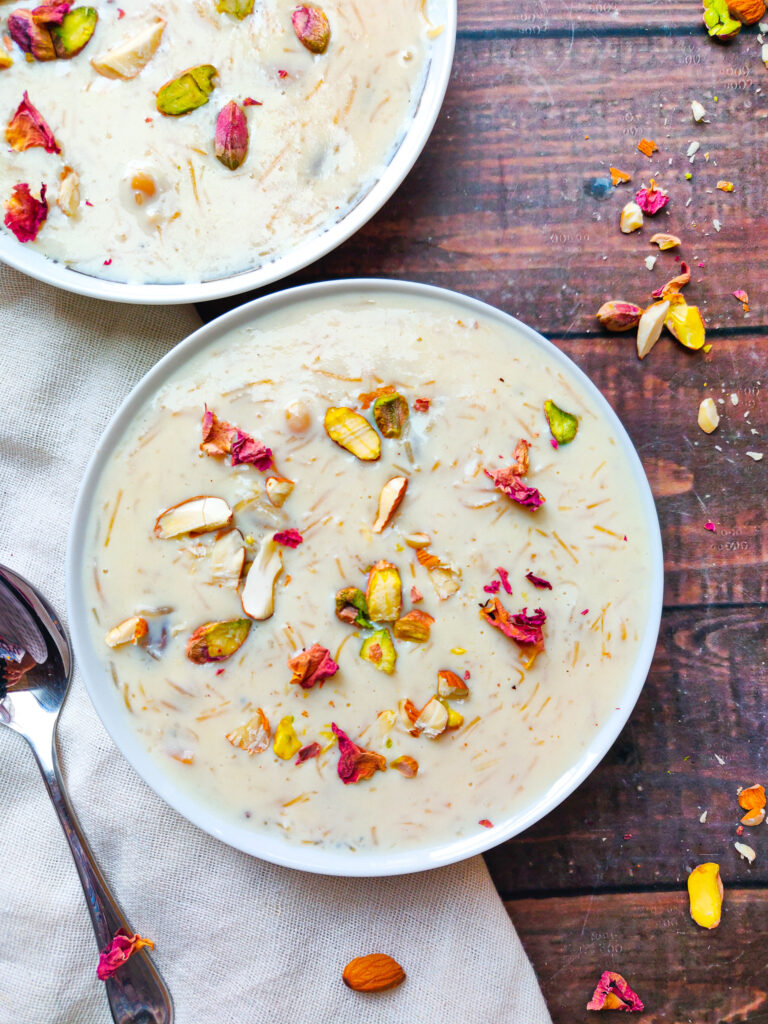
Seviyan Kheer

Seviyan kheer is a common Indian dessert made on festive occasions like Diwali, Eid and others. It’s one of the easiest and most luxurious desserts that comes together so quickly. Every household has their own unique recipe of seviyan kheer. Mine is one which is thick and bursting with creaminess and flavours. The perfect seviyan kheer is a result of patience and the right proportions of ingredients.

Just like my rice kheer recipe, this seviyan kheer also follows the same ratio of seviyan (vermicelli) to milk. The seviyan or vermicelli should ideally be roasted. If you have the plain one, make sure you fry it in ghee and roast it a bit before you add it to the milk.

seviyan kheer

The consistency of this seviyan kheer is thick and creamy. As it cools down, it keeps getting thicker, so we stop the cooking process once it reaches a semi thick consistency. The seviyan kheer is cooked in a way that it never becomes lumpy, even when you freeze it. As for sweetness, it is just the right amount of sweet for a festive occasion. You can always add more or reduce the amount of sugar as per your preference.

Tips to Get the Perfect Consistency

Though this seviyan kheer recipe is extremely simple and minimal, it can only taste so good if you take care of a few technicalities. Let’s take a look.

1. Get the ratio right

The secret to a great kheer is the correct ratio of milk to rice. The amount of rice is very less and we let it slow cook and merge with the reducing milk. If you get the ratio right, there is no stopping you from creating the best rice kheer at home.

2. Use the best ingredients

Like every simple recipe using a handful of ingredients, this rice kheer recipe also calls for sourcing the best ingredients. Make sure you use really good variety of roasted vermicelli or seviyan. Use good quality ghee.

This recipe cannot be replaced with low fat milk. The milk has to be full fat to get that perfectly thick and creamy consistency of the rice kheer. Get your hands on the best quality full-fat milk for this recipe.

3. Mind the heat

Cooking the seviyan kheer at the optimal temperature is very important to get it right. Once the milk comes to a boil, the flame will keep oscillating between low to medium, but it will never touch high. The temperature needs to be checked and regulated throughout the cooking process you would not want the milk to stick or worse, burn at any point. Keeping the flame high will also make the milk evaporate faster than it should, and affect the final consistency of the kheer.

4. Use a heavy bottomed pan

Make sure you use a heavy bottomed pan like a heavy stainless steel pot or kadhai or a cast iron pot. This will ensure that the kheer does not burn and cooks uniformly.

4. Be patient

This is probably the most important virtue to have while making kheer. There are no shortcuts to making a good seviyan kheer. Nothing can match the taste and excellence of slow cooking. So you will have to have patience and give your undivided attention to this recipe for at least 30 minutes. The results will really be worth it, I promise.

seviyan kheer

seviyan kheer

Preparation time – 15 minutes

Cook time – 30 minutes

Serves – 3

[ingredients title=”Ingredients”]

  • 1 tbsp ghee
  • 1/4 cup cashews
  • 1/4 cup roasted vermicelli/seviyan
  • 1 litre full fat milk
  • 7 tbsp sugar
  • 1 bay leaf
  • 1/4 tsp cardamom powder
  • Chopped almonds for garnish
  • Chopped pistachios for garnish
  • Dried rose petals for garnish [/ingredients]

[directions title=”Directions”]

  1. Heat ghee in a kadhai and fry the cashews till golden brown. Set aside.
  2. Saute the vermicelli or seviyan in the same kadhai for a minute. Set aside.
  3. Heat milk in a kadhai or pot and let it come to a boil. Keep stirring to prevent the milk from sticking to the bottom.
  4. Once the milk starts to boil, add the fried seviyan. Keep stirring continuously on medium flame.
  5. Add the bay leaf to the milk for enhanced flavour.
  6. Keep stirring continuously to prevent sticking. Milk will start to thicken and turn creamy.
  7. Once the milk is reduced by half and seviyan is cooked completely, add the sugar and mix well.
  8. Once you reach the desired consistency as shown in the video, garnish with some cardamom powder and give it one last mix.
  9. The final consistency should be a bit runny as the kheer will thicken as it gets cold.
  10. Garnish with chopped pistachios, chopped almonds and dried rose petals. Enjoy warm or cold. [/directions]

seviyan kheer

seviyan kheer

I hope you try this delicious and fool-proof seviyan kheer this festive season. If you have any doubts, comments, or feedback, please reach out to me in comments or my social media handles.

Find me on Instagram – www.instagram.com/slurrpilicious

Find me on Facebook – www.facebook.com/slurrpilicious

Find me on Youtube – https://www.youtube.com/channel/UCA-cJoo27OLSCswI4sy6lzA?

Happy cooking!

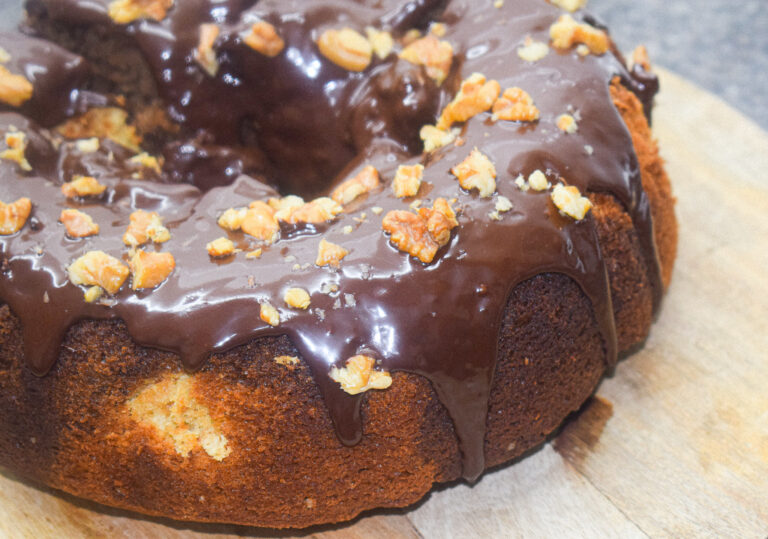
Marble Bundt Cake

When you love yourself some good old classic vanilla cake or a rich decadent chocolate cake and choosing one out of the two becomes tougher than Sophie’s choice, marble cakes come to the rescue. A marble cake is literally the best of both worlds – classic buttery vanilla and rich and moist chocolate cake, swirled together to make one cake! Who wouldn’t love that?

From adults to kids, marble cake has a place in everyone’s heart. I have grown up eating spongy, buttery and moist marble cakes and I would be lying if I said they are not my absolute favourite! I can never have enough of the classic marble tea cake. 

Marble cake is actually just as easy as any other sponge cake and requires making a single vanilla sponge cake batter, half of which we separate and add cocoa powder to. It is such an easy recipe and makes the most delightful buttery sponge cake. It is perfect for birthdays or special occasions.

marble bundt cake

Bundt pans can instantly transform any plain cake into something spectacular, and that is why I love baking with them so much. While baking a marble cake in a Bundt pan, you don’t even need a skewer or anything to make swirls around the cake to give it a marble effect. Because of its unique shape, just a tap on the counter after pouring the batter into it, the Bundt mound will give the cake the most beautiful marble effect. It may look like this Marble Bundt Cake has a lot of ingredients or steps, but it’s actually very easy and most (if not all) of the ingredients are things you have on hand.

Baking is really all about perfect measurements and techniques. Let’s talk about some of the ingredients and some significant points to keep in mind while baking this Marble Bundt Cake.

Ingredients in This Marble Bundt Cake

-Butter

Butter is one of the key ingredients in this mixture. It is vital to use good quality butter because it contributes the maximum flavour in the recipe. The buttery flavour complements the rich chocolaty taste so beautifully. It is also extremely important to use softened butter, i.e. butter at room temperature – when you make an impression on the butter, it should hold its position. That is the perfect consistency of the butter to use while baking any sponge cake – neither too hard nor too runny. It will also be easier to cream the butter with sugar incorporating the maximum air if the consistency is perfect. The cake will rise higher if more air is trapped, and yields a softer and fluffy texture. This process depends on a few factors:

  • The softness of the butter. The softer the butter, the easier air will be trapped in the butter-sugar mixture.
  • It is extremely important to add the sugar in batches. This allows the sugar to dissolve completely in the butter. For this recipe I am using granulated white sugar. However, you can swap it with castor sugar.
  • The speed of mixing. Use medium to high speed to mix the butter and sugar yields a smoother and lighter buttercream.

marble bundt cake

marble bundt cake

Signs to know if the buttercream is ready:

  • The colour of the butter turns from the initial bright to light yellow and fluffy.
  • It looks like soft ice cream.
  • There is no more visible sugar granule in the mixture.

-Eggs

Eggs act as a binding agent in cakes. They also provide moisture and help the cake retain its shape. It’s the balance between eggs and flour that help provide the height and texture of any cake. I recommend adding eggs one at a time and beat them with the buttercream for the best results but you can sure add it all at once if you are in a hurry.

When you add the eggs, the mixture will appear curdled, but keep whisking and rest assured, it will turn smooth before you know it.

-Baking Powder and Baking Soda

Since the amount of butter in this cake is on the higher side, it will rise well enough even without baking soda or baking powder. But addition of the two is extremely important for chocolate part of the batter which is denser and needs a rising agent to level with the vanilla part.

marble bundt cake

[ingredients title=”Ingredients”]

  • 200 g dark chocolate
  • 295 g all-purpose flour
  • 2.5 tsp baking powder
  • ¼ tsp baking soda
  • 170g softened butter
  • 220g granulated white sugar
  • 3 large eggs – at room temperature
  • 2 tsp vanilla extract
  • 80 ml plain yoghurt – whisked until smooth
  • 120 ml milk – at room temperature
  • ½ cup cocoa powder [/ingredients]

[directions title=”Directions”]

  1. Using the double boiler method melt the dark chocolate. You can replace it with milk chocolate if you do not prefer dark chocolate.  (double boiler method: heat some water in a pan and place a heat resistant bowl over it, making sure it doesn’t touch the water in the pan)  
  2. Once the chocolate is completely melted, set it aside and begin preparing the cake batter.
  3. In a big bowl, add in your softened butter.
  4. Start creaming the butter with the help of an electric hand blender.
  5. While continuously beating the butter, add the granulated white sugar in 3 batches.
  6. Beat the butter – sugar cream till it turns light and fluffy. It should take about 3 – 4 minutes.
  7. While still beating the buttercream, add in the eggs, one at a time and beat the mixture till smooth.
  8. Once the mixture is smooth, add in your whisked yoghurt and vanilla extract.
  9. Beat everything together till well combined.
  10. In a separate bowl, add in your sifted flour.
  11. To the flour add in the baking powder and the baking soda.
  12. Whisk the dry ingredients well in order to assure uniformity in the texture of the cake.
  13. While still beating the wet ingredients, add in the dry ingredients to it, in 3 batches – Whisking till smooth after every addition.
  14. Add in the milk to the batter, in two batches.
  15. Beat till you get a smooth and creamy batter.
  16. Once done, with the help of a spatula, scrap off the excess flour/sugar from the sides of the bowl and fold it into the batter using the Cut and Fold method.
  17. Take a new clean bowl.
  18. Transfer half of the batter to the new bowl.
  19. Add in some cocoa powder in half of the batter and mix it in using the cut and fold method till well combined.
  20. Take your Bundt pan and thoroughly layer it will non-stick cooking oil or spray.
  21. Pour the batter into the Bundt pan, alternating two spoons of both the batters – chocolate and vanilla.
  22. With the help of a skewer or the back of a spoon, make swirls throughout the cake giving it a marble effect.
  23. Tap the Bundt pan on the counter to release the air pockets before setting it to bake.
  24. Bake this in the oven at 180 degree Celsius for about 35 – 40 minutes.
  25. Flip the pan to release the cake and allow it to cool completely.
  26. Once at room temperature, pour the melted chocolate on top of the cake.
  27. Top the chocolate with some chopped walnuts for the added crunch and flavour and voila! You have yourself the most gorgeous, gourmet looking cake in no time. [/directions]

marble bundt cake

marble bundt cake

This recipe is full proof and makes for such a delicious homemade treat! Make it for birthdays or special occasions and it will be a hit. 

Feel free to reach out for feedbacks, suggestions or connect with me on Instagram or Facebook. Subscribe to my YouTube channel for all my videos and upcoming recipes.

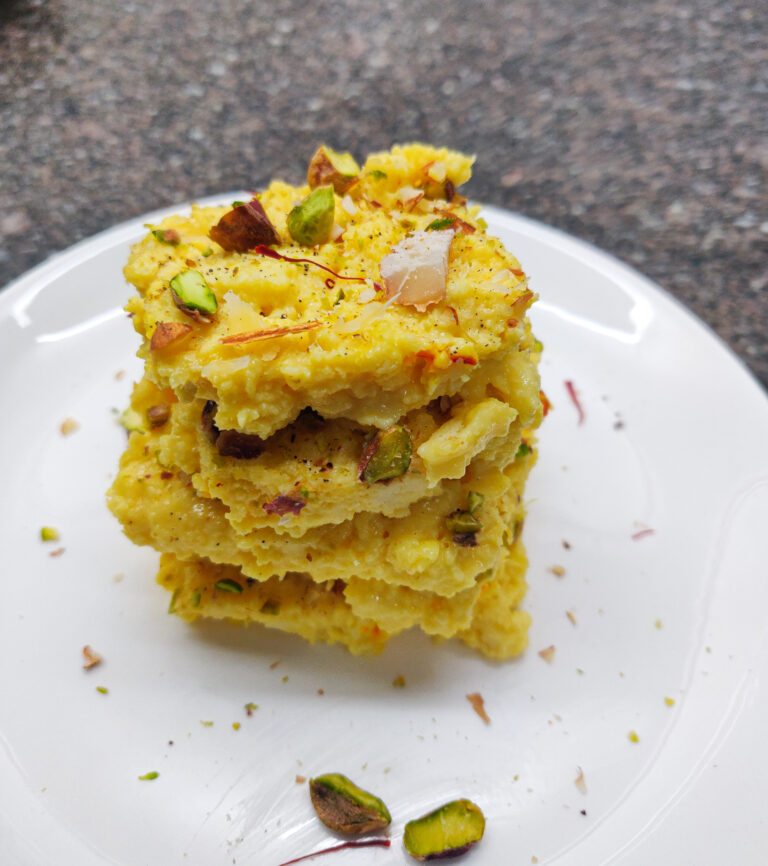
Kalakand

Kalakand is an easy and quick way to whip up a tasty Indian dessert in less time. Made with just a few ingredients, kalakand is very easy to make and tastes delicious! The recipe is made in two parts – first is splitting the milk and preparing the chenna. The second is boiling full fat milk, and reducing it to half. Then we mix the two parts till it turns into a creamy, luscious mix. Set to chill for a few hours and kalakand is ready! I love to serve this with a topping of condensed milk. It’s absolute heaven I tell you.

Kalakand is one of the most popular Indian sweets and is absolutely delicious. These soft, rich and creamy cakes of chhena wrapped in luscious thick rabdi with just the amount of sweetness and a slight crunch of sliced nuts will satiate your taste buds and leave you feeling happy and satisfied. This Kalakand recipe, unlike the traditional elaborated recipe which is long and time taking, is so easy to make and comes together in no time to give you that perfect desi dessert anytime the heart craves something sweet.

kalakand

If this is your first time trying your hands at making mithai or you’re not very confident, this Kalakand recipe is the perfect way to begin. It is absolutely fool proof and you cannot go wrong with it. Once you make it, you won’t stop. I like to top my Kalakand after setting it for a while, with some condensed milk and it is absolute heaven I tell you!

Ingredients in Kalakand

Kalakand is basically made up of just two ingredients – Milk and Sugar. Rest everything is optional but is highly recommended to get that perfect mithai. Let’s talk about milk, the base of this delight:

Milk

Milk is solely the hero of this dish, just like almost all other Indian sweets, and every element of it is constituted of milk. It is extremely important to use full fat milk to get the perfect juicy and spongy chhena and the best, luscious and thick rabdi. Avoid using milk from tetra packs or low fat or skimmed milk as it will affect the texture of your chhena and in turn prevent you from getting the perfect Kalakand.

kalakand

Tips to Get the Perfect Chhena Every Time

Making the perfect chhena can be a struggle sometimes. The crumbliness and softness of the chhena is a game changer and hence it is extremely important to make the perfect chhena for your Kalakand. The following tips will help you make that perfectly soft and crumbly chhena every single time.

  • Always use full fat milk or whole milk to extract the maximum chhena out of the milk and make perfectly soft and spongy rasgullas. Avoid using milk from tetra packs or low fat or skimmed milk as it will affect the spongy texture of your rasgullas.
  • Turn off the heat after the milk comes to a boil and then add your acidic ingredient. If the milk doesn’t start curdling, put it back on the stove and let it curdle.
  • Add ice cold water or ice cubes to the milk once it has curdled to stop the curdling process. This helps you get the softest chhena ever.
  • A perfectly drained chhena is very important. In order to test whether your chhena is perfect or not, smear a little portion of it on a smooth surface such as your kitchen countertop and check the consistency. For the perfect Kalakand we need a slightly crumbly yet soft chhena.

kalakand

[ingredients title=”Ingredients”]

  • 1 litre full fat milk – for the chhena
  • 1 litre full fat milk – for the rabdi
  • 3 tbsp lime juice or white vinegar
  • ½ cup sugar 
  • 10 – 12 strands of saffron
  • Chopped pistachios – for garnish
  • Chopped almonds – for garnish
  • 1/4 tsp cardamom powder  [/ingredients]

[directions title=”Directions”]

  1. In a deep pan, bring 1 litre full fat milk to a boil. 
  2. Stir continuously and make sure the pan is heavy bottomed to prevent the milk from burning.
  3. Once the milk comes to a boil, add in the lemon juice or white vinegar, one tbsp. at a time. 
  4. Turn the flame off while stirring well in order to split the milk evenly.
  5. Place the strainer over a big bowl and line it with a clean muslin cloth.
  6. Pour the curdled milk on the lined strainer and stir to drain the excess liquid.
  7. Wash the chhena with cold water.
  8. Pick up and twist the muslin cloth to squeeze out the excess liquid.
  9. Take out the well-drained chhena in a plate or a flat surface and disintegrate it gently with your fingers.
  10.  Rest it aside.
  11. In another clean deep pan, bring the other litre of full fat milk to a boil.
  12.  Keep boiling while stirring continuously, scrapping the bottom and sides of the pan.
  13. Boil the milk till it is reduced to half and attained a thick and creamy texture.
  14. Once the milk has reduced to the desired consistency, add in the saffron strands.
  15. Keep stirring continuously and allow the saffron to release its full flavour and colour into the mixture.
  16. Now, add the sugar and mix well.
  17. Add in the chhena that we set aside earlier to the reduced milk mixture.
  18. Mix well and keep stirring in order to avoid burning.
  19. Once you attain a thick rabdi consistency, take it off the heat.
  20. Grease a rectangular tray evenly with ghee.
  21. Transfer the Kalakand mixture on to the tray while it is still hot and spread it out evenly with the back of a spoon
  22. At this point, garnish with chopped pistachios and almonds and a few saffron strands.
  23.  Sprinkle some cardamom powder on top for added flavour.
  24. Place the tray in the fridge and let it set for at least 3 – 4 hours or more.
  25. Once completely set, take out and cut into cubes of desired sizes and serve with some condensed milk topping to experience the utmost deliciousness. [/directions]

kalakand

kalakand

Make sure to try this recipe out for yourself and dig into the ultimate rich goodness of this decadent Indian delicacy. You are going to become a fan of this Kalakand.

Feel free to reach out for feedback, suggestions or connect with me on Instagram or Facebook. Subscribe to my YouTube channel for all my videos and upcoming recipes.

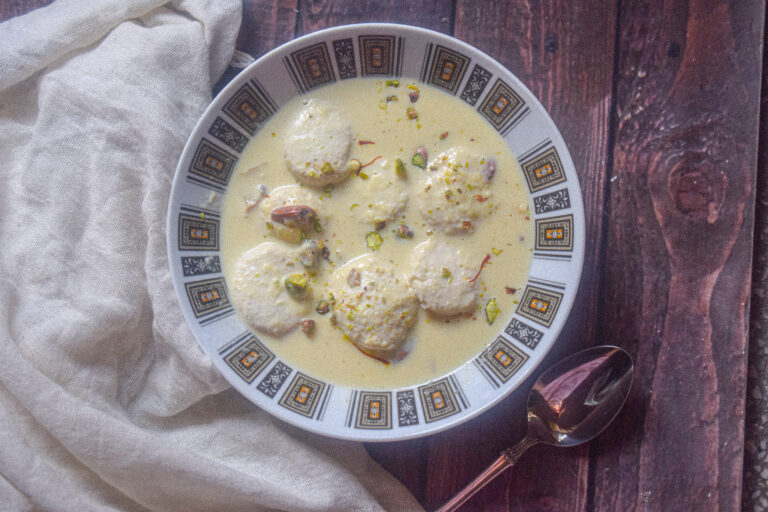
Rasmalai

Any Indian festival is incomplete without a widespread variety of sweets. Rasmalai is one of the most popular classic Indian sweets – Soft, delicate and spongy chhena dunked in sweet, thick, creamy and flavoursome milk – it is nothing short of a dream.  Everyone loves Rasmalai. Opposed to how we think that making Rasmalai is a complex and elaborated process, it is actually extremely easy and requires only a handful of ingredients to not just replicate, but make better than the store bought version at home.

Rasmalai is a comfort soul food and all of us have our share of happy moments attached with it. I can’t stop but cherish my happy memories attached with this sweet. Rasmalai has always been my favourite mithai. Even though I never had a sweet tooth growing up, I could never say no to Rasmalai. The joy of biting into those soft and sweet sponges dipped in creamy, flavourful milk always made me happy. Rasmalai happens to be the favourite mithai of everyone in my family too. I remember those visits to mithai shops with my parents where we would always have a small kulhad of Rasmalai each. And every time we would exclaim how good it is. 

rasmalai

I would always find myself packing some for myself from a sweet shop, for that love of Rasmalai followed me even after I left home. But when I started making Rasmalai at home, there was no looking back. It’s very easy and this version tastes better than anything I have had all my life. And what better time than the festive season to share this recipe? Trust me, once you start making it yourself, you will get hooked and be amazed by how easy it is to curate such a delicacy. 

Ingredients in this Rasmalai

Only a handful of ingredients go into making this incredible mithai, however, each of them has their own significance. The key ingredient of this recipe is milk – solely. All the other ingredients are basically supporting actors in this dish.

Milk

Milk is without a doubt, the star ingredient of this recipe, as it is of most Indian sweets. In fact, milk is the single most important main ingredient of both the sponges as well as the broth. It is extremely important to use fresh full fat milk or whole milk for:

  1. The sponges/rasgullas – to extract the maximum chhena out of the milk and make perfectly soft and spongy rasgullas. Avoid using milk from tetra packs or low fat or skimmed milk as it will affect the spongy texture of your rasgullas. 
  2. The rabri – to make it thick and creamy.

rasmalai

rasmalai

Here’s the recipe:

Prep time – 20 minutes

Cook time – 30 minutes

[ingredients title=”Ingredients”]

For the sponges:

  • 1 litre full fat milk
  • 3 tbsp. lime juice or white vinegar
  • 1 cup sugar
  • 1 litre water

For the rabri

  • 1 litre full fat milk
  • 2/3rd cup condensed milk
  • 1 tbsp. chopped pistachios
  • 1 tbsp. chopped almonds
  • ¼ tsp. cardamom powder
  • A few strands of saffron [/ingredients]

[directions title=”Directions”]

For the rabri:

  1. In a large vessel, pour the milk.
  2. Keep stirring to prevent from burning at the bottom and bring it to a boil.
  3. After the first boil, add in the condensed milk and mix very well.
  4. Add in the chopped almonds and pistachios.
  5. Stir continuously and reduce the milk to half.
  6. Keep scrapping off the sides and bottoms to retain the maximum cream in the broth.
  7. Finish off by mixing in a few saffron strands and the cardamom powder into the reduced broth. 
  8. Set it aside to cool down completely while we make the sponges.

For the sponges:

  1. In a large vessel, pour the milk.
  2. Stirring continuously, bring the milk to a boil.
  3. Once the milk comes to a boil, add in the lime juice or white vinegar, one tbsp. at a time and take it off the heat.
  4. Stir well to separate the milk solids (chhena) from the remnant water.
  5. Place a strainer over a big bowl. 
  6. Line the strainer with a clean muslin cloth.
  7. Pour the curdled milk on the lined strainer and stir to drain the excess liquid.
  8. Wash the chhena with cold water.
  9. Pick up and twist the muslin cloth to squeeze out the excess liquid.
  10.  Take the chhena out on a plate and knead for about 5 to 7 minutes or till your fingers start to turn oily. 
  11.  Make even, equal sized, soft round balls. 
  12.  To another pot, add the water and sugar and boil it till the sugar dissolves.
  13. Then, cover and bring it to a roaring boil. 
  14.  Once the sugar syrup start vigorously boiling, add in your chhena balls to it.
  15.  Cover and cook for 5-8 minutes or till the rasgullas start floating on the surface of water.
  16.  Take it off the heat.
  17. Once it cools down, take one sponge ball at a time and squeeze between your palm and fingers gently to squeeze out excess water and give them a disc shape.
  18.  Dunk the sponges in the broth of pour the broth all over them. 
  19.  Chill in the fridge for a few hours before consumptions for the best taste! [/directions]

rasmalai

Tips to Make The Perfect Rasmalai

Making the perfect chhena can be a struggle sometimes. The sponginess and softness of the chhena is a game changer and hence it is extremely important to make the perfect chhena for your Rasmalai. The following tips will help you make that perfectly soft and spongy chenna every single time.

  • Always use full fat milk or whole milk to extract the maximum chhena out of the milk and make perfectly soft and spongy rasgullas. Avoid using milk from tetra packs or low fat or skimmed milk as it will affect the spongy texture of your rasgullas.
  • Turn off the heat after the milk comes to a boil and then add your acidic ingredient. If the milk doesn’t start curdling, put it back on the stove and let it curdle. 
  • Add ice cold water or ice cubes to the milk once it has curdled to stop the curdling process. This helps you get the softest chhena ever.
  • A perfectly drained chhena is very important. In order to test whether your chhena is perfect or not, smear a little portion of it on a smooth surface such as your kitchen countertop and check the consistency. If the chhena is too sticky, it still has whey in it and is not ready to be kneaded and needs to be hung and drained for a little longer, whereas if the chhena is too dry and crumbly, it has over-drained and need to be kneaded with wet/moist hands. The perfect chhena when smeared is non-sticky and grainy.
  • Do not over-knead or over-boil the chhena. This results in getting hard and dense chhena.

rasmalai

I hope you’ll try this divine, soft, and creamy Rasmalai that melts into the mouth recipe for yourself and fall in love with it, just like I did. 

Feel free to reach out for feedbacks, suggestions or connect with me on Instagram or Facebook. Subscribe to my YouTube channel for all my videos and upcoming recipes.

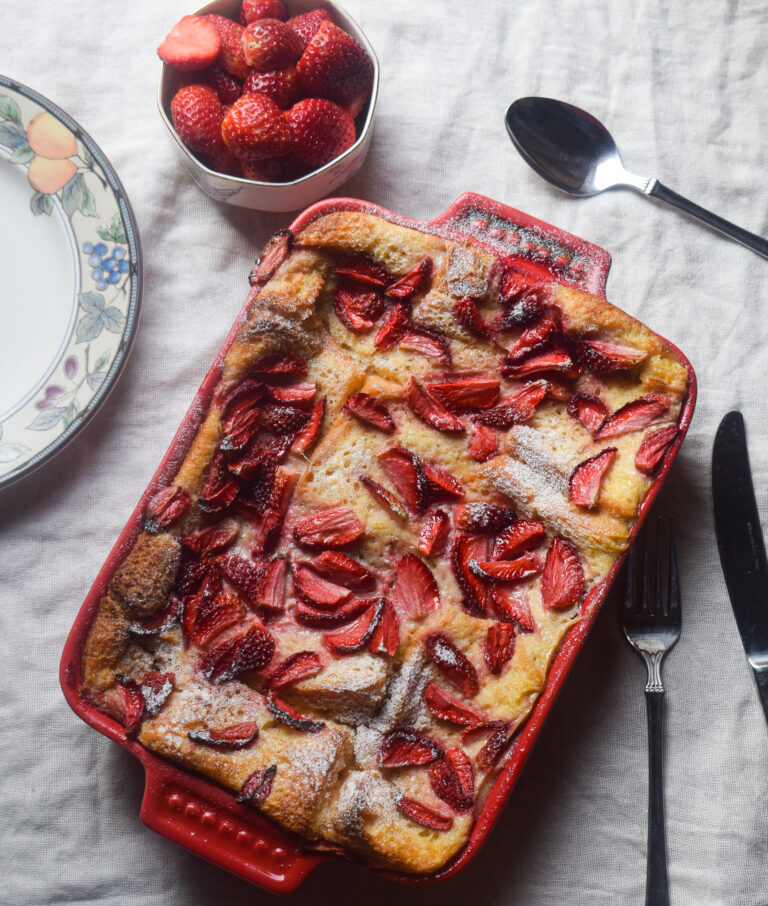
Strawberry Bread Pudding

I have the perfect dessert recipe for you if you’re planning to host or be in charge of dessert for your next social gathering at home. This strawberry bread pudding is so delicious, comforting and easy! You can make it with just a few ingredients and your kitchen will smell like a beautiful little bakery in no time. Every bite into this strawberry pudding feels like a warm hug. It’s soft, flavourful and has all the holiday flavours – vanilla, cinnamon and of course, strawberries.

This strawberry bread pudding is a perfect recipe to make in bulk if you are hosting or cooking for a large family. It really does not require any effort, and it comes together in no time. If you do not have strawberries, you can make it plain or add blueberries. You can also mix and match and customise it as per what fruit you have available.

How to Get The Perfect Pudding Texture

Bread puddings are very special to me and they remind of my childhood when my mom would make them for us kids when we wanted something special and sweet. I was such a huge fan of her bread pudding recipe, and every time I bite into a good pudding, it instantly reminds of those wonderful times. Even though a bread pudding might be the simplest dessert to pop in the oven, but it does require some crucial ticks to be checked.

strawberry bread pudding

strawberry bread pudding

Here are the tips I follow to make my pudding a little slice of heaven.

-Use the best quality of white bread possible

If you are making bread pudding, the #1 rule is to use the best kind of white bread possible. Do not try to substitute a good quality white bread with a brown or any other variant. The texture of the white bread will define how good your pudding it. So go for brioche, or any kind of superior, soft and fresh milk bread.

-Continuous whisking

This pudding is a delicious jelly filled sandwiches soaking in a pudding mix of eggs and milk. Because we add the eggs directly to the milk, it is important that the milk is stirred continuously while doing so. Doing this ensures that the egg disintegrates completely into the milk and mixes with the sugar, vanilla and cinnamon, making way for the perfect custard base for the pudding to cook in. Continuous whisking also ensures that the egg does not get a chance to cook in the warm milk.

strawberry bread pudding

strawberry bread pudding

-Temperature of ingredients

The perfect pudding is all about using ingredients in their right quantities and temperatures. The milk must be warm and not too hot. The eggs should be at room temperature. If the milk is too hot, the egg will not disintegrate, and instead start cooking as a result of the heat. This will result in an inconsistent batter for the bread to cook in, and might also lead to an overpowering “eggy” smell.

-Let it cool

Once you take the pudding out of the oven, let it sit on the rack and cool down for ten minutes before you serve it. It will help the pudding to cool, settle down and harden, making for the perfect consistency. This pudding can also be chilled and served just before dessert time. It makes for a delicious, cold dessert.

strawberry bread pudding

Now that you know all the secrets to making the perfect strawberry bread pudding, let’s take a look at the recipe.

Preparation time – 30 minutes

Cook time – 40-50 minutes

Serves – 4

[ingredients title=”Ingredients”]

  • 1 litre full fat milk
  • 100g fresh strawberries, sliced into medium chunks
  • 8 slices of white bread
  • 1 cup sugar
  • Apple cinnamon jelly for the bread sandwiches (or use any jam/jelly of your choice)
  • 4 eggs
  • 1 tsp vanilla essence
  • 1/4 tsp cinnamon powder [/ingredients]

[directions title=”Directions”]

  1. Apply the jelly in between two slices of bread and make sandwiches. You will need four to five jelly filled sandwiches.
  2. Cut each sandwich into four equal parts and set aside.
  3. Heat the milk and let it cool down for 5 minutes.
  4. Add the sugar to the milk, along with the vanilla essence and cinnamon powder. Whisk continuously.
  5. Add the eggs one by one. Keep stirring the milk continuously while you add the eggs. Whisk for around ten minutes till you get a smooth texture of the milk and everything is assimilated well into it.
  6. Thoroughly layer your baking tray with butter or oil.
  7. Place the jelly sandwiches on the tray as shown in the video. Make sure they are well packed and have filled the entire space.
  8. Gently pour the milk over bread, making sure each slice gets submerged in the milk.
  9. Garnish the top with some fresh strawberries, sliced into chunks. Pour some more milk on top of the strawberries.
  10. Bake at 180 degrees for 40-45 minutes. The time can vary in your oven, so keep a watch.
  11. Once done, carefully take out the tray and let it rest for ten minutes.
  12. Sprinkle powdered sugar on top.
  13. Cut and serve with more fresh strawberries on the side. You can also serve it with some whipped cream or custard. Enjoy! [/directions]

strawberry bread pudding

strawberry bread pudding

I hope you try this delicious strawberry bread pudding recipe soon. It is a great way to celebrate at home, something we all need this year.

If you have any doubts, comments, or feedback, please reach out to me in comments or my social media handles.

Find me on Instagram – www.instagram.com/slurrpilicious

Join me on Facebook – www.facebook.com/slurrpilicious

Watch me on Youtube – https://www.youtube.com/channel/UCA-cJoo27OLSCswI4sy6lzA?

Happy baking!


The Best Rice Kheer

Rice kheer is probably the most common sweet dish in every Indian household. Everyone has their own variations, but nothing can beat the classic one with white rice and full fat milk. As simple as the recipe is, it is also very easy to mess it up. Because more than anything else, the perfect rice kheer is a result of the right proportions of ingredients and a lot of love and patience. There are no shortcuts to making it. And 30-40 minutes of your time.

The secret to a good kheer is the perfect consistency and sweetness. I grew up eating paayokh, which is the rice pudding we make in Assam. It’s usually made with the aromatic joha rice, and can be sweetened with sugar or jaggery. It has taken me years to understand and create the perfect recipe for rice kheer, and this is exactly that. The consistency of this kheer is thick, and keeps getting thicker with time. However, it never reaches the point where it’s lumpy. It always has that extra bit of creaminess and the separation of the milk and rice. The texture remains uniform even if you freeze it. That’s the beauty of this recipe. As for sweetness, it is just the right amount of sweet for a festive occasion. You can always add more or reduce the amount of sugar as per your preference.

rice kheer

How to Make The Perfect Rice Kheer Every Single Time

Though this recipe is extremely simple and minimal, it can only taste so good if you take care of a few technicalities. These are very easy to follow, and important to keep in mind if you want the creamiest and tastiest kheer in your kitchen. Let’s take a look.

1.Get the ratio right

The secret to a great rice kheer is the correct ratio of milk to rice. The amount of rice is very less and we let it slow cook and merge with the reducing milk. If you get the ratio right, there is no stopping you from creating the best rice kheer at home.

2. Use the best ingredients

Like every simple recipe using a handful of ingredients, this rice kheer recipe also calls for sourcing the best ingredients. Make sure you use really good variety of aromatic rice. The grains should be small. I love to use joha rice, which is a local Assamese variety. You can opt for Bengali gobindbhog rice or a very good quality of broken basmati rice. The rice grains need to have their own scent.

This recipe cannot be replaced with low fat milk. The milk has to be full fat to get that perfectly thick and creamy consistency of the rice kheer. Get your hands on the best quality full-fat milk for this recipe.

3. Mind the heat

Cooking the rice kheer at the optimal temperature is very important to get it right. Once the milk comes to a boil, the flame will keep oscillating between low to medium, but it will never touch high. The temperature needs to be checked and regulated throughout the cooking process you would not want the milk to stick or worse, burn at any point. Keeping the flame high will also make the milk evaporate faster than it should, and affect the final consistency of the kheer.

4. Use a heavy bottomed pan

Make sure you use a heavy bottomed pan like a heavy stainless steel pot or kadhai or a cast iron pot. This will ensure that the kheer does not burn and cooks uniformly.

4. Be patient

This is probably the most important virtue to have while making kheer. I know it sounds exaggerated, but it is true! There are no shortcuts to making a good kheer. Trust me, I have tried it over many years. Nothing can match the taste and excellence of slow cooking. So you will have to have patience and give your undivided attention to this recipe for at least 30 minutes. The results will really be worth it, I promise.

rice kheer

rice kheer

Now that you know all the secrets to making the perfect rice kheer, let’s take a look at the recipe.

Preparation time – 15 minutes

Cook time – 30 minutes

Serves – 4

[ingredients title=”Ingredients”]

  • 2 tbsp ghee
  • 15 cashews, separated from the centre
  • 15 soaked raisins
  • 1/4 cup aromatic rice (gobindbhog rice/joha rice/jasmine rice/broken basmati rice)
  • 1 litre full fat milk
  • 1/4 cup sugar
  • 1/4 tsp cardamom powder [/ingredients]

[directions title=”Directions”]

  1. Soak raisins for an hour.
  2. Wash the rice thoroughly under running water. Set them out to dry on a sieve.
  3. Heat ghee in a kadhai. Once it heats up, add the cashews and fry on low flame for a few minutes till they turn golden brown. Set them aside.
  4. Heat milk in a heavy bottomed pan. Let it come to a boil.
  5. Once the milk comes to a boil, add the rice. Keep stirring continuously till milk reduces to half and rice cooks completely. The rice should disintegrate completely when you press it in between your index finger and thumb. This process will take time, so be patient and do not stop stirring. Keep the flame at medium to low.
  6. Once the rice is cooked completely and the milk has reduced by half (or more), add the sugar. The sugar has to be added once the rice is cooked, because the rice won’t cook after the sugar is added.
  7. Stir and cook till you achieve a creamy consistency (see video). The kheer should look slightly runny, yet be creamy. This is because it will keep getting thicker with time.
  8. Turn off the flame and add the fried cashews, soaked raisins and cardamom powder. Give it one last mix.
  9. Serve hot or freeze and serve cold. Enjoy! [/directions]

rice kheer

rice kheer

I hope you try this delicious and fool-proof rice kheer this festive season. If you have any doubts, comments, or feedback, please reach out to me in comments or my social media handles.

Find me on Instagram – www.instagram.com/slurrpilicious

Find me on Facebook – www.facebook.com/slurrpilicious

Find me on Youtube – https://www.youtube.com/channel/UCA-cJoo27OLSCswI4sy6lzA?

Happy cooking!

Lemon Sponge Cake

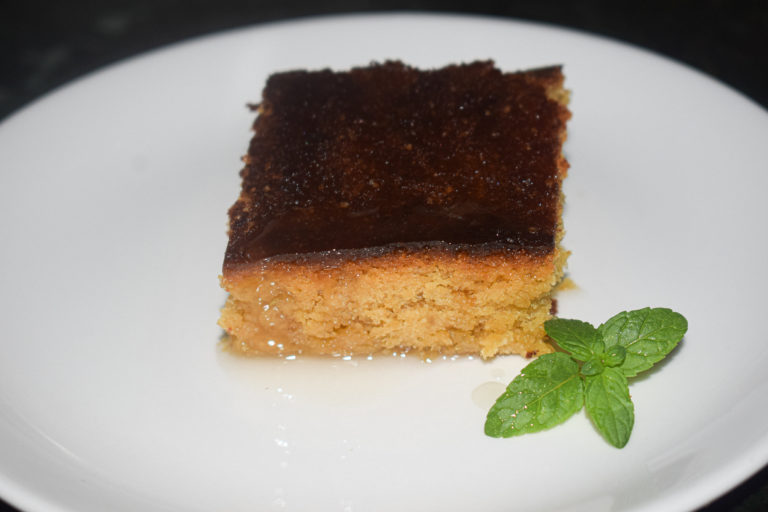
Lemon sponge cake makes for a wonderful option for tea time or brunch with friends and family. And this version is super easy to make, tastes refreshing and delicious and is very easy to make. This is a homemade version that is super comforting to say the least.

lemon sponge cake

You need a handful of ingredients and a few techniques to get perfectly moist and melt in the mouth sponge cake every single time. It all comes together in a single bowl. And I am also going to show you how to make the perfect lemon drizzle to pour on top of this cake. It’s like a match made in heaven!

Since this is a sponge cake, butter is one of the prime ingredients. Along with butter, we will use eggs, flour, sugar, lime juice, vanilla extract, and lime zest. That’s all that we need. Now let’s look at the little things that we need to consider to make this an unforgettable sponge cake every time you make it.

How to Make the Best Sponge Cake

There are a few basic tricks that can help you make a perfectly fluffy and moist sponge cake at home. It is no rocket science, just a few chemistry lessons up your sleeve. Almost all of them have to do with temperature. Let’s take a look.

  • Butter must be at room temperature

One of the most important factors to get a really good sponge cake is the way the butter is treated. Firstly, the butter has to be at room temperature. Make sure you take it out of the refrigerator well in advance so that it becomes soft. This soft butter then needs to be beaten until it acquires a creamy and luscious texture. This takes about four to five minutes. And the softer the butter, the better the sponge cake.

  • Eggs must be at room temperature and fresh

Eggs are used in this lemon sponge cake recipe. Eggs help bind the batter together and also add a lot of moistness and density to the cake. Make sure your eggs are also at room temperature and they are fresh.

  • Timing matters

Dairy and acidic elements like lime do not like each other. Adding lime to any dairy product exposes it to splitting immediately. That’s why the timing and the sequence of adding the ingredients matters a lot. For instance, the lime juice is added right in the end once the flour and the sugar are well combined. Adding the lime straight to the butter can make it split in no time. So make sure you follow the sequence.

lemon sponge cake

lemon sponge cake

Lemon Sponge Cake in One Bowl

This lemon sponge cake comes together in one bowl. An electric mixer is a requirement to get the best out of this cake, otherwise, you will have to whisk the butter with your hand for a long time. The batter comes together very quickly and you do not need to spend hours in the kitchen to get something out.

lemon sponge cake

Because this is such a simple cake, we also make a lemon drizzle as the topping. It is a super simple hack to elevate the taste of the cake to a whole new level. With just two ingredients, this lemon drizzle tastes refreshing and will shock you with how something so easy can be so good.

Preparation time – 15 minutes

Bake time – 30-40 minutes

Serves – 12

[ingredients title=”Ingredients”]

  • 200 g all-purpose flour (1 1/2 cups approx)
  • 4 large eggs
  • 200 g butter
  • 1 tsp vanilla essence
  • 1 tsp baking soda
  • Zest of 1 lime
  • Juice of 2 limes
  • 150 g granulated sugar (1/2 cup approx)
  • Juice of 7 lime (for the drizzle)
  • 1 cup icing sugar [/ingredients]

[directions title=”Directions”]

  1. Grease your baking tray with oil or butter and line it with parchment paper, leaving an overhang on all sides. Set aside.
  2. Take the butter in a large bowl and beat it for 4-5 minutes till it acquires a creamy and pale color.
  3. Add the granulated sugar and beat for another 2-3 minutes.
  4. Once the mixture is creamy, add the flour, eggs and vanilla essence. Beat till you get a smooth batter.
  5. Add in some fresh lime zest and lime juice. Mix.
  6. Add the baking powder right in the end and gently mix it all together with a spatula.
  7. Transfer the batter to the baking tray.
  8. Bake at 180-degree celsius for 30-40 minutes till you see a crusty top. You know your cake is done when it starts to come off the parchment paper.
  9. Allow the cake to cool completely. In the meanwhile, make the lemon drizzle.
  10. For the drizzle, squeeze out the juice of around 7 limes. Make sure there are no seeds. Add 1/4th cup of icing sugar in four batches, and keep whisking till you get a thick greyish liquid.
  11. Serve the cake with the drizzle on top and garnish with some mint leaves. Enjoy! [/directions]

lemon sponge cake

If you have any questions, feel free to reach out to me with a comment or connect with me on Instagram or Facebook. For all my videos, you can subscribe to me on YouTube.

Happy cooking!

Eggless Double Chocolate Banana Bread Recipe | Slurrp

Have you ever discovered something beautiful when you were not even looking for it in particular? Feels good, right?

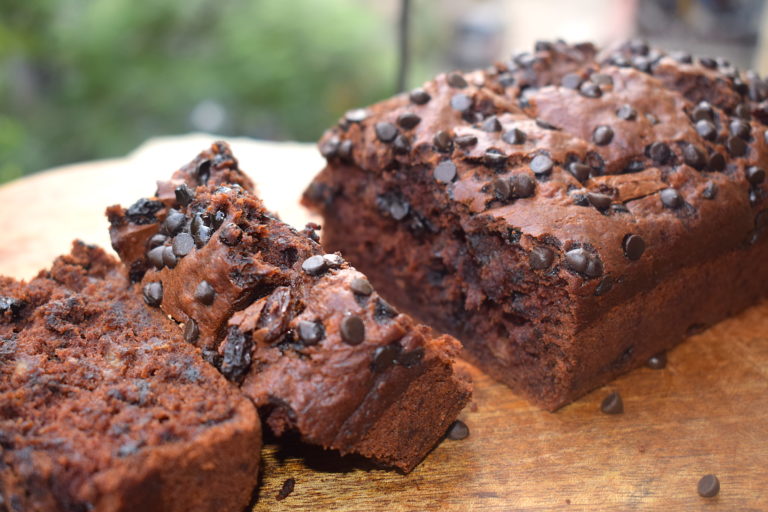
This eggless double chocolate chip banana bread was such a discovery for me. It all happened a few years ago when I had some really ripe bananas withering away in my pantry. And the best way to use those super ripe bananas is of course to mash them up with some flour and bake some comforting banana bread! That was exactly the intention.

eggless chocolate chip banana bread

But the curious cat in me did not want to gobble down a plain banana bread. Too boring! Especially so because I also found cocoa, chocolate chips, brown sugar, and some dark chocolate in my pantry. The advantages of having a stocked pantry and having an open mind? But the spoiler? I didn’t have any eggs. Which is the only reason why this is an eggless version.

It is almost unbelievable that this banana bread tastes as good without eggs as well. But it does!

The excitement started racing in my mind and I just HAD TO experiment with all these ingredients. And I am so glad I did. Just look at this beauty!chocolate chip banana bread

chocolate chip banana bread

I love this eggless chocolate chip banana bread so much that I end up baking it at least twice a month. It is moist, spongy and every chocolate lover’s dream come true. I love to grab a bite with my cup of chai in the mornings, or randomly stealing a bite at various times of the day. My friends love it and I have baked it a zillion times for so many people so far. So I can tell you that this recipe is absolutely full proof.

I hope you try this version of chocolate chip banana bread! Super simple and easy.

Preparation time – 15 minutes

Bake time – 40 minutes

Serves – 3-4 people

[ingredients title=”Ingredients”]

  • 150 g all purpose flour
  • 150 g butter, at room temperature
  • 80 g unsweetened cocoa powder
  • 80 g dark chocolate chips
  • 1 tsp baking soda
  • 1 tsp baking powder
  • 50 g brown sugar, crushed
  • 1.5 tsp vanilla essence
  • 50 ml milk
  • 3 very ripe bananas, mashed well
  • 1/2 tsp salt [/ingredients]

[directions title=”Directions”]

  1. Preheat the oven to 250 degrees.
  2. Add butter in a mixing bowl along with the crushed brown sugar. Mix well with a spatula till you get a creamy consistency.
  3. Pour in the vanilla essence into this and mix well.
  4. Add the mashed bananas to this and mix till everything comes together and there are no lumps.
  5. In another bowl, sieve the flour, baking powder, baking soda, and cocoa powder. Mix well.
  6. Gently add the flour to the butter and banana mixture, little by little. Take 4-5 rounds to complete this step.
  7. The final mixture might be too thick, so add some milk (room temperature) to get a thick batter.
  8. Take the chocolate chips and add to the batter, giving it one last mix with a spatula.
  9. Grease your loaf pan with butter or oil and add parchment paper on top.
  10. Pour in the banana bread batter into the loaf pan. Make sure it settles down completely.
  11. Garnish with lots of dark chocolate chips. I have also added a few chunks of my favorite dark chocolate on top. You can top it off with a few blocks of your favorite chocolate.
  12. Bake at 250 degrees for 40-45 minutes.
  13. Once done, allow the bread to cool completely before you cut it into pieces.
  14. Store in an airtight container once cut or finish it then and there! [/directions]

chocolate chip banana bread

chocolate chip banana bread

chocolate chip banana bread

This bread can be stored for up to a week. Once you cut the pieces, immediately transfer to an airtight container and store it in the fridge. But a bread this size will never last a week! 😉

chocolate chip banana bread

chocolate chip banana bread

chocolate chip banana bread

Slurrp pro tip: Whenever you bake bread or cake, always remember to mix the dry ingredients and the wet ingredients separately, and then slowly assimilate the dry into the wet ingredients in a number of rounds. And sieving the flour is extremely crucial, as it is to preheat the oven.

If you want regular access to more such delightful food, you can follow me on Facebook, Instagram, Twitter, and YouTube.

Happy baking!

Chunky Strawberry Jam Recipe

To me, there is nothing more satisfying than being able to make everything at home. The sense of making your own fresh food and not buying every single thing from the market is oddly gratifying. And of course, it is way more healthy, cooked without preservatives and filled with love!

strawberry jam

As a kid, I used to be so fascinated with jams and jellies. My mother used to make jam every once in a while and I used to think of it as something magical. This continued for a while. In college, I had visited a jam factory as a part of an excursion. This jam factory is a big name now and they make all kinds of jams possible – blueberries, strawberries, guava, apple, gooseberry…you name it and they make it. Even that fascinated me a lot! But I still did not start it on my own until recently.

strawberry jam

strawberry jam

It all started when I began baking my own bread. Once that happened, I asked myself why shouldn’t the complements to bread also be made at home! So my journey of making homemade jams, jellies and marmalades started. And the journey is still on.

strawberry jam

So here I am sharing all of them with you one by one. The first one this is chunky strawberry jam. I call it chunky because it has the crunch in each bite because of the seeds. Another way to make this is by grinding the strawberries in a mixer with some water and then cooking it. I have kept it a little more rustic by just cutting the strawberries into chunky pieces and then cooking it.

All you need is four key ingredients and then magic! I wish I knew how easy this is earlier in life. Better late than never!

Here’s a look at the recipe.

Preparation time – 10 minutes

Cook time – 10-12 minutes

[ingredients title=”Ingredients”]

  • 250 g fresh strawberries, cut into thin slices
  • 1/4 cup sugar
  • 1 tsp lime/lemon juice
  • 1/4 tsp cinnamon powder [/ingredients]

[directions title=”Directions”]

  1. Place a pan on the stove on medium flame and add the chopped strawberries and sugar.
  2. Let it simmer on low heat and allow the ingredients to slowly combine and start to melt.
  3. Once the strawberries start to melt and the sugar starts to caramelise, add the lime juice.
  4. Wait for the jam to turn sticky. Keep stirring continuously on low heat.
  5. Once the jam is thick, garnish with cinnamon powder and turn off the heat.
  6. The jam will be done when it sticks to your spoon and does not drip off.
  7. Transfer jam immediately to a glass jar or it will stick to the pan. [/directions]

Make sure once your jam is cooked, you test it out with a spoon. If the jam sticks to the spoon and does not drip off, it means it is ready. Do not overcook it.

Transfer the jam immediately to a jar while hot or else it will stick to the pan. Save up for up to a week! Enjoy and let me know how it turned out for you.

For more such delightful food, follow me on Facebook, Instagram, Twitter, and YouTube.