Creamy Mushroom Alfredo Pasta

This quick and easy one pot Creamy Mushroom Alfredo Pasta is my go-to comfort food recipe when I’m craving something decadent, and I’m also feeling lazy to spend hours in the kitchen. With the pasta boiled, this barely takes 10 minutes to come together and I cannot begin to tell you how delicious and filling it turns out to be. You have to try for yourself. 
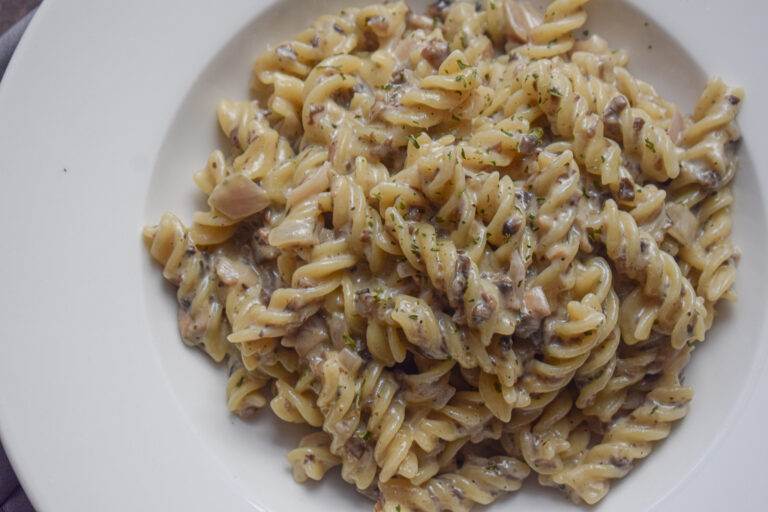
As a devotee of mushrooms, I love experimenting with it and coming up with recipes that fill me up with joy. Strictly for mushroom lovers, this fusilli cooked to perfection folded in luscious creamy mushroom Alfredo sauce with just the right amount of seasoning, cheese (because cheese makes everything perfect!) and delicious aroma filling the air around your kitchen is everything you’re going to need to turn your boring dinner nights and Sunday brunches tedious and boring to fun and lip-smacking! 

How to cook the perfect pasta every single time!

No one likes a plate of mushy broken pasta, and so, while it is important put in our best efforts in perfecting the sauce, where the entire flavour lies, it is also extremely important to boil the pasta to perfection. It is not rocket science, just a few basic steps and you’ll have yourself perfectly cooked pasta every single time: 

Bring sufficient water to a roaring boil

It is very important to have enough water in the pan to properly drown the pasta- Lesser volume of water may result into it getting extremely starchy; and bring it to a roaring boil before adding your pasta- the boiling water agitates the pasta pieces, thus helping them cook more evenly, keep them separated from one another and avoid clumps.

Add salt to boiling water

A very common mistake a lot of people make is adding oil to their pasta water in order to keep them from sticking to one another. However, this is completely false, as the only thing that can keep pasta from sticking is ample amount of water and a rolling boil, and hence is a waste of oil. Adding salt to the pasta water ensures that the pieces/strands of pasta do not remain bland while the only flavour and seasoning is in the sauce, because no one likes to bite into pasta that has all the flavors in the sauce and none into those pasta pieces.

mushroom alfredo pasta

Save the pasta water

Saving a couple ladles of pasta water goes a long way. Not only does the salty pasta water help flavour your sauce, it also plays a major role, along with butter and olive oil, to bring that glossy magical finish to your pasta. In this recipe, the saline pasta water plays a major role in making the sauce thick and creamy!

Cook according to pack instructions

There is no universal rule to cook the perfect pasta, it completely depends on the brand or product you are using and it is advisable to cook as per the packet instructions; especially timing. The most common way to cook pasta is till al dente, which loosely translates to “to the bite/tooth”, means almost cooked but not completely cooked. However, the above tips ensure getting the perfectly cooked pasta every single time. 

Ingredients in This Creamy Mushroom Alfredo Pasta

As mentioned before, this recipe calls for the most basic and minimal ingredients. Let’s take a look at the key ingredients:

Mushrooms

As the name of the recipe suggests, mushroom is the star ingredient of this recipe. It is strictly for mushroom lovers because the savoury, earthy flavour of it dominates all the other flavours of the sauce for this pasta. You can use any kind of mushroom or a combination of the same. I’ve used button mushrooms for this recipe which is very easily and abundantly available around where I live and would be for most of you as well.

mushroom alfredo pasta

The finely chopped mushrooms impart the maximum flavour to the sauce. One word of caution while cooking the mushrooms – do not salt them right in the beginning and do not touch them too much. These two tips ensure that the mushrooms turn crispy and not soggy. 

Extra Virgin Olive Oil (EVOO) and Butter

Butter is a key ingredient in any kind of Alfredo sauce. Paring it up with extra virgin olive oil elevates your dish by providing a bitter and fruity flavour to your pasta; increase the richness of the sauce as well as increasing the health co-efficient because extra virgin olive oil is probably the healthiest fat in the world.

Fusilli

A variety of pasta formed into corkscrew or helical shape, fusilli is used with cold salads with creamier dressing or with thick sauces as the twisted shape holds more flavour and sauce and is also aesthetically pleasing. Where I prefer fusilli with this pasta recipe as it soaks up the piquant mushroom flavours of this thick and creamy sauce really well, you can use any pasta of your choice. Fettuccini and Penne are other great choices for pastas in Alfredo sauce.

mushroom alfredo pasta

mushroom alfredo pasta

Here’s the recipe:

Let’s take a look at the recipe.

Preparation time – 20 minutes

Cook time – 30 minutes

[ingredients title=”Ingredients”]

  • 300 g fusilli pasta
  • 30 ml extra virgin olive oil
  • 15 g butter
  • 15 g garlic, finely chopped 
  • 100 g red onions, finely chopped
  • 200 g button mushrooms, finely chopped
  • 4 g black pepper powder
  • 15 g dried basil
  • 100 ml fresh cream
  • 100 g grated cheese
  • Salt to taste [/ingredients]

[directions title=”Directions”]

  1. To a pan, heat extra virgin olive oil and butter.
  2. Add the finely chopped garlic and sweat it. Do not brown.
  3. Only the garlic is golden on the edges, add the finely chopped red onions and sauté till translucent.
  4. Add the finely chopped Mushrooms and let it cook, stirring occasionally.
  5. Season with some black pepper powder, give it a good mix.
  6. Add the dried basil and cook till the mushrooms are properly done.
  7. Throw in the saline pasta water that we saved, and mix.
  8. Add the fresh cream, mix well and cook for a few minutes.
  9. Adjust the seasoning at this point.
  10.  Throw in the cooked fusilli and mix well. 
  11.  Add in more pasta water and cook to adjust the creaminess and the consistency of the sauce as per preference.
  12.  Mix in some grated cheese and take it off the heat.
  13.  Enjoy hot with some freshly baked garlic bread! [/directions]

mushroom alfredo pasta

mushroom alfredo pasta

Recipe Notes:

As letting the cooked pasta sit out for too long is not advisable, boiling the pasta simultaneously while making the sauce can be a good way to go about it. Since most pasta sauces take about 5 minutes to cook, you should put the pasta to boil slightly before starting up your sauce.

Try this mushroom alfredo pasta out if you’re a die-hard mushroom fan just like me!

Feel free to reach out for feedback, suggestions or connect with me on Instagram or Facebook. Subscribe to my YouTube channel for all my videos and upcoming recipes.

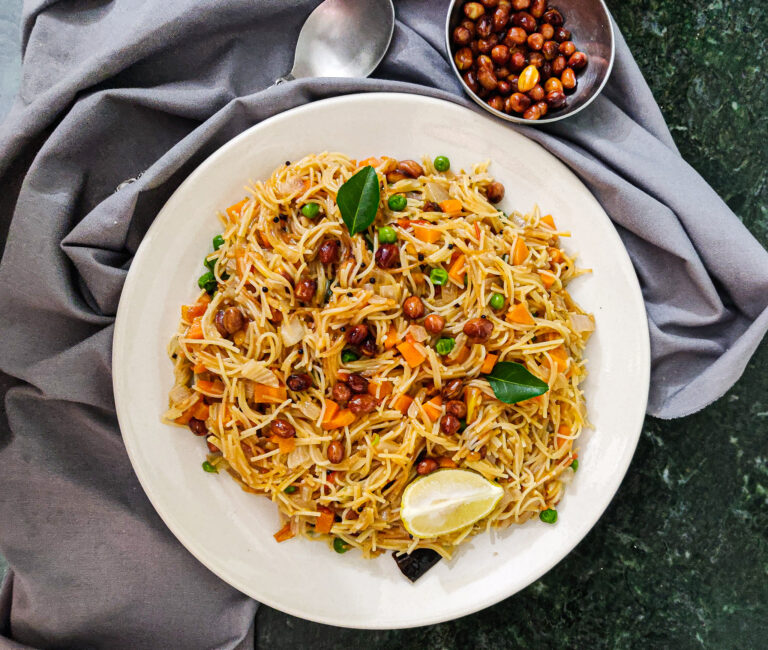
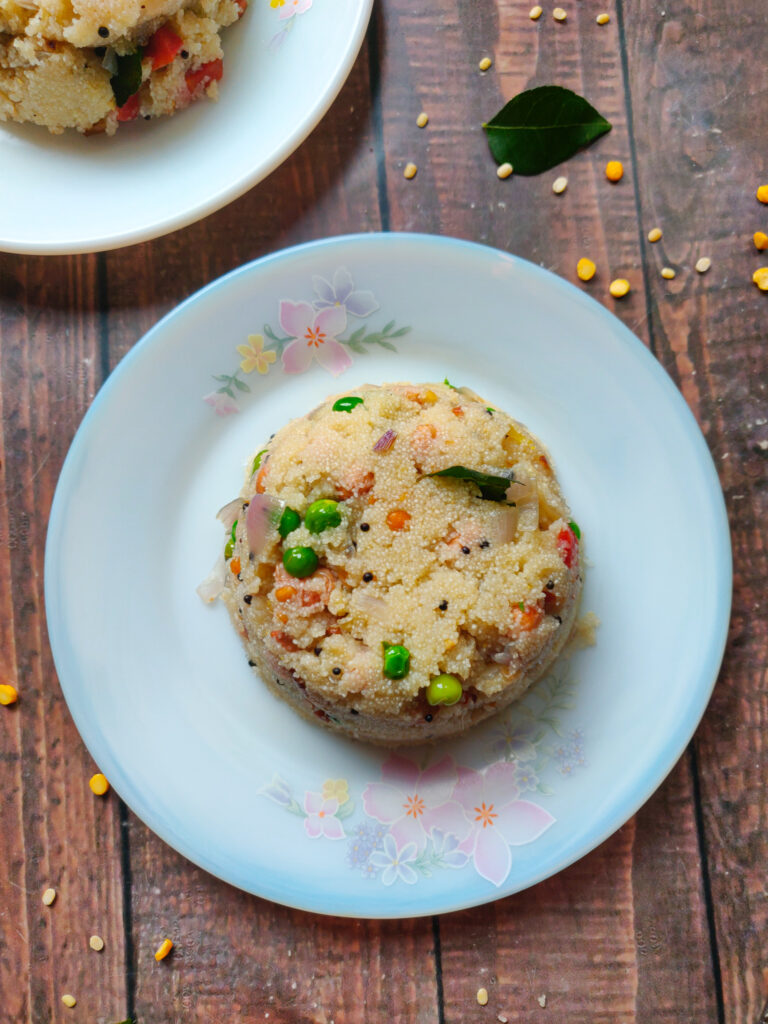
Vermicelli Upma | Semiyan Upma

We all love the humble upma with each of us having a variation of our own. Here’s an upma with a twist that uses vermicelli or semiyan as the base instead of the regular semolina or sooji. Soft vermicelli, cooked with a rainbow of vegetables, crunchy peanuts and the subtle yet extremely flavourful Indian spices that makes a light, filling, healthy and very tasty breakfast in one pot in under 30 minutes.

Upma is an all-time favourite Indian breakfast because it is packed with flavours and goodness of health. It can be made using Rava (sooji), oats or vermicelli. I absolutely love this Vermicelli Upma recipe that I’ll be sharing with you today. Vermicelli Upma basically comes from south India but is adapted in almost all homes across the country now.

The delicious aromas of ghee, crackling curry leaves and mustard seeds that fill your house while making this breakfast is to absolutely die for. This vermicelli upma is rich in protein and iron content and hence is a very healthy breakfast choice. I love adding lots of vegetables to it to increase the nutritional value and add an extra bite but you can totally skip it if you want to; it will taste just as heavenly with or without vegetables. This upma also keeps you full for a long time and is a great breakfast or light lunch option to assist weight loss. Since it’s not messy, it is also great for a packed lunch or last minute picnic.

Ingredients in This Vermicelli Upma

What sets this recipe of vermicelli upma apart is its simplicity, its customisation capacity and of course, its delicious flavours. Let’s take a look at the key ingredients in this recipe.

  • Vermicelli/Seviyan

The vermicelli, also known as Seviyan or semiyan is an Indian variant of the noodles/pasta or spaghetti that is thinner and broken into short pieces. It is typically made out of wheat or rice. For this recipe we’ll be using the wheat version as the rice one is rather on the slippery side and will make the dish very lumpy and mushy. For a plate of beautiful fluffy upma, we use roasted vermicelli which can either be store bought or roasted at home with a couple tablespoons of ghee till it turns golden brown.

  • Raw spices for tempering 

Some ghee is heated in a pan, which is then tempered with some curry leaves, black mustard seeds, chana dal and urad dal that not only enhances the dish and gives the major flavours, but also adds a nice bite. The aroma of this tempering as I mentioned before, is absolutely tempting!

  • Vegetables

While this recipe can be made just as delicious without vegetables, adding the same not just increases the nutritional value of the dish, but also adds a bite to it and is a great way to use the leftover vegetables in your fridge and reduce wastage. I have used fresh chopped carrots and peas for this recipe but you can go ahead and use frozen mixed vegetables along with any other vegetable of your choice such as potatoes, tomatoes, mushrooms, capsicum etc. This is a highly adaptable dish and it can be customised as per your choice.

  • Nuts

Using nuts in this soft savoury recipe helps add that extra crunch. While I have used peanuts for this recipe, you can also use cashew nuts instead of it or both.

  • Sugar & Lemon Juice

While sugar and lemon juice are not really the key ingredients and I haven’t used them in this recipe, adding these can elevate your dish and give it that authentic south Indian touch. While the lemon juice gives it a nice tang, the sugar balances the flavours and provides a slight sweetness that goes really well with this spicy dish.

vermicelli upma

Why this Vermicelli Upma?

  • Super quick and easy
  • Very minimal ingredients
  • A very healthy breakfast or light meal option
  • Absolutely delicious
  • Perfect for a packed lunch or picnic
  • Anyone can make it as it is fool proof
  • One pot recipe

vermicelli upma

Let’s take a look at the recipe.

Preparation time – 10 minutes

Cook time – 10 minutes

[ingredients title=”Ingredients”]

  • 1 cup vermicelli
  • ¼ cup raw peanuts
  • ½ cup chopped onions
  • ½ cup chopped tomatoes
  • A handful of fresh curry leaves
  • 4 tbsp of oil/ghee
  • 1 tsp mustard seeds
  • 1 tsp finely chopped ginger
  • 1 tsp roasted chana dal
  • 1 tsp urad dal
  • 1 green chilli
  • 1 dried red chilli
  • ½ cup chopped carrots
  • ¼ cup fresh peas
  • 2 cups hot water
  • Salt to taste [/ingredients]

[directions title=”Directions”]

  1. Heat some oil in a pan.
  2. Add un-roasted vermicelli and lightly roast till it turns golden brown. This step can be skipped if you’re using pre-roasted vermicelli.
  3. Take off the vermicelli and keep aside.
  4. Heat some more oil in the same pan and add the raw peanuts.
  5. Stir continuously and roast for a few minutes. Peanuts tend to burn easily so be extra careful while doing this step.
  6. Set the roasted peanuts aside and heat some more oil in the same pan.
  7. When the oil is hot, add the dried red chilli, mustard seeds, chana dal, urad dal, finely chopped ginger and broken green chilli to prepare the tempering.
  8. Stir and cook for a few seconds.
  9. Add in the chopped onions and sauté till they turn translucent.
  10.  Now, throw in the chopped tomatoes and cook for a few minutes.
  11. Then add in a handful of curry leaves and cook for another couple minutes.
  12. Add in the chopped vegetables of choice. I am adding fresh carrots and peas but feel free to use the frozen versions.
  13.  Sauté the vegetables for a few minutes then add the salt.
  14. Cover and cook on low flame till the vegetables are properly done.
  15. After the vegetables are done, give it a good stir and throw in your roasted vermicelli and mix till everything is combined.
  16.  Add the hot water and cook on high flame stirring occasionally till all the water is absorbed and the vermicelli strands are perfectly cooked and fluffy.
  17.  Add in the roasted peanut, mix and take off the heat.
  18.  Garnish with fresh coriander leaves and enjoy hot! [/directions]

vermicelli upma

I hope you try this super easy and quick Vermicelli Upma recipe and love it just as much as I do.

Feel free to reach out for feedbacks, suggestions or connect with me on Instagram or Facebook. Subscribe to my YouTube channel for all my videos and upcoming recipes.

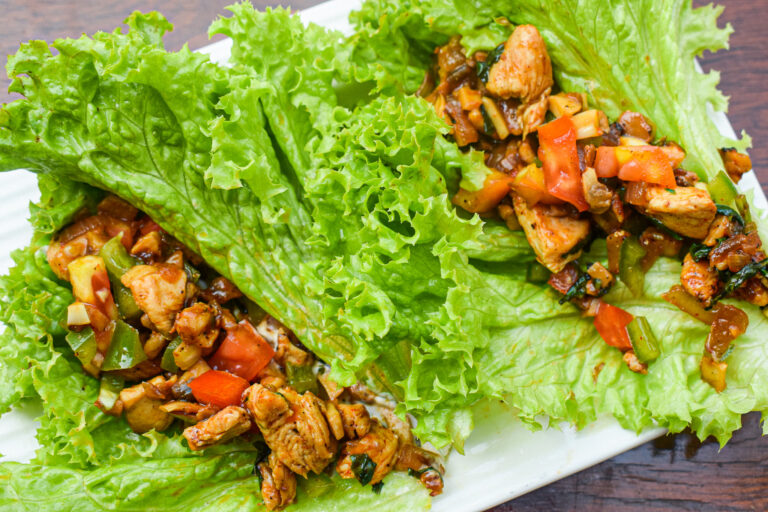
Chicken and Mushroom Lettuce Wraps

A delicious, light and healthy meal to go, this version of a spicy chicken and mushroom lettuce wraps makes for a refreshing option. Perfect for spring and summer, these lettuce wraps can also be a great appetiser option for your next micro meet with friends at home. But let me wan you in advance, these are going to disappear faster than you might think!

Summers are also a time when we need to take care of what we feed our stomach, as the chances of indigestion are higher. It is advisable to have foods that are rich in water content. These kinds of foods are not only nutritious but are easy on the stomach.

lettuce wraps diet food

I have been making these chicken mushroom lettuce wraps for long now and I truly feel that they are an excellent meal for summers. I like it best when cold. The crunch of the vegetables, the juiciness of the little dollop of cream and the flavour of a few fantastic spices make this dish a true winner. And it is so pretty to look at too! <3

So here is my recipe for chicken and mushroom lettuce wraps. It can be a perfect addition to your meal prep list and is a great dinner recipe in itself. The best part is that is is actually a salad, which means you can store it for longer and eat it in repeat mode 😉

For those of you who are vegetarians, feel free to replace the chicken with paneer (cottage cheese) or tofu. Also, feel free to use cucumber, your favourite fresh herbs as it is really up to you what you would like best in your filling. I have pan fried the chicken here, but you can also bake it with a generous drizzle of olive oil. Simple, fuss-free and absolutely delicious!

chicken and mushroom lettuce wraps

Here’s a look at the recipe.

Preparation time – 10 minutes

Cook time – 30 minutes

[ingredients title=”Ingredients”]

  • 2 tbsp extra virgin olive oil
  • 200 g boneless chicken breast
  • 5 garlic cloves, crushed
  • 1 medium onion, chopped
  • 1 green chilli, chopped
  • 4 button mushrooms, finely chopped
  • 50 g Italian basil leaves, chopped
  • 1/4 tsp black pepper powder
  • Salt to taste
  • 2 tbsp red chilli sauce 
  • 1 tomato, chopped
  • 1 capsicum, chopped
  • 2 tbsp lime juice
  • 1 tsp fresh cream per wrap
  • Green lettuce or iceberg lettuce [/ingredients]

[directions title=”Directions”]

  1. Heat olive oil in a pan. Add the slices of the boneless chicken breast and fry for about a minute. Make sure the pieces of the chicken are small, as we would not want huge chunks in the filling.
  2. Add the garlic, the chopped onions, and chopped green chilies. Saute this for about a minute.
  3. Add the chopped button mushroom and mix well.
  4. Season with salt and freshly ground black pepper powder. To this, add finely chopped Italian basil leaves. Mix everything together for another minute.
  5. For those who like it spicy, add two tablespoons of red chilli sauce. You can also add homemade chilli sauce to this. If you cannot bear too much spice, you can skip this step completely or replace the red chilli sauce with some sweet sauce.
  6. Once the chicken is cooked, transfer it to a glass bowl and let it cool down.
  7. In the same bowl, mix all the finely chopped vegetables like tomato and capsicum. Like I already mentioned, you can add more crunchy vegetables such as cucumber or even spinach. Mix the cooked chicken mix with these vegetables.
  8. Throw in a generous dash of freshly squeezed lime juice and mix well. There you go, your filling is ready!
  9. Take iceberg lettuce or green lettuce, add a dollop of fresh cream or hung curd to one leaf or a part of a leaf. Now fill it up with the chicken and vegetable mix. Crunch and munch away!  [/directions]

chicken and mushroom lettuce wrapschicken and mushroom lettuce wraps

You can be as creative as you want with the filling. I hope you try this delicious and healthy snack for yourself and your loved ones.


Feel free to reach out for feedbacks, suggestions or connect with me on Instagram or Facebook. Subscribe to my YouTube channel for all my videos and upcoming recipes.

Tomato Grilled Cheese Sandwich

A rich, cheesy and buttery bite for breakfast or a snack, this Grilled Cheese Tomato Basil Sandwich can be your holy grail. With just some basic items straight out of your fridge and a handful of fresh basil leaves plucked from your home garden (or store bought), you can put together this perfect, tangy, cheesy sandwich in less than 10 minutes. It is super quick, insanely easy to whip up and you wouldn’t believe how heavenly it turns out with such minimal ingredients and efforts! That slight crisp of perfectly toasted buttery bread slices, layered with tangy savoury tomato filling and that tempting cheese makes this recipe nothing short of an absolute delight. 

With the goodness of tomatoes and richness of cheese, this recipe makes a heavy and filling breakfast, a quick Sunday brunch or even a perfect last minute picnic lunch. Since I am a big fan of Italian cuisine, with the star ingredients as tomato and basil, this sandwich also helps satiate those Italian cravings without putting in too much effort or an elaborate spread.

Ingredients in This Tomato Grilled Cheese Sandwich

Tomato sandwiches make a perfect summertime meal. Throw in a little of olive oil, some basil and cheese and you have quite an ensemble. Let’s look at the key ingredients that make this recipe such a dream.

  • Tomato

As the name suggests, tomatoes are the star ingredient of this recipe. Tomatoes have a sweet, tangy flavour which elevates whatever dish you add them too. It is the base of most of the Italian cuisine and Indian curries. Tomatoes are very versatile- they can be had raw, blended into a salsa/dip, made into a base gravy/curry, cooked to perfection with herbs to make that perfect marinara/pizza/pasta sauce and in this case- stir fried and cooked till soft, seasoned and mixed with some fresh herb to make that perfectly gratifying sandwich filling. The sweet, bright, fresh flavour of tomatoes is unmistakable and they are also loaded with vitamins and antioxidants so eat well and feel better!

tomato grilled cheese sandwich

  • Basil

Basil is a culinary herb used in almost all Italian recipes, and several other cuisines worldwide. The flavour of basil is sweet and savoury, with hints of mint, anise and pepper; however the herb ultimately adds a hint of sweetness to any dish. While dried basil has more concentrated flavours and can be used in place of fresh, using fresh basil for your recipes is always better as dried uncooked herbs have a slight dusty taste to them and never fully substitute fresh herbs. Fresh basil is so good- it adds a punch of flavour, smells delicious and can add other dimensions to your dish. It is very easy to grow basil in your kitchen garden and pluck a fresh handful every time you need, just like me.

  • Cheese

Who doesn’t love cheese? It is literally the best food ever because it’s not just gloriously delicious and satisfying, but also good for your body because of its high calcium content. While it can be consumed raw, with a side of wine or as is, or melted into a dip, it also constitutes as the base of so many dishes. Think about it- Mac and cheese, grilled cheeses, cheeseburgers, mozzarella sticks, cheese fries. The list is endless, I mean, you just can’t beat it. All of these foods would not even be possible without the beauty of cheese. In this tomato basil sandwich, cheese really changes the whole game.

tomato grilled cheese sandwich

Why this Tomato Basil/Cheese Grilled Sandwich?

  • Super easy and quick
  • Can be whipped up in less than 10 minutes
  • All ingredients are most probably present in your fridge right now
  • Healthy breakfast/brunch
  • Fool proof recipe
  • Cheese!
  • Perfect for a picnic/ packed lunch

tomato grilled cheese sandwich

Let’s take a look at the recipe.

Preparation time – 10 minutes

Cook time – 10 minutes

[ingredients title=”Ingredients”]

For the filling:

  • 30ml olive oil
  • 10g finely chopped garlic
  • 100g finely chopped red onions
  • 500g chopped tomatoes
  • 3g black pepper powder
  • Salt to taste
  • 10g chopped Italian basil

For the sandwich:

  • 2 slices of white bread
  • Some more fresh basil leaves
  • Grated cheese (adjust quantity as per your liking)
  • Butter for grilling [/ingredients]

[directions title=”Directions”]

  1. Heat the olive oil in an iron cast skillet/pan. You can use any other oil but I’m using olive oil for that extra kick of flavour and slight Italian authenticity that it adds to the dish.
  2. Add the garlic to the oil and sweat it for a few seconds. Do not brown.
  3. Now add the chopped onions to the pan and cook stirring occasionally till they turn translucent. Again, do not brown.
  4. Throw in your chopped tomatoes and cook on high flame, stirring occasionally.
  5. When the tomatoes turn mushy and soft and loses all its raw smell, add in the chopped fresh basil leaves and mix well.
  6. Take it off the heat and let it cool down.
  7. Put a generous layer of filling on a slice of bread.
  8. Top it up with some more fresh basil.
  9. Now, add lots of grated cheese and cover it with another slice of bread.
  10. Heat some butter in a pan and place the sandwich on it.
  11. Grill on each side till crispy and golden brown.
  12. Once done, cut the sandwich in half or quarters and enjoy! [/directions]

tomato grilled cheese sandwich

tomato grilled cheese sandwich

Hope you try and enjoy this tomato grilled cheese sandwich.

Feel free to reach out for feedbacks, suggestions or connect with me on Instagram or Facebook. Subscribe to my YouTube channel for all my videos and upcoming recipes.

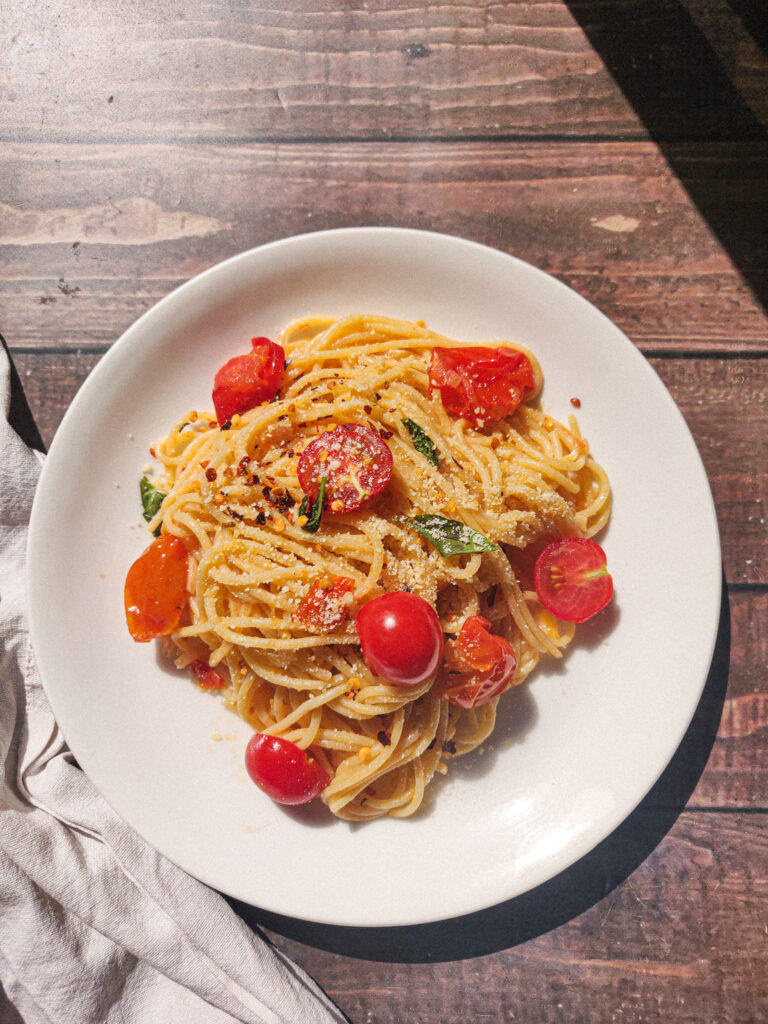
Spaghetti in Cherry Tomato Sauce

This Spaghetti in Cherry Tomato Sauce recipe will prove to be your holy grail when it comes to making the quickest, easiest, most flavourful and authentic pasta. You can whip this dish up in less than 20 minutes with the most minimal ingredients as a quick meal fix for yourself, or make it for a romantic date night or for your friends and family and be ready to get your share of praises for this delightful authentic Italian dish. You have to give it a try!

This spaghetti in cherry tomato sauce recipe does not require a whole list of ingredients, but the most basic, minimum and easily available at home ingredients. Just the basic onion, garlic and cherry tomatoes with some Italian herbs is all it takes to create this masterpiece. Once your spaghetti is cooked to perfection, it hardly takes 10 minutes to put this dish together. Being a big fan of a good wholesome plate of pasta, I end up making this recipe at least once a week, especially on days I’m low on energy and just want to whip up something quick and delicious.

spaghetti in cherry tomato sauce

As spaghetti is one of the variants of pasta that does not absorb the sauces as much as others, it is more often than not, cooked in an oil based or a tomato based sauce. In most pasta recipes that call for spaghetti, most of its flavour relies on the oil/fat used, the kind of tomatoes (if used- the level of sweetness differs based on the type of tomatoes used), the way the garlic is cooked (because the concentration of the garlic-y flavour in the sauce depends on the style of cooking- simmering garlic on a low heat till it becomes golden results in releasing its maximum flavour in the sauce) and the herbs used. 

Cherry tomato are slightly higher in fructose content, hence provide certain sweetness to the pasta. They are cooked till they pop open and release all their delicious juices in the sauce. The cherry tomatoes are unpeeled and cooked whole, which provides a tangy bite here and there along with a beautiful pop of colour to this spaghetti in cherry tomato sauce.

spaghetti in cherry tomato sauce

One of the best things about this spaghetti in cherry tomato sauce apart from the fact that it is super quick, wholesome and packed with flavours is- you cannot go wrong with this! Once you know how to boil the spaghetti (or any pasta) to perfection, this will be your fool proof weeknight dinner when the heart craves Italian!

How to Cook the Perfect Pasta Every Single Time!

Pasta making is easy with packaged pasta, but even the simplest of things require tips and tricks. Here are my tricks you can use to make gourmet, restaurant like pasta at home, every single time.

  • Bring Sufficient Water to a Roaring Boil

It is very important to have enough water in the pan to properly drown the pasta- Lesser volume of water may result into it getting extremely starchy; and bring it to a roaring boil before adding your pasta- the boiling water agitates the pasta pieces, thus helping them cook more evenly, keep them separated from one another and avoid clumps.

  • Add Salt, not oil

A very common mistake a lot of people make is adding oil to their pasta water in order to keep them from sticking to one another. However, this is completely false, as the only thing that can keep pasta from sticking is ample amount of water and a rolling boil, and hence is a waste of oil. Adding salt to the pasta water ensures that the pieces/strands of pasta do not remain bland while the only flavour and seasoning is in the sauce, because no one likes to bite into a pasta that has all the flavours in the sauce and none into those spaghetti strands.

  • Save some pasta water

Saving a couple ladles of pasta water goes a long way. Not only does the salty pasta water help flavour your sauce, it also plays a major role, along with butter and olive oil, to bring that glossy magical finish to your pasta. 

  • Cook according to package instructions

There is no universal rule to cook the perfect pasta, it completely depends on the brand or product you are using and it is advisable to cook as per the packet instructions; especially timing. The most common way to cook pasta is till al dente, which loosely translates to “to the bite/tooth”, means almost cooked but not completely cooked. However, the above tips ensure getting the perfectly cooked pasta every single time. 

spaghetti in cherry tomato sauce

spaghetti in cherry tomato sauce


Now that you know all the tips and tricks on how to make the perfect pasta, let’s take a look at the recipe to this spaghetti in cherry tomato sauce.

Preparation time – 10 minutes

Cook time – 15 minutes

Serves – 3 people

[ingredients title=”Ingredients”]

  • 200 grams spaghetti
  • 3 tbsp extra virgin olive oil
  • 1 medium sized red onion, finely chopped
  • 1 tbsp butter
  • 300 grams cherry tomatoes
  • 2 tbsp minced garlic
  • 1 tsp chilli flakes (adjust as per your liking)
  • 10-12 fresh Italian basil leaves
  • Fresh cilantro or parsley, finely chopped
  • 1/4 cup Grated parmesan cheese
  • Salt to taste [/ingredients]

[directions title=”Directions”]

  1. Bring about 2 liters of water in a wide mouthed pot to a rolling boil.
  2. Once the water starts boiling, add a handful of salt and mix well. We add the salt in order to season the spaghetti strands.
  3. Now, add the spaghetti and cook till al dente as per packet instructions. Drain and set aside.
  4. Heat olive oil and butter in a pan. Keep the heat at low and add the garlic.
  5. Cook the garlic patiently at the lowest possible heat till it releases all its flavors into the oil and has turned golden brown. Do not burn.
  6. Add the finely chopped onions and cook till they become transparent. Prevent it from browning.
  7. At this point, add the unpeeled whole Cherry Tomatoes and sauté for just about thirty seconds in low heat, till they just start to blister, pop open and start to release their juices in the sauce. Slightly mash the tomatoes with a spatula to get maximum flavor.
  8. Add the reserved salty pasta water followed by the cooked spaghetti, cilantro/parsley and chili flakes and toss with the help of a pair of tongs till well combined. Keep the heat low at all times.
  9. Splash a ladle full of remaining pasta water to add in the extra glaze to the spaghetti strands.
  10. Adjust the seasoning if required.
  11. Take it off the heat and throw in a handful of fresh Italian Basil leaves.
  12. Top with a good amount of Parmesan Cheese (adjust as per taste because there’s no such thing as too much cheese!) and serve hot! [/directions]

spaghetti in cherry tomato sauce

Additional Tips

As letting the cooked pasta sit out for too long is not advisable, boiling the pasta simultaneously while making the sauce can be a good way to go about it. Since most pasta sauces take about 5 minutes to cook, you should put the pasta to boil slightly before starting up your sauce.

Eat your pasta hot, a cold pasta will never taste as good as fresh pasta off the pan!

I hope you’ll try this quick, easy and very very flavourful spaghetti in cherry tomato sauce and make your boring dinner nights delightful.  

Feel free to reach out for feedbacks, suggestions or connect with me on Instagram or Facebook. Subscribe to my YouTube channel for all my videos and upcoming recipes.

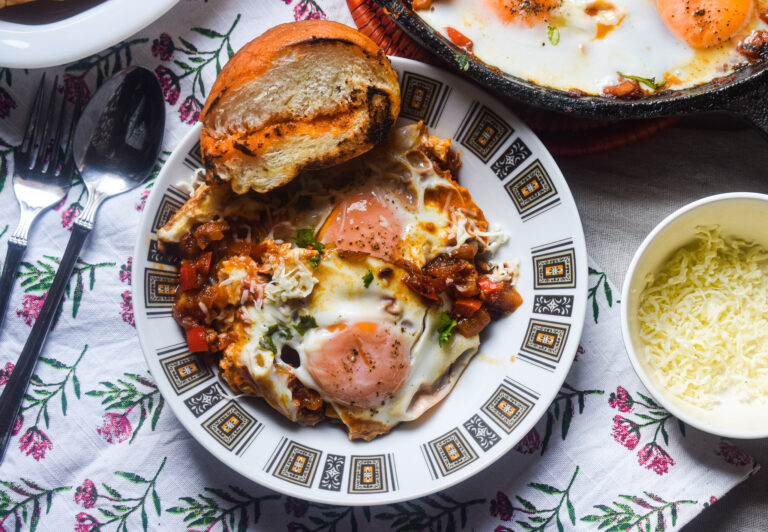
Shakshuka in Spicy Pepper Sauce

This Shakshuka in Spicy Pepper Sauce is the perfect comfort meal all by itself. This delicious recipe makes for a great brunch or breakfast option when you are craving for something gourmet right in your own kitchen. You can pair it with some toasted bread on the side, and voila! You have a healthy and filling meal to go in 30 minutes.

Shakshuka can be traced back to North Africa; however, it has been popularised by the Middle East and its variations are found in Palestine, Egypt, Israel and many other places. It is only obvious that we have an Indian variation as well, which in turn has variations differing from person to person. I’ll be sharing with you my variation of the Shakshuka in a spicy pepper sauce, my comfort in a bowl.

shakshuka in spice pepper sauce

Eggs, as a matter of fact, are one of the most versatile ingredients in the cooking world and can be used to create dreamy recipes for every meal of the day, be it breakfast or dinner; and any course of a meal, from entrée to dessert, eggs can be the key ingredient in a number of dishes. Eggs are also considered an almost perfect food as they contain a little bit of every nutrient you need. I love myself a wholesome dish prepared with eggs, because they’re easily available, cook super quickly and are delicious in all forms, be it a sunny side up, a perfectly poached egg, a raspberry meringue or Shakshuka. These jiggly eggs on a bed of tangy, sweet and spicy pepper sauce with a generous sprinkle of cheese are like magic served on a plate.

Where the basic Shakshuka is just soft eggs bed on a luscious tomato sauce with peppers, my variation slightly highlights the peppers, making it the star of the dish instead of just tomatoes. Peppers- that form the base sauce of this recipe have a lot going for them. They are low in calories and loaded up with good nutrition. From the bitter green pepper to the sweet yellow and sweetest red bell pepper, this also acts as a very versatile vegetable and can be paired with any dish to elevate it. Red and Yellow bell peppers used in this recipe give the sauce a sweet and spicy tang that is so good! 

Eggs, Peppers, Tomatoes, Cheese. What’s not to like?

That’s not it. Along with being a simple yet gourmet, minimal yet flavourful dish, made with the most easily available versatile ingredients in the culinary world, Shakshuka is also a very healthy meal choice. It can be had as a healthier alternative for breakfast, lunch, dinner or a fancy brunch! 

shakshuka in spicy pepper sauce

And guess what the best part is? It is very very easy to make! Even someone who has never cooked before cannot go wrong with Shakshuka. It’s a simple and minimal and foolproof recipe and can be whipped up in less than 15 minutes in a single pan! We could go on and on about why Shakshuka is one of the most perfect comfort meals, so let’s jump right into the recipe. Oh! And it’s gorgeous. Look at it!

shakshuka in spicy pepper sauce

Why Shakshuka?

  • Very easily available basic ingredients.
  • Packed with nutrition as the key ingredient is eggs
  • Super easy even for a beginner.
  • Takes less than 15-20 minutes to whip up.
  • Absolutely delicious and dreamy!
  • One-pan recipe.
  • A very good option for outdoor cooking (camping, picnic etc.)

Let’s take a look at the recipe.

Preparation time – 15 minutes

Cook time – 30 minutes

Serves – 3 people

[ingredients title=”Ingredients”]

  • 250 g noodles
  • 2 tbsp oil
  • 2 tbsp butter
  • 1 cup finely chopped onions
  • 6 eggs
  • 2 tbsp finely chopped garlic
  • 2 red bell peppers, finely chopped
  • 2 yellow bell peppers, finely chopped
  • 2 cups fresh tomato puree (fresh tomatoes ground to a paste)
  • 1/4 tsp black pepper powder
  • 1/2 tsp Kashmiri red chilli powder
  • 1 tsp dried thyme
  • 2 tbsp sweet chilli sauce
  • Salt to taste
  • Fresh coriander for garnish
  • Grated processed cheese, for garnish [/ingredients]

[directions title=”Directions”]

  1. Heat oil and butter in a pan till butter melts.
  2. Add finely chopped onions to the pan and cook till it turns translucent and begins to slightly golden on the edges.
  3. At this point add the finely chopped garlic.
  4. Cook till the raw smell of garlic is gone and the onions start to brown.
  5. Throw in the red and yellow bell peppers and cook for a few minutes.
  6. Add in the tomato puree and mix well.
  7. Cover and cook on low heat for about 10 minutes.
  8. Take the lid off and give it a good stir.
  9. Season with salt, Kashmiri red chilli powder, black pepper powder, mix well and cook for a few seconds.
  10. Add the sweet chilli sauce and give it a good mix.
  11. After the sauce is ready, make small pockets to place the eggs.
  12. Drop the eggs carefully in the pockets and season them with salt and black pepper.
  13. Cover and cook on low flame till the yolks are runny.
  14. Take it off the heat and garnish with grated cheese and fresh coriander leaves.
  15.  Serve hot with your choice of bread! [/directions]

shakshuka in spicy pepper sauce

shakshuka in spicy pepper sauce

Serving Tips

Shakshuka can be eaten for any meal of the day. It can be served for breakfast or brunch with a warm crusty bread, pita or naan. For lunch or dinner, it can be served with humus or green salad and make a nice, light and easy meal. Come up with your own ideas to pair it up with, because you can never go wrong with it. 

This was my take on a Shakshuka in spicy pepper sauce. Do give it a try because you will love it! And be creative, experiment with it and come up with your own variations and do not forget to share it with me!

Feel free to reach out for feedbacks, suggestions or connect with me on Instagram or Facebook. Subscribe to my YouTube channel for all my videos and upcoming recipes.

Upma

If you’re from India, you know that breakfast, more often than not is like a synonym to South Indian Cuisine. Among the most popular dishes is upma. A simple, soothing, quick and filling porridge made of dry-roasted semolina (rava or sooji) with choice of vegetables and authentic South Indian ingredients. Although upma is widely considered to be a dish from the southern part of the Indian subcontinent, it is also a very common choice of breakfast in Maharashtrian, Gujarati, Odia and Sri Lankan Tamil households.

Upma has been a part of all our childhood at some point or another. Everyone has their own variation, with an extra spice or two, or a handful of different vegetables, or basic plain onion upma. When those aromas of ghee and crackling curry leaves and mustard fill your home early in the morning, you can’t help but wander down memory lane.

upma

Now who wouldn’t want to begin their day with something light, yet flavourful, quick and healthy? Along with being an extremely simple, minimal and delicious dish, upma is also a very healthy choice for breakfast and has a whole list of benefits. A bowl of upma has fibre, vitamins, and healthy fats. It is low in cholesterol and calories which make it a healthy meal and help you have a balanced diet.  Upma keeps you full for longer helping you avoid the unnecessary unhealthy snacking. Semolina (Rava/Sooji) which is used to make upma is a rich source of protein, vitamin B and iron. Adding vegetables to your upma can escalate the health as well as taste factor; increasing your fibre intake and helping you stay active all day long. No wonder it is India’s hot-favourite breakfast.

Even though upma can come across as a very easy recipe, let me tell you it took me quite a while to perfect the recipe. While it may seem like the simplest of the recipes, the smallest things like the ratio of sooji to water, the spices, the timing, and heat make all the difference.

Why Upma for Breakfast?

  • Super easy and quick
  • Delicious
  • Vegan
  • Packed with nutrition
  • Keeps you full for longer
  • Low in cholesterol
  • Assists Weight loss
  • Minimal ingredients

upma

Note this recipe down, try it for yourself and you’ll never have to search for another recipe and get the perfect upma every single time. I promise!

Preparation time – 10 minutes

Cook time – 20 minutes

Serves – 3 people

[ingredients title=”Ingredients”]

  • 1 cup Sooji (Semolina)
  • ¼ cup raw peanuts
  • 1 tablespoon Chana Dal
  • 1 tablespoon Urad Dal
  • ½ cup finely chopped onions
  • 1 teaspoon finely minced ginger
  • 6-8 fresh curry leaves
  • 1 teaspoon mustard seeds
  • 2 tablespoon ghee
  • ¼ cup chopped carrot
  • ¼ cup raw green peas
  • 1-2 slit green chillies
  • 2.5 cups hot water
  • 1 teaspoon sugar(optional)
  • Salt to taste  [/ingredients]

[directions title=”Directions”]

  1. Heat some oil/ghee in a pan and add the raw peanuts. Keep stirring to prevent the peanuts from burning. Keep aside once roasted.
  2. In the same pan, throw in the sooji and roast till its colour slightly starts to change.
  3. In a clean pan, add ghee. Once the ghee is hot, add mustard seeds and allow it to splutter.
  4. Now add the chana dal and urad dal and stir and cook for a few seconds. Don’t let the mustard seeds burn.
  5. Once you start smelling the roasted pulses, add the finely chopped onions and fresh curry leaves.
  6. Cook the onions, stirring occasionally till translucent. Do not brown the onions.
  7. At this point add the finely minced ginger and slit green chillies (skip if you want to avoid the slight heat). The minced ginger adds freshness to the upma.
  8. Add sugar and mix well. You can avoid this step; however, sugar helps in balancing the flavours in the upma.
  9.  After the raw smell of ginger is gone, add chopped carrots, raw pees and any fresh vegetables of your choice.
  10.  Cook the vegetables to a point where the rawness is completely gone, however a bite is still there. Nothing complements a soft soothing porridge better than some fresh crunchy veggies.
  11. Add hot water and salt and stir well.
  12. Add the roasted sooji and keep stirring till your desired consistency is achieved.
  13. Finally, add the roasted peanuts right before turning off the heat and mix well.
  14. Serve hot! [/directions]

upma

upma

Additional tips:

Even though Upma is one of the healthiest breakfast choices in its authentic form, there are ways to make it healthier, such as-

  • Replacing Sooji with Oats, Wheat or Quinoa .
  • Adding more vegetables or choice.

Do try out this recipe on hasty mornings or a lazy Sunday, because such a quick, easy, filling, wholesome and healthy breakfast is always a go-to.

Feel free to reach out for feedbacks, suggestions or connect with me on Instagram or Facebook. Subscribe to my YouTube channel for all my videos and upcoming recipes.

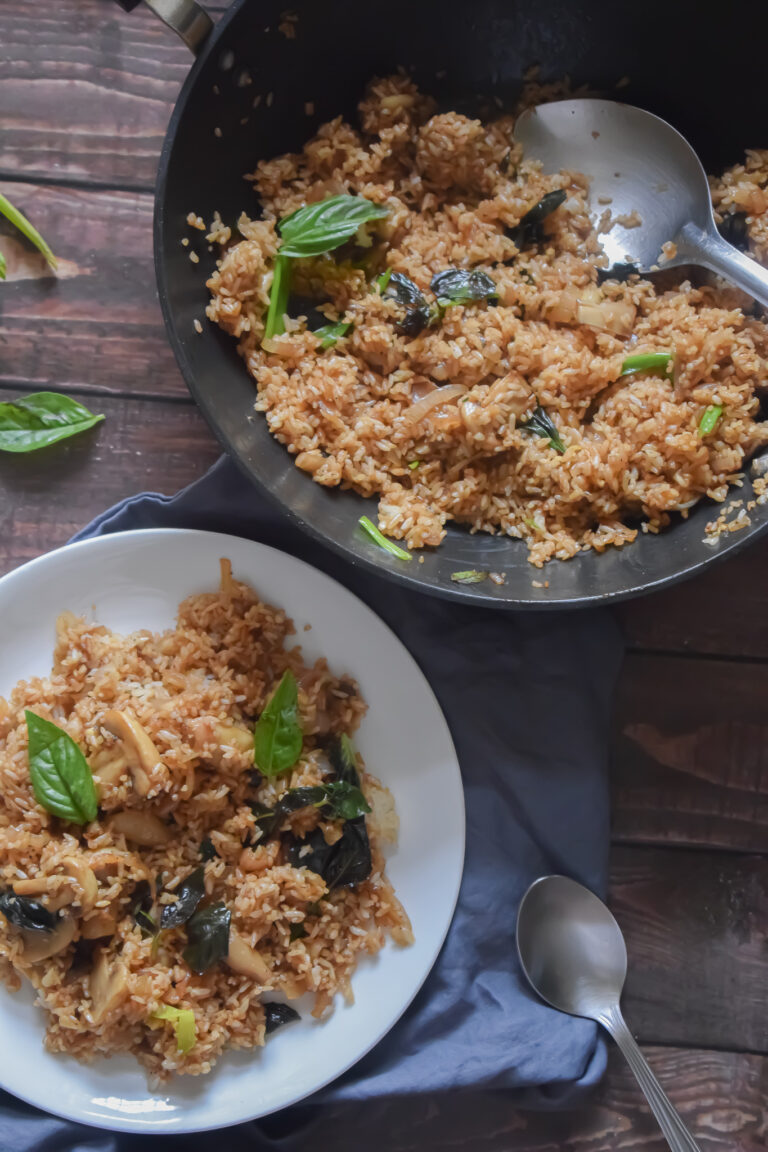
Mushroom Basil Fried Rice

Mushrooms, red onion, garlic and fresh Italian basil leaves – what’s not to like? As a devotee of mushrooms, I love experimenting with it and coming up with recipes that fill me up with joy. This quick mushroom basil fried rice recipe is a wonderful hack for a meal prepared in 30 minutes. A one-pot meal, this is a keeper. Make sure you add it to your list of easy veg recipes.

This Mushroom Basil Fried Rice is a simple, quick and flavourful recipe made with minimal and easily available at home ingredients. A one pot meal prepared under 30 minutes, this fried rice is bound to fill your home with the delicious lingering aroma of fresh basil, mushroom and authentic Chinese sauces and leave you feeling satisfied and happy. 

This recipe is highly adaptable and can be customised according to your personal preferences. You can add sauces, vegetables and proteins of your choice or even increase the heat adding some red chilli powder or cayenne pepper to whip up a personal masterpiece. 

mushroom basil fried rice

I have been making this mushroom basil fried rice for a long time, so I can assure you it’s full proof. Being a stir fry, it can prove to be a boon to those who do not cook very often. Eat it as is, throw in a dash of your favourite sauces, accompany it with your favourite Indo-Chinese dishes or Thai Curries or pack it for a picnic, your call! It’s an adaptable and versatile dish that will make you fall in love with it. 

Mushroom Basil Fried Rice is a vegan recipe making it a healthier choice on the spectrum and can be made with leftover rice. So, you’re not just eating healthy, you’re also reducing waste and curating something so delicious! 

Cooking Rice Perfectly

In this recipe, I have used joha rice, which is a flavourful small grained rice found in Assam, India. It is starchy and has a beautiful fragrant. You can use jasmine rice too. The quality of rice can really affect your recipe. Basically any small grain rice available near you should do the trick. Broken basmati is a great choice!

mushroom basil fried rice

For small grained rice: wash it thoroughly under running water till the water is clear. Once thoroughly washed, add it to a pan, instant pot or a pressure cooker. For 1 cup rice, use 1.5 cups of water to cook it. And once cooked, keep the rice covered for 10-15 minutes after turning off the gas. Keep the rice in the fridge for at least 2-3 hours before using or overnight, and use it the next day for the best results.

Tips to Get your Fried Rice Perfect Every Single Time!

Fried rice might be a rather simple dish to make; however there are certain things that need to be kept in mind. The best fried rice is the one where the vegetables are crunchy yet cooked and the rice grains are fluffy, separated and fragrant, packed with flavour and cooked to perfection. Sometimes in order to avoid a lumpy, soggy plate of fried rice, we undercook our rice, which results into half cooked rice and trust me, no one likes a bite in their rice. Here are some tips to get the perfect fried rice every single time.

  • Always use a deep dish for cooking, preferably a wok or a deep Pan. This promotes fast and uniform cooking.
  • Always start cooking once the oil is smoking hot and cook on high flame throughout.
  • Make sure you chop/ slice your ingredients finely to help them cook fast.
  • Always use cold rice. This point cannot be stressed enough. If the rice is not cold, it sticks to the pan and makes the fried rice lumpy. It is best to use leftover day-old rice.
  • Always add soy sauce and vinegar at the end, right before you remove your pan from heat.
  • Always garnish after turning the stove off to retain the freshness of the herbs.

The Mushrooms are the Hero

Needless to say, the mushrooms are the hero of this mushroom basil fried rice. I have used button mushrooms which are easily and locally available around where I live. You can use any kind of mushrooms, or a combination of mushrooms. The mushrooms add a lot of earthy flavour to this fried rice and make it very delicious. One word of caution while cooking the mushrooms – do not salt them right in the beginning and do not touch them too much. These two tips ensure that the mushrooms turn crispy and not soggy.

mushroom basil fried rice

Why this Fried Rice?

  • Quick and Healthy
  • Vegan
  • Super Easy and Flavourful
  • Highly adaptable and can be customised as per your needs.
  • Travel pack friendly
  • Beats restaurant food
  • Home-cooked and wholesome
  • Takes less than 30 minutes to make.
  • Prepared with easily available at home ingredients.

mushroom basil fried rice

Let’s take a look at the detailed recipe:

Preparation time – 15 minutes

Cook time – 30 minutes

Serves – 3 people

[ingredients title=”Ingredients”]

  • 2 tablespoons Oil
  • 200 grams button mushrooms, each sliced in half
  • 2 medium onions, finely sliced
  • 1 tbsp finely chopped garlic
  • 2 tsp black pepper powder
  • Salt to taste
  • 1 tbsp Sriracha/Schezwan/Red Chilli sauce
  • A handful of green onions, finely chopped
  • 2 cups cooked rice (should be cold and well seperated, preferably a day old/leftover)
  • 1 tablespoon dark soy sauce
  • A handful of fresh Italian basil leaves [/ingredients] 

[directions title=”Directions”]

  1. Heat oil in a wok or deep pan. Allow it to get hot till it starts to smoke.
  2. Add the button mushrooms. Let the mushrooms sit on the wok for 3-4 minutes without touching them. This will help them to crisp up better. Do not burn.
  3. Add the sliced onions and cook till it starts turning brown and translucent.
  4. Add the chopped garlic and sauté till the rawness fades.
  5. Season with salt and pepper and mix well.
  6. Add the Sriracha sauce or red chilli sauce and cook.
  7. Chop the green onions and add to the rice. Mix well, but do not overcook as it needs to remain crunchy.
  8. Add the cooked rice and mix well till the rice combines well with everything else and heated thoroughly.
  9. Top it up with the soy sauce and mix gently to prevent the rice grains from breaking.
  10. Turn off the heat, add the fresh basil leaves and mix well.
  11. Garnish with scallions, coriander, more fresh basil or whatever you have!
  12. Serve it as is or with an Indo-Chinese or Thai side dish. [/directions]

mushroom basil fried rice

mushroom basil fried rice

I hope you try out this quick, easy and delicious Mushroom Basil Fried Rice recipe not only to satiate your taste buds but also to help your inner chef, lost in this fast, busy life, resurface. 

Feel free to reach out for feedbacks, suggestions or connect with me on Instagram or Facebook. Subscribe to my YouTube channel for all my videos and upcoming recipes.

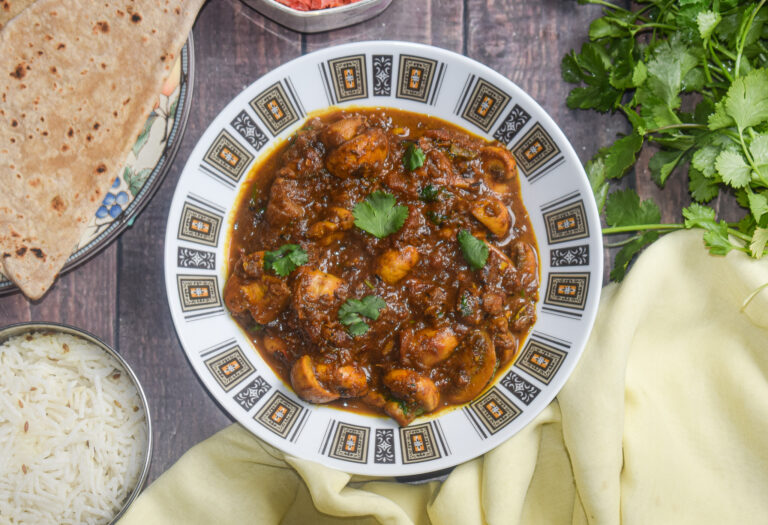
Mushroom Masala

This mushroom masala is a light and delicious curry that you can make in 30 minutes. A perfect accompaniment to hot rotis to fetch you a delicious and healthy vegan meal for lunch or dinner. Also makes for a delicious lunch box option for office or kids. It also happens to be vegan.

If you love mushrooms, you must try this vegan mushroom masala. The ingredients are simple and easily accessible in any Indian kitchen, and the results are delicious. The base is a mix of tomatoes and onions that do not require any grinding. the gravy is also free of any cashews or other kind of nuts. I have cooked this vegan mushroom masala in cold pressed mustard oil as its healthier and packed with a lot of nutrients. You can also make it in ghee or any other oil of your choice.

mushroom masala

mushroom masala

Let’s take a look at the recipe:

Preparation time – 15 minutes

Cook time – 30 minutes

Serves – 2-3 people

[ingredients title=”Ingredients”]

  • 200 g button mushrooms, each cut in half
  • 3 tbsp mustard oil (can be substituted with any oil of choice)
  • 1/2 cup finely chopped onions
  • 1/2 cup chopped tomatoes
  • 2 cardamoms
  • 1 half inch cinnamon stick
  • 1 tsp cumin seeds
  • 1 slit green chilli (add more if you like it hot)
  • 1 tsp cumin powder
  • 1 tsp coriander powder
  • 1/4 tsp black pepper powder
  • 1/2 tsp turmeric powder
  • Salt to taste
  • 1/4 tsp garam masala
  • 1/2 cup hot water
  • Fresh coriander leaves, finely chopped, for garnish [/ingredients]

[directions title=”Directions”]

  1. Wash and clean the button mushrooms. Pat dry them with a paper towel so that there is no excess water in them. Cut each mushroom into half.
  2. Heat mustard oil in a skillet or kadhai. Once the oil is hot and starts to smoke, lower the heat to minimum. Temper the oil with cardamom, cinnamon, cumin seeds and slit green chilli. Stir for 2-3 seconds.
  3. Add the onions and stir till they turn translucent and start to brown. Keep the heat at medium.
  4. Once the onions brown, add the fresh ginger and garlic paste. Stir till the raw aroma of the ginger and garlic completely fades.
  5. Add the chopped tomatoes and cook on medium flame till the tomatoes start to melt.
  6. Season with salt, turmeric powder, coriander powder, cumin powder and black pepper powder. Stir well on low heat.
  7. Pour some water to ensure the spices don’t stick to the skillet.
  8. Cover and let the onions and tomatoes cook on low flame for 5 minutes or till the oil starts to release from the sides.
  9. Stir again and add the chopped mushrooms.
  10. Coat the mushrooms well with the spice mix.
  11. Fry on high heat for two to three minutes till the mushrooms are well coated with all the masala.
  12. Pour hot water, stir and cover and cook for 5 minutes on low flame or till mushrooms are cooked.
  13. Open the lid and stir once again. Season with some garam masala and turn flame off.
  14. Garnish with chopped coriander leaves and give it one last mix.
  15. Serve hot with ghee-laden rotis and salad. Enjoy! [/directions]

mushroom masala

mushroom masala

This vegan mushroom masala is perfect for a busy day. It tastes authentic and the flavours are just on point.

I hope you try out this easy and delicious recipe for yourself.If you do, let me know how it turned out for you.

If you have any questions, suggestions or feedback, please leave me a comment here. Or connect with me Instagram, Facebook or YouTube.

Happy cooking!


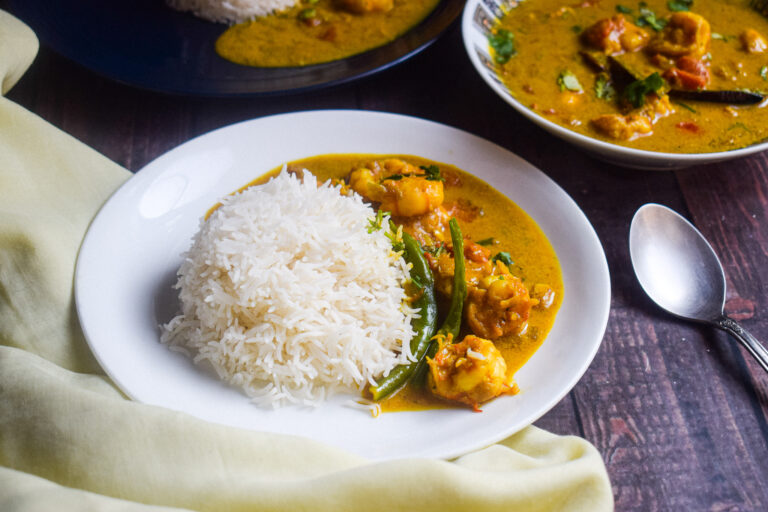
Prawn Curry

I absolutely love this prawn curry recipe. I end up making it once a week when all I have is 30-40 minutes to whip up dinner. The best part about prawns is that they cook super fast and let you pull off a hearty meal without spending hours in the kitchen. Because they have such a strong flavour of their own, you don’t even have to add too many ingredients to make prawns shine. And this prawn curry is no different, soft, juicy prawns in a creamy, subtle and coconut gravy. This with hot steaming rice is nothing short of an astounding culinary experience.

Ingredients in this Prawn Curry

This easy prawn curry has just a handful of ingredients, and is light and flavourful. The spice blend is a mixture of coriander powder, cumin powder, turmeric powder and garam masala. The creaminess comes from the coconut milk, that also adds a beautiful texture and natural sweetness to the curry.

prawn curry

Prawns

Prawns are the main ingredient in this curry. A couple of things need to be taken care of to get the perfect prawn flavour and texture.

  • Before starting, make sure you devein the prawns and clean it thoroughly to rid it off any impurities. You can keep the tail on too.
  • Second, once you wash the prawns, pat them dry with a kitchen towel. This is an important step to ensure that the prawns do not have too much water in them, otherwise they will release all the water into the gravy and get overcooked before absorbing the rest of the ingredients.
  • Third, marinate the prawns with salt for atleast 15 minutes. This will ensure that the prawns are seasoned well and do not end up tasting bland in the curry.
  • Lastly, prawns can be very unforgiving when it comes to cooking time. Make sure you do not leave the prawns undercooked or overcooked. Overcooking leads to prawns turning into a rubbery texture which can be disastrous. Keep an eye on them and follow the timings.

Coconut milk

Coconut milk is used generously in this recipe. I have used a semi thick coconut milk. You can also use coconut cream or thin coconut milk. The coconut milk is what sets this prawn curry apart and makes it irresistible. The coconut milk makes this prawn curry creamy, adds to the formation of a luscious gravy and also adds a natural sweetness to this light curry.

Spices

The best way to make sure you get the perfect prawn curry is making sure your spices are freshly ground. There are four spices used in this prawn curry – coriander powder, cumin powder, turmeric powder and garam masala.

prawn curry

prawn curry

Here’s a look at the recipe:

Preparation time – 15 minutes

Cook time – 30 minutes

Serves – 4

[ingredients title=”Ingredients”]

  • 700 g prawns, cleaned and deveined
  • Salt, to marinate the prawns
  • 3 tbsp mustard oil
  • 1 dried red chilli
  • 1 inch cinnamon stick
  • 2 cloves
  • 2 cardamoms
  • 2 bay leaves
  • 1 cup onions, finely chopped
  • 1 tbsp ginger garlic paste
  • 1 cup roughly chopped tomatoes
  • Salt to taste (for the curry)
  • 1 tsp sugar (optional)
  • 1 tbsp coriander powder
  • 1 tsp cumin powder
  • 1/4 tsp turmeric powder
  • 1/4 cup hot water (for the masala)
  • 400 ml coconut milk
  • 2 slit green chillies
  • 1 cup hot water (for the curry)
  • 1/2 tsp garam masala
  • Fresh coriander, chopped (for garnish) [/ingredients]

[directions title=”Directions”]

  1. Devein and clean the prawns. Wash and pat dry. Marinate with salt for 15 minutes. Get your vegetables ready in the meantime (onions, ginger garlic paste, tomatoes).
  2. Heat mustard oil in a kadhai. Once it heats up and starts to smoke, lower the heat and temper the oil with dried red chilli, cardamom, cloves and cinnamon. Give it a light stir.
  3. Add the chopped onions and cook for 3-4 minutes till the onions turn soft and translucent.
  4. Once the onions starts to release its flavours, add the ginger garlic paste and stir till its raw aroma disappears completely (3-4 minutes).
  5. Keep a check on the flame to ensure nothing burns. Keep the flame at medium.
  6. The ginger garlic will start to release its raw aroma and that’s when you must add the tomatoes. Stir in the tomatoes with the onions. Increase the flame for a minute while you do that.
  7. Lower the temperature and cover the kadhai with a lid. We want to tomatoes to cook completely and melt in with the onions. Cook this covered till the oil starts to release from the sides.
  8. Season with salt, turmeric powder, sugar, cumin powder and coriander powder. Add some hot water (1/4 cup) to prevent the masala from burning. Stir well.
  9. Add the marinated prawns and stir for 3-4 minutes till the prawns get half cooked. Keep the flame at high once you add the prawns and stir continuously.
  10. After 4 minutes, pour the coconut milk along with slit green chillies and let the curry come to a rolling boil.
  11.  Let the curry come to a semi thick consistency and prawns cook completely (another 7-10 minutes). Do not over cook the prawns as it will become chewy.
  12. Once done, garnish with garam masala and fresh coriander leaves. Stir well.
  13. Serve hot with boiled rice. [/directions]

prawn curry

prawn curry

If you have any questions, feel free to reach out to me with a comment or connect with me on Instagram or Facebook. For all my videos, you can subscribe to me on YouTube.

Happy cooking!