Cheesy Mushroom Onion Sandwich

Sandwiches are easy to make and filling for the stomach at the same time. This Cheesy Mushroom Onion Sandwich recipe is an apt dish that you can enjoy for breakfast, evening snack, or brunch. Made with caramelised mushrooms and onions, seasoned just right, topped with lots of cheese stuffed in bread slices, and grilled to perfection, it is an easy recipe and won’t even take up too much of your valuable time. This tempting sandwich recipe can be relished by people of all age groups and is quite sumptuous. Served with a dip or some coleslaw, this vegetarian recipe has the ability to become one of your favourites.
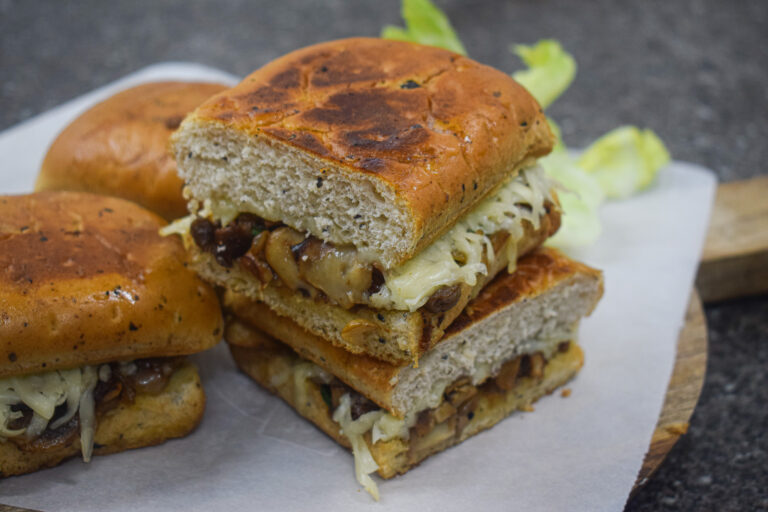
cheesy mushroom onion sandwich

Reasons to Make This Cheesy Mushroom Onion Sandwich

  • Effortless and foolproof
  • Takes less than 20 minutes to come together
  • Packed with flavours
  • Cheese! (yes, that counts as a whole reason)
  • Extremely adaptable and can be improvised according to one’s preferences.
  • Adults love it. Kids Love it.
  • Great for brunch, breakfast, picnic, packed lunch.
  • Filling and satiating.

Ingredients in This Cheesy Mushroom Onion Sandwich

Let’s take a look at the key ingredients:

Mushroom

Mushroom is one of the star ingredients of this recipe. If you’re not a big fan of mushrooms, this is probably not for you because the piquant flavour of mushrooms dominates this recipe. The earthy tones of mushrooms also complement the richness of the cheese and the sweetness of the onions.

cheesy mushroom onion sandwich

You can use any kind of mushroom or a combination of the same. I’ve used button mushrooms for this recipe which is very easily and abundantly available around where I live. The big chunks of mushrooms provide a meaty bite to your cheesy sandwich. One word of caution while cooking the mushrooms – do not salt them right in the beginning and do not touch them too much while they cook. These two tips ensure that the mushrooms turn crispy and not soggy. 

Cheese

Cheese makes the world a better place. It can be eaten as is, paired with wine, melted into a dip, or in the case of this recipe, grated onto a layer of mushroom-onion stuffing melts while grilling the sandwich and elevates this dish by folds. Also, there’s no such thing as too much cheese so go crazy with the cheese or skip it if you like. Completely your call!

Bread

Make sure you use any type of fresh good quality bread – large white bread, wholewheat multigrain bread, or panini bread like I have used to ensure that you get the best sandwich possible.

Onions

The onions lend a delicious sweetness and crunch to every bite of the mushrooms. Mushrooms and onions are a great combination and they work like magic in this sandwich. The onions are sliced thinly and cooked on medium to high flame till they turn golden brown, yet remain crunchy.

cheesy mushroom onion sandwich

Preparation time – 20 minutes

Cook time – 30 minutes

Serves – 3

[ingredients title=”Ingredients”]

  • 200 g button mushrooms, sliced
  • 2 bread slices/panini bread
  • 2 medium-sized onions, thinly sliced
  • 2 tbsp oil
  • 2 tbsp butter
  • 1 tbsp finely chopped garlic
  • Salt to taste
  • 1/2 tsp black pepper powder
  • 6-8 Italian basil leaves, chopped
  • 1 cup grated cheese (per sandwich)
  • Butter for toasting the sandwich [/ingredients]

[directions title=”Directions”]

For the stuffing:

  1. Finely slice your onions and set them aside.
  2. Similarly, finely slice your mushrooms and set them aside.
  3. In a pan, heat some oil.
  4. Add the butter to the oil. Adding butter and oil together prevents the butter from burning.
  5. To the melting butter, add the finely chopped garlic.
  6. Sweat the garlic for a few seconds, do not brown it. 
  7. Now, add in the sliced onion and saute with the garlic, stirring occasionally.
  8. Caramelise the onions well till it’s golden brown.
  9. Add in the sliced button mushrooms.
  10. Give it a light stir and top it with some butter or oil if needed. 
  11. Leave the mushrooms untouched for a few minutes and let them cook. This will ensure that the mushrooms turn crispy and not soggy. 
  12. Caramelise the mushrooms with the onions as well, stirring gently at regular intervals.
  13. Once the mushrooms acquire a beautiful golden brown colour and turn a little crispy, season it with some salt and black pepper powder and mix well.
  14. Stir fry for a few more minutes then top it off with some fresh basil and turn off the heat.

For the sandwich:

  1. Generously butter a slice of bread.
  2. Line the buttered side of the bread with sufficient mushroom onion stuffing. 
  3. Top the layer of filling with a good generous layer of cheese. Let the butter, stuffing, and cheese be more but not less.
  4. Place the second slice of bread on top and press the sandwich gently.
  5. In a pan, melt some butter. 
  6. Place the sandwich on the pan and grill it on both sides until golden brown and crispy.
  7. Cut it in half or serve it as is. [/directions]

cheesy mushroom onion sandwich

One bite of this sandwich, and you will never look for another mushroom sandwich recipe. I am a big-time mushroom fan hence this sandwich tops my list. You have to try this out because it’s just too good to be missed. Serve it with a glass of fresh juice and some chips or fries to make a perfect filling meal. Feel free to improvise according to your preferences and create wonders!

Feel free to reach out for feedback, suggestions or connect with me on Instagram or Facebook. Subscribe to my YouTube channel for all my videos and upcoming recipes.

Tomato Basil Pasta

Here is a very easy and delicious way to make pasta in red sauce. What’s special about this recipe is that this tomato basil sauce is not limited to be paired with just pasta. It is multipurpose and can be used as a sandwich spread, a pizza topping or a lasagne sauce! The best part about this tomato basil sauce is that it can be stored for up to a week and it just gets better with time. So if meal prep is your jam, this is your recipe.

tomato basil pasta

With a handful of ingredients like tomato, garlic, extra virgin olive oil, and basil that scream authenticity and comfort, this pasta is minimal. Since ingredients are a few, make sure you use the best quality to avoid any kind of compromise in taste.

How to Cook the Perfect Pasta Every Single Time

No one likes a plate of mushy broken pasta, and so, while it is important to put in our best efforts in perfecting the sauce, where the entire flavour lies, it is also extremely important to boil the pasta to perfection. It is not rocket science, just a few basic steps and you’ll have yourself perfectly cooked pasta every single time:

  •   Boil Water in a Large Pot

Always use a wide mouthed pot to boil pasta. It is important to fill up the pot with enough water so allow the pasta to drown and cook evenly. Lesser volume of water may result in the pasta getting extremely starchy, or worse – be left undercooked.

  •   Add Plenty of Salt 

Adding plenty of salt in the pasta water is non-negotiable. Make sure you add as much salt till the water starts to taste saline. Imagine you are having a clear soup and adjust the salt accordingly. Adding salt to the pasta water ensures that the pieces/strands of pasta do not remain bland  in the final dish. 

  •  Cook pasta till al dente

There is no universal rule to cook the perfect pasta, it completely depends on the brand or product you are using and it is advisable to cook as per the packet instructions. The most common way to cook pasta is until al dente, which loosely translates to “to the bite/tooth”, which means almost cooked but not completely cooked. Before the pasta is added to the sauce, it should still have a bit to it. The rest of it should cook along with the tomato sauce.

  •   Reserve Pasta Water

Saving a couple of ladles of pasta water goes a long way. Not only does the salty pasta water help flavour your sauce, but it also plays a major role, along with butter and olive oil, to bring that glossy magical finish to your pasta.

Ingredients in This Tomato Basil Pasta

Tomato

In this recipe, I’ve used the local red tomatoes that we find easily in the Indian markets and it has turned out to be just so good. Tomatoes are just the right amount of sweet and sour that balances all the flavours in this sauce. The tomatoes go through a four step process to get this rich sauce made.

First, they are boiled in water till the skin starts to show slits. Second, they are transferred to ice cold water and the skin is peeled. Third, the tomatoes are blended to a fine paste and finally, the tomatoes are cooked in olive oil and reduced to a thick sauce.

Extra Virgin Olive Oil and Butter

This tomato basil pasta recipe is minimalistic in terms of ingredients, which is why quality should not be compromised. Make sure you use high quality extra virgin olive oil for this recipe to get the best flavours.

Garlic

Garlic plays an important role in adding a lot of flavour to the simple tomato sauce. In pastas, the garlic is always slow cooked in the olive oil to give it enough time to release its flavour. We follow the same step with garlic in this recipe. The garlic is finely chopped and added to cold extra virgin olive oil. Then it is allowed to slow cook and take its time to release its oils into the pan.

Fusilli/Any Pasta of Choice

A variety of pasta formed into a corkscrew or helical shape, fusilli is used with cold salads with creamier dressing or with thick sauces as the twisted shape holds more flavour and sauce and is also aesthetically pleasing. Where I prefer fusilli with this pasta recipe as it soaks up the creamy, tangy tomato sauce with the freshness of basil really well, you can use any pasta of your choice. 

Italian Basil Leaves

Basil is a culinary herb used in almost all Italian recipes and several other cuisines worldwide. The flavour of basil is sweet and savoury, with hints of mint, anise, and pepper; however, the herb ultimately adds a hint of sweetness to any dish. While dried basil has more concentrated flavours and can be used in place of fresh, using fresh basil for your recipes is always better as dried uncooked herbs have a slight dusty taste to them and never fully substitute fresh herbs.

tomato basil pasta

Fresh Italian basil is so good- it adds a punch of flavour, smells delicious, and can add other dimensions to your dish. It is very easy to grow basil in your kitchen garden and pluck a fresh handful every time you need, just like me.

tomato basil pasta

Preparation time – 30 minutes

Cook time – 30 minutes

Serves – 8

[ingredients title=”Ingredients”]

  • 1.5 kg tomatoes
  • 90 g finely chopped garlic
  • 1/3 cup extra virgin olive oil
  • 1 tbsp chili flakes
  • 40 g butter
  • Fresh Italian basil leaves
  • 400 g fusilli pasta, boiled [/ingredients]

[directions title=”Directions”]

  1. In a big pot of water, gently drop all your tomatoes. You can make little cross slits on the base of the tomato which may prove to be helpful while peeling the skin after boiling.
  2. Put it on the heat and let it boil for about 30 minutes till the skin of the tomatoes starts to wrinkle.
  3. Once the tomatoes are boiled, place each of them directly into ice-cold water so that they stop cooking.
  4. Once the tomatoes cool down and become easy to handle, peel the skin off each tomato and place the peeled tomatoes in a separate bowl.
  5. Put the peeled tomatoes in a blender and blend them into a fine paste. Do it in batches to avoid a mess.
  6. Now, finely chop the garlic. The finer it is, the easier it is for it to release its flavours into the sauce.
  7. Pour extra virgin olive oil into a pot and add the chopped garlic before turning on the heat. We need to slowly simmer the garlic and let it cook well and release its flavours into the oil. 
  8. Once the garlic starts to sweat, add in a big chunk of butter and let it melt. The butter lends more flavour to the oil as well as prevents burning.
  9. Be patient and cook the garlic in the oil and butter at low flame until the maximum flavour of garlic isn’t released into it.
  10. Once the butter is bubbling well, the raw smell of garlic is lost and the garlic starts to become very lightly golden around the edges, we add some chilli flakes to the oil.
  11. When the butter has browned and all the flavours have come together and filled the air around you is when we add the tomato paste.
  12. Cook the tomatoes, stirring regularly till it thickens and is reduced to almost ⅓ rd of its original volume. Make sure you use a heavy bottom pan otherwise your tomatoes might stick to the bottom and burn.
  13. Cover and cook the tomatoes for about 15-20 minutes till the sauce gets reduced further.
  14. Now is the time when you season the sauce with some salt and black pepper. Give it a very good mix and bring everything together.
  15. Top the sauce up with some roughly torn fresh basil leaves. I use the ones from my kitchen garden and I suggest you do not substitute it with dried basil because in that case the authenticity of the sauce will be lost. 
  16. At this point, the sauce has reduced and thickened beautifully.
  17. Now is the time we throw in the boiled pasta. Mix it well with the sauce ensuring every piece is coated well and let it cook in the sauce.
  18. Once the pasta is cooked well with the sauce, we add in a lot of grated cheese and mix it very well into the sauce. [/directions]

tomato basil pasta

tomato basil pasta

This tomato basil pasta pasta is so simple, hearty and effortless. Have it hot garnished with some grated Parmesan cheese and fresh basil and a side of garlic bread. Or save it for the next day; it gets better with time. 

Feel free to reach out for feedback, suggestions or connect with me on Instagram or Facebook. Subscribe to my YouTube channel for all my videos and upcoming recipes.

Marble Bundt Cake

When you love yourself some good old classic vanilla cake or a rich decadent chocolate cake and choosing one out of the two becomes tougher than Sophie’s choice, marble cakes come to the rescue. A marble cake is literally the best of both worlds – classic buttery vanilla and rich and moist chocolate cake, swirled together to make one cake! Who wouldn’t love that?

From adults to kids, marble cake has a place in everyone’s heart. I have grown up eating spongy, buttery and moist marble cakes and I would be lying if I said they are not my absolute favourite! I can never have enough of the classic marble tea cake. 

Marble cake is actually just as easy as any other sponge cake and requires making a single vanilla sponge cake batter, half of which we separate and add cocoa powder to. It is such an easy recipe and makes the most delightful buttery sponge cake. It is perfect for birthdays or special occasions.

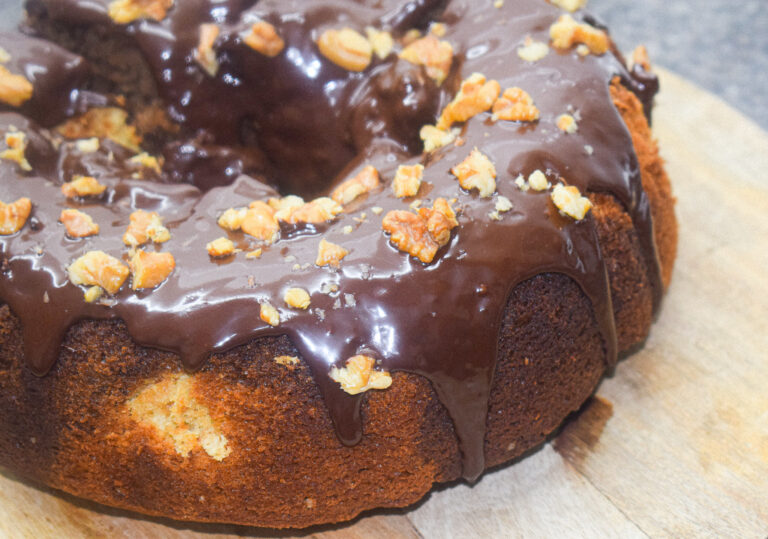
marble bundt cake

Bundt pans can instantly transform any plain cake into something spectacular, and that is why I love baking with them so much. While baking a marble cake in a Bundt pan, you don’t even need a skewer or anything to make swirls around the cake to give it a marble effect. Because of its unique shape, just a tap on the counter after pouring the batter into it, the Bundt mound will give the cake the most beautiful marble effect. It may look like this Marble Bundt Cake has a lot of ingredients or steps, but it’s actually very easy and most (if not all) of the ingredients are things you have on hand.

Baking is really all about perfect measurements and techniques. Let’s talk about some of the ingredients and some significant points to keep in mind while baking this Marble Bundt Cake.

Ingredients in This Marble Bundt Cake

-Butter

Butter is one of the key ingredients in this mixture. It is vital to use good quality butter because it contributes the maximum flavour in the recipe. The buttery flavour complements the rich chocolaty taste so beautifully. It is also extremely important to use softened butter, i.e. butter at room temperature – when you make an impression on the butter, it should hold its position. That is the perfect consistency of the butter to use while baking any sponge cake – neither too hard nor too runny. It will also be easier to cream the butter with sugar incorporating the maximum air if the consistency is perfect. The cake will rise higher if more air is trapped, and yields a softer and fluffy texture. This process depends on a few factors:

  • The softness of the butter. The softer the butter, the easier air will be trapped in the butter-sugar mixture.
  • It is extremely important to add the sugar in batches. This allows the sugar to dissolve completely in the butter. For this recipe I am using granulated white sugar. However, you can swap it with castor sugar.
  • The speed of mixing. Use medium to high speed to mix the butter and sugar yields a smoother and lighter buttercream.

marble bundt cake

marble bundt cake

Signs to know if the buttercream is ready:

  • The colour of the butter turns from the initial bright to light yellow and fluffy.
  • It looks like soft ice cream.
  • There is no more visible sugar granule in the mixture.

-Eggs

Eggs act as a binding agent in cakes. They also provide moisture and help the cake retain its shape. It’s the balance between eggs and flour that help provide the height and texture of any cake. I recommend adding eggs one at a time and beat them with the buttercream for the best results but you can sure add it all at once if you are in a hurry.

When you add the eggs, the mixture will appear curdled, but keep whisking and rest assured, it will turn smooth before you know it.

-Baking Powder and Baking Soda

Since the amount of butter in this cake is on the higher side, it will rise well enough even without baking soda or baking powder. But addition of the two is extremely important for chocolate part of the batter which is denser and needs a rising agent to level with the vanilla part.

marble bundt cake

[ingredients title=”Ingredients”]

  • 200 g dark chocolate
  • 295 g all-purpose flour
  • 2.5 tsp baking powder
  • ¼ tsp baking soda
  • 170g softened butter
  • 220g granulated white sugar
  • 3 large eggs – at room temperature
  • 2 tsp vanilla extract
  • 80 ml plain yoghurt – whisked until smooth
  • 120 ml milk – at room temperature
  • ½ cup cocoa powder [/ingredients]

[directions title=”Directions”]

  1. Using the double boiler method melt the dark chocolate. You can replace it with milk chocolate if you do not prefer dark chocolate.  (double boiler method: heat some water in a pan and place a heat resistant bowl over it, making sure it doesn’t touch the water in the pan)  
  2. Once the chocolate is completely melted, set it aside and begin preparing the cake batter.
  3. In a big bowl, add in your softened butter.
  4. Start creaming the butter with the help of an electric hand blender.
  5. While continuously beating the butter, add the granulated white sugar in 3 batches.
  6. Beat the butter – sugar cream till it turns light and fluffy. It should take about 3 – 4 minutes.
  7. While still beating the buttercream, add in the eggs, one at a time and beat the mixture till smooth.
  8. Once the mixture is smooth, add in your whisked yoghurt and vanilla extract.
  9. Beat everything together till well combined.
  10. In a separate bowl, add in your sifted flour.
  11. To the flour add in the baking powder and the baking soda.
  12. Whisk the dry ingredients well in order to assure uniformity in the texture of the cake.
  13. While still beating the wet ingredients, add in the dry ingredients to it, in 3 batches – Whisking till smooth after every addition.
  14. Add in the milk to the batter, in two batches.
  15. Beat till you get a smooth and creamy batter.
  16. Once done, with the help of a spatula, scrap off the excess flour/sugar from the sides of the bowl and fold it into the batter using the Cut and Fold method.
  17. Take a new clean bowl.
  18. Transfer half of the batter to the new bowl.
  19. Add in some cocoa powder in half of the batter and mix it in using the cut and fold method till well combined.
  20. Take your Bundt pan and thoroughly layer it will non-stick cooking oil or spray.
  21. Pour the batter into the Bundt pan, alternating two spoons of both the batters – chocolate and vanilla.
  22. With the help of a skewer or the back of a spoon, make swirls throughout the cake giving it a marble effect.
  23. Tap the Bundt pan on the counter to release the air pockets before setting it to bake.
  24. Bake this in the oven at 180 degree Celsius for about 35 – 40 minutes.
  25. Flip the pan to release the cake and allow it to cool completely.
  26. Once at room temperature, pour the melted chocolate on top of the cake.
  27. Top the chocolate with some chopped walnuts for the added crunch and flavour and voila! You have yourself the most gorgeous, gourmet looking cake in no time. [/directions]

marble bundt cake

marble bundt cake

This recipe is full proof and makes for such a delicious homemade treat! Make it for birthdays or special occasions and it will be a hit. 

Feel free to reach out for feedbacks, suggestions or connect with me on Instagram or Facebook. Subscribe to my YouTube channel for all my videos and upcoming recipes.

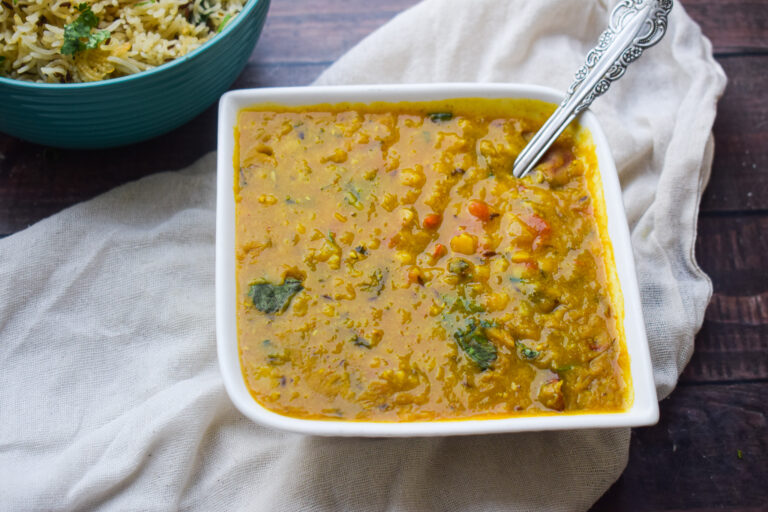
Boiled Moong Dal

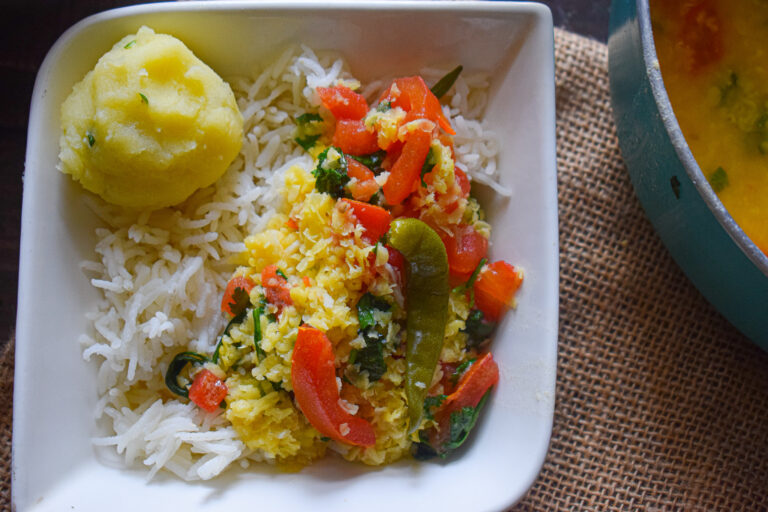
Moong dal is a subtly flavoured dal which is very light and filling. Even a simple bowl of plain moong dal with a few drops of ghee or lemon tastes nothing short of a dream. There’s just something so comforting about moong dal and I just love it in every form. I have been making this yellow moong dal for years and it is a regular in my kitchen. Super simple and loved equally by all, this dal is a crowd pleaser. 

Today I bring to you this even simpler version of my favourite moong dal – Boiled Moong Dal. It is very easy to make, requires the very basic ingredients easily found in every Indian kitchen and does not require any elaborated methods or high end utensils (not even a pressure cooker). This is a one pot recipe which is wholesome, comforting, and absolutely delicious and is hostel friendly too. If you live alone and are dependent on basic one pot recipes, this is the recipe which will take you back home and leave you feeling content on so many levels. 

boiled moong dal

boiled moong dal

It is extremely easy to make this Boiled moong dal and it takes no time to come along. The ingredients in this yellow dal are minimal, but the results are absolutely amazing – A hearty and comforting dal recipe that gets ready in minutes. Let’s take a look at the handful of ingredients and the steps involved in curating this wholesome goodness. 

Preparation time – 10 minutes

Cook time – 30 minutes

Serves – 4 people

[ingredients title=”Ingredients”]

  • 500 ml water
  • 100 g moong dal (washed and soaked – at  least 30-60 minutes)
  • 2 green chilies
  • 1 medium tomato – julienne or finely chopped
  • 6 g fresh garlic paste
  • 1 tbsp ghee
  • A handful of fresh coriander leaves
  • Salt to taste [/ingredients]

[directions title=”Directions”]

  1. In a deep pot, add the water.
  2. Add in the washed and soaked yellow moong dal to the water.
  3. Give it a mix. 
  4. Add in the green chilies and tomatoes and mix well.
  5. Add in the fresh garlic paste.
  6. Cook the dal on low flame stirring occasionally.
  7. Once the dal is thoroughly cooked, season it with salt.
  8. Finish off with a teaspoon of ghee and a handful of chopped fresh coriander leaves. [/directions]

boiled moong dal

boiled moong dal

Enjoy this hot bowl of goodness with some plain rice or roti and a side of sautéed vegetables or pickles. Try this recipe for yourself today. I promise it will not disappoint you! 

Feel free to reach out for feedbacks, suggestions or connect with me on Instagram or Facebook. Subscribe to my YouTube channel for all my videos and upcoming recipes.

Egg Curry with Potatoes

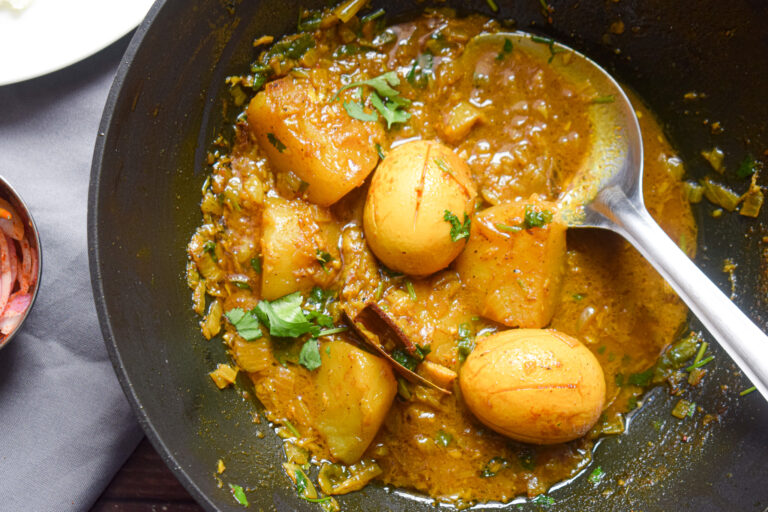
Eggs and potatoes – striking a perfect balance of protein and carbs in this super flavoursome curry make it a must try. This is a very basic, simple yet nutritious curry that pairs beautifully with hot phulkas, parathas or a steaming bowl of rice. With just some eggs, potatoes and the most basic ingredients and spices found easily in almost all Indian kitchens, you can whip this up in no time. 

This is the perfect recipe for times when you don’t feel like making an elaborate lunch or dinner and still have yourself something flavourful and healthy. I used to make this curry almost every other day during the dreaded 2020 lockdown and it was a family favourite.

Ingredients in This Egg Curry With Potatoes

This is not one of those recipes that requires a lot of ingredients or have a ton of different spices and oil. It is a simple, easy curry that can be whipped up using the essentials present in your pantry right now. Let’s discuss a few ingredients that are key to this recipe:

-Eggs

As we know, eggs are the most versatile of all foods. They are extremely adaptable, healthy (one of the richest sources of protein) and easy to cook. Since egg is one of the stars of this recipe and it cooks very quickly, this recipe comes together in no time. Just like any other basic egg curry, this recipe also uses hard boiled eggs that are seasoned and deep fried and added to the curry right before finishing it off. It is very important to know how to boil the eggs perfectly and in turn get a perfect egg curry. Boiling an egg to perfection can be a little tricky. No one likes a piece of misshapen or broken egg in their egg curry and following a few tips and tricks can ensure that you have yourself the perfect boiled egg every single time.

egg curry with potatoes

egg curry with potatoes

Tips to become a pro at boiling perfect eggs:

-Pour sufficient water in a large pot and add your eggs. It is important to give eggs ample room in the pot to avoid collision and hence breakage of eggs.

-Season the water with salt once the water comes to a boil is extremely important. This prevents the eggs from cracking.

-Bring the water to a roaring boil before adding the eggs is always a good idea because adding the eggs to room temperature water and then bringing them to a boil gives them a shock when the temperature rapidly rises and results into the shell sticking to the skin. This will make it hard to peel and you’ll end up with cracked or broken eggs.

-Be gentle while adding your eggs to the boiling water is crucial because raw eggs break very easily and the rapid movement of the water may result into cracking of the egg. Add the eggs one at a time with a spoon and do not let go until your eggs are right at the bottom of the pan.

egg curry with potatoes

-Timing is everything when boiling eggs. The duration of your boiling the eggs will determine the final texture of the eggs. For this recipe we need hard boiled eggs, for which I let it boil on high flame for exactly ten minutes after adding it into the boiling water.

-Remove the eggs and place it immediately in ice cold water so that it stops cooking. De-shell the eggs after ten minutes and you have yourself the perfect boiled egg.

-Potatoes

I get my love for potatoes from my culture. Assamese food celebrates potatoes and we use it in every recipe you can imagine! Potatoes help make meals more filling and add that much needed satiety. Potatoes are versatile and they also add their own flavour when slow cooked like in this curry. 

This recipe uses raw potatoes that are allowed to cook in the curry. This helps the potato absorb the flavours of the curry, become soft and complement the crispy boiled eggs beautifully. Since potatoes have their own starch, no additional thickening agent has been used to make the curry creamy in this recipe. 

Now that you know all the tips and tricks on how to make the perfect pasta, let’s take a look at the recipe to this spaghetti in cherry tomato sauce.

egg curry with potatoes

Preparation time – 20 minutes

Cook time – 30 minutes

Serves – 3 people

[ingredients title=”Ingredients”]

  • 3 hard boiled eggs
  • Salt to taste
  • ¼ tsp red chilli powder – to coat the eggs
  • ¼ tsp turmeric powder – to coat the eggs
  • 30 ml (2 tbsp) mustard oil
  • 2-3 slit green chilies
  • 1 bay leaf
  • 2 cloves
  • 2 cardamoms
  • 1 dry red chilli
  • 1 stick of cinnamon
  • 400 g red onions – finely chopped
  • 15 g ginger – garlic paste (1 tbsp)
  • 2 large potatoes – cut into quarters
  • 4g turmeric powder 
  • 4g cumin powder 
  • 2g black pepper powder
  • 4g coriander powder
  • 80ml + 250 ml hot water
  • 2g garam masala
  • Handful of fresh coriander leaves for garnish [/ingredients]

[directions title=”Directions”]

  1. Make small slits in your hard boiled eggs. This helps the egg absorb the maximum flavours in the curry.
  2. Season the eggs with some salt, turmeric and red chilli powder and toss till well coated.
  3. In a pan, heat the mustard oil.
  4. Add in the seasoned eggs and shallow fry them on medium heat.
  5. Once the eggs are nice golden and crispy, take them out.
  6. In the same heated mustard oil, add in the slit green chilies and your whole spices – cloves, cardamom, bay leaves, cinnamon and dry red chilli.
  7. Fry for a few seconds. Now, add in the finely chopped red onions.
  8. Cook the onions, stirring occasionally till they turn translucent.
  9. As the onions turn translucent, add in the ginger garlic paste and fry for a few minutes.
  10.  As soon as the onions start to brown, add in the potatoes and mix well.
  11. Add in your dry spices – turmeric powder, cumin powder, coriander powder, black pepper powder and season with salt.
  12. Fry the potatoes for a few seconds with the spices.
  13. Add 80 ml of hot water and mix until well combined. 
  14. Cover and cook on low flame till the potatoes are done.
  15. Once the potatoes are cooked, take off the lid and increase the heat.
  16. Give it a good mix and add the remaining hot water. You can adjust the water according to your preferred consistency.
  17. Top it with some garam masala and fresh coriander leaves and mix well.
  18. Add your fried eggs and cook for another few minutes, letting your eggs soak up the flavours of the curry.
  19. Finish of with some more fresh coriander leaves and enjoy hot with plain rice or rotis. [/directions]

egg curry with potatoes

egg curry with potatoes

This is one such recipe that has my whole heart and once you taste it, you will keep coming back to it just like me. I hope you try it super soon and fall in love with it too.

Feel free to reach out for feedback, suggestions or connect with me on Instagram or Facebook. Subscribe to my YouTube channel for all my videos and upcoming recipes.

Kalakand

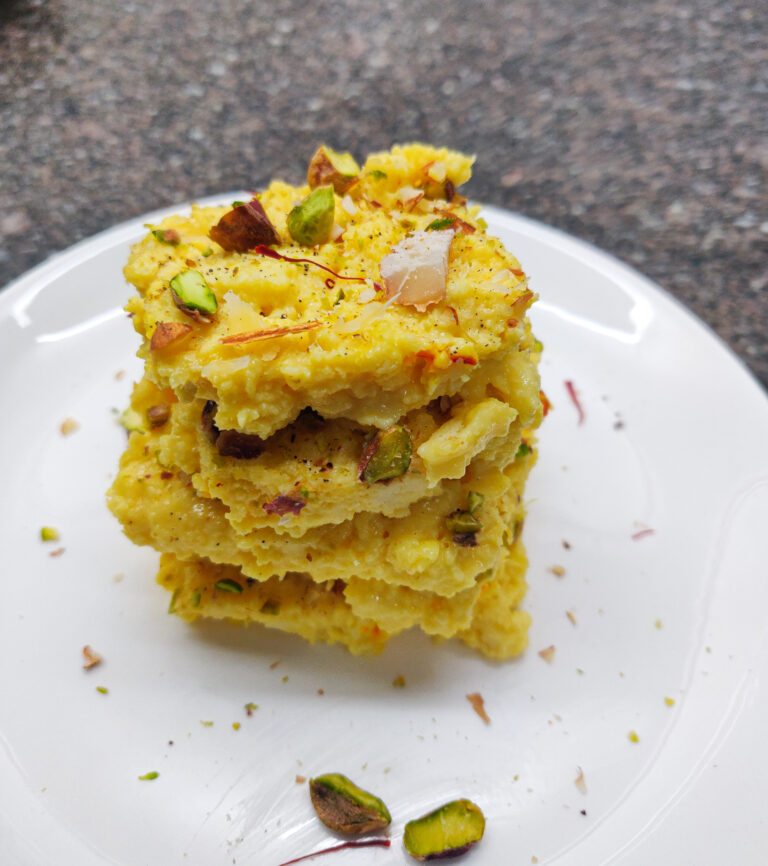
Kalakand is an easy and quick way to whip up a tasty Indian dessert in less time. Made with just a few ingredients, kalakand is very easy to make and tastes delicious! The recipe is made in two parts – first is splitting the milk and preparing the chenna. The second is boiling full fat milk, and reducing it to half. Then we mix the two parts till it turns into a creamy, luscious mix. Set to chill for a few hours and kalakand is ready! I love to serve this with a topping of condensed milk. It’s absolute heaven I tell you.

Kalakand is one of the most popular Indian sweets and is absolutely delicious. These soft, rich and creamy cakes of chhena wrapped in luscious thick rabdi with just the amount of sweetness and a slight crunch of sliced nuts will satiate your taste buds and leave you feeling happy and satisfied. This Kalakand recipe, unlike the traditional elaborated recipe which is long and time taking, is so easy to make and comes together in no time to give you that perfect desi dessert anytime the heart craves something sweet.

kalakand

If this is your first time trying your hands at making mithai or you’re not very confident, this Kalakand recipe is the perfect way to begin. It is absolutely fool proof and you cannot go wrong with it. Once you make it, you won’t stop. I like to top my Kalakand after setting it for a while, with some condensed milk and it is absolute heaven I tell you!

Ingredients in Kalakand

Kalakand is basically made up of just two ingredients – Milk and Sugar. Rest everything is optional but is highly recommended to get that perfect mithai. Let’s talk about milk, the base of this delight:

Milk

Milk is solely the hero of this dish, just like almost all other Indian sweets, and every element of it is constituted of milk. It is extremely important to use full fat milk to get the perfect juicy and spongy chhena and the best, luscious and thick rabdi. Avoid using milk from tetra packs or low fat or skimmed milk as it will affect the texture of your chhena and in turn prevent you from getting the perfect Kalakand.

kalakand

Tips to Get the Perfect Chhena Every Time

Making the perfect chhena can be a struggle sometimes. The crumbliness and softness of the chhena is a game changer and hence it is extremely important to make the perfect chhena for your Kalakand. The following tips will help you make that perfectly soft and crumbly chhena every single time.

  • Always use full fat milk or whole milk to extract the maximum chhena out of the milk and make perfectly soft and spongy rasgullas. Avoid using milk from tetra packs or low fat or skimmed milk as it will affect the spongy texture of your rasgullas.
  • Turn off the heat after the milk comes to a boil and then add your acidic ingredient. If the milk doesn’t start curdling, put it back on the stove and let it curdle.
  • Add ice cold water or ice cubes to the milk once it has curdled to stop the curdling process. This helps you get the softest chhena ever.
  • A perfectly drained chhena is very important. In order to test whether your chhena is perfect or not, smear a little portion of it on a smooth surface such as your kitchen countertop and check the consistency. For the perfect Kalakand we need a slightly crumbly yet soft chhena.

kalakand

[ingredients title=”Ingredients”]

  • 1 litre full fat milk – for the chhena
  • 1 litre full fat milk – for the rabdi
  • 3 tbsp lime juice or white vinegar
  • ½ cup sugar 
  • 10 – 12 strands of saffron
  • Chopped pistachios – for garnish
  • Chopped almonds – for garnish
  • 1/4 tsp cardamom powder  [/ingredients]

[directions title=”Directions”]

  1. In a deep pan, bring 1 litre full fat milk to a boil. 
  2. Stir continuously and make sure the pan is heavy bottomed to prevent the milk from burning.
  3. Once the milk comes to a boil, add in the lemon juice or white vinegar, one tbsp. at a time. 
  4. Turn the flame off while stirring well in order to split the milk evenly.
  5. Place the strainer over a big bowl and line it with a clean muslin cloth.
  6. Pour the curdled milk on the lined strainer and stir to drain the excess liquid.
  7. Wash the chhena with cold water.
  8. Pick up and twist the muslin cloth to squeeze out the excess liquid.
  9. Take out the well-drained chhena in a plate or a flat surface and disintegrate it gently with your fingers.
  10.  Rest it aside.
  11. In another clean deep pan, bring the other litre of full fat milk to a boil.
  12.  Keep boiling while stirring continuously, scrapping the bottom and sides of the pan.
  13. Boil the milk till it is reduced to half and attained a thick and creamy texture.
  14. Once the milk has reduced to the desired consistency, add in the saffron strands.
  15. Keep stirring continuously and allow the saffron to release its full flavour and colour into the mixture.
  16. Now, add the sugar and mix well.
  17. Add in the chhena that we set aside earlier to the reduced milk mixture.
  18. Mix well and keep stirring in order to avoid burning.
  19. Once you attain a thick rabdi consistency, take it off the heat.
  20. Grease a rectangular tray evenly with ghee.
  21. Transfer the Kalakand mixture on to the tray while it is still hot and spread it out evenly with the back of a spoon
  22. At this point, garnish with chopped pistachios and almonds and a few saffron strands.
  23.  Sprinkle some cardamom powder on top for added flavour.
  24. Place the tray in the fridge and let it set for at least 3 – 4 hours or more.
  25. Once completely set, take out and cut into cubes of desired sizes and serve with some condensed milk topping to experience the utmost deliciousness. [/directions]

kalakand

kalakand

Make sure to try this recipe out for yourself and dig into the ultimate rich goodness of this decadent Indian delicacy. You are going to become a fan of this Kalakand.

Feel free to reach out for feedback, suggestions or connect with me on Instagram or Facebook. Subscribe to my YouTube channel for all my videos and upcoming recipes.

Dhaba Style Dal Fry

If you are a fan of dhaba style dal fry, this is the recipe for you. This Dhaba Style Dal Fry recipe will refresh the memories you had at a dhaba on the side of highway during your road trips. This Dhaba Style Dal Fry consists of three types of lentils, making it super healthy and also imparting individual flavours into the curry. This dal goes best with some hot butter roti or paratha or jeera rice and green chilies. It is so flavourful that it can be enjoyed perfectly well as a soup, all by itself. 

dhaba style dal fry

dhaba style dal fry

This dal fry is made with a mix of three lentils – arhar/toor/yellow dal, Masoor dal and moong dal. The earthy and nutty flavours of these dals complement the ghee tempering beautifully. 

Preparation time – 40 minutes

Cook time – 30 minutes

Serves – 4 people

[ingredients title=”Ingredients”]

  • ¼ cup arhar/toor/yellow dal
  • ¼ cup moong dal
  • ¼ cup Masoor dal
  • 2.5 cups of water for pressure cooking the pulses
  • 1 tsp salt for the pressure cooker (adjust as per taste if needed)
  • 1 tsp turmeric powder for the pressure cooker
  • 3 tbsp oil or ghee
  • ¼ tsp heeng or asafetida 
  • 1 tbsp cumin seeds/jeera
  • 2 dried red chilies
  • 1 cup finely chopped onions
  • 1 tbsp ginger garlic paste
  • 1 cup finely chopped tomatoes
  • 1 tbsp coriander powder
  • 1 tsp cumin powder
  • 1 tsp Kashmiri red chilli powder
  • ¼ tsp dry mango powder/amchur powder
  • 1 cup hot water 
  • 1 tbsp kasuri methi / dried fenugreek leaves
  • Salt to taste
  • Fresh coriander leaves for garnish
  • 1 tbsp ghee for garnish (optional) [/ingredients]

[directions title=”Directions”]

  1. In a bowl, add in your three types of pulses – arhar / toor, moong and Masoor dal.
  2. Pour plenty of water in the bowl and rinse the pulses thoroughly by rubbing a handful at a time between your fingers.
  3. Once clean, soak in sufficient water for at least 30 minutes. Soak it overnight to accelerate the process.
  4. Now, drain and transfer the soaked dal in a pressure cooker.
  5. Add water into the pressure cooker.
  6. Season it with some salt and turmeric powder and mix well.
  7. Close the lid with the whistle and set it on heat.
  8. Pressure cook for 4 whistles on medium heat.
  9. In a wide pan, heat some oil / ghee.
  10. Once the oil is hot, add the dried red chilies and the cumin seeds and let it crackle.
  11. Now, add in the finely chopped onions to the pan and fry it, stirring occasionally.
  12. Once the onions are halfway done, i.e. translucent, add in the heeng / asafetida.
  13. Fry the onions till they turn golden.
  14. Add in the freshly ground ginger garlic paste and fry for another few minutes.
  15. Once the raw aroma of the ginger and garlic disappear, and the onions start browning, it is time to add in your finely chopped tomatoes.
  16. Sauté the tomatoes for a few minutes then start adding the dry spices – coriander powder, cumin powder, Kashmiri red chili powder and dry mango / amchur powder.
  17. Fry the masalas for a few minutes to cook them properly.
  18. Now, add in the hot water to the pan. The hot water will help homogenize the mixture.
  19. Add in the kasuri methi or dry fenugreek leaves and mix really well.
  20. Cover the tempering and cook on low flame for 8 minutes.
  21. After 8 minutes, most of the water is evaporated and the tomatoes have become mushy, just like we want them.
  22. Give it a good stir then season with salt according to taste.
  23. Now, add the pressure cooked dal to the pan and mix it very well till it is well combined with the tempering.
  24. Add hot water to adjust the consistency as per your preference.
  25. Cook the dal for a few minutes.
  26. Finish it off with a generous handful of coriander leaves and a tbsp. of ghee. You can also add in a pinch of garam masala in order to round up the flavours, but I didn’t feel the need to. [/directions]

dhaba style dal fry

dhaba style dal fry

And there, you have the healthier, yummier version of your favourite Dhaba style dal fry. Serve it hot with some parathas, sliced onions and a squirt of lemon juice and you are set. This is a MUST try recipe for everyone as it can very easily be inculcated in every day cooking. You will love it!

Feel free to reach out for feedback, suggestions or connect with me on Instagram or Facebook. Subscribe to my YouTube channel for all my videos and upcoming recipes.

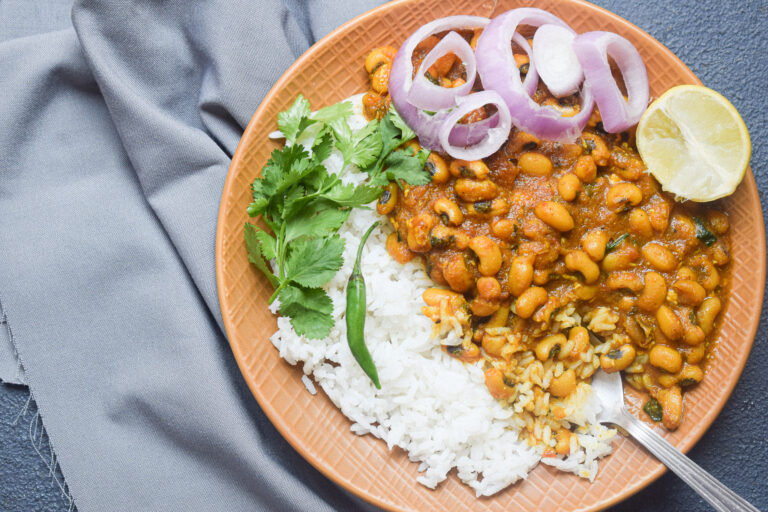
Masala Lobia

Making weekday meals can be a task sometimes, as after a point you run out of ideas about what to cook on a daily basis that is healthy and delicious at the same time. Eating vegetables everyday can get boring, and that’s when we like to switch our basic vegetable stews and curries with beans and peas. One such recipe, which yet again makes a perfect comfort meal, is Masala Lobia or Black eyed peas curry. It is packed with protein, high in several other necessary nutrients, very easy to make and is just so delicious. It is the kind of soul food which speaks to you and is perfect to indulge in your everyday meals.

Cooked with a very basic Indian curry with an onion-tomato base, this Masala Lobia makes a hearty bowl of steaming goodness. It is the kind of comfort food one can never get tired of. I am a huge fan of black eyed peas curry. It is super healthy and the curry tastes so good with a side of steamed rice. Pair it with some raw onions, a quick salad and a generous drizzle of lemon juice, and you have yourself a comfort meal that will leave you feeling full, satisfied and content for hours. There is no way one can go wrong with such simple meals. Indian food is so soulful and amazing as most of it is naturally vegan and nothing is processed. 

masala lobia

This is a simple curry where cooked Lobia is flavoured in an onion-tomato masala. Let us discuss the one key ingredient of this recipe, i.e. Lobia or Black Eyed Peas:

As the name suggests, Lobia is the star ingredient of this curry. Lobia or black eyed beans is one of the most nutritional dried beans which can be included in our diet. It has no fat and is low in calories making it a perfect food to be included for diabetics and heart patients.  Lobia as such does not have any taste of its own; hence it is easy to cook it with various spices to make it flavourful.

As these are a form of dried beans, they are to be soaked 6-8 before cooking. This will reduce its cooking time and ensure it cooks perfectly. Lobia is also better than other variety of dried beans or grams because it is far easier to cook it than bigger beans or grams like Rajma or Chickpea. It is smaller, hence requires lesser time to soak and can be put together in almost as long as it takes to make a traditional dal. 

Lobia has a soft and mushy texture which goes really well with the tangy and spicy tomato curry; however, make sure not to overcook it otherwise you will be left with a lumpy mushy mess that no one likes.

lobia masala

Here’s the recipe:

Prep time – 20 minutes

Cook time – 35-40 minutes

[ingredients title=”Ingredients”]

  • 100 g Lobia (black eyed peas) – soaked overnight
  • 500 ml water
  • 1 cinnamon stick
  • Salt to taste
  • 2 tbsp mustard oil
  • 2 dried red chilli
  • 180 g onion paste – around 2 onions
  • 2 green chillies – chopped
  • 12 g ginger paste
  • 8 g garlic paste
  • 250 g fresh tomato puree
  • Salt to taste
  • ½ tsp red chilli powder
  • 1 tsp coriander powder
  • 1 tsp black pepper powder
  • 1 tsp cumin powder
  • 1 tsp turmeric powder
  • 1 tsp garam masala [/ingredients]

[directions title=”Directions”]

  1. In a pressure cooker, add 500 ml of water.
  2. To the water, add soaked Lobia or black eyed peas.
  3. Add in a cinnamon stick and season with some salt.
  4. Pressure cook for 6 whistles.
  5. Meanwhile, let’s make the curry base. 
  6. Heat some mustard oil in a pan.
  7. When it gets hot (smoking), add two dry red chillies and stir fry for a few seconds.
  8. Add in the onion paste and stir continuously to combine with the mustard oil.
  9. Add two chopped green chillies to the onion paste and continue stirring.
  10. Now, throw in the ginger and the garlic paste and mix well to combine with the onion paste.
  11. Stir and cook till the raw aroma fades away.
  12. Pour the fresh tomato puree and mix well till combined.
  13.  After cooking the tomatoes for a few minutes, start adding the dry spices and seasoning – salt, red chilli powder, coriander powder, black pepper powder, cumin powder, turmeric powder.
  14. Mix everything well and cook till the oil starts separating from the onion and tomato mixture and it starts leaving the pan. 
  15. Now is the time to add in the cooked Lobia and mix well.
  16. Let it come to a boil.
  17. Finish of with some garam masala and a good mix. [/directions]

lobia masala

Take a break from your regular vegetables and give this healthy, vegetarian and naturally vegan delight a try. Despite how you choose to have it – with rice or roti or as is as a bean soup, you will absolutely love it. 

Feel free to reach out for feedback, suggestions or connect with me on Instagram or Facebook. Subscribe to my YouTube channel for all my videos and upcoming recipes.

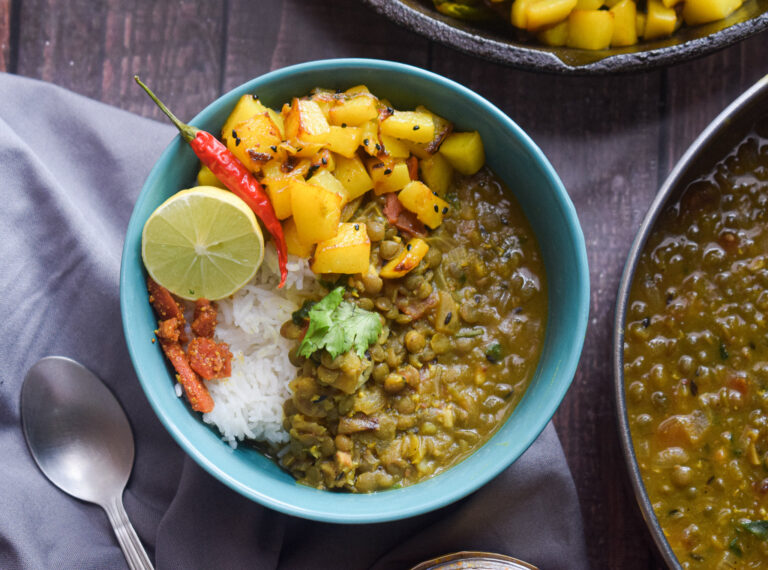
Black Masoor Dal

On days when we crave comfort, having a wholesome home cooked meal is everything we need. A basic dal tadka on a bed of steamed rice with maybe a lemon wedge or green chilli is the perfect comfort meal for me. If it is your comfort meal too, you’re at the right place. I will be sharing with you my take on the infamous Black Masoor Dal. It is a very simple dal tadka that is made with whole black Masoor dal or saboot Masoor dal as we call it in Hindi and flavoured with a handful of spices that are easily found in every Indian kitchen.

Dal is a staple in India and is eaten in a variety of forms all over the country. Indian dals are so healthy and comforting. And such a wide variety to choose from! Every part of the country has its own plethora of dal versions. Cannot imagine an Indian thali without a dal, right? This black Masoor dal, also known as brown lentils has a distinct flavour of its own and doesn’t require a lot of spices to be flavoured. This dal goes best with a side of hot steamed rice or even jeera rice but can be paired with roti or paratha as well because it has a tendency to thicken as it cools down. 

black masoor dal

I like to pressure cook my Black Masoor dal until it’s perfectly cooked. Thereafter, I temper it in an onion-tomato masala seasoned with basic Indian spices and it turns out to be so tasty! Whole Masoor Dal is highly rich in proteins and fibre. It has an earthly flavour, is easy to digest and is very palatable. Whole pulses are rich in nutrients, some of which are lost during splitting and skinning them. Black Masoor dal makes a very delicious, protein-packed and wholesome meal all by itself.

Whole Masoor dal is a one of the best vegetarian sources of protein and is also naturally vegan. It is also one of the most widely used dal all over India and is a healthy and delicious choice for everyday meals. Since it is whole, it is way richer in nutrients than polished or refined dals. It has a naturally creamy texture and thickens over time, making it not just perfect for rice but also quite a wonderful curry to be had with rotis.

Unlike other dals, whole masoor dal needs to be washed and soaked in sufficient water for at least 2 hours or overnight before cooking.

black masoor dal

Why make a hearty bowl of this dal?

  • Extremely flavourful and light
  • Has a naturally thick and creamy texture
  • Super quick. Comes together in just 30 minutes!
  • Healthy – one of the best vegetarian sources of protein
  • Naturally vegan
  • Requires basic Indian pantry ingredients.
  • Comfort meal!

black masoor dal

Note this recipe down to try this recipe in your own kitchen.

Preparation time – 20 minutes

Cook time – 40 minutes

Serves – 4 people

[ingredients title=”Ingredients”]

  • 2 cups of black Masoor dal
  • 1 tsp turmeric powder 
  • 2 ½ cups of water
  • 2 tbsp mustard oil
  • 1 tbsp cumin seeds
  • ¼ tsp hing
  • 2 tbsp ginger – finely chopped
  • 1 tbsp garlic – finely chopped
  • 2 large onions – finely chopped
  • 1 chili – slit
  • 1 cup tomatoes – finely chopped
  • Salt to taste
  • 1 tsp cumin powder
  • 1 tsp black pepper powder
  • 1 tsp coriander powder
  • 200 ml hot water
  • Handful of coriander leaves – finely chopped
  • 1 teaspoon garam masala
  • 1 tbsp ghee [/ingredients]

[directions title=”Directions”]

  1. Wash the whole Masoor dal well and let it soak in sufficient water for 1-2 hours or overnight.
  2. Transfer the soaked dal into a pressure cooker along with 2 ½ cups of water.
  3. Season with salt and turmeric powder and mix well.
  4. Set it to pressure cook and let it cook for 6-7 whistles.
  5. Once the dal is done, heat some mustard oil in a pan.
  6. When the oil gets hot, add cumin seeds and let them splutter.
  7. Add the hing followed by ginger and garlic.
  8. Stir and cook till the garlic turn golden around the edges.
  9. Throw in the finely chopped onions and cook them stirring occasionally.
  10. Once the onions start turning brown, add in the chilli and cook for another few minutes.
  11. Now, add the finely chopped tomatoes and cook them for a few minutes.
  12. When the tomatoes become a little soft, add in your seasoning and dry spices – salt. Black pepper powder, cumin powder, coriander powder.
  13. Cook the spices for a few minutes.
  14. Now, add in the hot water to homogenise all the spices in the tempering.
  15. Cover and cook for a few seconds.
  16. Take the lid off, give it a goof mix and add in the chopped coriander leaves.
  17. Now is the time to add the cooked black Masoor dal to the tempering.
  18. Give it a good mix and combine everything well.
  19. Season with some garam masala and garnish with another handful of coriander leaves.
  20. Keep mixing it well.
  21. Finish it off with some ghee and serve hot with some steamed rice or hot rotis. [/directions]

black masoor dal

black masoor dal

Give this recipe a try and make this Black Masoor Dal for your next meal and you’ll be left feeling happy and content, I promise! 

Feel free to reach out for feedback, suggestions or connect with me on Instagram or Facebook. Subscribe to my YouTube channel for all my videos and upcoming recipes.

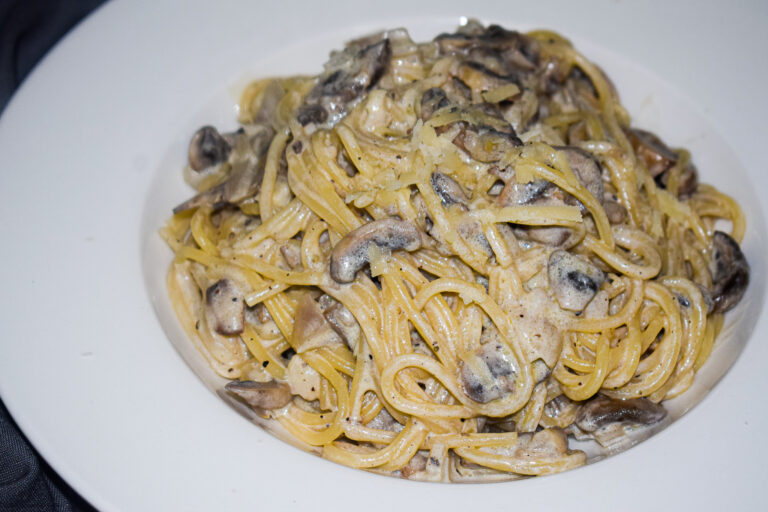
Spaghetti Mushroom Alfredo

This Spaghetti Mushroom Alfredo is a wholesome and hearty pasta dish which comes together in 30 minutes. It is whipped up with minimum ingredients in no time and such minimal efforts and yet tastes gourmet. This Spaghetti in Mushroom Alfredo is not just extremely tempting, but looks straight out of a fancy cookbook. Put this together as a quick meal fix for yourself, or make it for a romantic date night or for your friends and family and be ready to get your share of praises for this delightful pasta dish. You have to give it a try!

This quick and easy one pot creamy Spaghetti Mushroom Alfredo pasta is one such go to recipe when you’re tired, lazy or just don’t have a lot of time in hand because with the spaghetti is boiled to perfection, this barely takes 10 minutes to come together and I cannot begin to tell you how delicious and filling it turns out to be. Being a big fan of a good wholesome plate of pasta, I end up making this recipe on those nights when the heart craves for an indulgent pasta.

spaghetti mushroom alfredo

This creamy pasta, with earthy tones of flavour from mushrooms, richness of the thick cream, the pungency of the garlic and sweetness of the onions topped with fruity and nutty parmesan in every bite will definitely top the list of your quick and easy go to pasta recipes. 

One of the best things about this recipe apart from the fact that it is super quick, wholesome, comes together in a single pot and packed with flavours is- you cannot go wrong with this! Once you know how to boil the spaghetti (or any pasta) to perfection, this will be your fool proof weeknight dinner when the heart craves that hearty plate of creamy authentic Italian pasta.

How to Cook the Perfect Pasta Every Single Time

No one likes a plate of mushy broken pasta, and so, while it is important put in our best efforts in perfecting the sauce, where the entire flavour lies, it is also extremely important to boil the pasta to perfection. It is not rocket science, just a few basic steps and you’ll have yourself perfectly cooked pasta every single time:

– Bring sufficient water to a boil

It is very important to have enough water in the pan to properly drown the pasta- Lesser volume of water may result into it getting extremely starchy; and bring it to a roaring boil before adding your pasta- the boiling water agitates the pasta pieces, thus helping them cook more evenly, keep them separated from one another and avoid clumps.

– Add salt

A very common mistake a lot of people make is adding oil to their pasta water in order to keep them from sticking to one another. However, this is completely false, as the only thing that can keep pasta from sticking is ample amount of water and a rolling boil, and hence is a waste of oil. Adding salt to the pasta water ensures that the pieces/strands of pasta do not remain bland while the only flavour and seasoning is in the sauce, because no one likes to bite into pasta that has all the flavours in the sauce and none into those spaghetti strands.

– Save the pasta water

Saving a couple ladles of pasta water goes a long way. Not only does the salty pasta water help flavour your sauce, it also plays a major role, along with butter and olive oil, to bring that glossy magical finish to your pasta. 

– Cook according to package instructions

There is no universal rule to cook the perfect pasta, it completely depends on the brand or product you are using and it is advisable to cook as per the packet instructions; especially timing. The most common way to cook pasta is till al dente, which loosely translates to “to the bite/tooth”, means almost cooked but not completely cooked. However, the above tips ensure getting the perfectly cooked pasta every single time. 

Ingredients in this Creamy Mushroom Alfredo Pasta?

As mentioned before, this recipe calls for the most basic and minimal ingredients. Let’s take a look at the key ingredients:

– Mushrooms

Mushroom is one of the star ingredients of this recipe. If you’re not a big fan of mushrooms, this is probably not for you because the piquant flavour of mushroom somewhat dominates all the other flavours in this recipe. However, the earthy tones of mushroom also complement the richness of the cream. You can use any kind of mushroom or a combination of the same. I’ve used button mushrooms for this recipe which is very easily and abundantly available around where I live and would be for most of you as well. 

The big chunks of mushrooms provide a meaty bite to your creamy pasta. One word of caution while cooking the mushrooms – do not salt them right in the beginning and do not touch them too much. These two tips ensure that the mushrooms turn crispy and not soggy. 

– Cream

Fresh cream is the base of this Alfredo sauce. It provides certain richness and thickness to the sauce. Although we know how many Alfredo sauce recipes contain flour and milk- that is not the authentic way to go as that version of the Italian cream sauce was invented somewhere in America and not Italy. Truth is, for the most authentic, flavourful Italian Cream Sauce or Alfredo Sauce all you need is cream, freshly grated parmesan cheese and salt.

– Extra Virgin Olive Oil (EVOO) and Butter

Butter is a key ingredient in any kind of Alfredo sauce. Paring it up with extra virgin olive oil (EVOO) elevates your dish by providing a bitter and fruity flavour to your pasta; increasing the richness of the sauce.

spaghetti mushroom alfredo

Note this recipe down, try it for yourself and you’ll never have to search for another recipe and get the perfect Spaghetti Mushroom Alfredo every single time.

Preparation time – 10 minutes

Cook time – 30 minutes

Serves – 3 people

[ingredients title=”Ingredients”]

  • 150 g spaghetti
  • 2 tbsp extra virgin olive oil
  • 1 tbsp butter
  • 2 tbsp garlic – finely chopped
  • 1 cup onions – finely chopped
  • 200 g button mushrooms, cleaned and cut into half 
  • 1 cup fresh cream
  • 1 cup reserved pasta water
  • ½ cup grated parmesan cheese
  • Salt to taste
  • 1 tsp black pepper powder  [/ingredients]

[directions title=”Directions”]

  1. Bring enough water in a deep pot to a roaring boil.
  2. Season the water with enough salt to make it saline.
  3. Add in the spaghetti and give it a mix.
  4. Boil the pasta according to package instructions and set aside. 
  5. Save some saline pasta water.
  6. In another pan, heat some extra virgin olive oil.
  7. Add in the butter to the pan and let it melt.
  8. Throw in the chopped garlic and sweat it, stirring continuously. Do not brown the garlic.
  9. Add the finely chopped onions to the pan.
  10. Right after adding the onions, add the mushrooms.
  11. Cook till the mushroom turn a nice golden brown and crispy and cook completely and the onions become translucent, stirring occasionally.
  12. Throw in the fresh cream and saline pasta water and give it a good mix.
  13. Bring the sauce to a boil.
  14. Season with some black pepper and give it another good mix.
  15. Add your perfectly cooked spaghetti to the creamy sauce and fold it in.
  16. Adjust the salt at this point if needed.
  17. Add in the grated parmesan and mix it well.
  18. Garnish it with some more parmesan and serve it hot. [/directions]

spaghetti mushroom alfredo

Additional Tips:

As letting the cooked pasta sit out for too long is not advisable, boiling the pasta simultaneously while making the sauce can be a good way to go about it. Since most pasta sauces take about 5 minutes to cook, you should put the pasta to boil slightly before starting up your sauce.

Feel free to reach out for feedback, suggestions or connect with me on Instagram or Facebook. Subscribe to my YouTube channel for all my videos and upcoming recipes.