The Best Rice Kheer

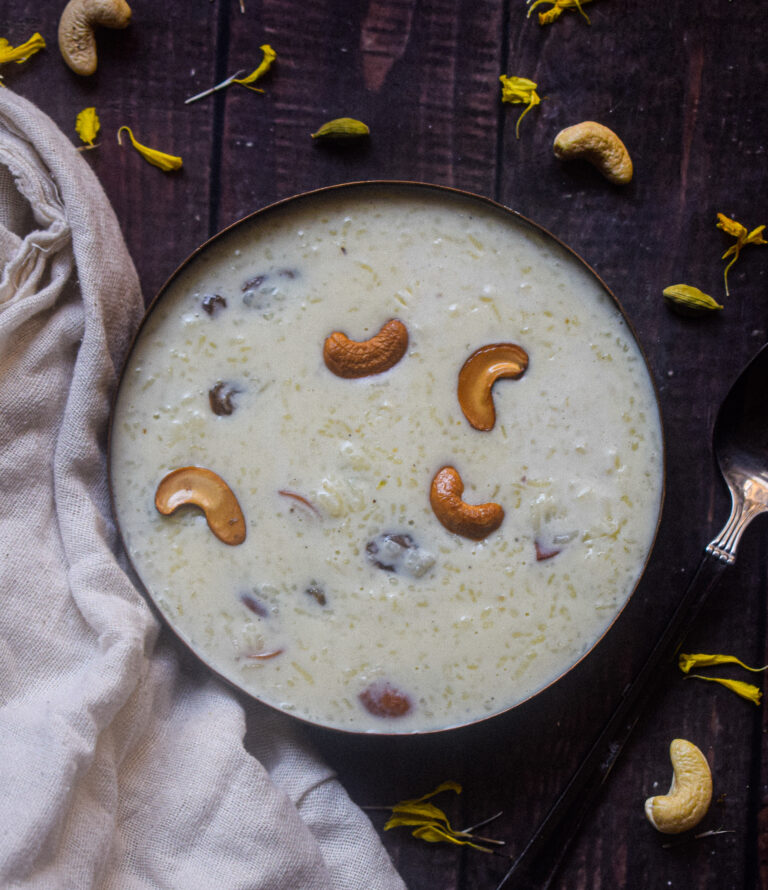
Rice kheer is probably the most common sweet dish in every Indian household. Everyone has their own variations, but nothing can beat the classic one with white rice and full fat milk. As simple as the recipe is, it is also very easy to mess it up. Because more than anything else, the perfect rice kheer is a result of the right proportions of ingredients and a lot of love and patience. There are no shortcuts to making it. And 30-40 minutes of your time.

The secret to a good kheer is the perfect consistency and sweetness. I grew up eating paayokh, which is the rice pudding we make in Assam. It’s usually made with the aromatic joha rice, and can be sweetened with sugar or jaggery. It has taken me years to understand and create the perfect recipe for rice kheer, and this is exactly that. The consistency of this kheer is thick, and keeps getting thicker with time. However, it never reaches the point where it’s lumpy. It always has that extra bit of creaminess and the separation of the milk and rice. The texture remains uniform even if you freeze it. That’s the beauty of this recipe. As for sweetness, it is just the right amount of sweet for a festive occasion. You can always add more or reduce the amount of sugar as per your preference.

rice kheer

How to Make The Perfect Rice Kheer Every Single Time

Though this recipe is extremely simple and minimal, it can only taste so good if you take care of a few technicalities. These are very easy to follow, and important to keep in mind if you want the creamiest and tastiest kheer in your kitchen. Let’s take a look.

1.Get the ratio right

The secret to a great rice kheer is the correct ratio of milk to rice. The amount of rice is very less and we let it slow cook and merge with the reducing milk. If you get the ratio right, there is no stopping you from creating the best rice kheer at home.

2. Use the best ingredients

Like every simple recipe using a handful of ingredients, this rice kheer recipe also calls for sourcing the best ingredients. Make sure you use really good variety of aromatic rice. The grains should be small. I love to use joha rice, which is a local Assamese variety. You can opt for Bengali gobindbhog rice or a very good quality of broken basmati rice. The rice grains need to have their own scent.

This recipe cannot be replaced with low fat milk. The milk has to be full fat to get that perfectly thick and creamy consistency of the rice kheer. Get your hands on the best quality full-fat milk for this recipe.

3. Mind the heat

Cooking the rice kheer at the optimal temperature is very important to get it right. Once the milk comes to a boil, the flame will keep oscillating between low to medium, but it will never touch high. The temperature needs to be checked and regulated throughout the cooking process you would not want the milk to stick or worse, burn at any point. Keeping the flame high will also make the milk evaporate faster than it should, and affect the final consistency of the kheer.

4. Use a heavy bottomed pan

Make sure you use a heavy bottomed pan like a heavy stainless steel pot or kadhai or a cast iron pot. This will ensure that the kheer does not burn and cooks uniformly.

4. Be patient

This is probably the most important virtue to have while making kheer. I know it sounds exaggerated, but it is true! There are no shortcuts to making a good kheer. Trust me, I have tried it over many years. Nothing can match the taste and excellence of slow cooking. So you will have to have patience and give your undivided attention to this recipe for at least 30 minutes. The results will really be worth it, I promise.

rice kheer

rice kheer

Now that you know all the secrets to making the perfect rice kheer, let’s take a look at the recipe.

Preparation time – 15 minutes

Cook time – 30 minutes

Serves – 4

[ingredients title=”Ingredients”]

  • 2 tbsp ghee
  • 15 cashews, separated from the centre
  • 15 soaked raisins
  • 1/4 cup aromatic rice (gobindbhog rice/joha rice/jasmine rice/broken basmati rice)
  • 1 litre full fat milk
  • 1/4 cup sugar
  • 1/4 tsp cardamom powder [/ingredients]

[directions title=”Directions”]

  1. Soak raisins for an hour.
  2. Wash the rice thoroughly under running water. Set them out to dry on a sieve.
  3. Heat ghee in a kadhai. Once it heats up, add the cashews and fry on low flame for a few minutes till they turn golden brown. Set them aside.
  4. Heat milk in a heavy bottomed pan. Let it come to a boil.
  5. Once the milk comes to a boil, add the rice. Keep stirring continuously till milk reduces to half and rice cooks completely. The rice should disintegrate completely when you press it in between your index finger and thumb. This process will take time, so be patient and do not stop stirring. Keep the flame at medium to low.
  6. Once the rice is cooked completely and the milk has reduced by half (or more), add the sugar. The sugar has to be added once the rice is cooked, because the rice won’t cook after the sugar is added.
  7. Stir and cook till you achieve a creamy consistency (see video). The kheer should look slightly runny, yet be creamy. This is because it will keep getting thicker with time.
  8. Turn off the flame and add the fried cashews, soaked raisins and cardamom powder. Give it one last mix.
  9. Serve hot or freeze and serve cold. Enjoy! [/directions]

rice kheer

rice kheer

I hope you try this delicious and fool-proof rice kheer this festive season. If you have any doubts, comments, or feedback, please reach out to me in comments or my social media handles.

Find me on Instagram – www.instagram.com/slurrpilicious

Find me on Facebook – www.facebook.com/slurrpilicious

Find me on Youtube – https://www.youtube.com/channel/UCA-cJoo27OLSCswI4sy6lzA?

Happy cooking!

Creamy Vegan Pumpkin Pasta

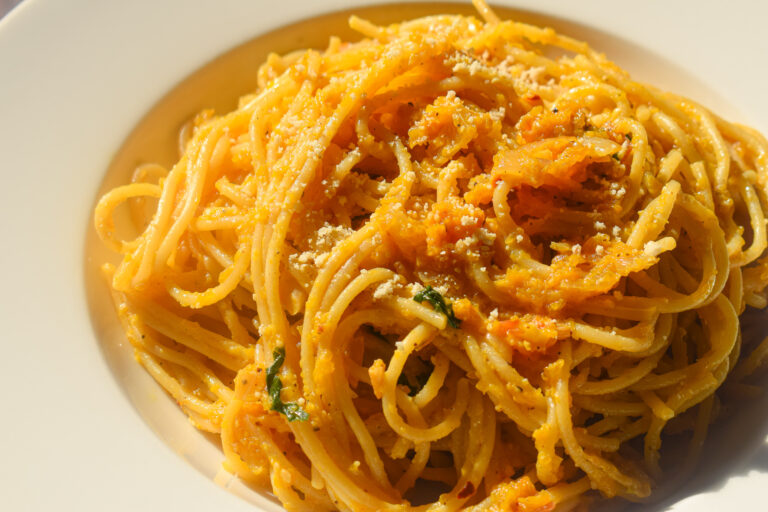
Truth be told, if someone told me that a vegan pumpkin pasta can taste as creamy and delicious as a pasta with butter and cheese, I would have probably ignored it as a ridiculous rumour. But when I tried making it in my own kitchen as an experiment, I was truly bowled over by the results! It did take me a few trials to get the perfect recipe, but I knew from the first attempt that this creamy vegan pumpkin pasta is nothing short of magnificent. It is so easy to make, celebrates the beauty, sweetness, textures and taste of seasonal pumpkin, and is light on the stomach because of the missing dairy elements. If you are vegan or you are looking for vegan pasta recipes to make, you are going to fall in love with this creamy vegan pumpkin pasta recipe.

creamy vegan pumpkin pasta

This vegan pumpkin pasta is better than I imagined. The base is a creamy sauce of roasted pumpkins, onions, garlic and cashew powder. The ingredients are really less as we want the pumpkin to shine. I have roasted the pumpkins in a cast iron skillet. You can also roast them in the oven with some olive oil. This recipe also shows you how you can make your own pumpkin puree and store it to add in cakes, breads, doughs or anything you fancy. This puree is ready to eat before we add it to our pasta sauce.

Making the pumpkin sauce or puree is the most effort you will have to make in this recipe. Because the rest of the steps come together really quick. Make sure you cook your spaghetti right before you start preparing the final recipe. Make the pumpkin puree before you start cooking the spaghetti.

Tips For This Creamy Vegan Pumpkin Pasta

Here are a few tips you should follow to make sure you make that perfect plate of vegan spaghetti for yourself.

  • Cook spaghetti as per package instructions till al dente

For this recipe, we cook the spaghetti first and once it’s almost done. First tip is to make sure you buy good quality spaghetti. I personally love Borges that we get in India (not sponsored) because it really holds its shape and also tastes smooth. Del Monte  and Disano also has some good range of spaghetti that you can try (not sponsored).

The idea is to cook the spaghetti till its al dente, or has that perfect bite. Each brand of pasta has its own cooking instructions, so make sure you follow them when you cook the spaghetti, and you will be good to go.

  • Add salt to pasta water

This little hack will elevate the level of your pasta from average to excellent! There is no bigger heartbreak than biting into pasta that has all the flavours in the sauce, but really a bland bite in those spaghetti strands. Sounds like a nightmare to me! It’s important to add a lot of salt to the water in which you boil the pasta because you do not want your spaghetti to be bland.

In order for the spaghetti strands to absorb the flavour of the salt, it needs to cook in water that is almost as saline as sea water. This is because it does not absorb all of it, but just enough to flavour the spaghetti throughout. Adding salt in the water you boil the spaghetti in is the only time you will flavour the spaghetti so this step cannot be missed.

creamy vegan pumpkin pasta

  • Pasta water makes all the difference

Have you ever wondered how restaurants get that perfect glaze over every strand of spaghetti that you order? While olive oil and butter play a major role, chefs also add a magic potion in the end while tossing the pasta. It’s the reserved pasta water. And because this pasta is vegan and lacks butter, the reserved pasta water is even more crucial.

Reserved pasta water is nothing but the water in which you boil your pasta. This pasta water absorbs a lot of starch from the dry pasta and the addition of salt in it also helps flavour the final pasta sauce. So make sure you save two to three ladles of that starchy, saline and boiling pasta water to add that extra dose of magic to your dish.

  • Source the best quality ingredients

This vegan pasta will taste as good as a non-vegan one only if you use the best ingredients. First up, the pumpkin that you use must be ripe and sweet. This is the season for the best pumpkins in the market which makes fall the best time to make this creamy vegan pasta. Go for a disco pumpkin which is uniformly orange throughout, and mildly sweet. Try to buy a whole and uncut pumpkin so that it’s fresh when you cut through it. Sourcing the best pumpkin will elevate the taste of this vegan pasta. A bad pumpkin will ruin it.

Apart from the pumpkin, make sure you use really good quality extra virgin olive oil in this recipe. The quality of olive oil can also make or break this creamy vegan pasta.

  • Keep flame at medium to low for the sauce

The sauce for this creamy vegan pumpkin pasta pasta is basic and uses just a few ingredients. To get the most out of the sauce, it’s important to cook it at optimal temperatures. The flame should be kept at low before you add the pumpkin puree.  The first step of the sauce is infusing the flavour of garlic into the olive oil. For this, the flame needs to be low and the garlic needs to sizzle at low temperature for 5 to 6 minutes to release its oils into the olive oil. This is a gradual process. The sauce is cooked till it turns a little brown and toasty, without any hint of burn.

creamy vegan pumpkin pasta

Preparation time – 30 minutes

Cook time – 30 minutes

Serves – 5

[ingredients title=”Ingredients”]

For roasting the pumpkin

  • 500 g disco pumpkin, skin removed and cut into 3cm cubes
  • 2 tbsp vegetable oil

For the pasta

  • 250 g dried spaghetti
  • 3 tbsp extra virgin olive oil
  • 2 tbsp finely chopped garlic
  • 1 cup finely chopped onion
  • A handful of fresh Italian basil leaves, chopped
  • Salt to taste
  • 1 tsp chilli flakes (adjust as per taste)
  • 1 tsp freshly ground black pepper powder
  • 3-4 tbsp reserved salty pasta water
  • 3 tbsp cashew powder
  • 1 cup hot water [/ingredients]

[directions title=”Directions”]

  1. Remove the skin of a fresh seasonal pumpkin. Use the best kind which is sweet and bright orange in colour.
  2. Cut the pumpkin into 3 cm cubes.
  3. Heat oil in a skillet (preferably cast iron). Add the pumpkin cubes and roast them till they are brown from both sides and also 80% cooked. This process will easily take at least ten minutes per batch. Do not cover the skillet as it will make the sides of the pumpkin mushy. We need that roasted skin to add more flavour to the puree. You can also roast the pumpkins in an oven.
  4. Once the pumpkins are evenly roasted and soft (not too soft), set them aside and allow them to cool.
  5. Blend the pumpkins with some water till you get a smooth and creamy puree. Set it aside.
  6. Fill a wide pot with water. Let it come to a boil. Add enough salt to it so that it tastes like how you would want your soup to taste. Add the spaghetti and cook as per package instructions.
  7. Save two to three ladles of the pasta water.
  8. Once the pasta is almost done, cook the sauce simultaneously.
  9. Heat olive oil in a skillet. Keep the flame at low. Before it heats up, add the finely chopped garlic. Give it a light mix, allowing the garlic to sweat. The oil should get infused with the aroma and flavours of the garlic. Let it stay like that for two to three minutes. Keep the flame at low.
  10. Add the chopped onions and mix for three to four minutes till they brown and become translucent.
  11. Time to add the pumpkin puree along with some water. Cook the puree for another 3-4 minutes.
  12. Season with salt, black pepper powder and chilli flakes. Mix well.
  13. Once the pumpkin puree is cooked with the rest of the ingredients, add fresh basil and cashew powder. Cashew powder is nothing but cashews pulsed to a powder. You can do this in a mixer.
  14. Drain the pasta and add it to the skillet. Add a ladle of the reserved pasta water (or as required). Keep the flame at low.
  15. Give the pasta a good toss. Garnish with fresh more Italian basil leaves.
  16. Serve on a plate. Garnish with some cashew powder (optional). Serve immediately. [/directions]

creamy vegan pumpkin pasta

I hope you try this creamy vegan pumpkin pasta. If you have any doubts, comments, or feedback, please reach out to me in comments or my social media handles.

Find me on Instagram – www.instagram.com/slurrpilicious

Find me on Facebook – www.facebook.com/slurrpilicious

Find me on Youtube – https://www.youtube.com/channel/UCA-cJoo27OLSCswI4sy6lzA?

Happy cooking!


Vegan Dhaba Style Arhar Dal

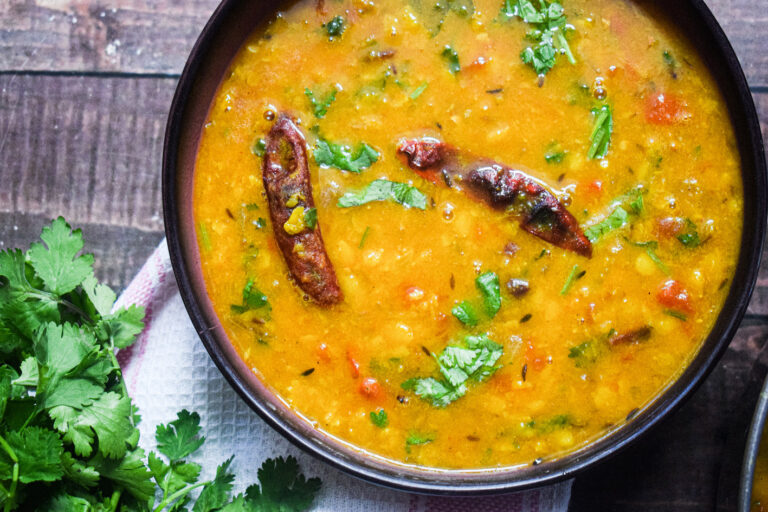
No matter how much I crave for other cuisines, my comfort food will always be a hot bowl of dal and rice. Rice and dal is such a hearty and wholesome combination that it can never go out of style. And this dhaba style arhar dal is my absolute favourite. It tastes like those delicious dals that you get in dhabas but requires very less effort. It is a very simple preparation and you only need a handful of Indian pantry essentials to make this. And once you do, you will never stop!

vegan dhaba style arhar dal

Arhar dal or tool dal (split pigeon peas) is a very common and popular pulse in Indian households. It is made almost every other day and mostly paired with rice or roti. There are several ways you can make toor dal, but this recipe tries to emulate the quintessential dhaba taste. While the dhaba style arhar dal is richer and usually has a tempering of ghee, this dal is entirely vegan and skips on the tempering.

vegan dhaba style arhar dal

vegan dhaba style arhar dal

Let’s dive straight into the ingredients and procedure for the recipe.

Preparation time – 30 minutes

Cook time – 30 minutes

Serves – 4 people

[ingredients title=”Ingredients”]

  • 200 g arhar/toor dal (1 cup approx)
  • 900 ml water (for boiling the dal)
  • Salt to taste
  • 4 g turmeric powder (1 tsp approx)
  • 15 ml mustard oil (1 tbsp approx)
  • 15 g cumin seeds (1 tbsp approx)
  • 2 dried red chillies
  • 1/2 tsp asafoetida (hing)
  • 200 g finely chopped onions (1 cup approx)
  • 15 g ginger-garlic paste (1 tbsp approx)
  • 120 g tomatoes, finely chopped
  • 4 g cumin powder (1 tsp approx)
  • 4 g coriander powder (1 tsp approx)
  • 4 g red Kashmiri chilli powder (1 tsp approx)
  • 100 ml hot water (for the curry)
  • 1/4 cup fresh coriander, finely chopped [/ingredients]

[directions title=”Directions”]

  1. Throughly wash the arhar dal. Soak it in water for at least 30 minutes.
  2. Pressure cook with 900 ml water, salt and turmeric powder for four whistles (or till tender).
  3. Heat oil in a kadhai or skillet. Let it smoke gently. Reduce the flame and temper with cumin seeds, dried red chillies and hing. Stir for ten seconds.
  4. Add the finely chopped onions and increase the flame to medium. Stir till the tomatoes start to turn translucent and eventually turn brown. The process will take a few minutes, so be patient.
  5. Once the onions are brown and cooked, add the fresh ginger-garlic paste. Stir this with the tomatoes till the raw aroma disappears.
  6. Add the finely chopped tomatoes and cook till they melt and assimilate with the tomatoes.
  7. Season with cumin powder, coriander powder, red chilli powder and salt. Mix well till the tomatoes and spices are well cooked. Add some fresh coriander leaves.
  8. Add 100 ml hot water.
  9. Cover and cook the masala on low flame for five minutes.
  10. Uncover and add the boiled dal. Mix well and let it come to an aggressive boil.
  11. Boil till you reach your desired consistency.
  12. Garnish with fresh coriander leaves. Serve hot with rice, jeera rice or roti. [/directions]

I hope you try this easy dhaba style arhar dal super soon. If you have any doubts, comments, or feedback, please reach out to me in comments or my social media handles.

Find me on Instagram – www.instagram.com/slurrpilicious

Find me on Facebook – www.facebook.com/slurrpilicious

Find me on Youtube – https://www.youtube.com/channel/UCA-cJoo27OLSCswI4sy6lzA?

Happy cooking!

Mushroom Pepper Fry

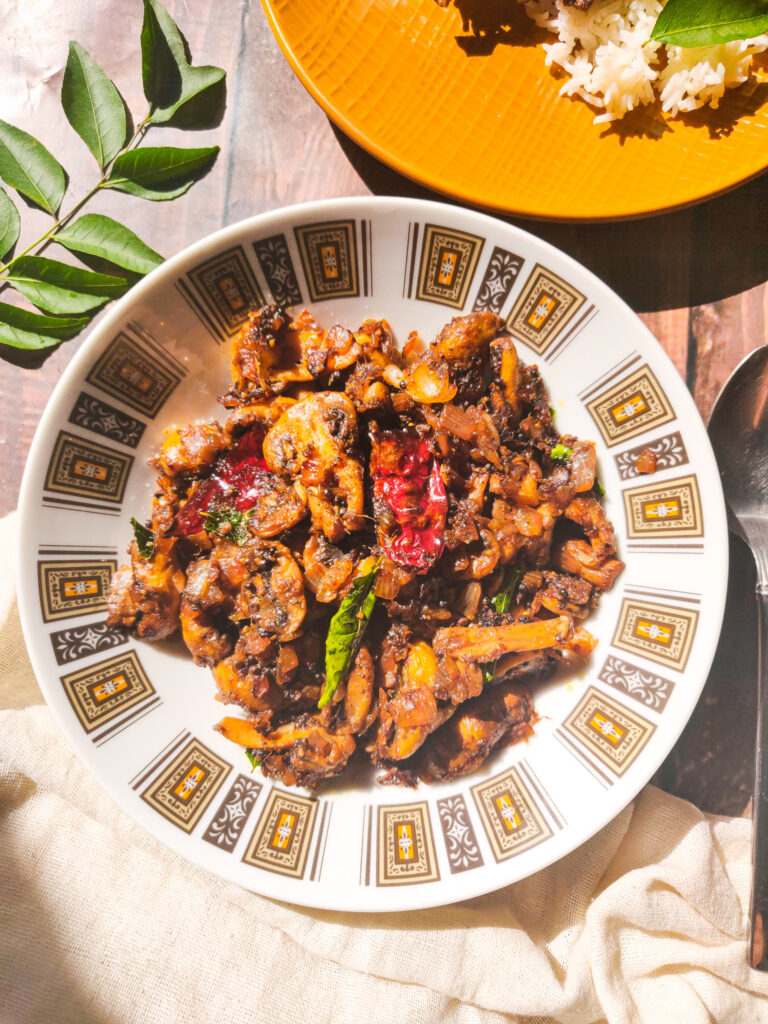
Mushroom Pepper Fry is a recipe that I keep going back to because of its simplicity and perfection when it comes to flavours. This mushroom pepper fry recipe uses just a handful of fresh ingredients and the results are phenomenal! You will get a hint of Kerala food as the spices and way of cooking is similar. And mopping these juicy mushrooms with some crispy dosa, appam or some malabar porottas will make a delicious vegetarian feast right at the comfort of your home.

mushroom pepper fry

mushroom pepper fry

This mushroom pepper fry is a vegan recipe. It tastes incredible. The deliciousness of this recipe has only one reason – the use of fresh spices. For instance, the black pepper powder and fennel powder that you use in this recipe has to be absolutely fresh. Take some seeds, slightly roast them on a pan and grind them as a part of your preparation. The only way to ensure a simple recipe tastes good is by ensuring you have the freshest and best quality ingredients possible. And this mushroom pepper fry calls for it.

Whoever has made this recipe has loved it. I posted the video two weeks ago on my YouTube channel and I got so many messages on my Instagram saying they loved the recipe, the ease of it and how good it tasted. This mushroom pepper fry is one of my favourite recipes and if you are a mushroom lover, you must try this spicy and desi version. I am sure you will fall in love with it.

mushroom pepper fry

mushroom pepper fry

Let’s take a look at the recipe:

Preparation time – 15 minutes

Cook time – 20 minutes

Serves – 2-3 people

[ingredients title=”Ingredients”]

  • 200 g button mushrooms, each cut in half
  • 3 tbsp mustard oil (can be substituted with any oil of choice)
  • 1/2 tsp mustard seeds
  • 1 dried red chilli
  • 1 cup finely chopped onions
  • 7-8 fresh curry leaves
  • 1 tsp fresh garlic paste
  • 1 tsp fresh ginger paste
  • 1 tbsp freshly ground black pepper powder
  • 1 tsp fennel powder
  • 1/2 tsp cumin powder
  • Salt to taste
  • 1 tbsp lime juice [/ingredients]

[directions title=”Directions”]

  1. Wash and clean the button mushrooms. Pat dry them with a paper towel so that there is no excess water in them. Cut each mushroom into half.
  2. Dry roast some black pepper corns in a pan till they turn aromatic. Cool them down and grind them in a mortar pestle or a grinder. It’s essential that we use fresh black pepper powder in this recipe.
  3. Follow the same procedure for the fennel and cumin powder. Dry roast fennel seeds and cumin seeds in a pan till they turn aromatic. Once cool, grind them into a powder.
  4. Heat oil in a skillet or pan. Once the oil is hot, add some mustard seeds and allow them to splutter.
  5. Temper with one dried red chilli.
  6. Add the onions and stir till they turn translucent and start to brown. Add a few curry leaves.
  7. Once the onions brown, add the fresh ginger and garlic paste. Stir till the raw aroma of the ginger and garlic completely fades.
  8. Add the chopped mushrooms and let them sit on the pan for three minutes. This will help them brown evenly and not become soggy.
  9. Stir the mushrooms with the rest of the spices till they start to shrink and change colour. Add more fresh curry leaves for flavour.
  10. Season with freshly ground black pepper powder, fennel powder and salt.
  11. Once the mushrooms are thoroughly cooked, add salt to taste.
  12. Pour the lime juice and mix well. The lime juice will help deglaze the pan.
  13. Serve hot with dosa, appam or malabar porotta. [/directions]

mushroom pepper fry

mushroom pepper fry

This mushroom pepper fry is perfect for a busy day. It tastes authentic and the flavours are just on point. The fresh fennel, black pepper and cumin powder just elevate the flavour quotient to a whole new level.

I hope you try out this easy and delicious mushroom pepper fry soon.If you do, let me know how it turned out for you.

If you have any questions, suggestions or feedback, please leave me a comment here. Or connect with me Instagram, Facebook or YouTube.

Happy cooking!

Chilli Cheese Mushroom Toast

An easy to make, filling and delicious snacking option, this chilli mushroom toast recipe is addictive! It requires minimal ingredients and a good quality loaf of bread is a must! The cheese on top balances out all the flavours and adds that extra gooeyness. Mushrooms are cooked till they absorb all the flavours of the sauces, aromatics and spices. The addition of green capsicum adds that extra crunch as well as pop of green. It’s really one of my favourite recipes and I love to include this in my lazy brunch options on weekends.

This chilli mushroom toast also makes for a great appetiser option if you are planning to host soon. You can also put this delicious filling on small bruschettas and serve them to your guests. They are going to love it!

chilli cheese mushroom toast

The chilli element of these toasts are a combination of red chilli sauce and chilli flakes. The quantity of these two ingredients can be adjusted as per your preference. If you would like to make it extra hot, please add more.

chilli cheese mushroom toast

Here’s the recipe:

Preparation time – 10 minutes

Cook time – 20 minutes

[ingredients title=”Ingredients”]

  • 2 tbsp oil
  • A loaf of bread
  • 5 garlic cloves, finely chopped
  • 1 medium onion, finely chopped
  • Salt to taste
  • 1/2 tsp black pepper powder
  • 1 large tomato, finely chopped
  • 100 g button mushroom, finely chopped
  • 1/2 capsicum, finely chopped
  • 1 tbsp hot sauce/Schezwan sauce/red chilli sauce
  • 1 tsp Oregano
  • 1 tsp chilli flakes (adjust as per liking)
  • Melted butter (to layer the bread)
  • 1 cup Grated mozzarella cheese (adjust as per your liking) [/ingredients]

[directions title=”Directions”]

  1. Heat oil in a pan. Add the finely chopped garlic and stir for a minute on low flame. The garlic should release its aroma and flavour the oil.
  2. Add the finely chopped onions and stir for a few minutes till they turn brown and translucent.
  3. Once the onions are have softened, add the tomatoes and cook for another 2-3 minutes till the tomatoes melt. Add a splash of hot water to prevent it from sticking.
  4. Season with salt and black pepper powder. Mix well.
  5. Add the chopped mushrooms and chopped capsicum. Mix and cook for 3-4 minutes.
  6. For the heat, add a tablespoon of any chilli sauce. I have used a red chilli sauce here, also known as hot sauce.
  7. Season with some Oregano and chilli flakes. Mix everything well together.
  8. Cut the loaf of bread into bruschetta slices. Melt some butter and apply on the bread with a brush (see video for reference).
  9. Put a few spoons of the mushroom filling on top of the bread, followed by a generous topping of grated cheese.
  10. Toast it in the oven for 10 minutes till its hot and crunchy. Enjoy while its hot. [/directions]

chilli cheese mushroom toast

chilli cheese mushroom toast

Every bite of this cheesy, crunchy and garlicky chilli cheese mushroom toast is so delicious!

I hope you try out this delicious recipe. If you do, let me know how it turned out for you. If you have any questions, suggestions or feedback, please leave me a comment here. Or connect with me Instagram, Facebook or YouTube.

Happy toasting!


Creamy Pesto Pasta

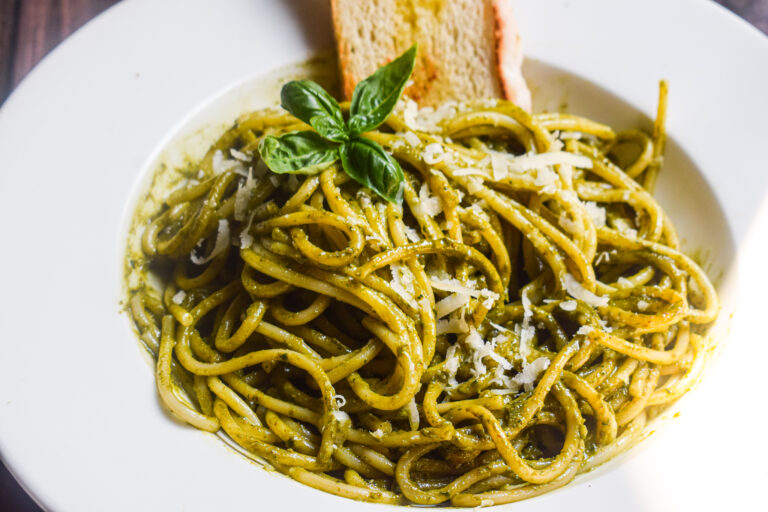
If there is one kind of pasta I truly love, can eat everyday and basically never get bored of, it’s this creamy pesto pasta. I love it so much that I started growing Italian basil in my garden so that I never run out of basil. And Italian basil grows like a weed so your girl has been very happy! And I am finally sharing the recipe.

This pasta requires the least amount of cooking. You just have to boil your spaghetti and that’s it! The rest of the magic happens in the blender and the result is one of the most delicious creamy pesto pasta that oozes comfort and happiness. This vibrant pasta recipe is made with my in-house pesto sauce that is EXTRA creamy. This pesto sauce has the most silken texture and it is super rich and indulgent. Also this pesto sauce is multi-purpose. You can lather it up on your sandwiches, enjoy it as a luxurious dip or add it to anything you’re eating (I love it on my morning omelette). This pesto stays well for upto three days so make sure you make extra.

creamy pesto pasta

There are a plethora of reasons why this recipe is my ultimate favourite. It’s easy, involves no cooking (except boiling the pasta) and the flavours always make my heart skip a beat. I always eat this pasta with my eyes closed, because I’m too busy relishing the beautiful flavours once I put it in my mouth. I might have also made some inappropriate noises🤤 It’s just so good! This creamy pesto pasta is one of the best examples of how fascinating minimalistic cooking can be. Source the best ingredients and have a remarkable meal in 20 minutes. If this is not a good life, I don’t know what is.

creamy pesto pasta

creamy pesto pasta

Pesto refers to any sauce with a nut and a herb. So pesto can be any combination of a really flavourful herb and a nut that goes well with it. The most common kind of pesto is Italian basil with pine nuts, but you can try and experiment with any combination. I particularly love arugula or rocket leaves as the base in my pesto, and it tastes absolutely stunning. This creamy pesto sauce is a take on the most classic combination of Italian basil and pine nuts. Because I am in India and pine nuts are not local to us at all, I have used toasted almonds. You can also use toasted walnuts if that’s available with you.

creamy pesto pasta

The speciality of this creamy pesto pasta is that it is extra creamy! This is because of the ratio of basil to almonds and cheese. Because this pesto sauce just has a few ingredients, it is of utmost importance that you source the best quality possible. Make sure you use very good quality extra virgin olive oil, Parmesan cheese and of course, fresh Italian basil. The rest of the ingredients is just salt, almonds and garlic, which can be easily found in any pantry.

creamy pesto pasta

creamy pesto pasta

So go ahead, make this creamy pesto pasta in your kitchen and fall in love with minimalistic cooking and smashing flavours!

Preparation time – 10 minutes

Cook time – 20 minutes

Serves – 2 to 3 people

[ingredients title=”Ingredients”]

  • 200 g dried spaghetti
  • 3 cups fresh Italian basil
  • 1/4 cup almonds
  • 1/2 cup Grated parmesan cheese
  • 2 small garlic cloves/1 large garlic clove
  • 3-4 tbsp reserved pasta water
  • 1/2 cup Extra Virgin Olive Oil
  • 1/2 tsp salt [/ingredients]

[directions title=”Directions”]

  1. Heat water in a large mouthed pot. Let it come to a boil. Add enough salt to it to make it saline.
  2. Cook the spaghetti in the boiling salty water till done. Start preparing the sauce while the spaghetti cooks.
  3. Toast the almonds in a pan till it turns nice and crispy. Set aside and allow too cook completely.
  4. Pulse garlic, almonds, parmesan cheese and olive oil together.
  5. Add the fresh basil and salt and blend to a creamy and smooth paste.
  6. Add the cooked spaghetti on a plate or bowl. Add pesto sauce as per your liking and mix well. Add more olive oil if you prefer the pasta to be more glazy.
  7. Garnish with some grated Parmesan cheese and enjoy while hot. [/directions]

creamy pesto pasta

creamy pesto pasta

Note – To store this pesto sauce, add a layer of olive oil on top to help it retain its colour.

Every bite of this creamy pesto pasta will knock your socks off!  You can store this pesto for 2-3 days.

I hope you try out this delicious pesto pasta recipe. If you do, let me know how it turned out for you. If you have any questions, suggestions or feedback, please leave me a comment here. Or connect with me Instagram, Facebook or YouTube.

Happy hosting!


Creamy Mushroom Omelette

This week’s recipe is a delicious breakfast or brunch option –  a creamy mushroom omelette. Super simple, minimal and easy to pull off, but so gourmet! This is the kind of meal that will keep you full and satiated for hours! The omelette is super simple and the creamy mushroom filling is to die for! So if you are looking to jazz up a boring day with an easy, exquisite and pretty looking brunch, this is the recipe you need.

There are two main steps to this recipe. The first is to make the filling of the omelette which is where we prepare the delicious and creamy mix of mushrooms with garlic, butter, cream, salt and pepper. It’s a very basic but solid preparation! Once the mushrooms are ready, we set them aside and move on to the omelette. And the final step is merging the two together.

creamy mushroom omelette

Let’s take a look at the ingredients and procedure to make this delicious recipe – Creamy Mushroom Omelette.

Preparation time – 10 minutes

Cook time – 20 minutes

Serves – 2 people

[ingredients title=”Ingredients”]

  • 200 g button mushrooms, sliced
  • 4 eggs
  • 3 tbsp oil
  • 1 tsp butter
  • 1/2 cup finely chopped onions
  • 1 tbsp finely chopped garlic
  • 1/2 tsp black pepper powder
  • Salt to taste
  • 3 tbsp cream
  • 1/2 cup hot water/vegetable stock/chicken stock
  • Fresh coriander for garnish
  • 2 tbsp oil (for the omelette) [/ingredients]

[directions title=”Directions”]

  1. Heat oil and butter in a skillet. Add the onions and stir them for about a minute.
  2. Add the garlic and stir for 3-4 minutes till the onions turn translucent and a beautiful brown on the sides.
  3. Slice the button mushrooms. Add them to the skillet and let them sit for 3-4 minutes. This trick helps the mushrooms to brown beautifully.
  4. Stir the mushrooms well on medium heat for 4-5 minutes till they cook.
  5. Season with black pepper powder and salt only once the mushrooms are cooked. Adding salt before cooking the mushrooms will make them release all the water way in advance and make them soggy.
  6. Pour the cream on top and mix well on low heat. Add some water or stock to help make the creamy mushroom sauce slightly thick and glazy. Do not over cook. Set aside.
  7. Break four eggs into a bowl. Season with salt and some black pepper powder. Mix well.
  8. Heat oil or butter in a tawa or pan. Distribute the oil evenly across the pan. Pour the beaten eggs on top and distribute it. Keep the flame at medium.
  9. Once the egg starts to cook and holds shape, add the creamy mushroom mix in the middle and spread it out on one side of the omelette.
  10. Wrap the omelette from the other side (as shown in the video above).
  11. Gently transfer the omelette onto a plate without breaking it.
  12. Garnish with fresh coriander/herb of your choice. Enjoy! [/directions]

creamy mushroom omelette

creamy mushroom omelette

Every bite of this creamy mushroom omelette will instantly comfort you! I hope you try out this recipe soon.If you do, let me know how it turned out for you.

If you have any questions, suggestions or feedback, please leave me a comment here. Or connect with me Instagram, Facebook or YouTube.

Happy cooking!

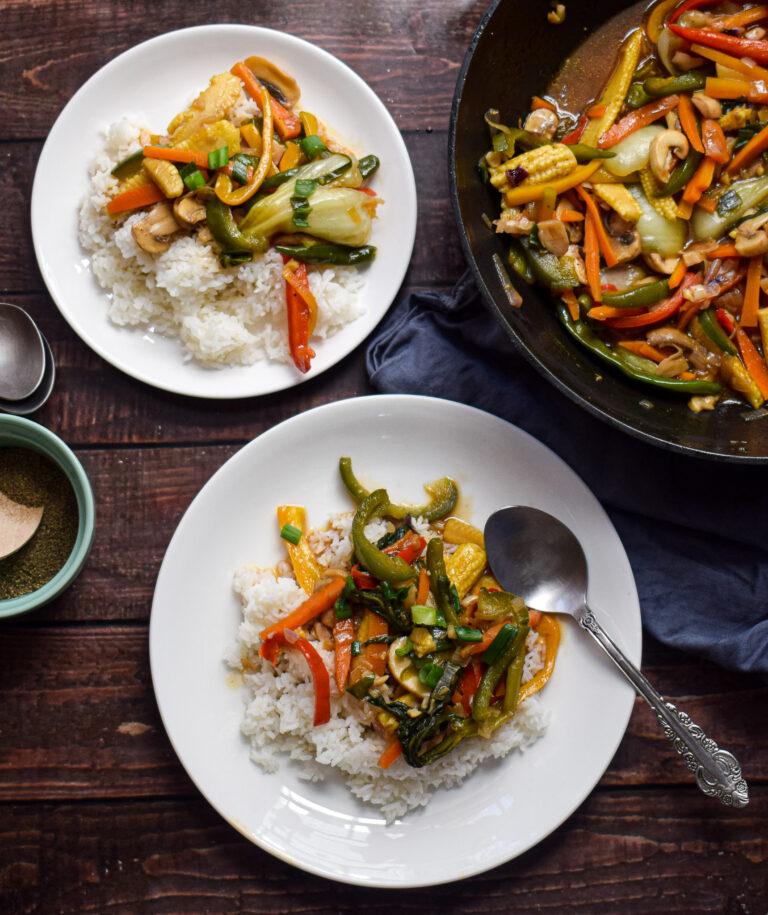
Asian Style Vegetables in Oyster Sauce

I love eating my vegetables and here is a treasured way to do that. An easy, simple and absolutely stunning preparation of vegetables in oyster sauce, this recipe is a weeknight favourite. Pair it up with some jasmine rice and you will have a wholesome, healthy and luscious meal in 30 minutes cook time.

vegetables in oyster sauce

The beauty of this recipe lies in its innate simplicity. It just involves cutting up those colourful and nutritious vegetables, mixing up some basic Asian sauces and bringing it all together in a wok. There is no secret ingredient, technique or trick. Anybody can pull this off. I have had people tell me in the lockdowns how this recipe helped them eat their vegetables when they were too scared to consume meat. This vegetables in Oyster sauce preparation is an easy hack to relish vegetables in a beautiful stock that is healthy and nutritious.

vegetables in oyster sauce

vegetables in oyster sauce

Since the vegetables are the key ingredients in this preparation, I have chosen naturally sweet vegetables that can add a lot of crunch and flavour to the dish. The red and yellow bell peppers add colour and sweetness, the baby corn and carrots add their own crunch and sweet flavour and the mushrooms add an earthy flavour. The sauces are soy and Oyster sauce. If you’d like to make this vegan, you can opt for vegan variations of Oyster sauce or use any other Asian sauce like Schezwan or Red Chilli. This recipe is highly customisable basis your preferences.

vegetables in hot garlic sauce

Let’s take a look at the ingredients and procedure to make this delicious recipe – Vegetables in Oyster Sauce :

Preparation time – 20 minutes

Cook time – 30 minutes

Serves – 4 people

[ingredients title=”Ingredients”]


  • 30 ml vegetable oil (2 tbsp approx.)
  • 15 ml sesame oil (1 tbsp approx.)
  • 15 g finely chopped garlic (1 tbsp approx.)
  • 10 finely chopped ginger (3/4 tbsp approx.)
  • 80 g finely chopped onions (2/3 cup approx.)
  • 110 g sliced carrots
  • Red bell pepper, sliced – 100g
  • Green capsicum, sliced – 100g
  • Yellow bell pepper, sliced – 100g
  • Baby corn, sliced – 100g
  • Button mushroom – 100g
  • Bokchoy – 150g
  • 4 whole green chillies
  • Salt to taste
  • 12g black pepper powder
  • Oyster sauce – 15 ml(1 tbsp approx.)
  • Red chilli sauce – 15 ml (1 tbsp approx.)
  • Dark soy sauce – 30 ml (2 tbsp approx.)
  • Balsamic vinegar – 15 ml (1 tbsp approx.) (Substitute – while vinegar)
  • 1 tbsp cornflour
  • 1 cup hot water
  • Chopped spring onion greens for garnish [/ingredients]

[directions title=”Directions”]

  1. Chop all the vegetables and keep ready.
  2. Heat oil in a hot wok.
  3. Toss in the ginger and garlic and stir on high heat for ten seconds.
  4. Add the chopped onions and stir till they turn translucent. Do not brown.
  5. Once the onions are translucent, add the carrots, green capsicum, red bell pepper, yellow bell pepper and baby corn. Stir all this on high heat for 2-3 minutes.
  6. Add the mushrooms, bokchoy and whole green chillies and stir them into the mix.
  7. Season with salt and black pepper powder.
  8. Pour the Oyster sauce, soy sauce, red chilli sauce and vinegar. Mix well and let it all assimilate into the vegetable mix.
  9. Mix 1 tbsp cornflour in one cup hot water. Add this to the gravy and stir well.
  10.  Boil the mixture till you get your desired consistency.
  11. Garnish with fresh spring onions greens.
  12. Serve hot over rice. [/directions]

vegetables in oyster sauce

vegetables in oyster sauce

vegetables in oyster sauce

Every bite of this delicious vegetables in Oyster sauce will instantly comfort you! I hope you try out this recipe soon.If you do, let me know how it turned out for you.

If you have any questions, suggestions or feedback, please leave me a comment here. Or connect with me Instagram, Facebook or YouTube.

Happy cooking!

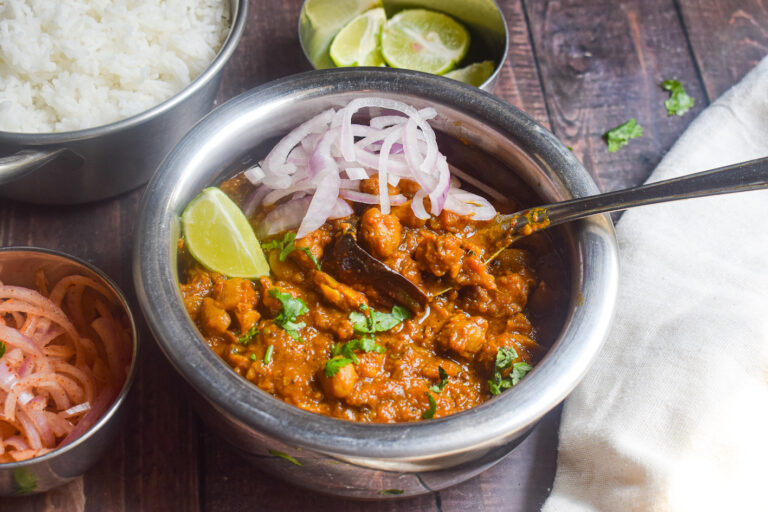
Pressure Cooker Chana Masala

Here’s a pressure cooker chana masala recipe that is full-proof, easy and insanely delicious! It all comes together in one pot, i.e. the pressure cooker. And that tempering in the end elevates the recipe to another new level, so do not skip on the tempering! This pressure cooker chana masala recipe does not require you to boil the chickpeas separately and add it to the curry. Instead, we make the masala or the base of the curry in the pressure cooker, add the soaked chickpeas to it and let it whistle till it’s soft and absorbs all the flavours.

pressure cooker chana masala

pressure cooker chana masala

While this version of chana masala is very easy to pull off, it does come with a tiny handbook of tips and tricks. For instance, the beautiful colour of this chana masala is not because of the addition of any colours or tea leaves. It’s just a method of cooking that I learned from my grandmother-in-law. It literally opened my eyes to a technique of cooking that I knew, but never really paid attention to! Read on to know what that trick is. Besides the colour, there are also a tons of tips that I will share on the timing of cooking, the temperatures to cook at, and other little nuggets of information that you can use to elevate your chana masala to a level of utmost deliciousness. Let’s begin.

Tips to Make the Perfect Chana Masala

Colour

Most of the chana masalas in restaurants have a deep brown colour that gets us drooling at the very first sight. For the longest time, I thought that brown colour comes from soaking the chickpeas in tea bags. While that is the case and I do have a recipe with the same technique, it’s not a necessary thing to do to get the deep brown colour. In fact, you do not need anything other than the normal ingredients to get it brown colour! The trick lies in the way you cook your onions. Yes, you read that right.

pressure cooker chana masala

The method you use to fry the onions can make or break your chana masala. The trick is to have them finely chopped and cook them in medium flame till they are completely brown. This is a slightly time consuming process and you will have to spend anywhere between ten to fifteen minutes to achieve this stage. But the effort will be so worth it because of the results you’ll get. So have a little bit of patience while you deal with your onions and see how it gives a sensational colour to your final chana masala.

Timing

To get the perfect chana masala that tastes outstanding, it is important to know the timing of adding ingredients, and the duration of their cooking. I have already explained the timing for the onions. But we also add a lot of other ingredients to make the base of the curry. A crucial ingredient here is the fresh tomato puree. Because the puree is made from fresh tomatoes, it is raw and needs its own time to cook. This makes it extremely crucial for us to cook it to perfection before we add the chickpeas to it.

pressure cooker chana masala

How do we know if the tomatoes are cooked? When the oil starts to release from the edges of the masala pasta, the tomatoes turn into a thick base and there is no aroma of anything raw in the air. When you achieve these three outcomes, you know your tomatoes are ready.

Chickpeas

For this particular version of chana masala, we only have to soak the chickpeas overnight. There is no need to boil them separately and add them to the masala base. Everything happens in one pot, in this case – the pressure cooker. We cook the chickpeas for a long time on medium flame in the pressure cooker and the whistles do their own magic. What we end up getting is a scrumptious curry along with the softest chickpeas that absorb all the flavours of the ingredients.

Tempering

Tempering is very essential in this chana masala recipe. Without the tempering, the recipe will be incomplete. It is the tempering in the end that makes this chana masala the best version you will ever make! So make sure you do not skip on this delicious tadka!

pressure cooker chana masala

Now that you know the most important aspects of nailing this pressure cooker chana masala, let’s dive straight into the ingredients and procedure for the recipe.

Preparation time – 20 minutes

Cook time – 40 minutes

Serves – 5 people

[ingredients title=”Ingredients”]

  • 1 cup chickpeas, soaked overnight
  • 1/4 cup mustard oil
  • 1 1/2 cups finely chopped onions
  • 1/4 tsp asafoetida
  • 1/2 tsp carrom seeds
  • 1 tsp cumin seeds
  • 2 cardamoms
  • 1 inch cinnamon stick
  • 2 cloves
  • 1 tsp cumin powder
  • 2 tsp garlic paste
  • 1 tbsp ginger paste
  • Salt to taste
  •  1/2 tsp turmeric powder
  • 1 tsp coriander powder
  • 1/2 tsp Kashmiri red chilli powder
  • 1 1/2 cups fresh tomato puree
  • 4 cups hot water
  • 1/2 tsp raw mango powder
  • 2 tbsp Kasuri methi (dried fenugreek leaves)
  • 1/2 tsp garam masala

For the tempering:

  • 2 tbsp ghee
  • 3 dried red chillies
  • 1 tsp cumin seeds
  • 10-12 strips of julienne ginger
  • 1/4 tsp Kashmiri red chilli powder [/ingredients]

[directions title=”Directions”]

  1. Soak the chickpeas overnight in room temperature water. Drain, rinse and set aside.
  2. Heat oil in a pressure cooker. Once the oil starts to smoke gently, turn the heat to low. Temper with cumin seeds, carrom seeds, asafoetida, cardamom, clove and cinnamon stick. Give it a good mix.
  3. Add the onions and fry on medium heat till they transform from a translucent colour to a deep brown colour. This step is very important and can take anywhere between 10-15 minutes.
  4. The aim is to allow the onions to brown without burning them. This step will help us achieve a deep brown colour in the final curry.
  5. Once the onions are deep brown, add the ginger and garlic paste. Stir till the raw aroma disappears. Do not burn and keep a check on the flame.
  6. Season with salt, turmeric powder, cumin powder, coriander powder, Kashmiri red chilli powder and raw mango powder.
  7. Cook the masalas well.
  8. Pour the fresh tomato puree into the masala and stir well. Cook this for another 8-10 minutes till the rawness of the tomatoes is gone and oil starts to release from the sides. Add a splash of water if necessary.
  9. Add the soaked chickpeas to this spice base and coat them well.
  10. Pour 4 cups of hot water and mix.
  11. Season with some Kasuri methi and garam masala.
  12. Close the lid of the pressure cooker and allow one whistle on high flame. Turn the flame to medium at cook the chickpeas for 20 minutes. The number of whistles will vary according to the pressure cooker you’re using. 20 minutes is a good time to ensure the chickpeas are soft.
  13. Once done, let the pressure cooker release its steam automatically. Prepare the tadka or the tempering only once you open the lid of the cooled down cooker.
  14. For the tempering, heat ghee in a tadka pan. Once the ghee smokes up, turn off the flame and add the dried red chillies, cumin seeds, julienne ginger and Kashmiri red chilli powder. Give it a quick mix with a spoon and immediately add it to the chana masala. Mix well and we are done!
  15. Serve the chana masala with some onions, rice, puris, parathas or bhaturas! Enjoy! [/directions]

pressure cooker chana masala

pressure cooker chana masala

It’s almost unbelievable how good this pressure cooker chana masala tastes. It is a recipe I am definitely proud of and I want you to try it at-least once. Trust me, you will not be able to stop eating this!

I hope you try this delicious pressure cooker chana masala super soon. If you have any doubts, comments, or feedback, please reach out to me in comments or my social media handles.

Find me on Instagram – www.instagram.com/slurrpilicious

Find me on Facebook – www.facebook.com/slurrpilicious

Find me on Youtube – https://www.youtube.com/channel/UCA-cJoo27OLSCswI4sy6lzA?

Happy cooking!


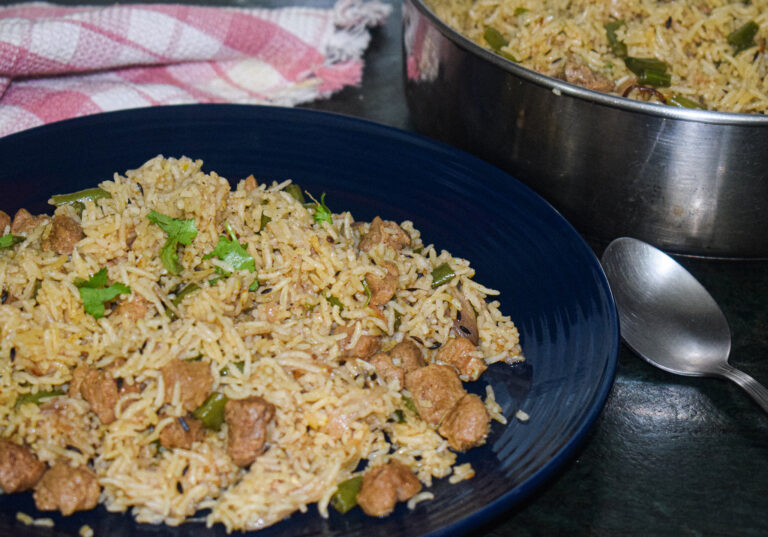
Soya Pulao

This soya pulao is a delicious and easy way to make dinner in bulk and store it for the next day. I love such one-pot rice recipes and this recipe was a result of the quarantine experience, when we were at home all the time and had no option to order in food. Top that up with work from home! It was a really stressful time and such one-pot meals really saved me and my family.

This soya pulao recipe is easy, delicious and can be customised as per choice. I loved adding green beans to it, and you can go ahead and load it with more vegetables of your choice.

soya pulao

Me and my family have been eating this soya pulao a lot lately and it has been such a saviour during the lockdown. Minimal ingredients, easy process and a big batch of food – pulao’s always make for a smart meal option for me. I hope this inspires you and helps you cook something delicious for your family. Stay safe and stay strong.

Making the perfectly fluffy rice

Soaking

For this pulao, find yourself the best quality long grained basmati rice. Wash the rice thoroughly with water till its clear. Next, soak it for exactly 30 minutes in room temperature water. After that, strain the water and keep the rice as dry as possible. I used a sieve to release the water and keep it undisturbed. Do not soak for more than 30 minutes as the rice will become too wet and will cook very fast, and end up sticking to each other. Soaking for longer duration might also break the rice. Soaking is an essential pre-requisite to get the perfectly fluffy rice that you see in this egg pulao.

Correct water quantities

Next is the perfect amount of water for the rice to cook. I have added the exact measurements for this recipe, but the usual and easy rule to follow is – For every cup of rice that you use, use half cup more water than that. For example, if you use 1 cup of rice, use 1.5 cups of water. If you use 2 cups of rice, use 2.5 cups of water. And the water should always be hot if you’re making the rice in a pot. Otherwise, the temperature difference might ruin the rice. This rule applies only if you soak the rice for 30 minutes before cooking it.

Low flame and rest

Lastly, perfectly fluffy rice is always cooked in low flame. If you’re making rice in a pot, make sure you cover and cook it in the lowest flame possible. And once its done, do not serve immediately. Turn off the gas and let it rest for another 10-15 minutes. This will give the perfect edge to the rice and make it bloom to its best ability.

soya pulao

Ingredients in this soya pulao

This one-pot soya pulao is so wholesome, and requires just a few basic Indian pantry essentials. The soya chunks need to be soaked and softened in hot water. All the excess water needs to be removed so that it does not mess up the water ratio in the pulao. The rice is also soaked prior to starting the cooking process. Aromatics include fresh ginger-garlic paste, and spices are also very staple ones – cumin, red chilli, coriander and black pepper. The addition of herbs like mint really elevates the flavour profile of this soya pulao. Do not miss out on the mint.

There is no addition of turmeric in this recipe. You can add it if you like to get a beautiful yellow colour. I have also skipped on tomatoes.

soya pulao

soya pulao

Let’s take a look at the recipe:

Preparation time – 30 minutes

Cook time – 45 minutes

Serves – 5-6 people

[ingredients title=”Ingredients”]

  • 2 cups soya chunks
  • 1 1/2 cups basmati rice
  • 2 tbsp mustard oil
  • 1 tbsp ghee
  • 2 dried red chillies
  • 1 bay leaf
  • 2 tsp cumin seeds
  • 1 inch cinnamon stick
  • 2 cloves
  • 2 cardamoms
  • 1 large onion, finely sliced
  • 1 tbsp ginger-garlic paste
  • 2 cups green beans
  • Salt to taste
  • 1 tsp cumin powder
  • 1 tsp black pepper powder
  • 1/2 tsp Kashmiri red chilli powder
  • 2 tsp coriander powder
  • 1/2 cup hot water (for the masala)
  • 2 cups water (for the rice)
  • 1/2 tsp garam masala
  • A handful of fresh coriander leaves
  • A handful of fresh mint leaves [/ingredients]

[directions title=”Directions”]

  1. Soak the soya chunks in hot water for 20 minutes. Squeeze the excess water out and set aside.
  2. Wash the rice thoroughly. Soak in water for 30 minutes.
  3. Heat oil in a skillet. Once the oil starts to smoke gently, reduce the flame.
  4. Temper with bay leaves, dried red chillies, cumin powder, cardamom, cinnamon stick, cloves and bay leaf.
  5. Add the sliced onions and stir on medium flame till they turn brown.
  6. Once the onions are brown, add the ginger-garlic paste and mix till the raw aroma disappears.
  7. Add the green beans and the soya chunks. Give it a good mix.
  8. Season with all the spices – salt, cumin powder, black pepper powder, coriander powder and Kashmiri red chilli powder.
  9. Pour some hot water if necessary.
  10. Once all the spices are assimilated into the masala, add the soaked rice. Gently mix to prevent the rice grains from breaking.
  11. Add hot water and stir. Add garam masala, coriander and mint leaves. Cover and cook on low flame for 30 minutes.
  12. Check rice after 30 minutes with a fork. Turn the flame off and let it rest for another 15 minutes.
  13. Serve hot with raita and salad. [/directions]

soya pualo

This soya pulao recipe is perfect for a busy day. I usually like to make this in a large batch like this so that it also covers us for another one or two meals.

I hope you try out this easy and wholesome soya pulao recipe soon.If you do, let me know how it turned out for you.

If you have any questions, suggestions or feedback, please leave me a comment here. Or connect with me Instagram, Facebook or YouTube.

Happy cooking!