Vegan Creamy Matar Mushroom

The Matar Mushroom recipe makes a delicious vegetarian meal with creamy textured gravy reminiscent of a restaurant curry sauce. It is delicious when served with rice or roti, and it takes less than 20 minutes to prepare this simple gravy.

An iconic North Indian curry, Mushroom Matar combines mushrooms and green peas for maximum flavor. But this matar mushroom recipe is vegan. But that does not alter its flavours at all. 

Based on tomato and onion, the curry is seasoned with a variety of simple spices, making it easy to prepare and consume regularly.

https://www.youtube.com/shorts/qR7q4DrmBdI

A creamy and rich flavor is achieved by adding cream and coriander leaves at the end.

When making this curry on a weekday, I sometimes prefer to skip the cream and coriander leaves to keep it simple. 

When you’re out of vegetables, make this recipe with green peas and mushrooms, which freeze well. These two key ingredients are enough to fill your desperate cravings.

This post covers the step-by-step recipe for lip-smacking and your truly favorite creamy mushroom recipe.

Ingredients in Matar Mushroom Recipe 

  • Mushrooms: This vegetable is packed with nutrients and should be part of every household. Normally, I make this curry with white button mushrooms. In any case, you may use any mushroom you can find.
  • Matar: Mushrooms and peas make a wonderful combination, and this dish is flavored with matar, which adds a light sweetness to the dish. You can use either fresh or frozen Matar.
  • Spices: Making Matar mushrooms only requires a few spices, such as, turmeric powder, Kashmiri red chili powder, coriander powder,and garam masala powder. Combining these spices makes the curry spicy and masala dal, adding a great taste.
  • Coconut Milk: This gives this curry a rich, creamy texture and immediately lifts its flavor. If you are making it for everyday meals, you can also leave it out.

matar mushroom


Let’s dive in and take a look at the recipe:

Preparation time – 20-30 minutes

Cook time – 20 minutes

Serves – 2

[ingredients title=”Ingredients”]

250 g button mushrooms, cleaned and each cut in half

1 cup green peas, fresh or frozen

3 tbsp mustard oil

2 cardamoms, 1-inch cinnamon stick, 2 cloves, and 2 bay

leaves

2 medium onions, finely chopped

2 medium tomatoes, chopped

1 tbsp ginger garlic paste

2-4 slit green chillies

Salt to taste

1 tsp cumin powder

1 tbsp coriander powder

1 tsp Kashmiri red chili powder

1/4 tsp black pepper powder

1/4 tsp garam masala

Chopped coriander leaves for garnish

1/4 tsp turmeric powder

350 ml coconut milk [/ingredients]

[directions title=”Directions”]

  1. Put mustard oil in a kadhai and heat it. Incorporate 2 cardamoms, 1-inch cinnamon stick, 2 cloves, and 2 bay leaves into the kadhai.
  2. Now it’s time to add some finely chopped onions. Stir the onions well until it turns brown. Add 1 tablespoon ginger-garlic paste along with 2 Green chilies.
  3. Allow the paste to simmer with the onion mixture for 5-7 minutes. Cook it until the raw aroma of the ginger garlic paste has faded.
  4. Add medium tomato and ensure it is finely chopped to mix it well with the gravy. Cover the tomato in the kadhai, then cook on medium-high heat for 5 minutes.
  5. Now add peas. Here I have used frozen peas. Highly recommended.
  6. Once you have added peas, mix it well for 2-3 minutes and then begin to add mushrooms, cleaned and each cut in half. Cook it well for another 4-5 minutes.
  7. Then add salt and other spices like salt, cumin powder, coriander powder, Kashmiri red chili powder, and garam masala to add a delicious taste to the dish.
  8. Now add coconut milk and garam masala, and mix well.
  9. Cover the kadhai and cook for up to 15 minutes on medium heat until the peas are softer.
  10. Finally, add the coriander leaves and then turn down the heat. It’s all set to serve your delicious and creamy matar mushroom recipe. You can have every taste of it with rice or bread of your choice, mushroom matar curry is a delicious accompaniment to any meal. Enjoy [/directions].

matar mushroom

Conclusion 

I hope you find this Creamy Matar Mushroom Recipe useful. Start preparing today to surprise your loved ones with a truly delicious Creamy matar Mushroom. You don’t have to wait for special occasions to make this recipe. You can make it any time of the day and fill your cravings with a blast. 

You can follow me on Facebook, Instagram, Twitter, and YouTube for more food-related content and updates that excites you to try something new every day.

Paneer Bhurji

The perfect combination of buttery soft, crumbled paneer and a rich, mouth-watering gravy. It is equally as easy to prepare Dhaba Style Paneer Bhurji at home. Incorporating street style into a classic paneer dish is great for special occasions. Make your paneer bhurji even more delicious with parathas, naan bread, pav, or bread toast.

In this post, I’ll take you through the end-to-end steps to make a Paneer Bhurji.

https://www.youtube.com/shorts/Cb00oKjo-6E

Key Ingredients to Include in Paneer Bhurji Recipe

Here are the ingredients you’ll need:

  • Paneer (Indian Cottage Cheese). This recipe relies heavily on paneer. Fresh cheese is known as paneer. Fresh paneer is what I use in making my paneer bhurji every time. I love how much better it tastes. Sure, you can use store-bought paneer if you need more time or feel like making it. It’s best to use fresh paneer if you can. With paneer ready, you can make this dish in 15 minutes.


  • Fresh red and green chilies. I use fresh green Indian chilies. It’s fine to use any red or green chili that’s small and hot. The amount you use will depend on what level of spiciness you prefer.


  • Ginger-Garlic-chili Paste. This recipe also includes ginger, garlic, and paste. The same combination of ginger, garlic, and chili can be grated or chopped. It is always best to use freshly made ginger, garlic, and chili paste, but ready-made paste is also an option. The green chili can be left out if you are making this for young children.

paneer bhurji


  • Spices. Indian ground spices include cumin seeds, turmeric powder, mustard powder, coriander powder, cumin powder, salt, and Kasuri methi. Indian stores easily carry most of these ground Indian spices.


  • Gram flour. Garbanzo bean flour is also known as besan, chickpea flour, and chickpea flour. The nutty flavor also adds body to the gravy, helping to thicken it. A large well-stocked supermarket or Indian grocery store should carry it.


  • Onions and Tomatoes. Many Indian dishes include both onions and tomatoes. White onions, yellow onions, or red onions are good onions to use.


  • Ghee. It gives a wonderful taste to paneer bhurji to cook in oil, adding a rich, delicious taste to it. In any case, it can be made in oil. Oil and ghee may also be mixed to make it.

paneer bhurji

Let’s dive in and take a look at the recipe:

Preparation time – 15 minutes

Cook time – 10 minutes

Serves – 2

[ingredients title=”Ingredients”]

  • ​​200g grated paneer
  • 4 tbsp oil
  • Whole spices – 2 cardamom, 2 cloves and 1 inch cinnamon stick
  • 1 cup finely chopped onions
  • 2 green chillies, finely chopped
  • 1 tsp ginger garlic paste
  • 1 tbsp besan or chickpea flour
  • 1 cup finely chopped tomatoes
  • Salt to taste
  • 1 tsp cumin powder
  • 1 tsp coriander powder
  • 1/4 tsp turmeric powder
  • 1/4 tsp black pepper powder
  • 1/2 tsp Kashmiri red chilli powder
  • 1/2 cup chopped capsicum
  • 1/4 tsp garam masala
  • 1 tbsp crushed Kasuri methi [/ingredients]

[directions title=”Directions”]

  1. Cook oil in a kadhai over medium heat.
  2. Use whole spices to temper.
  3. Once the onions are golden brown, add them to the pan.
  4. Put the garlic and ginger paste into a bowl. Add the green chillies. Cook until raw aroma is completely gone.
  5. Assimilate the masala paste and besan well by stirring it continuously.
  6. Once the tomatoes are added, cook until the oil starts to come out of the sides.
  7. Adding salt and spices completes the seasoning.
  8. Make sure the masala is not sticking by pouring some hot water on it. Boil this mixture.
  9. Mix well with the paneer.
  10. Once the oil has been released, add garam masala, kasuri methi, and coriander.
  11. Stir it one last time and serve with plain parathas or rotis. [/directions]

paneer bhurji

I hope you enjoyed reading the easy-to-make restaurant-style Paneer bhurji recipe. I’m sure to can’t resist the deliciousness of the Paneer bhurji. So get ready with the ingredients and get going with having the top of the now tasty lunch and dinner.

If you enjoy my food-related recipes, follow my Instagram, Facebook, and YouTube to get updated on more deliciousness in your feed.

Oats Besan Cheela

Oats Besan Cheela makes a great breakfast option. Vegan and gluten free, it’s full of fiber and helps you lose weight. The best part is that it tastes amazing.

A few ingredients make up Oats Besan Cheela recipe, such as oats, chickpea flour (besan), and seasonal vegetables that add freshness to its taste.

Served with hot tea or as a snack, oats Cheela is best eaten with green chutney or tomato sauce. 

Read on to explore the steps.

Ingredients

Oats Besan cheela can usually be made with basic kitchen staples.

Oats: A traditional Oats Besan cheela is made from traditional oats, which are the primary ingredient of this dish. This recipe calls for oat flour; various ready-made oats flours are available in supermarkets. My preferred method of preparing oats is to buy traditional oats, blend them dry in a blender, and keep them airtight. On a busy morning, keeping a large supply of oat flour on hand is advisable to prepare this healthy breakfast quickly.The oats also need to be soaked for 15 minutes before cooking. Do mention that.

Besan/Chickpea flour: Almost every Indian kitchen contains besan. In northern India, besan Cheelas are popular breakfast items made from chickpea flour. The healthier oats Cheela is derived from besan Cheela, which has grown exponentially in popularity recently. Adding a pinch of besan to the batter facilitates the binding of it and maintains the shape of the oats squeal, and adds an extra dose of protein to your meal.

Veggies: Adding vegetables to the oats Cheela increases the fibre content. As well as adding colours to the food, vegetables have a crunch that makes them more appealing. There are several vegetables that I frequently use to add that special kick to my food. Still, my favourites are grated carrots, finely chopped onions, cabbage, spinach, finely chopped green beans, and occasionally a small piece of green chilli to add an extra edge to the dish. Finely chopping vegetables is necessary for proper cooking.

Herbs: The aroma of coriander leaves is one of my favourite flavours to add to my oats Cheela batter. If you do not like it, you may omit it from the batter or replace it with any other herb you choose.

Onions: Often, I make my Cheela only with onion, as I love the taste of onion in it.

Green chilli – Spices up the dish with an extra kick of flavour.

Ginger: Suppresses the smell of oats and is also effective in aiding digestion during the process.

Spice powders: Roasted cumin powder, a spice powder made from chilli peppers, adds flavour and helps the digestion of dishes. Turmeric and pepper are both known for their health benefits.

Step-By-Step Instructions to make a Perfect Oats Besan Cheela

Let’s look at the step-by-step recipe:

1. Put the oats in the bowl and soak them in water.

a bowl in hand and taking oats, depending on the number of people who will be eating it. Once you have taken the oats, soak them in the water and rinse them. Make sure to soak the oats in the water for up to 15 minutes.

2. Add the besan and transfer it to the mixer.

Now it’s time to prepare with the besan, water, chilli, and a mixer. transfer the Cheela with a blend of besan, Ginger, chilli, and a cup of water to the mixer. Stir it well until the batter is smooth and consistent.

3. Add your favourite veggie and spices to give a mesmerizing taste.

Add the favourite range of veggie items to the batter, including carrots, Onion, Cabbage, Capsicum, Spinach, and Coriander leaves. The vegetables should be finely chopped or grated.

Add some spices, including black pepper powder, Carrom seeds (Ajwain), cumin powder, red chilly powder, and turmeric. Adding all these veggies and spices is optional, depending on your taste and requirements.

4. Mix it well

Once you are done adding all the required veggies and spices, it’s time to start mixing it well (I’ve used the spoon to mix it. You can even use a wire whisk to mix it). Make sure to mix it with a light hand. Now it’s time to add some salt to it, 

Continue to mix the batter. You will notice that it becomes thicker over time. Therefore, it is necessary to add some water to it. I added about 1/2 cup of water to blend it all together. It can be up to a little more, depending on the flour brand.

Ultimately, you should be able to pour the batter with reasonable consistency. There should be no runny substance present, and it shouldn’t be too thick or too thin.

Making of the Cheela

1. Heat the pan

Heat a tawa on the stove and smear it with a bit of oil. Avoid overheating the pan put the flame on a low level and pour the batter of the oats Cheela onto the flame. Let the dough spread slightly. As you use more batter, you can make smaller or larger squeals.

2. Put some oil/ghee around the cheela

Pour some oil around and in the centre of the Cheela. Then put a lid on it and let it cook on low heat for 10 minutes.

3. Continue to cook 

With a spatula, flip the Cheela carefully once one side has been cooked, and then continue cooking the other. Once again, cover the pot and simmer it on low heat for a few minutes. Turn it over and continue cooking until it becomes brown.

You will notice the softness. So finally, the Cheela is ready to eat. Served with a perfect green chutney, the mouthwatering Oats Besan cheela will have you trying out something new and exciting.

If you wish to make other pieces of Cheela, you can follow the same procedure until all of the batters have been used up to begin making new ones.

oats besan cheela

Let’s dive in and take a look at the recipe:

Preparation time – 20 minutes

Cook time – 30 minutes

Serves – 2

[ingredients title=”Ingredients”]

  • 1 cup traditional oats
  • 1 cup chickpea flour/besan
  • 1-2 green chillies (basis how spicy you want it)
  • 1/2 inch ginger
  • 1/2 cup water to blend it all together
  • 1 tsp carrom seeds (ajwain)
  • 1/2 cup water for the consistency (or add as required)
  • 1/2 cup grated carrots
  • 1/2 cup grated cabbage
  • 1 small onion, finely chopped
  • 1/2 cup chopped capsicum
  • 1/4 cup chopped spinach
  • 1 tbsp chopped coriander leaves
  • 1/4 tsp turmeric powder
  • 1/2 tsp black pepper powder
  • 1/2 tsp cumin powder
  • 1/2 tsp red chilli powder [/ingredients]

[directions title=”Directions”]

  1. Soak the oats in water for 15 minutes. Drain the water out, rinse the pats well and set aside.
  2. Transfer the soaked oats into a blender. Add chillies, ginger, besan or chickpea flour and water and blend it all to a smooth batter.
  3. Transfer the batter to a large bowl. Add in all the finely chopped vegetables – grated carrot, grated cabbage, finely chopped onion and capsicum, finely chopped spinach, finely chopped coriander leaves.
  4. Add carrom seeds, black pepper powder, cumin powder, turmeric powder and red chilli powder.
  5. Give it all a good mix.
  6. Season with salt.
  7. Pour in some more water as needed to adjust the consistency. Your batter is ready.
  8. Heat a skillet or a non stick tawa with some oil or ghee. Pour two ladles full of the batter and spread out evenly. Let it cook for 3-4 minutes on medium to low flame.
  9. Flip over once the bottom side is cooked. And cook the other side in the same way.
  10. Serve hot with chutney or ketchup. [/directions]

I hope you find this recipe helpful. Oats Besan Cheela is the perfect thing to have any time of the day. Every time you eat it, you will get amazed by its great taste. It isn’t easy and quick to make the Oats Besan cheela. So for what you are waiting for, get ready with all the ingredients and start making one for your family.

If you have any questions, feel free to reach out to me with a comment or connect with me on Instagram or Facebook. For all my videos, you can subscribe to me on YouTube.

Happy cooking!

Related recipe – Beetroot Falafel

Easy Cauliflower Potato Curry Without Garlic & Onion

Here’s a delicious way to combine cauliflower and potatoes. The recipe is simple, devoid of any garlic and onions, and has subtle flavours. The cauliflower shines here as it is treated with a lot of love and patience in this recipe. I personally have fond memories of eating this cauliflower potato curry throughout my childhood, especially on special occasions like Durga puja, birthdays, lunch invitations and other events.

Also known as phulkopi’r dalna in Bengali, this recipe has a gravy base which is thick and non-watery.The potatoes are cooked till soft and the cauliflower has that crunch to it in the final bite. Overall, this cauliflower potato curry is a delight to enjoy with family and loved ones in this season when it grows in abundance all around us.

cauliflower potato curry

cauliflower potato curry

Let’s dive in and take a look at the recipe:

Preparation time – 20 minutes

Cook time – 45 minutes

Serves – 3

[ingredients title=”Ingredients”]

  • 500g cauliflower, cut into florets
  • 4 large potatoes, cut into large cubes
  • 3 tbsp mustard oil, for frying the cauliflower
  • 4 tbsp mustard oil, for the gravy
  • 2 cloves
  • 1 inch cinnamon stick
  • 1-2 dried red chillies
  • 2 bay leaves
  • 1 tsp cumin seeds
  • 2 cardamom
  • 1 tbsp ginger paste
  • Salt to taste
  • 1 tbsp sugar (optional)
  • 1 tsp turmeric powder
  • 1 tsp cumin powder
  • 1 tbsp coriander powder
  • 1 tsp Kashmiri red chilli powder
  • 100 ml water to mix the spices
  • 1/4 cup green peas
  • 1 small tomato, chopped
  • 2 green chillies
  • Fresh coriander for garnish
  • 250 ml hot water [/ingredients]

[directions title=”Directions”]

  1. Remove the florets from a large cauliflower. Wash and pat dry. Keep the florets big (about 5cm each) as we want the cauliflower to have a bite to it in the final recipe. Overcooked cauliflower won’t taste nice in this recipe.
  2. Cut the potatoes into big cubes as well. Soak in water for 20 minutes to release excess starch. Wash and pat dry with a kitchen towel.
  3. Heat mustard oil in a kadhai. Once the oil starts to smoke, add the cauliflower florets. Fry this on medium to high heat till the edges start to turn golden brown. Do this for 5 to 7 minutes. Do not burn. Once done, set the florets aside.
  4. In the same kadhai, add more mustard oil. Once it starts to smoke, reduce the flame to low and temper the oil with all the whole spices – dried red chillies, bay leaves, cinnamon, cardamom, clove and cumin seeds. Give it a light mix.
  5. Add the potatoes to the kadhai and increase the flame. Cook for 3-4 minutes.
  6. In the mean time, make a mix with the spices and ginger paste. Spices would include turmeric, cumin, coriander and red chilli powder. Mix all of this with some room-temperature water.
  7. Pour the mixture into the potatoes and fry till oil starts to release from the sides of the kadhai.
  8. Throw in the fried cauliflower florets and mix everything together.
  9. Season with salt and sugar and mix. Cover and cook on low flame for 8 to 10 minutes.
  10. Remove lid and add the tomatoes, slit green chillies and peas. Give it all a stir.
  11. Pour in some boiling hot water for the gravy. Mix it all up and cover and cook till potatoes are soft. You can adjust the consistency of the gravy as per your liking. But traditionally, it shouldn’t be a runny curry, but a thick one.
  12. Once potatoes are cooked, garnish with chopped coriander leaves, garam masala and more slit green chillies.
  13. Enjoy hot with some luchi, pulao or rotis. [/directions]

cauliflower potato curry

cauliflower potato curry

If you have any questions, feel free to reach out to me with a comment or connect with me on Instagram or Facebook. For all my videos, you can subscribe to me on YouTube.

Happy cooking!

Related recipe – Potato Gravy Without Onions & Garlic


Butter Garlic Prawns

Here’s a butter garlic prawns recipe that is unbelievably simple to make, and tastes absolutely fantastic! Juicy, plump and flavourful prawns that comes together in 10 minutes. Let’s go!

Preparation time – 10 minutes

Cook time – 15 minutes

Serves – 3

[ingredients title=”Ingredients”]

  • 500 g prawns, cleaned and deveined (patted dry with a kitchen towel)
  • 3 tbsp butter
  • 4 tbsp finely chopped garlic (the HERO of this dish)
  • 1 tsp chilli flakes (add more if you like it spicy)
  • Salt to taste
  • 1/4 tsp freshly ground black pepper powder
  • 1 tbsp lime juice
  • 2 tbsp finely chopped coriander leaves/parsley leaves [/ingredients]

[directions title=”Directions”]

  1. Heat butter in a pan and add the finely chopped garlic.
  2. Saute the garlic in the butter in low heat till it releases its oils into it.
  3. Add a dash of chilli flakes as per your taste and give it a stir.
  4. Once its aromatic and the garlic is infused into the butter, add the plump prawns and give it a mix.
  5. Cook for 4-5 minutes till prawns change their colour.
  6. Once the prawns are almost done, season with salt and freshly ground black pepper powder and mix well.
  7. Let the prawns cook to perfection and once it’s ready, drizzle some lime juice and chopped coriander leaves on top. Serve hot. [/directions]

butter garlic prawns

butter garlic prawns

If you have any questions, feel free to reach out to me with a comment or connect with me on Instagram or Facebook. For all my videos, you can subscribe to me on YouTube.

butter garlic prawns

Related recipe – Prawn Alfredo Pasta

Happy cooking!

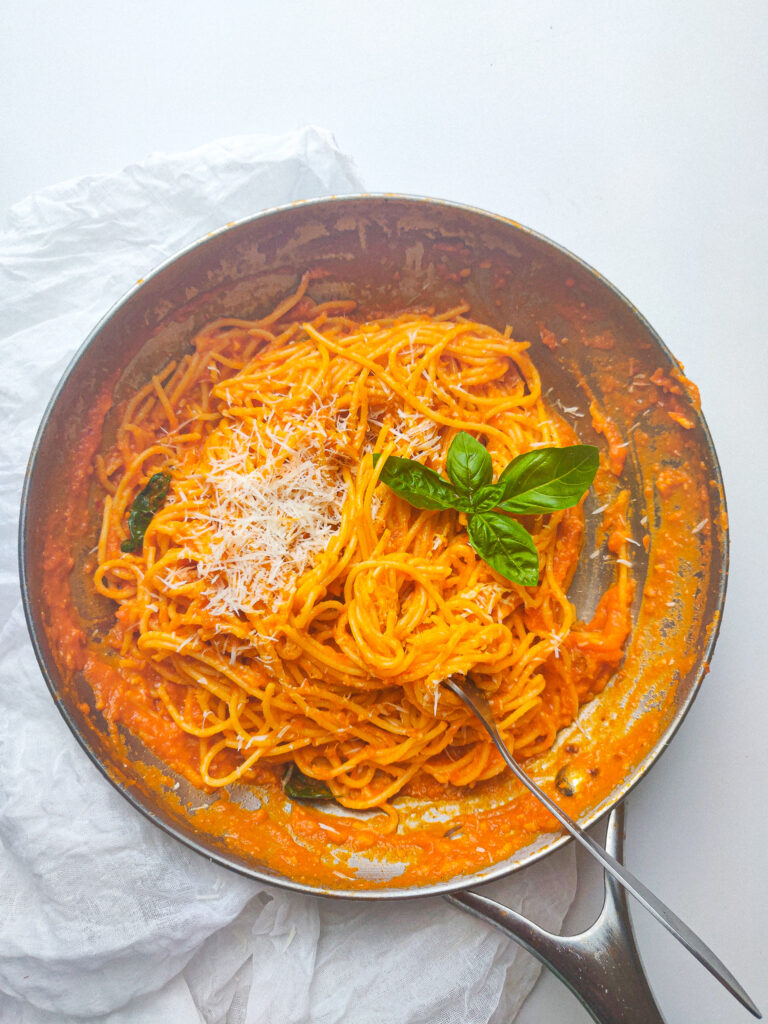
Prawn Alfredo Pasta

The most creamy, delicious, comforting and devour-worthy prawn Alfredo pasta is here. This is the recipe you can make on a weeknight for a quick 30 minute dinner. Or even go for a weekend meal for two if you are in the mood for comfort food that doesn’t take hours in the kitchen.

The prawns are juicy and plump, soaking in all the flavours of the creamy Alfredo sauce, and the pasta is so so luxurious. Whenever I make this prawn Alfredo pasta, I just can’t stop eating it. It’s one of those special recipes that I just keep going back to. Hope you try it and love it as much as I do.

How to Cook the Perfect Pasta Every Single Time

No one likes a plate of mushy broken pasta, and so, while it is important put in our best efforts in perfecting the sauce, where the entire flavour lies, it is also extremely important to boil the pasta to perfection. It is not rocket science, just a few basic steps and you’ll have yourself perfectly cooked pasta every single time:

– Bring sufficient water to a boil

It is very important to have enough water in the pan to properly drown the pasta- Lesser volume of water may result into it getting extremely starchy; and bring it to a roaring boil before adding your pasta- the boiling water agitates the pasta pieces, thus helping them cook more evenly, keep them separated from one another and avoid clumps.

– Add salt

A very common mistake a lot of people make is adding oil to their pasta water in order to keep them from sticking to one another. However, this is completely false, as the only thing that can keep pasta from sticking is ample amount of water and a rolling boil, and hence is a waste of oil. Adding salt to the pasta water ensures that the pieces/strands of pasta do not remain bland while the only flavour and seasoning is in the sauce, because no one likes to bite into pasta that has all the flavours in the sauce and none into those spaghetti strands.

– Save the pasta water

Saving a couple ladles of pasta water goes a long way. Not only does the salty pasta water help flavour your sauce, it also plays a major role, along with butter and olive oil, to bring that glossy magical finish to your pasta.

– Cook according to package instructions

There is no universal rule to cook the perfect pasta, it completely depends on the brand or product you are using and it is advisable to cook as per the packet instructions; especially timing. The most common way to cook pasta is till al dente, which loosely translates “to the bite/tooth”, means almost cooked but not completely cooked. However, the above tips ensure getting the perfectly cooked pasta every single time.

prawn alfredo pasta

Ingredients in this Prawn Alfredo Pasta

As mentioned before, this recipe calls for the most basic and minimal ingredients. Let’s take a look at the key ingredients:

– Prawns

Prawns are the star of this recipe. They need to be cooked just right to get that plump and juicy taste. Make sure you pat them dry before cooking in butter and cook them just enough so that they don’t turn rubbery. It acts as the perfect protein element of this dish and adds that appetizing seafood flavour to your pasta. A win-win for all!

– Cream

Fresh cream is the base of this Alfredo sauce. It provides certain richness and thickness to the sauce. Although we know how many Alfredo sauce recipes contain flour and milk- that is not the authentic way to go as that version of the Italian cream sauce was invented somewhere in America and not Italy. Truth is, for the most authentic, flavourful Italian Cream Sauce or Alfredo Sauce all you need is cream, freshly grated parmesan cheese and salt.

– Extra Virgin Olive Oil (EVOO) and Butter

Butter is a key ingredient in any kind of Alfredo sauce. Paring it up with extra virgin olive oil (EVOO) elevates your dish by providing a bitter and fruity flavour to your pasta; increasing the richness of the sauce. Make sure you use good quality fat to get the best results in this otherwise simple recipe.

prawn alfredo pasta

Let’s take a look at the recipe.

Preparation time – 10 minutes

Cook time – 35 minutes

Serves – 3

[ingredients title=”Ingredients”]

For the prawns:

  • 400 g prawns, cleaned and deveined
  • 1 tsp salt
  • 1/4 tsp black pepper powder
  • 2 tbsp butter

For the final pasta recipe:

  • 250 g pasta of choice, cooked al dente in salty pasta water as per package instructions
  • 4 tbsp olive oil
  • 1 tbsp finely chopped garlic
  • 1 cup onions, finely chopped
  • 200 ml fresh cream
  • 1/4 cup pasta water (add more if required)
  • Salt to taste
  • 1/4 tsp black pepper powder
  • 4 tbsp grated parmesan cheese
  • 1 tsp finely chopped basil leaves or parsley for garnish [/ingredients]

[directions title=”Directions”]

  1. Heat water in a large pot. Add enough salt to it till saline. Once it comes to a boil, cook the pasta in it till al dente as per package instructions. Set some pasta water aside.
  2. Clean and devein the prawns. Pat them dry with a kitchen towel.
  3. Marinate the prawns with salt and freshly crushed black pepper powder.
  4. Heat butter in a pan. Cook the prawns for five minutes or till cooked. Set them aside.
  5. In the same pan, add extra virgin olive oil. Add the chopped onions and cook till they caramelise and turn brown.
  6. Add the garlic and cook till aromatic.
  7. Pour the fresh cream along with pasta water and mix till well combined.
  8. Add the cooked prawns along with the cooked pasta and cook till everything is well combined.
  9. Grate parmesan cheese on top and mix.
  10. Add pasta water if required.
  11. Garnish with fresh parsley or basil leaves and enjoy steaming hot! [/directions]

prawn alfredo pasta

I hope you try this Prawn Alfredo Pasta super soon. If you have any doubts, comments, or feedback, please reach out to me in comments or my social media handles.

Find me on Instagram – www.instagram.com/slurrpilicious

For more such delightful food, follow me on Facebook, Instagram, Twitter, and YouTube.

Happy cooking!

MORE LIKE THIS


One Pot Chicken and Rice

Something between a pulao and a biryani, this one pot chicken and rice is my favourite way to get a comforting weekend lunch ready. My husband and I absolutely love this recipe and we end up eating it on almost every alternate Sunday.  We usually eat non-vegetarian food on the weekend and this one pot chicken and rice recipe is one of our favourite ways to enjoy chicken and rice together. The chicken is juicy from the marination and slow cooking, and the rice is so flavourful, you won’t be able to stop eating it. We pair this with cucumber and onion salad, and some fresh raita.

Ingredients in this One Pot Chicken and Rice

The ingredients in this recipe are simple pantry staples that an Indian kitchen always has. We marinate the chicken first in a yogurt and spice mix, and then go on to cook it in the pot. In the same pot, we temper the rice with whole spices and caramelised onions, and let it all come together in the end with slow cooking.

I love using boneless chicken thighs in this recipe as it remains juicy till the end and does not dry up unlike chicken breast. Though chicken breast also does not dry up if cooked the right way. For the rice, I have used long-grained basmati rice. But you can use any white rice. Long-grain rice needs to be soaked for 30 minutes and flushed of all the excess starch to get beautiful, light and separate grains in the end.

For the marination, I have used hung curd (you can use regular thick curd) mixed with pantry staple spices like cumin, black pepper, coriander, salt and red chilli powder. Fresh ginger and garlic paste adds that extra bout of flavour to this dish which goes into the marination. The chicken needs to marinate for atleast one hour to get the maximum flavour.

one pot chicken and rice

Another delicious part of this one pot chicken rice are the caramelized onions that go into it. I don’t cook them till they melt. the final recipe has onions with a slight bite in them. The onions mix with the leftover marination remains in the pan – for which they need some water to help deglaze the pan.

If you are making this one pot chicken and rice, make sure you use a pot or pan with a strong base and you’d need a heavy duty vessel for this. I usually make this in my Meyer pan with a glass lid. Works beautifully for all one-pot dishes.

one pot chicken and rice

Let’s take a look at the recipe.

Preparation time – 1.45 hours (including marination)

Cook time – 35- 40 minutes

Serves – 4

[ingredients title=”Ingredients”]

For the chicken marination:

  • 500 g boneless chicken thighs, washed and patted dry with a paper towel
  • 1/2 cup hung curd/thick curd
  • 1 tsp black pepper powder
  • 1 tbsp red chilli powder
  • 1 tbsp cumin powder
  • 1 tbsp coriander powder
  • 1 tbsp ginger paste
  • 1 tbsp garlic paste
  • 1 tbsp salt (or as required)

For the recipe:

  • 1.5 cups basmati rice, washed and soaked for 30 minutes
  • 1/4 cup oil
  • 2 bay leaves
  • 3 cardamoms
  • 2 cloves
  • 1 inch cinnamon stick
  • 4 medium onions, sliced
  • 1 tbsp ghee
  • 1/4 cup water to deglaze the pan
  • Salt to taste
  • 1 tsp garam masala
  • A handful of fresh mint and coriander leaves, finely chopped
  • 2 cups water [/ingredients]

[directions title=”Directions”]

  1. Clean and pat dry the boneless chicken thigh pieces.
  2. Whisk hung curd in a bowl. Add the spices to it – salt, cumin, coriander, red chilli and black pepper powder. Add fresh ginger and garlic paste. Mix everything well and add the chicken pieces to it.
  3. Coat the chicken pieces in the curd mix well. Cover and marinate for an hour.
  4. Wash rice thoroughly under running water till it starts to run clean. Once done, soak the rice in water for 30 minutes.
  5. Heat oil in a pan. Add the marinated chicken pieces and cook. Flip the pieces from time to time and let it turn brown. The chicken has to be 80-90% cooked in this stage before you take it out.
  6. Once the chicken is done, temper the same pan with whole spices – cardamoms, cloves, cinnamon stick and a bay leaf. Give it a light stir till it turns aromatic.
  7. Add onions to the same pan and cook on medium flame till they start to turn transparent.
  8. Once the onions are slightly brown, add some water to deglaze the pan. Cook the onions for another 5 minutes.
  9. Add the soaked rice to this along with some salt. Mix the rice gently with the onions.
  10. Pour water into the pan and place the chicken pieces on top.
  11. Cover and cook on low flame for 20 – 25 minutes.
  12. Turn off the heat and take the lid off. Sprinkle garam masala on top, along with freshly chopped mint and coriander leaves.
  13. Cover and let it rest for another 10 minutes.
  14. Enjoy hot with some raw onions, cucumber and raita. [/directions]

one pot chicken and rice

one pot chicken and rice

I hope you try this one pot chicken and rice recipe super soon. If you have any doubts, comments, or feedback, please reach out to me in comments or my social media handles.

Find me on Instagram – www.instagram.com/slurrpilicious

For more such delightful food, follow me on Facebook, Instagram, Twitter, and YouTube.

Happy cooking!

MORE LIKE THIS

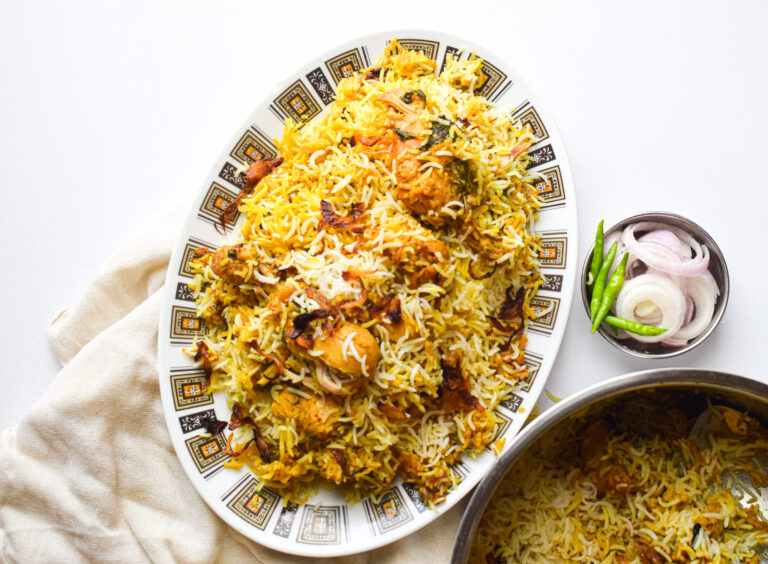
Prawn Biryani

Finally added a prawn biryani recipe to my stock of biryani recipes! 😀

I know it’s preposterously delayed, but better late than never, right? This prawn biryani can be your go-to recipe when you crave some aromatic rice with perfectly cooked prawns. I have realized this method of cooking makes the prawns super soft, as it slowly cooks with the moisture intact.

I make this prawn in a kadhai which has a solid stainless steel base and a lid without a hole. This evenly cooks the prawn biryani just like a handi. You can also use a cast iron kadhai with a lid that does not have a hole for the steam to release. Or else, a traditional handi arrangement also works.

Like every good biryani, this prawn biryani too has some steps that need to be followed to the T to get the best results. Let’s dive straight into them.

Steps To Making This Prawn Biryani

There are mainly seven parts in this chicken biryani making process. Let’s go through each of them one by one.

Step 1 – Making the birista or fried onions

The birista or fried onions play a crucial role in any biryani recipe. The fried onions and its oil adds a unique earthy flavour to the biryani and also some delicious crunch in every bite. There are stores that sell fried onions, but I prefer to make them on my own. I also use the left over oil in the biryani layering, and it creates a world of a difference.

Making birista is a long process that requires patience and good handling of the temperature you fry your onions in. The good part is you can make a big batch and store it for weeks in an air tight jar. Fried onions lend their own taste and colour to recipes, especially to rich ones like biryani and kormas.

To make the fried onions, chop the onions finely and separate them from each other. Make sure you pat the onions completely dry with a paper towel. There should be no moisture in them. Once the onions are chopped and dried, heat oil in a heavy bottomed pan (to prevent burning). The oil needs to get really hot before you add the onions. Add the onions and fry for a minute. Add some salt (the secret) after a minute. The salt helps with the caramelisation.

prawn biryani

Once the onions start to brown, turn the flame to medium and keep an eye on the onions till you get the desired texture. One look away and the onions can burn. Once they have shrunk and turn crispy, take them out and spread them out on a paper towel. Let the onions cool completely before using them. Do not throw away the oil as it is packed with flavour. The entire process can take you anywhere between 45 minutes to one hour.

Keep aside one cup of the birista for the chicken gravy and keep the rest for layering the biryani.

Step 2 – Marinating the prawns

This prawn biryani requires a simple marination for the prawns – just some salt and turmeric powder. This step ensures that the prawns do not remain bland in the final recipe. Marinating this for even 30 minutes will do the job.

Step 3 – Making the saffron milk

Saffron milk is what lends a beautiful colour to the rice strands in this recipe. Food colour can also be used but they might have synthetic flavours in them. Using saffron milk is a natural and delicious way to add colour as well as flavour to the chicken biryani.

To make the saffron milk, add a few saffron strands to about 1/4 cup of warm milk and give it a stir. Over time, it will acquire a beautiful orange hue that we can use in the layering phase.

Step 4 – Soaking the rice

The sign of a good biryani is perfectly cooked and separate grains of rice. The rice needs to be soft, aromatic, fluffy and a single entity not sticking to anything else.

To achieve this, you have to follow certain steps without fail.

  • Thoroughly wash your rice. Once you get your raw rice, wash it thoroughly under running water at least 5-6 times till the water that drains out is crystal clear. This step is very important as it helps to ensure that all the excess starch is removed so that you get rice that is fluffy and also not too heavy. Pro tip – Do not waste the starchy water. It is full of nutrients. Use it to water your plants.
  • Soak the rice for at least 30 minutes. Once your rice is washed, soak the rice in clean water for 30 minutes to one hour. Till step will ensure that the rice fluff up to its maximum potential.
  • Buy biryani rice, not long-grained basmati rice. To make restaurant-style biryani, make sure you purchase rice which is known as biryani rice. This rice is actually perfect for making biryani and is really thin, light, and long-grained. Buying basmati rice might not give you the same results as this rice would. There are many brands in the market that offer “biryani rice” in particular. Choose one of those.
  • Make room for a lot of water. Your rice will cook perfectly when it gets a lot of water to swim in. So make sure you fill up a pot with lots of water so that the rice gets submerged in it. In this recipe, I have used 500 grams of rice and 3 litres of water.
  • Salt your water well. This is crucial to make sure every grain of rice is well seasoned. Add enough salt in the pot of water as much as you would want in your soup. Mix it well and taste it before you add the rice.
  • Add some slit green chillies for added flavour.
  • Cook the rice before layering it only till it’s 80 percent done. This step can honestly make or break your biryani. When we cook the rice before layering it, make sure it’s cooked just enough that it still has a bit of a bite to it.
  • Strain the par boiled rice well. When you take the rice out of the water to save it for the layering, make sure you strain every bit of that excess water in which it was cooking. Leaving the rice in water will make it lumpy and stick to one another and that’s no good!
  • Be gentle when using the spoon. At all points of handling the rice, be it raw or semi-cooked, be gentle so that you don’t break the grains.
  • Use a cast iron pot or a good quality stainless steel pot/handi to cook the biryani. The last thing you would want is burnt rice at the bottom.
  • To prevent rice from sticking to the bottom, place an iron tawa below the pot you’re cooking the biryani in.

Step 5 – Cooking the prawns

Once your rice is 80 percent ready and set aside to cool, the next step is to make the prawn gravy for the biryani. This step includes frying the marinated prawns in a mix of spices, curd and crispy fried onions. This gravy is rich and forms the base of our biryani.

Step 6 – Layering the biryani

Now comes the best and my most favourite part of making this prawn biryani – the layering. It is a highly rewarding technique that gives that ultimate respect to your chicken biryani by making it all come together. The layering involves many ingredients so make sure you do not miss out on any of the following ingredients as each one of them plays a very crucial role in making the biryani what it is.

  • Fresh coriander leaves
  • Fresh mint leaves
  • Birista oil
  • Ghee
  • Kewra water
  • Saffron infused milk

There are two layers in this prawn biryani recipe. This layering works for the quantity here. But if you are making for a large gathering, you might want to layer the prawn gravy and rice alternately.

Step 7 – Slow cooking the prawn biryani on “dum”

The last and final step of this prawn biryani is slow cooking it towards perfection. While traditional biryanis are dum cooked in handis, we will use our own hacks to make it at home. You can either make a dough with whole wheat and spread it around your pot to make sure the air does not escape, or you can put something heavy on top of your lid like I did. It is important to keep a strong base like an iron tawa at the bottom to prevent your chicken biryani from burning. Keep the flame at low and let time do its own magic.

Like I mentioned, I love making this prawn biryani in my stainless steel kadhai that has a strong base and a strong glass lid without holes.

The time for cooking the biryani on low heat is about 30 minutes for this quantity. Once it’s done, let it rest without the flame for another 10 minutes before you serve it.

prawn biryani

Let’s take a look at the recipe:

Preparation time – 2 hours (with fried onions)

Cook time – 1 hour

Serves – 4

[ingredients title=”Ingredients”]

  • 500 g prawns, cleaned and deveined
  • 500 g biryani rice

For cooking the rice:

  • 2 cardamoms
  • 1 inch cinnamon stick
  • 2 cloves 1 tsp caraway seeds (shah jeera)
  • 2 green chillies, slit in half
  • 1 bay leaf
  • 8 black peppercorns
  • Salt (enough salt to make it as salty as you’d like your soup to be)

For the prawn gravy:

  • 4 tbsp oil
  • 4 tbsp fried onion oil (birista oil)
  • 1/2 cup fried onions
  • 2 cardamoms
  • 2 cloves
  • 1 inch cinnamon stick
  • 1 tsp caraway seeds (shah jeera)
  • 1 bay leaf
  • 1/2 cup crispy fried onions
  • 1 tbsp ginger-garlic paste
  • 1 tsp cumin powder
  • 1 tbsp red chilli powder
  • 1 tbsp coriander powder
  • 1 tbsp biryani masala
  • Salt to taste
  • 1/2 cup whisked curd

For layering the biryani:

  • Ghee – 2 tbsp
  • Starchy rice water
  • 1/2 cup Kewra water
  • Saffron milk – 1/4 cup
  • Chopped mint and coriander leaves
  • Crispy fried onions [/ingredients]

[directions title=”Directions”]

  1. Clean the prawns and pat them dry with a paper towel.
  2. Marinate the prawns with salt and turmeric powder. And set it aside for atleast 30 minutes.
  3. Heat water in a wide pot. Add shah jeera, salt, mace, star anise, green and black cardamom, cloves, and cinnamon. Stir well till it boils. Check the salt, add more if required. The water should be as salty as soup.
  4. Add the soaked rice to the boiling pot of water. Cook it till it’s about 80 percent done. The grains should be cooked, but still have a bite to them.
  5. Drain the rice well and set it aside.
  6. Add a few saffron strands to about 1/4 cup of warm milk and give it a stir. Over time, it will acquire a beautiful orange hue that we can use in the layering phase.
  7. Heat oil in a pot or handi. Add some leftover fried onion oil too. Temper with cardamom, bay leaf, caraway seeds, clove and cinnamon.
  8. Add ginger-garlic paste and cook till raw aroma disappears. Keep the flame at low to prevent burning.
  9. Add the crispy fried onions to this and stir well.
  10. Spice it up with coriander powder, cumin powder, biryani masala, red chilli powder. Saute it well. Do not burn the spices.
  11. Turn off the flame and add in some whisked curd. Mix it well into the spices and oil and turn the flame back on to low.
  12. Once oil starts to release from the sides, add the marinated prawns. Cook this for 5-7 minutes.
  13. Add some fresh coriander and mint leaves. Mix well.
  14. To the same pot/kadhai, add the parboiled rice and layer it well.
  15. Drizzle ghee, saffron-infused milk, starchy rice water, and kewra water over the rice.
  16. Garnish with chopped mint and coriander leaves.
  17. Cover & cook on low flame for 20 minutes.
  18. Once done, let it rest for ten more minutes.
  19. Gently take the lid off and mix all the layers of the prawn biryani. Be gentle as the rice and prawns would be tender.
  20. Garnish with crispy fried onions on top.
  21. Serve hot with raita, salan, and salad on the side. Enjoy! [/directions]

prawn biryani

prawn biryani

I hope you try this prawn biryani recipe super soon. If you have any doubts, comments, or feedback, please reach out to me in comments or my social media handles.

Find me on Instagram – www.instagram.com/slurrpilicious

For more such delightful food, follow me on Facebook, Instagram, Twitter, and YouTube.

Happy cooking!

MORE LIKE THIS

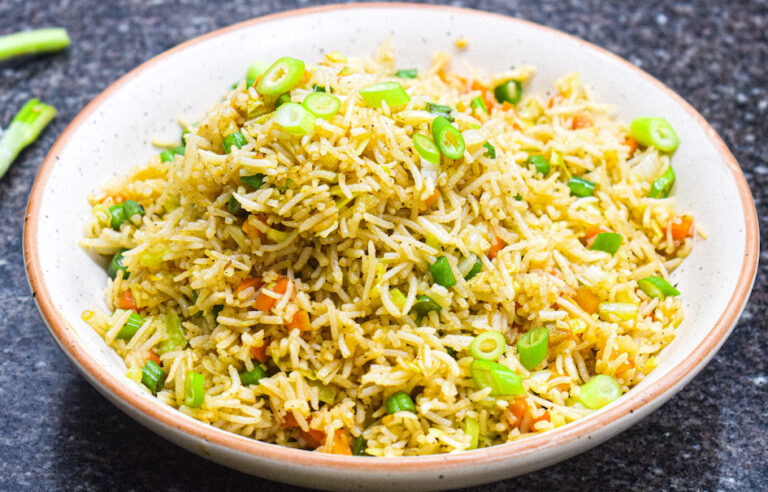
Veg Fried Rice

Here’s a veg fried rice recipe that is healthy, wholesome, loaded with crunchy vegetables and so easy to put together. It tastes even better than takeaway with very less oil. This veg fried rice recipe can be your weeknight meal for those busy days. You can enjoy it as it is, with some fried eggs or an Indo-Chinese gravy of your choice.

Tips to Get the Perfect Veg Fried Rice

Even though this is a very easy recipe to make, there are still a few tips that make it what it is. Let’s take a look.

1. Use cooked rice with separate grains

To get the best fried rice texture, use rice that is preferably cold and a day old. This ensures the rice grains do not add moisture to the recipe and end up giving you a fried rice with separate, fluffy rice grains. Before you add the rice to the pan, make sure you separate any clumped up grains.

2. Keep everything within your arms reach

Every step in this veg fried recipe moves really fast. Which is why it is important to keep all the ingredients within your arms reach so that you get the perfect steps for this fried rice recipe. This includes the spices, sauces, oil, rice and vegetables that go into this veg fried rice recipe.

3. Chop vegetables uniformly

The vegetables that you use in your veg fried rice recipe need to be chopped in the same size. The reason for this is to ensure they all cook uniformly and have the same level of crunch in each bite.

veg fried rice

veg fried rice

Let’s dive straight into the recipe.

Preparation time – 20 minutes

Cook time – 10 minutes

Serves – 3

[ingredients title=”Ingredients”]

  • 3 tbsp oil (any neutral flavoured oil will work, e.g.sunflower oil)
  • 1 tbsp finely chopped ginger
  • 1 tbsp finely chopped garlic
  • 1/4 cup spring onion bulbs, sliced
  • 1 cup beans, chopped into small pieces
  • 1 cup carrots, chopped into small pieces
  • 1 cup cabbage, chopped finely
  • 5 cups cooked rice (preferably cold)
  • 1 tbsp dark soy sauce
  • 1 tsp vinegar
  • 1/2 tsp freshly ground black pepper
  • Salt to taste [/ingredients]

[directions title=”Directions”]

  1. Chop everything up and keep everything ready. Everything moves really fast in this recipe.
  2. Heat oil in a wok or pan. Once it starts to smoke, add finely minced ginger, garlic and chopped spring onion bulbs. Saute for ten seconds.
  3. Add the chopped carrots, beans and cabbage. Fry for 2 minutes till they cook just a bit, remain crunchy and do not turn soggy.
  4. Season with salt. Mix well.
  5. Add the cooked rice. Add freshly ground black pepper powder, dark soy sauce and vinegar.
  6. Mix well with the rest of the vegetables till every grain of rice is uniformly coated in the sauces.
  7. Garnish with some chopped spring onion greens and serve hot. [/directions]

veg fried rice

veg fried rice

Hope you try out this veg fried rice in your own kitchen.

Feel free to reach out for feedback, suggestions or connect with me on Instagram or Facebook. Subscribe to my YouTube channel for all my videos and upcoming recipes.

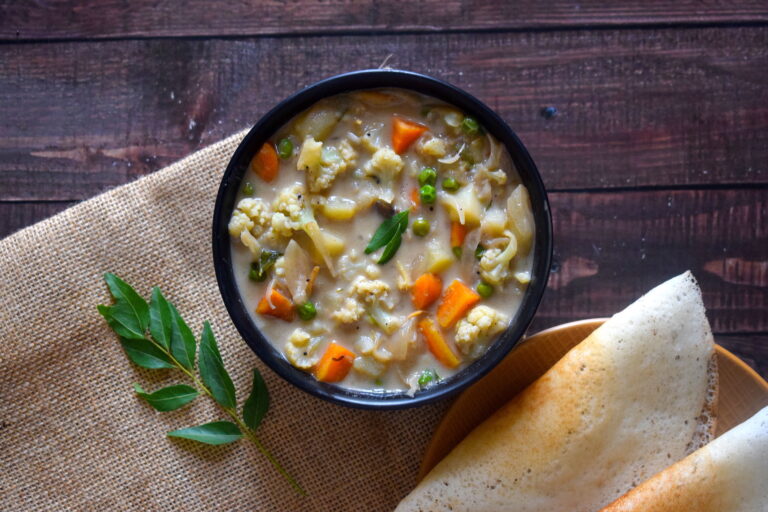
Vegetable Stew

Here’s a delicious, comforting and light vegetable stew recipe. With summers upon us, this vegetable stew makes for a healthy meal that has the goodness of vegetables. You can pair this vegetable stew with dosa, appam or rice, and get a wholesome meal for yourself.

The recipe of this vegetable stew is extremely simple and minimalistic. The star of the dish is coconut milk. You can add vegetables of your choice. But it’s advisable to use hardy vegetables that take time to cook and can soak up the flavours of the broth.

Ingredients in This Vegetable Stew

Like I mentioned, the ingredients in this vegetable stew are very minimal. The main ingredient is coconut milk that lends this stew a unique flavour. I have used thick coconut milk. Please see the ratio of coconut milk to the quantity of vegetables for best results.

The second important ingredient here are the onions. The way you cook your onions can change the flavour and texture of a vegetable stew. For best results, cook your onions till they turn brown and soft. This adds a unique depth of flavour and colour to the stew. Onions are sliced thinly and cooked in coconut oil for 10-15 minutes till they reach this stage. It requires some patience. But the results are absolutely worth it.

This vegetable stew has some hardy vegetables like cauliflower, beans, carrot and potatoes. You can also add peas. If you do add peas, make sure you add them 10 minutes after you add the hardy vegetables.

In terms of spices, this vegetable stew is as simple as they come. The only spice is freshly ground black pepper powder. That’s it!

Fresh curry leaves, fresh ginger-garlic paste, green chillies work their magic in lending their own flavours and assimilating beautifully with the curry.

vegetable stew

Let’s take a look at the recipe.

Preparation time – 20 minutes

Cook time – 30 minutes

Serves – 4

[ingredients title=”Ingredients”]

  • 3 tbsp coconut oil
  • 2 cloves
  • 2 cardamoms
  • 2 cups onions, thinly sliced
  • 1 tbsp ginger garlic paste
  • 2-4 green chillies, slit in half
  • 1 cup cauliflower, cut into small florets
  • 1 cup potatoes, cut into cubes
  • 1 cup carrots, cut into small cubes
  • 1 cup green beans, cut into 1-inch pieces
  • Salt to taste
  • 400 ml thick coconut milk
  • 1/4 tsp freshly ground black pepper powder
  • 8-10 fresh curry leaves [/ingredients]

[directions title=”Directions”]

  1. Heat coconut oil in a pan. Temper with cloves and cardamom.
  2. Add the sliced onions. Cook till they turn translucent, and slowly start to caramelize. The whole process will take 10-15 minutes.
  3. Stir for two minutes and add the slit green chillies and half of the curry leaves.
  4. Once the onions are brown and soft, add fresh ginger garlic paste. Keep the flame at low and stir till the rawness fades.
  5. Add the vegetables and stir for 5 minutes. Season with salt.
  6. Add some water. Cover and cook till the vegetables are 80% cooked.
  7. Pour coconut milk and give everything a good mix. Cover and cook till vegetables are soft.
  8. Garnish with more curry leaves and freshly ground black pepper powder.
  9. Serve hot with appam, dosa or rice. [/directions]

Hope you try out this delicious vegetable stew in your own kitchen.

Feel free to reach out for feedback, suggestions or connect with me on Instagram or Facebook. Subscribe to my YouTube channel for all my videos and upcoming recipes.