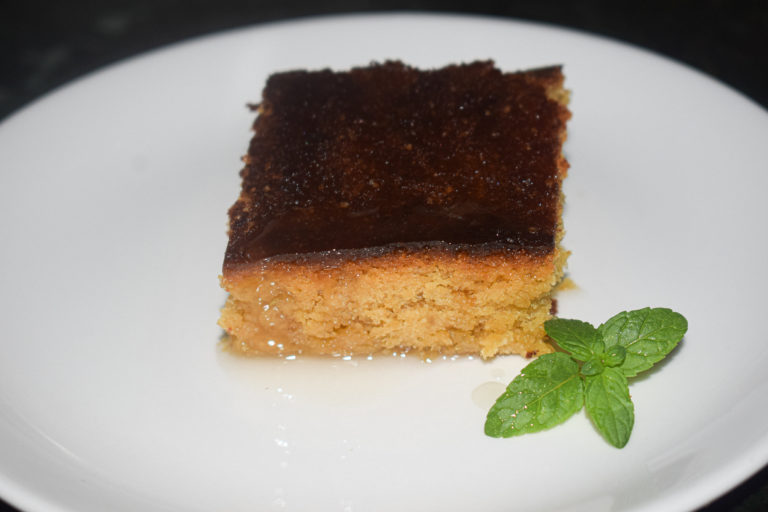
Lemon Sponge Cake

Lemon sponge cake makes for a wonderful option for tea time or brunch with friends and family. And this version is super easy to make, tastes refreshing and delicious and is very easy to make. This is a homemade version that is super comforting to say the least.

lemon sponge cake

You need a handful of ingredients and a few techniques to get perfectly moist and melt in the mouth sponge cake every single time. It all comes together in a single bowl. And I am also going to show you how to make the perfect lemon drizzle to pour on top of this cake. It’s like a match made in heaven!

Since this is a sponge cake, butter is one of the prime ingredients. Along with butter, we will use eggs, flour, sugar, lime juice, vanilla extract, and lime zest. That’s all that we need. Now let’s look at the little things that we need to consider to make this an unforgettable sponge cake every time you make it.

How to Make the Best Sponge Cake

There are a few basic tricks that can help you make a perfectly fluffy and moist sponge cake at home. It is no rocket science, just a few chemistry lessons up your sleeve. Almost all of them have to do with temperature. Let’s take a look.

  • Butter must be at room temperature

One of the most important factors to get a really good sponge cake is the way the butter is treated. Firstly, the butter has to be at room temperature. Make sure you take it out of the refrigerator well in advance so that it becomes soft. This soft butter then needs to be beaten until it acquires a creamy and luscious texture. This takes about four to five minutes. And the softer the butter, the better the sponge cake.

  • Eggs must be at room temperature and fresh

Eggs are used in this lemon sponge cake recipe. Eggs help bind the batter together and also add a lot of moistness and density to the cake. Make sure your eggs are also at room temperature and they are fresh.

  • Timing matters

Dairy and acidic elements like lime do not like each other. Adding lime to any dairy product exposes it to splitting immediately. That’s why the timing and the sequence of adding the ingredients matters a lot. For instance, the lime juice is added right in the end once the flour and the sugar are well combined. Adding the lime straight to the butter can make it split in no time. So make sure you follow the sequence.

lemon sponge cake

lemon sponge cake

Lemon Sponge Cake in One Bowl

This lemon sponge cake comes together in one bowl. An electric mixer is a requirement to get the best out of this cake, otherwise, you will have to whisk the butter with your hand for a long time. The batter comes together very quickly and you do not need to spend hours in the kitchen to get something out.

lemon sponge cake

Because this is such a simple cake, we also make a lemon drizzle as the topping. It is a super simple hack to elevate the taste of the cake to a whole new level. With just two ingredients, this lemon drizzle tastes refreshing and will shock you with how something so easy can be so good.

Preparation time – 15 minutes

Bake time – 30-40 minutes

Serves – 12

[ingredients title=”Ingredients”]

  • 200 g all-purpose flour (1 1/2 cups approx)
  • 4 large eggs
  • 200 g butter
  • 1 tsp vanilla essence
  • 1 tsp baking soda
  • Zest of 1 lime
  • Juice of 2 limes
  • 150 g granulated sugar (1/2 cup approx)
  • Juice of 7 lime (for the drizzle)
  • 1 cup icing sugar [/ingredients]

[directions title=”Directions”]

  1. Grease your baking tray with oil or butter and line it with parchment paper, leaving an overhang on all sides. Set aside.
  2. Take the butter in a large bowl and beat it for 4-5 minutes till it acquires a creamy and pale color.
  3. Add the granulated sugar and beat for another 2-3 minutes.
  4. Once the mixture is creamy, add the flour, eggs and vanilla essence. Beat till you get a smooth batter.
  5. Add in some fresh lime zest and lime juice. Mix.
  6. Add the baking powder right in the end and gently mix it all together with a spatula.
  7. Transfer the batter to the baking tray.
  8. Bake at 180-degree celsius for 30-40 minutes till you see a crusty top. You know your cake is done when it starts to come off the parchment paper.
  9. Allow the cake to cool completely. In the meanwhile, make the lemon drizzle.
  10. For the drizzle, squeeze out the juice of around 7 limes. Make sure there are no seeds. Add 1/4th cup of icing sugar in four batches, and keep whisking till you get a thick greyish liquid.
  11. Serve the cake with the drizzle on top and garnish with some mint leaves. Enjoy! [/directions]

lemon sponge cake

If you have any questions, feel free to reach out to me with a comment or connect with me on Instagram or Facebook. For all my videos, you can subscribe to me on YouTube.

Happy cooking!

The BEST Fudgy Chocolate Brownie Recipe

Chocolate brownies are love. The fudgier, the better. Right?

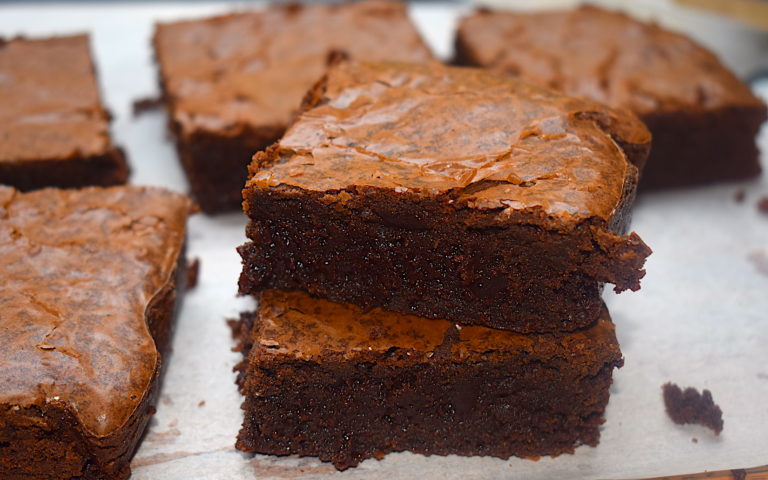
fudge chocolate brownie

If you also are a lover of fudgy chocolate brownies like me, I am going to give you my secret recipe which has taken years to form. Because making the best, fudgy chocolate brownie might not be as simple as it may seem.

I have tried many versions over the years and this particular recipe is the one that I have come to swear by. And trust me, it is simple once you have the recipe with you. Anyone can make it!

fudge chocolate brownie

fudge chocolate brownie

This fudgy chocolate brownie is perfect, with a gorgeous crackle on top and a gooey center. Each bite is rich and dense and will transport you into dessert heaven. That’s my promise.

This recipe is made in two fundamental steps, for which you will need two glass bowls. The first step uses a double boiler to melt the butter and the chocolate. The second step is to mix the dry and wet ingredients to form the batter. The brownie batter is a mixture of the two steps.

Preparation time – 15 minutes

Bake time – 30-40 minutes

Quantity – 5-6 pieces

[ingredients title=”Ingredients”]

  • Semi-sweet dark chocolate, 200 g
  • Butter, 110g
  • Granulated white sugar, 120 g
  • Brown sugar, 50 g
  • 1 tsp instant espresso powder (optional)
  • 1 tsp vanilla essence
  • 3 medium eggs
  • All-purpose flour, 180 g
  • Unsweetened cocoa powder, 80g [/ingredients]

[directions title=”Directions”]

  1. Grease a baking tray with oil or butter and line it with parchment paper, leaving an overhang on all sides.
  2. Preheat your oven at 200 degrees celcius/392 degree Fahrenheit.
  3. Take some water in a saucepan and heat it. Once the water starts to simmer, place a glass bowl on top of it in a way that it does not touch the water. Keep the flame at low.
  4. Cut the semi-sweet dark chocolate into small pieces and add them to the glass bowl on top of the saucepan. We call such an arrangement a double boiler.
  5. To the same bowl, add the butter, instant espresso powder (optional). Mix it and let it melt completely. The instant espresso powder will elevate the taste of the chocolate without adding any coffee flavor. If you want, you can skip adding the espresso powder.
  6. Keep the flame at low at all times. Once done, take out the glass bowl and allow the chocolate and butter mixture to cool.
  7. In another glass bowl, mix the white sugar and the brown sugar. I have used very small white and brown sugar. I like the texture of it in the final brownie. You can crush your sugar if you want.
  8. To the sugar, add one egg at a time and mix till it becomes creamy and acquires a pale yellow color.
  9. Pour some vanilla essence to the creamy sugar and egg mixture. Mix well with a spatula or a whisk.
  10. Now pour the cooled down chocolate and butter mix into this bowl. Make sure it’s completely cooled down otherwise the eggs can get scrambled.
  11. Mix the chocolate, butter and egg mixture very gently with a spatula till it turns dense and dark.
  12. Sieve the all purpose flour and cocoa powder through into chocolate and egg mixture. Fold gently with a spatula till it all comes together. Do this slowly, but make sure not to overmix.
  13. Pour the brownie batter over the prepared baking tray and spread it evenly with the spatula.
  14. Bake in your pre-heated oven for 35-40 minutes till you see a brownish golden crackle on top.
  15. Let it cool for at least 30 minutes before you cut the fudgy chocolate brownie into pieces.
  16. Enjoy your fudgy chocolate brownie with some ice cream and chocolate sauce drizzled on top. Or grab one just like that! [/directions]

fudgy chocolate brownie

fudgy chocolate brownie

I hope you try this really delicious and fudgy chocolate brownie for yourself and enjoy it as much as I do. Do not forget to share your chocolate walnut brownie picture and link it to #slurrpitup. You can also add walnuts if you like 🙂

If you have any questions, feel free to reach out to me with a comment or connect with me on Instagram or Facebook.

Happy baking!

Eggless Double Chocolate Banana Bread Recipe | Slurrp

Have you ever discovered something beautiful when you were not even looking for it in particular? Feels good, right?

This eggless double chocolate chip banana bread was such a discovery for me. It all happened a few years ago when I had some really ripe bananas withering away in my pantry. And the best way to use those super ripe bananas is of course to mash them up with some flour and bake some comforting banana bread! That was exactly the intention.

eggless chocolate chip banana bread

But the curious cat in me did not want to gobble down a plain banana bread. Too boring! Especially so because I also found cocoa, chocolate chips, brown sugar, and some dark chocolate in my pantry. The advantages of having a stocked pantry and having an open mind? But the spoiler? I didn’t have any eggs. Which is the only reason why this is an eggless version.

It is almost unbelievable that this banana bread tastes as good without eggs as well. But it does!

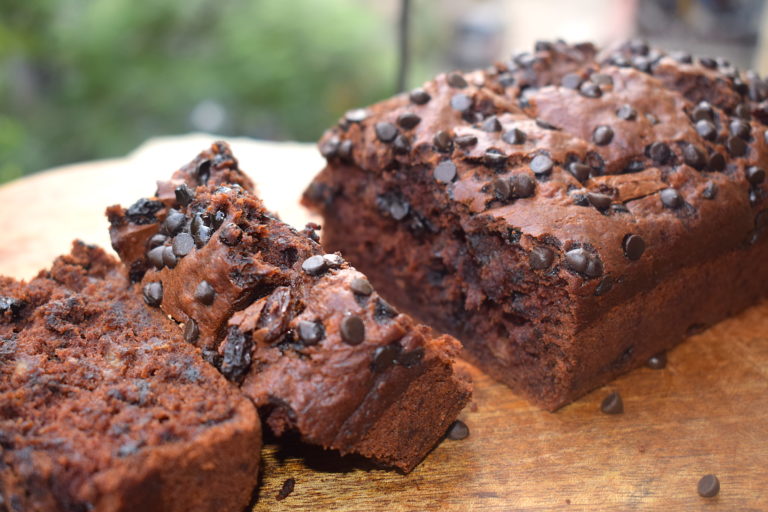
The excitement started racing in my mind and I just HAD TO experiment with all these ingredients. And I am so glad I did. Just look at this beauty!chocolate chip banana bread

chocolate chip banana bread

I love this eggless chocolate chip banana bread so much that I end up baking it at least twice a month. It is moist, spongy and every chocolate lover’s dream come true. I love to grab a bite with my cup of chai in the mornings, or randomly stealing a bite at various times of the day. My friends love it and I have baked it a zillion times for so many people so far. So I can tell you that this recipe is absolutely full proof.

I hope you try this version of chocolate chip banana bread! Super simple and easy.

Preparation time – 15 minutes

Bake time – 40 minutes

Serves – 3-4 people

[ingredients title=”Ingredients”]

  • 150 g all purpose flour
  • 150 g butter, at room temperature
  • 80 g unsweetened cocoa powder
  • 80 g dark chocolate chips
  • 1 tsp baking soda
  • 1 tsp baking powder
  • 50 g brown sugar, crushed
  • 1.5 tsp vanilla essence
  • 50 ml milk
  • 3 very ripe bananas, mashed well
  • 1/2 tsp salt [/ingredients]

[directions title=”Directions”]

  1. Preheat the oven to 250 degrees.
  2. Add butter in a mixing bowl along with the crushed brown sugar. Mix well with a spatula till you get a creamy consistency.
  3. Pour in the vanilla essence into this and mix well.
  4. Add the mashed bananas to this and mix till everything comes together and there are no lumps.
  5. In another bowl, sieve the flour, baking powder, baking soda, and cocoa powder. Mix well.
  6. Gently add the flour to the butter and banana mixture, little by little. Take 4-5 rounds to complete this step.
  7. The final mixture might be too thick, so add some milk (room temperature) to get a thick batter.
  8. Take the chocolate chips and add to the batter, giving it one last mix with a spatula.
  9. Grease your loaf pan with butter or oil and add parchment paper on top.
  10. Pour in the banana bread batter into the loaf pan. Make sure it settles down completely.
  11. Garnish with lots of dark chocolate chips. I have also added a few chunks of my favorite dark chocolate on top. You can top it off with a few blocks of your favorite chocolate.
  12. Bake at 250 degrees for 40-45 minutes.
  13. Once done, allow the bread to cool completely before you cut it into pieces.
  14. Store in an airtight container once cut or finish it then and there! [/directions]

chocolate chip banana bread

chocolate chip banana bread

chocolate chip banana bread

This bread can be stored for up to a week. Once you cut the pieces, immediately transfer to an airtight container and store it in the fridge. But a bread this size will never last a week! 😉

chocolate chip banana bread

chocolate chip banana bread

chocolate chip banana bread

Slurrp pro tip: Whenever you bake bread or cake, always remember to mix the dry ingredients and the wet ingredients separately, and then slowly assimilate the dry into the wet ingredients in a number of rounds. And sieving the flour is extremely crucial, as it is to preheat the oven.

If you want regular access to more such delightful food, you can follow me on Facebook, Instagram, Twitter, and YouTube.

Happy baking!

Mango Oatmeal Bread

The best part of Indian summers to me is the abundance of mangoes that I get to see everywhere. India is home to more than a thousand varieties of mangoes, and it is undoubtedly the king of all fruits. Mango season has started again this year and I thought of sharing a unique mango based recipe with you guys – a delicious and healthy Mango Oatmeal Bread.

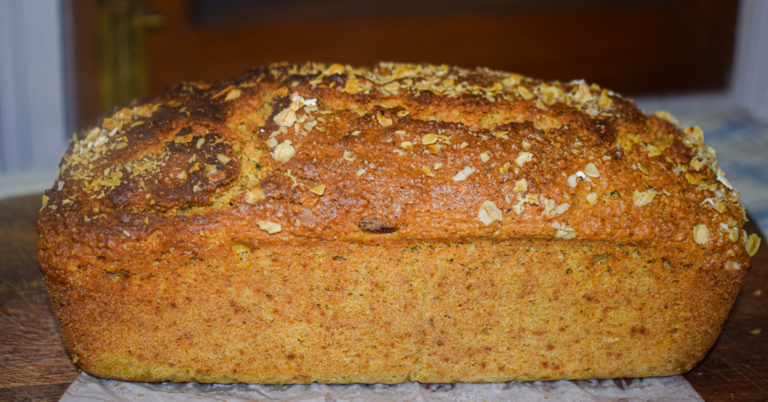
mango oatmeal bread

If you love desserts and you want to make it in a healthier way, this bread recipe is meant for you. This mango oatmeal bread tastes so good that it is almost unbelievable that it is filled with fiber and health. I have used zero all purpose flour and the entire base is made with oats. Yes, you read it right! I love the nutty flavor of this bread, and the subtle hint of mango makes it a must try!

This recipe uses fresh mango pulp. Every bite comes with the frangrance of mango – it is not overpowering at all, but absolutely delicious. The oat flour gives the cake a dense texture, but it’s also soft and moist as you cut into it. For flavouring I have used fresh cinnamon powder and vanilla essence. They shine in this simple recipe. The dry fruits add a lot more flavour and crunch to the bread. All in all, it’s a beautiful bread and I highly recommend you try it this mango season.

mango oatmeal bread

Since this is made with fresh mango pulp, it needs to be consumed immediately. Do not keep it for more than two days as it might perish sooner and refrigerate it immediately once it cools down. It is a perfect tea time partner. I make this variant for my parents who avoid sugar, and they have also given this a green signal!

Preparation time – 30 minutes

Cook time – 60 minutes

Serves – 6

[ingredients title=”Ingredients”]

  • 4 cups oat flour
  • 2 eggs (at room temperature)
  • 1 tsp vanilla essence
  • 2/3 cup melted butter (cooled down)
  • 1 cup powdered sugar
  • 1/2 cup warm milk (full fat preferred)
  • 1/4 cup dry fruits (cashews, raisins, almonds)
  • 1 tsp baking powder
  • 1 tsp baking soda
  • 1 tbsp cinnamon powder
  • 1 cup fresh mango pulp [/ingredients]

Oat flour is nothing but oats ground to a fine powder in a grinder. For an extra nutty flavor, you can also slightly toast the oats on a pan before grinding.

[directions title=”Directions”]

  1. Mix the wet ingredients first – In a glass bowl, whisk in two eggs, vanilla essence and melted butter. Add in warm milk to this, little by little. Whisk continuously in the process.
  2. Next, mix the dry ingredients together – In another glass bowl, mix oat flour, sugar, baking powder, baking soda, cinnamon powder and dry fruits together.
  3. Add the dry ingredients slowly and in parts to the wet egg base (watch the video below). Make sure everything gets mixed in complete harmony, with no lumps or unevenness in the consistency. The end batter should be a thick one as shown in the video.
  4. Once the batter is ready, add the fresh mango pulp into it and mix till it distributes evenly into the batter.
  5. Grease the baking tray with oil/butter. Pour in the batter. Sprinkle some oats on top.
  6. Pre-heat your oven at 180 degrees. Bake this bread for 50-60 minutes. Once done, allow it to cool completely before serving. Enjoy! [/directions]

This is a delicious way to eat those fresh and ripe mangoes, and a perfectly healthy bread, which is also gluten-free! If you want to avoid the sugar completely, go ahead and add some honey or jaggery for the sweetness. You can also add some dates and other kinds of dry fruits such as walnuts if you like!

mango oatmeal bread

mango oatmeal bread

mango oatmeal bread

More such baking delights:

The ULTIMATE Fudgy Brownies

Chocolate Cake

I hope you try out this delicious and unique mango oatleam bread for yourself. It’s aboslutely divine. If you have any questions, feel free to reach out to me with a comment or connect with me on Instagram or Facebook. For all my videos, you can subscribe to me on YouTube.

Happy baking!

Moist-Rich Chocolate Chip Tea Cake

Love chocolate cake? We all do!

Baking is truly an art and this most-rich chocolate chip cake is just the perfect dessert to have around at this time of the year. If you are an amateur baker trying to get that perfect chocolate cake out of your oven, you have come to the right place. This is one of the simplest chocolate cake recipes out there.

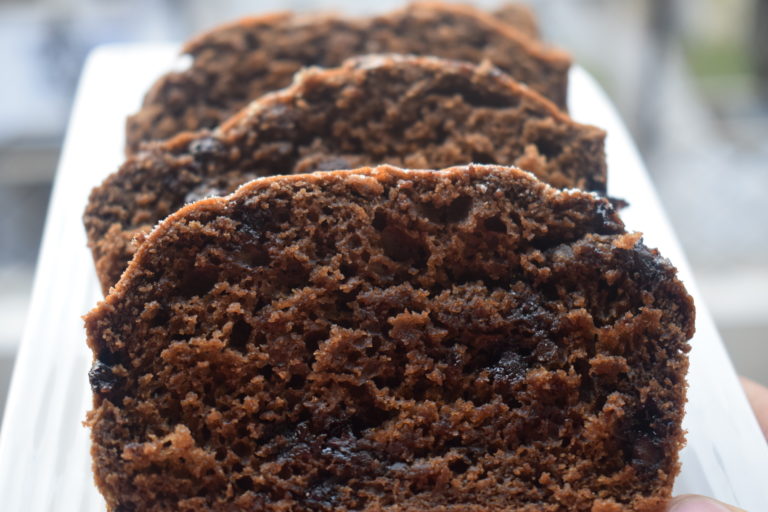
chocolate cake

I have been a cook all my life, but my interest in baking has only developed recently. For some reason, I always thought I’ll never be good at baking. Perhaps that was because I grew up in a time when cakes and pastries were only meant for birthdays. My mother has been baking tea cakes for as long as I can remember. I love her nutty flavored cakes, filled with dry fruits and spongy textures. They smell like a dream, filling the whole house with a familiar aroma. I also remember the huge oven we had in the ’90s. All the neighborhood aunties used to borrow it during birthdays to bake cakes for their children.

It’s not like I have never tried my hands at baking. Just like cooking, I tried baking a couple of times even as a kid, but I have never really been successful in any endeavor. Until I laid my hands upon a vegetarian cookbook in the early 2000s. My mother had got this book as a gift from work and it opened up a whole lot of possibilities for me. I do not remember the name of this book, and I haven’t ever been able to find it at home (considering we have moved so much). But this is one book that taught me so much about cooking. It’s really unfortunate that my memory doesn’t bring back the name of it.

This book had the most amazing chocolate cake recipe, with a delicious and gooey chocolate glaze. I started following the recipe step by step, failed multiple times. I still remember how I told my friend in school that salt is also an ingredient in cake. Her eyes expressed disbelief. I finally cracked it in my 9th standard. I still remember my family’s reaction to it. They were stunned! My brother’s friend had a bite and said “Stop kidding me. I’m not a fool. You didn’t bake this!”

This chocolate tea cake is that very same recipe but kept simple and humble. There are no layers or glaze (maybe I will do it later someday). It is simple to make, provided the techniques to be followed are adhered to.

Here’s the recipe:

Preparation time – 20 minutes

Cook time – 30-40 minutes

Serves – 4 people


[ingredients title=”Ingredients”]

  • 3 eggs
  • 200 g flour
  • 100 g melted butter
  • 1 tsp vanilla essence
  • 200 g powdered brown sugar
  • 80 g unsweetened cocoa powder
  • 1 tsp baking powder
  • 150 g dark chocolate chips
  • 100 ml of warm milk [/ingredients]

chocolate chip cake

[directions title=”Directions”]

Mixing the liquid ingredients:

  • In a glass bowl, whisk three eggs until smooth.
  • Pour in the melted butter and vanilla essence into the whisked eggs. Mix till everything comes together smoothly.

Mixing the dry ingredients:

  • In a glass bowl, add the flour, brown sugar, cocoa powder, and baking powder.
  • Mix everything together.

Time to add the liquid to the dry mixture.

  • Gently pour the whisked egg mixture over the flour mixture. Take your time and mix this well with a spatula till a thick batter is formed.
  • Add the choco chips to this batter and mix well without damaging the chips.
  • Once the batter is done, add the milk. Take your time to mix the two. The milk needs to be completely absorbed by the chocolate chip cake batter.

Time to bake:

  • Preheat the oven to 180-degree Celsius.
  • Grease your baking tray with butter or refined oil with a pastry brush.
  • Put the batter into the baking tray. Bake the cake at 180 degrees for 30 minutes. Let the cake cool completely before serving. [/directions]

More desserts:

Apple Crumble

Chocolate Coconut Laddoos

For more such delightful food, follow me on Facebook, Instagram, Twitter, and YouTube.