Chicken Pulao

Indian pulaos are one-pot dishes that combine wholesome flavours and spices to create magical tastes. The predominant ingredient in most pulaos is the garam masala. The most basic garam masala is a spice made by grinding dry-roasted cinnamon, cardamom and cloves.

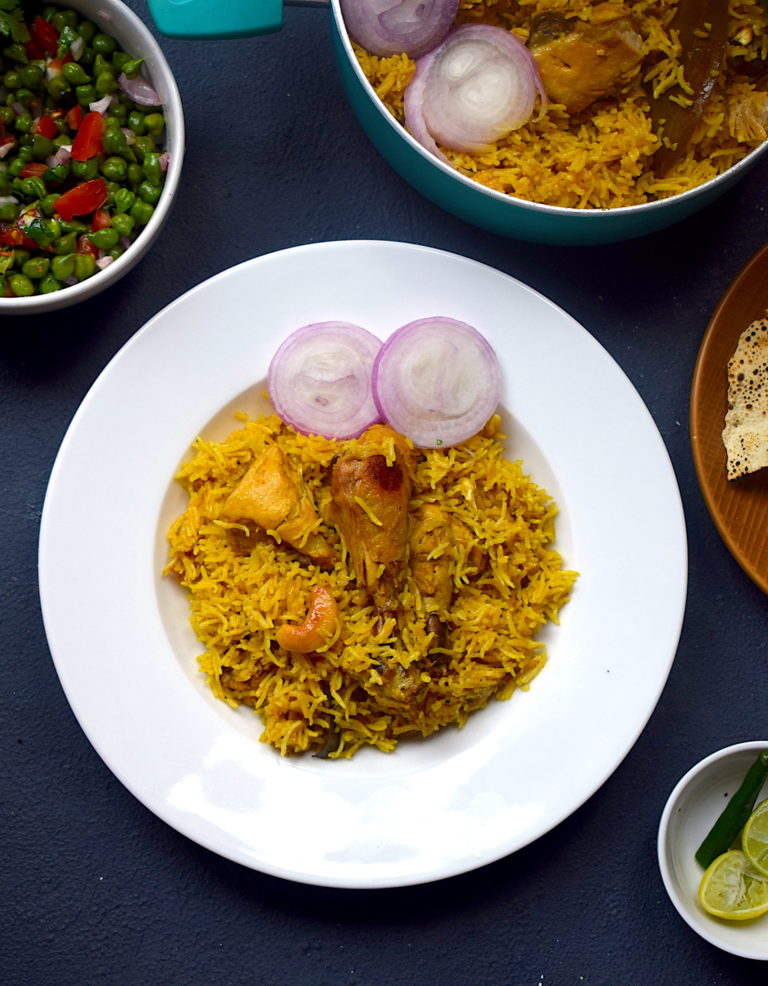
This chicken pulao recipe is a quick fix for those special cravings. It is a one-pot recipe and comes out beautifully in about 40 minutes. It can be had as a meal in itself.

This recipe is very special to me because it was an essential part of my childhood. Pulao used to be served with chicken or mutton curry in birthday parties or to the guests. Although my family never really made chicken pulao, the fundamental ways to cook any pulao remains the same. Chicken pulao is something I have been making for myself and my loved ones over the years, and it has always remained a favourite.

chicken pulao

chicken pulao

The rice in this pulao can be any fragrant one. I prefer using broken rice for pulao, as it gives the entire meal a different flavor. Here, I have used good quality Basmati rice. The quality of the rice should be of supreme concern in this meal.

I mostly make chicken pulao with joha rice. Joha rice is a variety of rice grown in India and is notable for its aromatic and excellent taste. My home state, Assam, is the largest cultivator of this rice, and hence I am very particular about using it in most of my recipes involving rice. But you can go ahead and use high quality and aromatic broken basmati too.

chicken pulao

chicken pulao

I like my pulao to have a little sweetness since that is how I have eaten it throughout my life. There is a delicate hint of sugar and part of the flavor also comes from some dry fruits that this dish includes. Another important tip that I would like to share is to always use fresh ingredients. For example, the ginger garlic paste should be freshly ground. The only ready-made spice that I have used here is the meat masala.

Even though this recipe is made in a pressure cooker, you can also go ahead and make it this way. If the rice is soaked for some time, it takes lesser time to cook.

Making Perfectly Fluffy Rice

  • Soaking

For this pulao, find yourself the best quality long grained basmati rice. Wash the rice thoroughly with water till its clear. Next, soak it for exactly 30 minutes in room temperature water. After that, strain the water and keep the rice as dry as possible. I used a sieve to release the water and keep it undisturbed. Do not soak for more than 30 minutes as the rice will become too wet and will cook very fast, and end up sticking to each other. Soaking for longer duration might also break the rice. Soaking is an essential pre-requisite to get the perfectly fluffy rice that you see in this egg pulao.

  • Correct water quantities

Next is the perfect amount of water for the rice to cook. I have added the exact measurements for this recipe, but the usual and easy rule to follow is – For every cup of rice that you use, use half cup more water than that. For example, if you use 1 cup of rice, use 1.5 cups of water. If you use 2 cups of rice, use 2.5 cups of water. And the water should always be hot if you’re making the rice in a pot. Otherwise, the temperature difference might ruin the rice. This rule applies only if you soak the rice for 30 minutes before cooking it.

  • Low flame and rest

Lastly, perfectly fluffy rice is always cooked in low flame. If you’re making rice in a pot, make sure you cover and cook it in the lowest flame possible. And once its done, do not serve immediately. Turn off the gas and let it rest for another 10-15 minutes. This will give the perfect edge to the rice and make it bloom to its best ability.

Here is the recipe for my version of a Chicken pulao. Every step brings out a different flavour and uniqueness. I hope you enjoy it.

Preparation time – 30 minutes

Cook time – 60 minutes

Serves – 4-5 people

[ingredients title=”Ingredients”]

For the chicken marination:

  • 1 kg chicken (curry cut)
  • 1 tbsp salt
  • 2 tsp Kashmiri red chilli powder

For the rice

  • 500 g biryani rice
  • 3 tbsp vegetable oil
  • 2 tsp ghee
  • 1 inch cinnamon stick
  • 2 cardamoms
  • 2 cloves
  • 2 bay leaves
  • 20 raisins
  • 15 cashews
  • 1 green chilli, slit in half
  • 2 cups finely sliced onions
  • Salt to taste
  • 1 tbsp coriander powder
  • 1 tbsp cumin powder
  • 1 tsp black pepper powder
  • 1 tsp turmeric powder
  • 1 tsp garam masala powder
  • 1 tsp sugar [/ingredients]

[directions title=”Directions”]

  1. Wash the rice thoroughly under running water till all excess starch is drained. Soak in water for 30 minutes.
  2. Wash and pat dry the chicken pieces with a paper towel. Rub the chicken pieces with salt and Kashmiri red chilli powder. Mix really well and marinate for 30 minutes.
  3. Heat oil in a pot. Add the ghee. Temper with all the whole spices – cinnamon stick, cardamom, clove and bay leaves.
  4. Add the raisins and the cashews and fry it on low heat for just a few seconds, making sure they don’t burn.
  5. Add the onions and green chilli and fry on medium heat for 7-10 minutes till they turn translucent and start to brown.
  6. Add sugar at this point. Sugar will help the onions caramelise and also add a beautiful brown colour to them.
  7. Once the sugar is mixed, add the marinated chicken. Mix well for 10 minutes on medium flame.
  8. Cover and cook the chicken on low flame for 20 minutes.
  9. Take lid off and five one good mix. Season with salt, turmeric powder, black pepper powder, coriander powder and cumin powder. Mix well.
  10. Once done, add the soaked rice and mix everything gently so that rice grains remain intact.
  11. Pour hot water and mix. Add garam masala and stir it into the rice.
  12. Cover and cook on low flame for 1-20 minutes till rice is cooked.
  13. Take off flame and let it rest for 15-20 minutes before serving.
  14. Serve hot with salad and raita. [/directions]


chicken pulao

chicken pulao

I hope you try this delicious chicken pulao super soon! If you have any doubts, comments, or feedback, please reach out to me in comments or my social media handles.

Find me on Instagram – www.instagram.com/slurrpilicious

Find me on Facebook – www.facebook.com/slurrpilicious

Find me on Youtube – https://www.youtube.com/channel/UCA-cJoo27OLSCswI4sy6lzA?

Happy cooking!

Winter Fried Rice

I love winters! Cooking becomes all the more fun because of the variety of seasonal produce that nature offers during this season. The colors and diversity at the local store make me a happy home cook!

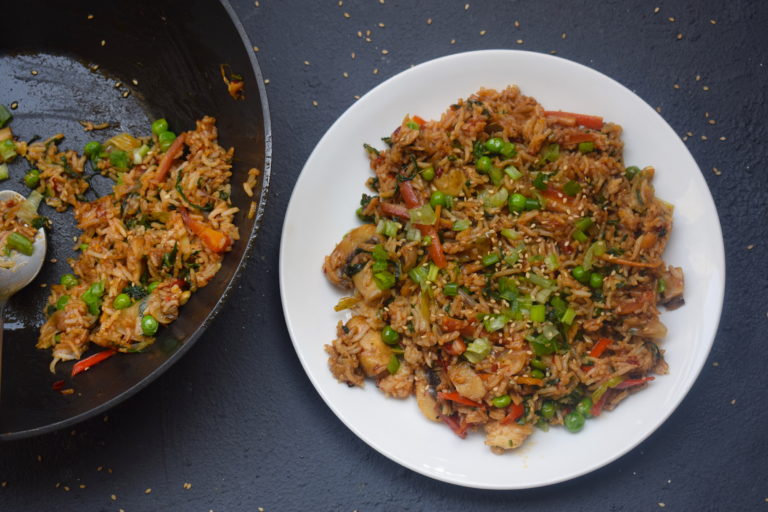
The reason why I call this recipe winter fried rice is that you can add any number of winter vegetables here. I have gone ahead and added spinach, button mushrooms, carrots, and peas. The idea is to make your fried rice as diverse as possible in using winter produce!

fried rice

The reason why I love this fried rice so much is that it is not only tasty but filled with the crunch of vegetables. The health quotient is also automatically high as a result of so many vegetables. This is a vegetarian version. If you’d like, you can add your favorite protein in here too (chicken or eggs would be a heavenly addition).

fried rice

fried rice

Another reason is the use of the availability of fresh large red chilies or cayenne pepper in the market. The bright red color just pulled me towards it and I bought a few to add in my meals. And it added just the right punch to my fried rice.

Preparation time – 20 minutes

Cook time – 20 minutes

Serves – 2 people

[ingredients title=”Ingredients”]

  • 100 g cooked rice
  • 2 tbsp vegetable oil
  • 10 g butter
  • 8 garlic cloves, finely chopped
  • 1/2 carrot, finely sliced
  • 6 button mushrooms, cut in halves
  • 50 g fresh peas
  • 100 g chopped spinach
  • 1/2 fresh large red chili or cayenne pepper, finely chopped
  • 3 spring onion, chopped
  • 1 tsp sambal sauce
  • 1 tsp black pepper sauce
  • Salt to taste
  • 1 tsp Oyster sauce
  • 1 tsp dark soy sauce
  • Spring onion greens for garnish
  • Sesame seeds for garnish
  • Salt to taste [/ingredients]

[directions title=”Directions”]

  1. Heat oil in a wok. Add the butter to it and mix till it combines together.
  2. Add the chopped cayenne pepper into the oil. This will help its aroma and flavor of the cayenne pepper infuse into the oil.
  3. Next, add the finely chopped garlic to the oil. Give it a light stir. Do not burn. Let it release its aroma.
  4. Cut the spring onions into medium pieces and add it to the oil. Stir for about thirty seconds.
  5. Add the vegetables including peas, carrot, mushroom, and spinach. You can add any of your favorite winter vegetables here, including mustard leaves, capsicum, cabbage etc. It tastes brilliant!
  6. Stir the vegetables for another minute or two till they cook, but do not get soggy, The vegetables need to remain slightly crunchy to add freshness to the final recipe.
  7. Pour some oyster sauce and mix well.
  8. Season with salt and black pepper powder.
  9. Add the cooked rice, stir well till every grain is coated in the oil and sauces.
  10. Add dark soy sauce and mix well.
  11. Garnish with fresh scallions and sesame seeds.
  12. Serve hot. [/directions]

fried rice

fried rice

fried rice

For more such delightful food, follow me on Facebook, Instagram, Twitter, and YouTube.

Schezwan Noodles With Homemade Schezwan Sauce

It’s time to raise your threshold for all things Schezwan! This Schezwan noodles with crunchy vegetables are going to fall in love with spicy food all over again.

What makes it special you ask?

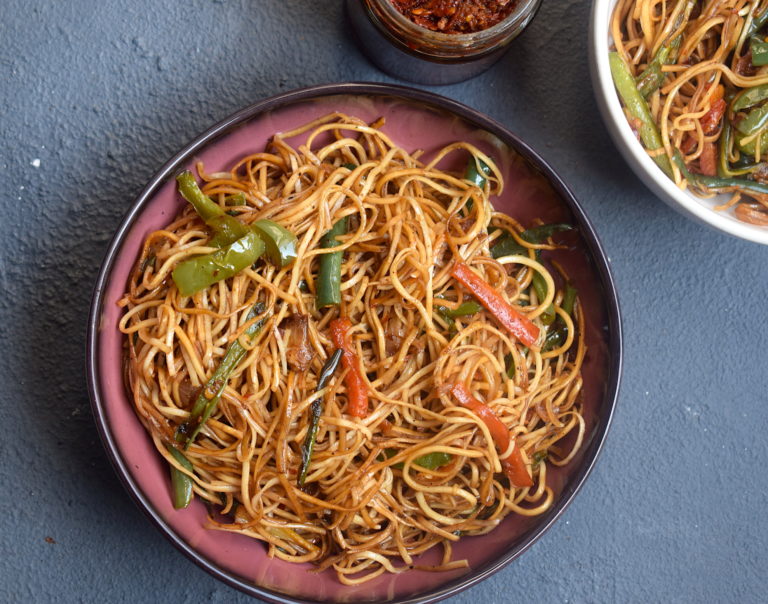
The main ingredient of the recipe aka the Schezwan sauce isn’t store bought. It is as fresh and lively as a recipe can get.

I absolutely love these noodles. They are super simple to make, a great way to eat those vegetables and also not compromising on taste. Because we never want to do that, right? You can also go ahead and add your favorite protein to this. Chicken and scrambled eggs would be delightful in these noodles.

schezwan noodles

For these noodles, I have used my go-to Schezwan chutney which works like magic. It is way better than store bought sauce and will give your noodles that extra oomph and color.

schezwan noodles

So here is the recipe.

Preparation time – 30 minutes

Cook time – 40 minutes

Serves – 1-2 people

[ingredients title=”Ingredients”]

  • 150 g Chinese noodles
  • 3 tbsp vegetable oil
  • 7 garlic cloves, finely chopped
  • 1 medium onion, finely sliced
  • 80 g green beans, thinly sliced
  • 1 medium carrot, thinly sliced
  • 1/2 green bell pepper, thinly sliced
  • 1 tsp freshly ground black pepper powder
  • 1 tbsp Schezwan chutney/sauce
  • 1 tsp brown sugar
  • 2 tsp dark soy sauce
  • 1 tsp sesame oil
  • Salt to taste [/ingredients]

[directions title=”Directions”]

  1. Cook the noodles as per package instructions with some salt in boiling water. Set aside.
  2. Heat oil in a wok. Add the sliced onions, followed by the finely chopped garlic. Saute for a minute.
  3. Add the vegetables – carrot, green bell pepper, and green beans. Feel free to add any crunchy vegetable of your choice here. Cook for about two minutes till they are semi-cooked and still crunchy.
  4. Add some brown sugar and mix well.
  5. Add the Schezwan chutney to the vegetables and mix well for another minute. Do not add salt at this point since the Schezwan chutney will already have some salt and spices.
  6. Once the vegetables are coated in the Schezwan paste, add the cooked noodles to the wok. Use a pair of tongs to mix this well.
  7. Season with salt and pepper as required. Taste it beforehand to get an idea of how much seasoning is required.
  8. Add dark soy sauce to the noodles and bring it all together slowly.
  9. Drizzle a bit of sesame oil on the noodles for some extra glaze and flavor.
  10. Take off the heat and serve hot. [/directions]

Slurrp tip: Top it off with some scrambled eggs or a fried egg for more flavor.

schezwan noodles

schezwan noodles

For more such delightful food, follow me on Facebook, Instagram, Twitter, and YouTube.

Related recipe – Better-Than-Takeout Shrimp Fried Rice

If you are new to the kitchen or are confused about what to buy for my recipes/kitchen tools, I can help. I have curated a special list that you can order right from Amazon and get the best products for your kitchen. Click here to explore.

And as always, happy cooking! <3

Nasi Goreng at Home (Indonesian Fried Rice) | Slurrp

Nasi Goreng literally translates to fried rice in Indonesia. I have had several versions of this delicious dish in India and Thailand. But the one you get in its place of origin, i.e. Indonesia is at a different level.

My recent trip to Bali consisted of eating Nasi Goreng for almost every meal. I just couldn’t stop eating it wherever I went. It was just so darn delicious! I had to learn the basics there and make it for myself.

nasi goreng

What makes this Nasi Goreng unique?

Making Nasi Goreng is really simple and you do not really need to hunt down for any ingredients. The Indonesian addition to this unique fried rice is the Sambal. Sambal is a hot sauce or a paste made with chilies, garlic, oil, salt, sugar, and a few other spices. You can call it the Indonesian version of a Schezwan paste. You can either make your own or get it directly from the store. I used the store bought Sambal which was quite good.

I learned this recipe from a local chef in Bali. And that’s when I realized Nasi Goreng is pretty much like any fried rice. Only the addition of Sambal sauce gives it an edge.

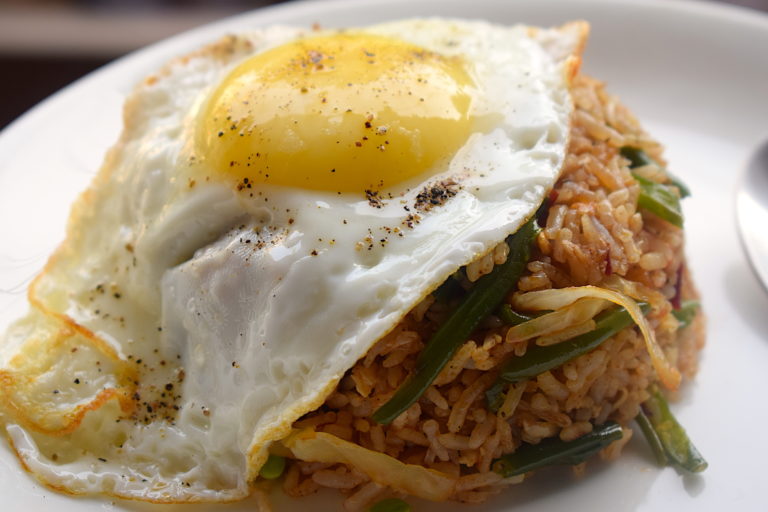
Nasi Goreng is usually served with an egg on top, some cucumbers on the side and some prawn crackers. It is spicy and sweet at the same time. The dark brown color of the sauce comes from sweet Indonesian soy sauce, which can be replaced with regular dark soy sauce mixed with some sugar.

nasi goreng

nasi goreng

How to make the perfect fried rice every time

Fried rice might be a simple dish but it requires a few things done right every single time. Since Nasi Goreng is also a version of fried rice, the same rules apply to this as well.

  • Always use a wok for making fried rice because it helps is faster and uniform cooking.
  • Make sure your wok is really hot before you add oil and other ingredients.
  • Make sure the vegetables you add are chopped finely so that they can cook quickly.
  • The rice that you add to any fried rice should always be cold. Otherwise, it will stick to the wok and become lumpy.
  • If you add any protein like chicken or shrimp, cook them before you add the vegetables.
  • Add the soy sauce and vinegar just before you remove the wok from the gas stove.

There are obviously many variations of Nasi Goreng like every other recipe. This is my homemade version for a comforting weeknight dinner. This version is also without shrimp, and just with some moist chicken and lots of vegetables. And the best part? It’s all done at lightning fast speed in 20 minutes.

nasi goreng

Why this version of Nasi Goreng?

  • Delicious and super easy!
  • Healthy and quick
  • Better than takeout
  • You need 20 minutes to make this
  • Made with basic Chinese pantry essentials, except the Sambal sauce.
  • Highly customizable!
  • Top it off with toasted sesame seeds for extra crunch.

nasi goreng

Preparation time – 15 minutes

Cook time – 25-30 minutes

Serves – 3

[ingredients title=”Ingredients”]

  • 200 g chicken thighs, cut into small pieces
  • 250 g rice
  • 50 g butter
  • 8-9 garlic cloves
  • 4 tbsp vegetable oil
  • 2 eggs
  • 100 g green beans, thinly sliced
  • 100 g carrots, thinly sliced
  • 100 g cabbage, thinly sliced
  • 2 tbsp Sambal Paste
  • 1 tbsp sugar
  • 2 tbsp dark soy sauce
  • 1 tsp black pepper powder
  • Salt to taste [/ingredients]

[directions title=”Directions”]

  1. Heat oil in a wok. Add the butter and mix the oil and butter.
  2. Add the sliced garlic and mix it together.
  3. Add in the chicken pieces and cook for about two minutes. Season with some sugar and mix well.
  4. Once the chicken is cooked 90 percent, add one beaten egg into the oil and cook till it’s done.
  5. Next, add the beans, carrots, and cabbage and saute for a minute. Do not overcook the vegetables as they need to remain crunchy.
  6. Add the Sambal paste and mix well with the vegetables.
  7. Season with salt and pepper.
  8. Add the boiled and cold rice to the mixture. Mix well till the rice is heated through and everything gets mixed together perfectly.
  9. Pour in the soy sauce and mix well until every grain of the rice gets stained in the sauce.
  10. Fry an egg sunny side up, one for each plate.
  11. Transfer the nasi goreng onto a bowl and serve it on a plate upside down, as shown in the picture. Top it off with a fried egg.
  12. Serve with cucumbers and tomatoes on the side. [/directions]

nasi goreng

nasi goreng

I hope you try this version of Nasi Goreng! Super simple and easy. Please feel free to substitute the chicken with any protein of your choice. If you are a vegetarian, you can skip the steps where I add chicken and egg, and substitute with tofu and more vegetables.

If you have any questions, feel free to reach out to me with a comment or connect with me on Instagram or Facebook. For all my videos, you can subscribe to me on YouTube.

Related recipe – 30 Minute Stir Fry Noodles

Happy cooking!

Peanut Butter Noodles With Stir-Fried Vegetables in Oyster Sauce | Slurrp

This stir-fry noodles recipe epitomizes comfort food. It is extremely simple to prepare, comes together in just a few minutes and can be customized as per your choice of vegetables or protein.

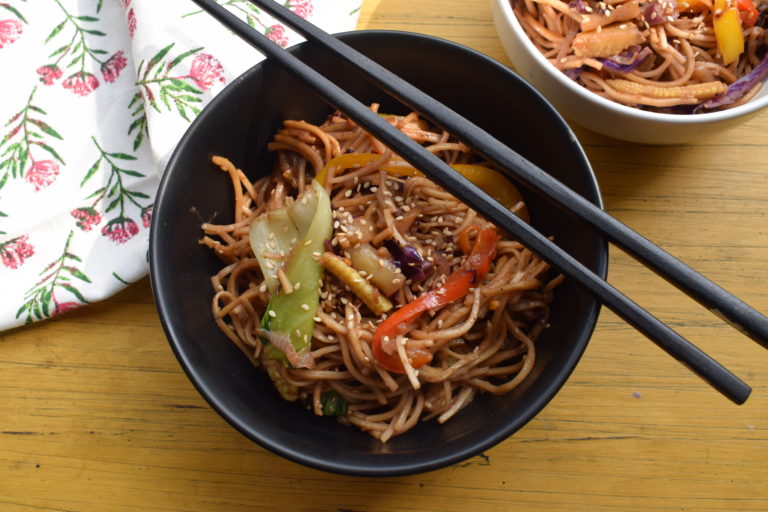
You can use any kind of noodles with this recipe such as spaghetti, udon, rice and the like. I have used the regular plain noodles here. For non-vegetarians, you can go ahead and add some chicken to this. If you prefer non-spicy, you can skip the red chili paste. I have added it because I have recently started to love spicy food!

As you can see I have added a lot of crunch to this stir-fry noodles recipe with a variety of vegetables that were available to me. Bok choy and purple cabbage can act as a great addition to this and also raise up the health quotient of the recipe. You can add more vegetables like carrots and beans if you wish. So go ahead and note this recipe down!

stir fry noodles


stir fry noodles

Grab more such recipes here – http://bit.ly/2xuged2

Similar recipe – Crispy Chili Fish

For more such delightful food, follow me on Facebook, Instagram, Twitter, and YouTube.

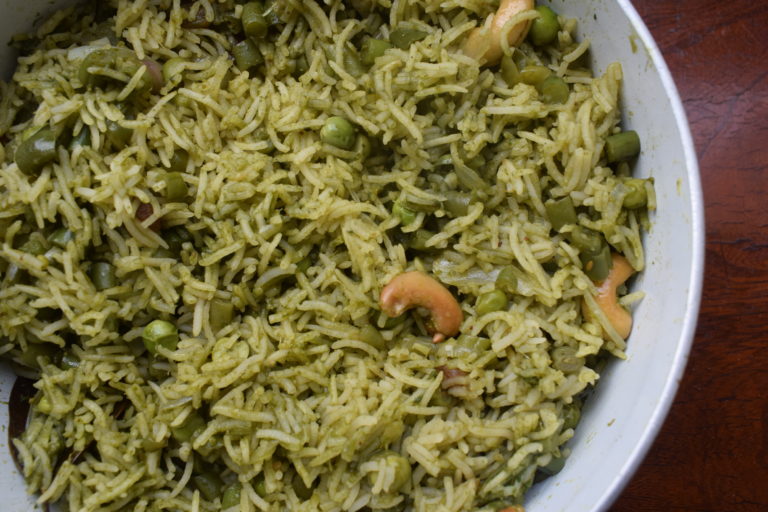
One-Pot Spinach Pulao | Slurrp

Winters are my favorite, mostly because of the fresh harvest and options at the local vegetable vendor. I love buying my vegetables on winter days and the options spoil me with choices. A recent visit to my local vegetable vendor exposed me to a variety of greens, from some beautiful spinach, peas, beans and more! Common among all these vegetables was, of course, the color green.

So I thought to myself, what if I bring all these elements together and make a delicious and healthy pulao? This thought made me so excited that I rushed back home with my stock and managed to prepare this moreish spinach pulao.

A note before you start, for the spinach puree that I have used in this recipe, I have blanched it for about two minutes in boiling water, and then ground it to a fine paste.

Here is the recipe.

Preparation time – 30 minutes

Cook time – 45 minutes

Serves – 3-4 people

[ingredients title=”Ingredients”]

  • 2 tbsp ghee (clarified butter)
  • 1 bay leaf
  • 30 g cashews
  • 30 g soaked raisins
  • 2 medium onions, thinly sliced
  • 2 cardamoms
  • 2 cloves
  • 1 cinnamon stick
  • 20 g ginger garlic paste
  • 50 g fresh peas
  • 50 g green beans, chopped
  • 1 tsp sugar
  • 1 green chilies, chopped
  • Salt to taste
  • 1 tsp cumin powder
  • 200 g soaked basmati rice
  • 150 g spinach puree
  • 500 ml water [/ingredients]

spinach pulao

[directions title=”Directions”]

  1. Heat the ghee or clarified butter in one large pot.
  2. Add the bay leaf, cardamom, cinnamon, and cloves and fry for a few seconds in the hot ghee till you can smell the aroma.
  3. Next, add the cashews and the soaked raisins. Again, fry it for about ten seconds to give a slightly brown layer to the cashews.
  4. Add the diced onions to this and fry till they begin to caramelize.
  5. Throw in the ginger garlic paste and fry it with the onions till the raw smell disappears.
  6. Once the onion is cooked, add the peas and the chopped green beans. Stir well with the onion.
  7. For the touch of heat, add some chopped green chilies as well.
  8. An Indian pulao is usually sweet, so add a teaspoon of sugar to this and fry.
  9. Season with salt and cumin powder.
  10. Next, add soaked basmati rice to this vegetable mixture and stir well.
  11. Now it’s time for the magic ingredient – the spinach puree. Add the puree to the rice and mix it all up gently, till it all comes together.
  12. Pour in some water and give it a gentle stir.
  13. Cover and cook for about 20 minutes and let it rest for another 20 minutes after that.
  14. Serve with raita or plain curd. [/directions]

For more such delightful food, follow me on Facebook, Instagram, Twitter, and YouTube.